
Related Manuals for Fanimation The Odyn


Summary of Contents for Fanimation The Odyn
-
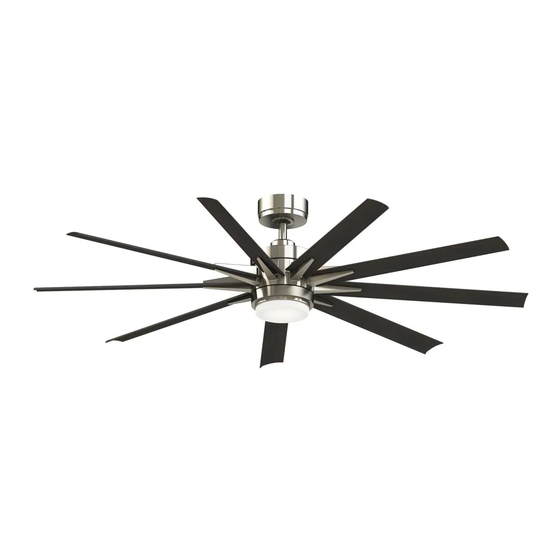
Page 1: Ceiling Fan
The Odyn ™ Ceiling Fan Net Weight 14.6 kg Model No. FPD8148**AU OWNER'S MANUAL READ AND SAVE THESE INSTRUCTIONS... -
Page 2: Table Of Contents
Important Safety Instructions WARNING: To avoid fire, shock and serious personal injury, follow these instructions. 1. Read your owner’s manual and safety information before installing your new fan. Review the accompanying assembly diagrams. 2. Before servicing or cleaning unit, switch power off at service panel and lock service panel disconnecting means to prevent power from being switched on accidentally. -
Page 3: Tools Needed For Assembly
This product is designed to use only those parts supplied with this product and/or any accessories – designated specifically for use with this product by Fanimation. Substitution of parts or accessories not designated for use with this product could result in – personal injury or property damage. -
Page 4: Energy Effi Cient Use Of Ceiling Fans
2.4-2.7 m above the floor for optimal airflow. Consult your down into the occupied space. Remember to adjust your Fanimation Retailer for optional mounting accessories. air conditioner when using your ceiling fan-additional energy and dollar savings could be realized with this simple step! Turn Off When Not in the Room Ceiling fans cool people, not rooms. -
Page 5: Assembling This Ceiling Fan
Assembling This Ceiling Fan 1. Remove the hanger ball portion from the downrod/ hanger ball assembly by loosening the set screw in the hanger ball until the ball falls freely down the downrod. Remove the pin from the downrod, then remove the Downrod hanger ball. - Page 6 Assembling This Ceiling Fan (continued) 6. Reinstall the hanger ball on the downrod as follows. Route the three 2m length wires and safety cable through the hanger ball. Position the pin through the two holes in the downrod and align the hanger ball so the pin is captured in the groove in the top of the hanger ball.
-
Page 7: How To Hang This Ceiling Fan
How to Hang This Ceiling Fan WARNING To avoid possible re or shock, be sure electricity is turned off at the main fuse box before wiring. MAIN FUSE BOX (Figure 1) WARNING Figure 1 The fan must be hung with at least 2.1m of clearance from oor to blades. -
Page 8: How To Wire Your Ceiling Fan
How to Wire Your Ceiling Fan This ceiling fan must be installed by a licensed electrician. WARNING To avoid possible re or shock, be sure electricity is turned off at the main fuse box before wiring. MAIN FUSE BOX (Figure 1) 1. -
Page 9: Installing The Canopy Housing
Installing The Canopy Housing NOTE: This step is applicable after the neccessary wiring is completed. 1. Remove one of the two shoulder screws in the hanger bracket. Loosen the second shoulder screw without fully removing it. Assemble canopy by rotating key slot in canopy over shoulder screw in Ceiling Canopy hanger bracket. -
Page 10: Assembling The Light Kit Assembly Or Cap
Assembling The Light Kit Assembly or Cap 1 (Option A--for use with light kit) Remove one of the three screws in the support bracket at the bottom of the motor assembly. Slightly loosen the remaining two screws. Assemble the light plate assembly to the support bracket using the two key slots in the socket plate. -
Page 11: How To Operate Your Ceiling Fan
How to Operate Your Ceiling Fan Restore electrical power to the outlet box by turning the electricity on at the main fuse box (Figure 1). WARNING MAIN FUSE BOX Check to see that all connections are tight, including earth, and that no bare wire is visible at the wire connectors, except for the earth wire. -
Page 12: Maintenance
How to Operate Your Ceiling Fan (continued) (Figure 4) 4. The remote buttons function as follows: Fan speed: I = minimum speed II = low speed III = medium low speed IV = medium speed V = medium high speed VI = high speed : Turns the fan off. -
Page 13: Trouble Shooting
Trouble Shooting WARNING For your own safety turn off power at fuse box or circuit breaker before trouble shooting your fan. Some suggested remedies require the attention of a licensed electrician. Trouble Probable Cause Suggested Remedy 1. Fuse or circuit breaker blown. 1. -
Page 14: Parts List
Parts List Model No. FPD8148**AU Reference # Description Part # Hanger Bracket Assembly A R1 Canopy AP26 Canopy Screw Cover Assembly otor Coupling Cover Blade Cover Set Blade Set AP814809** Blade Holder Set AP814814-220 Adapter-Steel Cap Steel Cap Assembly Hand-Held Remote Receiver —... -
Page 15: Exploded-View Illustration
The Odyn ™ Model FPD8148**AU Exploded-View Figure 1 NOTE: The illustration shown is not to scale or its actual con guration may vary. Product/parts are subject to change without notice. - Page 16 MyFan Warranty for Australian purchasers Our goods come with guarantees that cannot be excluded under the Australian Consumer Law. You are entitled to a refund or replacement for a major failure and for compensation for any other reasonably foreseeable loss or damage. You are also entitled to have the goods repaired or replaced if the goods fail to be of acceptable quality and the failure does not amount to a major failure.
- Page 17 Distributed in Australia by MyFan Pty Ltd www.myfan.com.au Copyright 2015 Fanimation 2015/10 V.01...
Need help?
Do you have a question about the The Odyn and is the answer not in the manual?
Questions and answers