Symbol PPT 2800 series Product Reference Manual
Hide thumbs
Also See for PPT 2800 series:
- Product reference manual (362 pages) ,
- Quick reference manual (45 pages) ,
- User manual (36 pages)
Table of Contents
Advertisement
Quick Links
Advertisement
Table of Contents
Troubleshooting

Related Manuals for Symbol PPT 2800 series


Summary of Contents for Symbol PPT 2800 series
- Page 1 PPT 2800 Series Product Reference Guide...
- Page 2 PPT 2800 Series Product Reference Guide 72-50931-02 Revision A — December 2001 Symbol Technologies, Inc. One Symbol Plaza, Holtsville N.Y. 11742...
- Page 3 PPT 2800 Series Product Reference Guide 72-50931-02 Revision A December 2001...
- Page 4 The software is provided strictly on an “as is” basis. All software, including firmware, furnished to the user is on a licensed basis. Symbol grants to the user a non-transferable and non-exclusive license to use each software or firmware program delivered hereunder (licensed program).
-
Page 5: Table Of Contents
Symbol Support Centers ........ - Page 6 PPT 2800 Series Product Reference Guide Chapter 2. Operating the PPT 2800 Chapter Contents ............. . 2-1 Introduction .
- Page 7 Contents Performing ActiveSync using the Synchronization Cable......4-4 Performing ActiveSync using the Cradle ........4-5 Performing Subsequent ActiveSync Operations .
- Page 8 PPT 2800 Series Product Reference Guide Using the Library ............6-15 Reading a Book .
- Page 9 Symbol Windows CE SDK ........
- Page 10 PPT 2800 Series Product Reference Guide Chapter 13. Maintenance and Troubleshooting Chapter Contents ............. 13-1 Introduction .
- Page 11 Contents Feedback...
- Page 12 PPT 2800 Series Product Reference Guide...
-
Page 13: About This Guide
About This Guide Introduction The PPT 2800 Series Product Reference Guide provides information about the PPT 2800 Series terminal and its accessories. The PPT 2800 Series includes the following variations of the terminal: • PPT 2800: batch • PPT 283X: Wireless WAN versions •... -
Page 14: Notational Conventions
PPT 2800 Series Product Reference Guide • Chapter 6, Companion Programs describes how to use Pocket Word, Pocket Excel, and Microsoft Money. • Chapter 7, Pocket Internet Explorer explains how to set up favorite links and channels, and browse the web on your terminal. -
Page 15: Related Documents
Service Information If you have a problem with the PPT 2800 equipment, contact the Symbol Support Center. If your problem cannot be resolved over the phone, you may need to return your equipment for servicing. If that is necessary, you will be given special directions. -
Page 16: Symbol Support Centers
PPT 2800 Series Product Reference Guide Symbol Support Centers For service information, warranty information or technical assistance contact or call the Symbol Support Center in: United States Canada Symbol Technologies, Inc. Symbol Technologies Canada, Inc. One Symbol Plaza 2540 Matheson Boulevard East... - Page 17 92184 Antony Cedex, France +358 9 5407 580 (Outside Finland) 01-40-96-52-21 (Inside France) +33-1-40-96-52-50 (Outside France) Germany Italy Symbol Technologies GmbH Symbol Technologies Italia S.R.L. Waldstrasse 68 Via Cristoforo Columbo, 49 D-63128 Dietzenbach, Germany 20090 Trezzano S/N Navigilo 6074-49020 (Inside Germany) Milano, Italy...
-
Page 18: Warranty
This warranty is provided to the original owner only and is not transferable to any third party. It shall not apply to any product (i) which has been repaired or altered unless done or approved by Symbol, (ii) which has not been maintained in accordance with any operating or handling instructions supplied... -
Page 19: Warranty Coverage And Procedure
Shipments from the US or other locations will be made F.O.B. Symbol’s manufacturing plant. Symbol will use new or refurbished parts at its discretion and will own all parts removed from repaired products. Customer will pay for the replacement product in case it does not return the replaced product to Symbol within 3 days of receipt of the replacement product. - Page 20 PPT 2800 Series Product Reference Guide xviii...
-
Page 21: Chapter Contents
Chapter 1 Getting Started Chapter Contents Introduction ..............1-3 Unpacking the Terminal . - Page 22 PPT 2800 Series Product Reference Guide...
-
Page 23: Introduction
Verify that you received all equipment listed on the packing slip and inspect the equipment for damage. If you are missing any equipment or if you find any damaged equipment, contact the Symbol Technologies Support Center immediately. See page xiv for contact information. -
Page 24: Parts Of The Ppt 2800
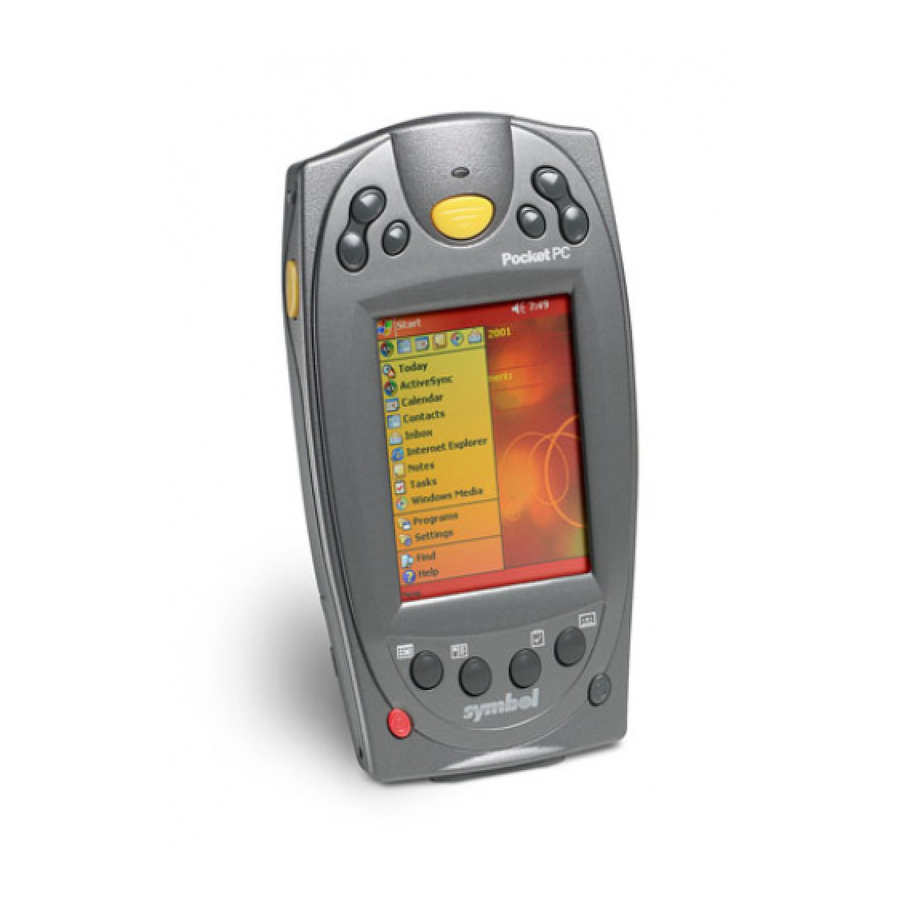
PPT 2800 Series Product Reference Guide Parts of the PPT 2800 Front View Scan Trigger WAN Antenna APP5 Button (Start Menu) Scan LED Scroll Button Scroll Button Right Scan Trigger Action Button LCD (Screen) Power Button Function Button Application Buttons Figure 1-1. - Page 25 Getting Started Bottom View Top View Scan Window Serial Port Figure 1-3. Parts of the PPT 2800 (Bottom and Top View) WAN Antenna Headset Connector Stylus Stylus Silo WAN Antenna Infrared Port Handstrap Connector Handstrap Connector Speaker Reset Button SIM Socket Battery Compartment Lithium-Ion Battery...
-
Page 26: Accessories
PPT 2800 Series Product Reference Guide Accessories The following accessories are available for the PPT 2800: • Synchronization Charging Cable synchronizes the PPT 2800 with a desktop computer, and can also be used to charge the terminal using an external power supply. -
Page 27: Installing The Sim Card (Ppt 2837 Only)
Getting Started Installing the SIM Card (PPT 2837 Only) Open the latches on the battery cover and lift it away from the PPT 2837. SIM Card Contact Area Metal Clip 2. Insert the card between the 1. Slide the metal clip to the right cardholder body and the metal to release the SIM cardholder, clip;... -
Page 28: Installing Batteries
PPT 2800 Series Product Reference Guide Installing Batteries Before using your PPT 2800, install the lithium-ion battery. The battery fits behind the battery cover on the back of the PPT 2800. To install the battery in your PPT 2800: 1. Open the latches on the battery cover and lift the battery cover away from the PPT 2800. -
Page 29: Charging The Battery
Getting Started Note: Be careful to position the battery latches completely open while placing the battery cover on the terminal. Charge the battery in the terminal for approximately 2 1/2 hours before initial use. Charging the Battery Before using your terminal for the first time, charge the battery. Also, when battery voltage is low, a warning message appears indicating the battery needs to be charged. - Page 30 PPT 2800 Series Product Reference Guide 2. Connect the cradle to your computer by plugging the serial cable into the serial port on the back of the cradle, and the other end of the cable into the serial port on your computer.
-
Page 31: Charging Spare Batteries
Getting Started Note: If the battery in the terminal is low, the Terminal Charge LED may flicker or turn yellow during an ActiveSync operation. The LED returns to red when the operation is complete. Charging Spare Batteries To charge a spare battery, insert the battery in the spare battery charging slot in the back of the cradle, oriented so the contacts are facing down and towards the back of the cradle. - Page 32 PPT 2800 Series Product Reference Guide 1. Insert the cable into the bottom of the terminal. Synchronization Cable Figure 1-10. Inserting the Cable in the Terminal 2. Plug the power cable into a wall outlet and plug the other end into the battery charging receptacle on the side of the Synchronization Cable.
-
Page 33: Checking Battery Power
Getting Started Checking Battery Power To check whether the battery in the terminal is charged, tap Start, Settings, System, Power to display the following Battery Status screen. Figure 1-12. Battery Status Screen To save battery power, set your terminal to turn off after a specified number of minutes on battery power. -
Page 34: Attaching The Handstrap
PPT 2800 Series Product Reference Guide Attaching the Handstrap The PPT 2800 has an optional handstrap which increases comfort when holding the terminal for extended periods of time. To attach the handstrap to the back of the terminal: 1. Thread the round metal piece through the metal handstrap connector on the back of the terminal. -
Page 35: Attaching The Wrist Strap
Getting Started Attaching the Wrist Strap An optional wrist strap is available which helps prevent damage to the terminal if you drop it. To attach the wrist strap: 1. Thread the elastic band on the wrist strap through the metal handstrap connector on the back of the terminal. -
Page 36: Starting The Ppt 2800
Power Button Figure 1-15. Power Button As the terminal initializes its unique Flash File system, the Symbol splash screen displays for about a minute. When the Welcome screen appears, tap anywhere on the screen to continue to the Align screen. - Page 37 Getting Started 4. Follow the directions on the screen which lead you through a simple exercise illustrating how to use the stylus and pop-up menus. Figure 1-17. Using Pop-up Menus 1-17...
-
Page 38: Setting Up Your Terminal
PPT 2800 Series Product Reference Guide 5. Use the drop-down menus to set your city and time zone, and tap Next. Figure 1-18. Setting City and Time Zone on the PPT 2800 Note: These initial setup screens appear each time you perform a hard reset. - Page 39 Getting Started • To configure your PPT 283X for Wireless WAN, see Chapter 10, Wireless Wide Area Network Configuration. • To install development software on your development PC, see Chapter 11, Software Installation on Development • To configure your terminal using the Terminal Configuration Manager, see Chapter 12, Configuring the Terminal.
- Page 40 PPT 2800 Series Product Reference Guide 1-20...
- Page 41 Chapter 2 Operating the PPT 2800 Chapter Contents Introduction ..............2-3 Using the Power Button .
- Page 42 PPT 2800 Series Product Reference Guide...
-
Page 43: Introduction
Operating the PPT 2800 Introduction This chapter provides basic instructions for using and navigating your PPT 2800 terminal. Using the Power Button Press the red power button on the lower left-hand side of the terminal to turn the PPT 2800 on and off. - Page 44 PPT 2800 Series Product Reference Guide • Tap: Touch the screen once with the stylus to open items and select options. • Drag: Hold the stylus on the screen and drag across the screen to select text and images. Drag in a list to select multiple items.
-
Page 45: Today Screen
Operating the PPT 2800 Today Screen When you turn on your terminal for the first time each day (or after 4 hours of inactivity), the Today screen appears. You can also display it by tapping , then Today. On the Today screen, you can see important information for the day. -
Page 46: Selecting Programs
PPT 2800 Series Product Reference Guide Table 2-1. Status Icons (Continued) Icon Meaning Main batteries are very low. External (AC) power source is connected. Dial-up connection is active. Direct connection is active. Selecting Programs To select a program, tap , Programs, then the program name. (To select which... -
Page 47: Using The Navigation Bar And Command Bar
Operating the PPT 2800 Using the Navigation Bar and Command Bar The navigation bar at the top of the screen displays the active program and current time, and allows you to select programs and close screens. Use the command bar at the bottom of the screen to perform tasks in programs. The command bar includes menu names, buttons, and the input panel button. -
Page 48: Entering Information
PPT 2800 Series Product Reference Guide Entering Information To enter information, you may: • Use the input panel to enter typed text, either using the soft keyboard or Character Recognizer. • Write directly on the screen. • Draw pictures on the screen. -
Page 49: Writing On The Screen
Operating the PPT 2800 2. On the soft keyboard that is displayed, tap the keys with your stylus. To use Character Recognizer: 1. Tap the arrow next to the Input Panel button, then Character Recognizer. 2. Write a letter in the box. When you write a letter, it is converted to typed text that appears on the screen. -
Page 50: Drawing On The Screen
PPT 2800 Series Product Reference Guide Note: Some programs that accept writing do not have the Pen button. See the documentation for that program to find out how to switch to writing mode. Selecting Writing To select writing to edit or format: 1. -
Page 51: Recording A Message
Operating the PPT 2800 Recording a Message You may record a message to capture thoughts, reminders, and phone numbers. In Calendar, Tasks, and Contacts, you can include a recording in the Notes tab. In the Notes program, you can either create a stand-alone recording or include a recording in a written note. -
Page 52: Finding Information
PPT 2800 Series Product Reference Guide Finding Information The Find feature locates information. On the menu, tap Find. Enter the text you want to find, select a data type, then tap Go. To find information taking up storage space on your terminal, select Larger than 64 KB in Type. -
Page 53: Scanning
Scanning PDF417 Bar Codes The 2D scanning PPT 2800 terminal supports PDF417 bar code scanning. The raster pattern has multiple scanning rows to accommodate the PDF417 symbol’s multiple rows. 1. Point the scanner at the bar code and press the trigger. -
Page 54: Resetting Your Ppt 2800 Terminal
PPT 2800 Series Product Reference Guide “Tall” PDF Bar Codes If the PDF417 symbol is “tall,” the vertical scan pattern may not be high enough to cover it. Move the terminal slowly down toward the bottom of the symbol, keeping the beam horizontal to the rows, then slowly back up toward the top. -
Page 55: Performing A Cold Boot
Operating the PPT 2800 To perform a warm boot, hold down both the up and down scroll buttons, then press the App 4 button. Up & Down Scroll Buttons App 4 Button Figure 2-11. Warm Boot Buttons Performing a Cold Boot A cold boot also restarts your PPT 2800 terminal, but erases all stored records and entries. - Page 56 Button Figure 2-12. Cold Boot Buttons 3. Replace the battery cover and press the Power button. 4. As the terminal initializes its unique Flash File system, the Symbol splash screen displays for about a minute. 5. See Aligning the Screen on page 1-16 to perform an initial setup of the terminal.
-
Page 57: Chapter Contents
Chapter 3 Customizing Your PPT 2800 Chapter Contents Introduction ..............3-3 Adjusting Settings . - Page 58 PPT 2800 Series Product Reference Guide...
-
Page 59: Introduction
Customizing Your PPT 2800 Introduction This chapter provides basic instructions for customizing your terminal by adjusting settings and installing additional software. Adjusting Settings To view available options for your terminal settings, tap , Settings, then the Personal or System tab at the bottom of the screen. You might want to adjust the following: •... -
Page 60: Working With Ffs Partitions
• Application: The Application FFS Partition is used to store application programs needed to operate the terminal. This partition includes the Symbol demo program, which can be overwritten with your own program. •... -
Page 61: Non-Ffs Partitions
If necessary, the entire OS image may be downloaded to the terminal using files provided by Symbol. The current OS partition on the terminal is included as part of the TCM installation package. Any upgrades must be obtained from Symbol. -
Page 62: Downloading Partitions To The Terminal
PPT 2800 Series Product Reference Guide Downloading Partitions to the Terminal TCM is used to specify a hex destination file for each partition and download each file to the terminal. This download requires a program loader stored on the terminal. The terminal comes with a program loading utility, Initial Program Loader (IPL), stored in the terminal's write-protected flash. -
Page 63: Adding A Program To The Start Menu
Customizing Your PPT 2800 If the file is not an installer, an error message states that the program is valid but it is designed for a different type of computer. Move this file to your terminal. If you cannot find installation instructions for the program in the Read Me file or documentation, use ActiveSync Explore to copy the program file to the Program Files folder on your terminal. -
Page 64: Removing Programs
PPT 2800 Series Product Reference Guide Removing Programs To remove a program, tap , then Settings. On the System tab, tap Remove Programs. If the program does not appear in the list of installed programs, use File Explorer on your terminal to locate the program, tap and hold the program, then tap Delete on the pop-up menu. - Page 65 Chapter 4 Communications Chapter Contents Introduction ..............4-3 Installing ActiveSync Software.
- Page 66 PPT 2800 Series Product Reference Guide...
-
Page 67: Chapter 4. Communications
Communications Introduction The CRD 2700 Cradle serves as an essential data communications device, enabling you to synchronize the information on your PPT 2800 terminal and the ActiveSync® software on your desktop computer. With customized or third party software, it can also be used to synchronize your PPT 2800 terminal with corporate databases and other host computers. -
Page 68: Performing Activesync Using The Synchronization Cable
PPT 2800 Series Product Reference Guide Note: You must perform your first ActiveSync operation with a local, direct connection, rather than using a modem. Performing ActiveSync using the Synchronization Cable To perform an ActiveSync operation for the first time using the synchronization cable: 1. -
Page 69: Performing Activesync Using The Cradle
Communications about the location of the serial port on your computer, refer to the user’s manual supplied with the computer. 4. On the desktop computer, enter a name for your PPT 2800 terminal and click the Next button. Follow the instructions on the screen to set up a partnership that allows synchronization of information between the two devices. - Page 70 PPT 2800 Series Product Reference Guide Note: The CRD 2700 cable requires a dedicated port. It cannot share a port with an internal modem or other device. If you are unsure about the location of the serial port on your computer, refer to the user’s manual supplied with the computer.
-
Page 71: Performing Subsequent Activesync Operations
Communications Performing Subsequent ActiveSync Operations After you complete the first ActiveSync operation, you just need to place the terminal in the connected cradle or connect the synchronization cable and synchronization occurs automatically. Performing a Remote ActiveSync You can also sync your PPT 2800 remotely using a modem. See Creating a Modem Connection to a Network on page 8-6 to set up your terminal for a modem ActiveSync. - Page 72 PPT 2800 Series Product Reference Guide...
-
Page 73: Chapter Contents
Chapter 5 Applications Chapter Contents Introduction ..............5-3 Calendar . - Page 74 PPT 2800 Series Product Reference Guide...
-
Page 75: Introduction
Applications Introduction Your PPT 2800 terminal includes Calendar, Contacts, Tasks, Inbox, and Notes applications. You can use these programs individually or together. For example, e-mail addresses stored in Contacts can be used to address e-mail messages in Inbox. Using ActiveSync, you can synchronize information in these applications between your desktop computer and your terminal. -
Page 76: Creating Appointments
PPT 2800 Series Product Reference Guide Figure 5-1. Calendar Application Note: You can customize the Calendar display, such as changing the first day of the week, by tapping Options on the Tools menu. Creating Appointments To create an appointment: 1. To select Calendar, press the App1 button or select Calendar from the menu. -
Page 77: Using The Summary Screen
Applications 7. To add notes, tap the Notes tab. You can enter text, draw, or create a recording. For more information on creating notes, see Notes on page 5-12. 8. When finished, tap OK to return to the calendar. Note: If you select Remind me in an appointment, your terminal notifies you according to the options set in , Settings, Personal tab, Sounds &... -
Page 78: Contacts
PPT 2800 Series Product Reference Guide To schedule a meeting: 1. Create an appointment. 2. In the appointment details, hide the input panel, then tap Attendees. 3. From the list of e-mail addresses you've entered in Contacts, select the meeting attendees. - Page 79 Applications Note: To change the way information is listed, tap Tools, then Options. To create a contact: 1. Tap New. Figure 5-5. Creating a Contact 2. Using the input panel, enter a name and other contact information. Scroll down to see all fields.
-
Page 80: Using The Summary Screen
PPT 2800 Series Product Reference Guide Using the Summary Screen When you tap a contact in the contact list, a summary screen displays. Figure 5-6. Contacts Summary Screen... -
Page 81: Tasks
Applications Tasks Use Tasks to keep a “to do” list. In the task list, overdue tasks display in bold. Figure 5-7. Task Application Note: To change the way information displays in the list, tap Tools, then Options. - Page 82 PPT 2800 Series Product Reference Guide To create a task: 1. Tap New. Figure 5-8. Creating a Task 2. Using the input panel, enter a description. 3. You can enter a start date and due date or enter other information by first tapping the field.
-
Page 83: Using The Summary Screen
Applications Using the Summary Screen When you tap a task in the task list, a summary screen displays. Figure 5-9. Task Summary Screen 5-11... -
Page 84: Notes
PPT 2800 Series Product Reference Guide Notes Capture thoughts, reminders, ideas, drawings, and phone numbers with Notes. You can create a written note or a recording. You can also include a recording in a note. If a note is open when you create the recording, it is included in the note as an icon. If the note list is displayed, it is created as a stand-alone recording. - Page 85 Applications To create a note: 1. Tap New. 2. Create your note by writing, drawing, typing, and recording. For more information about using the input panel, writing and drawing on the screen, and creating recordings, see Chapter 2, Operating the PPT 2800.
-
Page 86: Inbox
PPT 2800 Series Product Reference Guide Inbox Use Inbox to send and receive e-mail messages in the following ways: • Synchronize e-mail messages with Microsoft Exchange or Outlook 2000 on your desktop computer. • Send and receive e-mail messages by connecting directly to an e-mail server through an Internet service provider (ISP) or a network. - Page 87 Applications Messages that you receive directly from an e-mail server are linked to your e-mail server rather than your desktop computer. When you delete a message on your terminal, it's also deleted from the e-mail server the next time you connect. You can work online or offline.
-
Page 88: Using The Message List
PPT 2800 Series Product Reference Guide Using the Message List Messages you receive display in the message list. By default, the most recently received messages are listed first. Figure 5-12. Inbox Application 5-16... - Page 89 Applications When you receive a message, tap it in the list to open it. Unread messages display in bold. Figure 5-13. Viewing a Message When you connect to your e-mail server or synchronize with your desktop computer, Inbox downloads only the first 100 lines of each new message by default. No e-mail attachments are downloaded.
-
Page 90: Creating E-Mail Messages
PPT 2800 Series Product Reference Guide You specify your downloading preferences when you set up the service or select your synchronization options. You can change them at any time: • Change options for Inbox synchronization using ActiveSync options. For more information, see ActiveSync Help. -
Page 91: Managing E-Mail Messages And Folders
Applications 3. Compose your message. Tap Send when you're finished. The message is placed in the Outbox folder on your terminal and is delivered in one of two ways: • It is transferred to the Outbox folder in Exchange or Outlook 2000 on your desktop computer and sent the next time you synchronize. - Page 92 PPT 2800 Series Product Reference Guide 5-20...
-
Page 93: Chapter Contents
Chapter 6 Companion Programs Chapter Contents Introduction ..............6-3 Pocket Word . - Page 94 PPT 2800 Series Product Reference Guide...
-
Page 95: Introduction
Companion Programs Introduction The PPT 2800 contains the companion programs Microsoft Pocket Word, Microsoft Pocket Excel, Microsoft Money, and Microsoft Reader. To select a companion program, tap Programs on the menu, then the program name. Pocket Word Pocket Word works with Microsoft Word on your desktop computer to give you access to copies of your documents. - Page 96 PPT 2800 Series Product Reference Guide Pocket Word contains a list of the files stored on your device. Tap a file in the list to open it. To delete, make copies of, or send a file, tap and hold a file in the list. Then, select the appropriate action on the pop-up menu.
-
Page 97: Typing Mode
Companion Programs Typing Mode Use the input panel to enter typed text into a document. See Entering Information on page 2-8 for more information. To format or edit text, select the text using your stylus instead of the mouse to drag across the text. -
Page 98: Writing Mode
PPT 2800 Series Product Reference Guide Writing Mode In writing mode, use your stylus to write directly on the screen. Ruled lines are displayed as a guide, and the zoom magnification increases to allow you to write more easily. For... -
Page 99: Drawing Mode
Companion Programs Drawing Mode In drawing mode, use your stylus to draw on the screen. Gridlines appear as a guide. When you lift your stylus off the screen after the first stroke, a drawing box indicates the boundaries of the drawing. Every subsequent stroke within or touching the drawing box becomes part of the drawing. -
Page 100: Pocket Excel
PPT 2800 Series Product Reference Guide Pocket Excel Pocket Excel works with Microsoft Excel on your desktop computer to provide easy access to copies of your workbooks. You can create new workbooks on your PPT 2800, or copy workbooks from your desktop computer to your PPT 2800. Synchronize workbooks between your desktop computer and your PPT 2800 so you have up-to-date content in both locations. -
Page 101: Tips For Working In Pocket Excel
Companion Programs Pocket Excel provides fundamental spreadsheet tools, such as formulas, functions, sorting, and filtering. To display the toolbar, tap View, then Toolbar. Figure 6-5. Using Pocket Excel If your workbook contains sensitive information, you can protect it with a password. Open the workbook, tap Edit, then Password. -
Page 102: Microsoft Money
PPT 2800 Series Product Reference Guide • Freeze panes on a worksheet. First select the cell where you want to freeze panes. Tap View, then Freeze Panes. You may want to freeze the top and leftmost panes in a worksheet to keep row and column labels visible as you scroll through a sheet. -
Page 103: Using The Account Register
Companion Programs Figure 6-6. Using Microsoft Money Using the Account Register To view the Account Register for an account, tap it in the Account Manager. The Account Register displays all transactions stored on your PPT 2800 for that account. For each transaction, you will see the date, the payee, the amount, and the running balance of your 6-11... -
Page 104: Entering Transactions
PPT 2800 Series Product Reference Guide account as a result of the transaction. The ending account balance is displayed at the bottom of the screen. Figure 6-7. Account Register To switch between accounts, tap the name of the current account in the upper-right corner and select another account from the list. -
Page 105: Entering And Tracking Investments
Companion Programs When you accept a payee, Microsoft Money enters the same amount, category, and subcategory that you used for the last transaction with that same payee. This information is entered on the Required tab and the Optional tab. This AutoComplete+ feature helps you quickly enter similar transactions, such as ATM withdrawals. - Page 106 PPT 2800 Series Product Reference Guide To create a new investment, tap New. Enter the name, symbol, current price, and number of shares. Tap OK to save the new investment. Microsoft Money can update investment prices from the MoneyCentral Web site. To do this, open a connection to the Internet and tap Update Investments on the Tools menu.
-
Page 107: Microsoft Reader
Companion Programs Microsoft Reader Reader enables you to read electronic books on your PPT 2800. To open Microsoft Reader, tap Start, Programs, then Microsoft Reader. For more specific instructions on using Reader, open the Reader Guidebook by tapping Guidebook on the Reader command bar, or, on a book page, tap the book title, then tap Guidebook on the pop-up menu. -
Page 108: Reading A Book
PPT 2800 Series Product Reference Guide To open a book, tap its title in the Library list. Figure 6-10. Reader Library Reading a Book Each book consists of a cover page, an optional table of contents, and the pages of the book. -
Page 109: Using Reader Features
Companion Programs Each page also includes a page number and book title. Figure 6-11. Annotating and Navigating a Book Use the Up and Down scroll buttons to page through a book, or tap the page number on each page. Using Reader Features To use Reader options, select text by dragging across the text on the page. -
Page 110: Removing A Book
PPT 2800 Series Product Reference Guide • Add Bookmark: Select this option to add a bookmark to a book. A color-coded bookmark icon appears in the right margin. Tap this icon from anywhere in the book to go to the bookmarked page. -
Page 111: Chapter Contents
Chapter 7 Pocket Internet Explorer Chapter Contents Introduction ..............7-3 Mobile Favorites. - Page 112 PPT 2800 Series Product Reference Guide...
-
Page 113: Introduction
Pocket Internet Explorer Introduction With Pocket Internet Explorer, you can view Web pages in the following ways: • During synchronization with your desktop computer, download your favorite links, mobile favorites, and mobile channels stored in the Mobile Favorites subfolder in Internet Explorer on the desktop computer. -
Page 114: Saving Memory On Your Terminal
PPT 2800 Series Product Reference Guide 5. To download the pages linked to the mobile favorite you just created, in Internet Explorer on the desktop computer, right-click the mobile favorite, then click Properties. On the Download tab, specify the number of links deep you want to download. -
Page 115: Using Pocket Internet Explorer
Pocket Internet Explorer To see a list of mobile channels you can subscribe to at no fee, visit the Windows CE Mobile Channel List Web page (http://www.microsoft.com/windowsce/channels). Click the Add Mobile Channel button and select Make available offline to download the channel to your desktop computer. - Page 116 PPT 2800 Series Product Reference Guide To view mobile favorites and channels, tap the Favorites button to display your list of favorites, then tap the mobile favorite or channel you want to view. Figure 7-2. Mobile Favorites You'll see the page that was downloaded the last time you synchronized with your desktop computer.
-
Page 117: Browsing The Web
Pocket Internet Explorer Browsing the Web 1. Connect to the Internet or your network in one of the following ways: • Using Connections, as described in Chapter 8. Then select Pocket Internet Explorer from the menu. • In Pocket Internet Explorer. To select a service or type of connection, tap Tools, then Options. - Page 118 PPT 2800 Series Product Reference Guide...
-
Page 119: Chapter Contents
Chapter 8 Connections Chapter Contents Introduction ..............8-3 Transferring Items Using Infrared . - Page 120 PPT 2800 Series Product Reference Guide...
-
Page 121: Introduction
Connections Introduction Your terminal can exchange information with other Windows-powered devices using its infrared (IR) port. In addition to using a cradle, cable, or IR port to connect your terminal to your desktop computer, you can also: • Connect to your Internet service provider (ISP) to send and receive e-mail messages using Inbox and view Web pages using Pocket Internet Explorer. -
Page 122: Transferring Items Using Infrared
PPT 2800 Series Product Reference Guide Transferring Items Using Infrared Using infrared (IR), you can send and receive information, such as contacts and appointments, between two Windows-powered devices. To send information: 1. Open the program where you created the item you want to send and locate the item in the list. - Page 123 Connections 3. Tap New connection. Figure 8-1. Creating a Modem Connection 4. Enter a name for the connection. 5. In the Select a modem list, select Hayes Compatible on COM1. 6. You should not need to change any settings in Advanced. Most ISPs now use a server-assigned address.
-
Page 124: Connecting To Your Network
PPT 2800 Series Product Reference Guide • Send and receive e-mail messages using Inbox. You first must provide the information it needs to communicate with the e-mail server. For instructions, see Connecting Directly to an E-mail Server on page 8-8. - Page 125 Connections 3. Tap New connection. Figure 8-2. Creating a Modem Connection 4. Enter a name for the connection. 5. Select Hayes Compatible on COM1. 6. You should not need to change any settings in Advanced. Most servers use a server-assigned address. If not, tap Advanced, then the TCP/IP tab and enter the address.
-
Page 126: Disconnecting
PPT 2800 Series Product Reference Guide • Visit Internet or intranet Web pages using Pocket Internet Explorer. You may need to set up a proxy server to visit Internet Web pages. For more information on setting up a proxy server, see Pocket Internet Explorer Help on the terminal. -
Page 127: Setting Up An E-Mail Service
Connections Setting Up an E-mail Service 1. In Inbox on your terminal, tap Services, then New Service. Figure 8-3. Setting Up E-mail Service 2. Select POP3 as the service type, name the service, and tap Next. Ask your ISP or network administrator which service type to select. -
Page 128: Getting Help Connecting
PPT 2800 Series Product Reference Guide Getting Help Connecting See the following for more connection information: • Inbox on page 5-14 • Online Help on the terminal. Tap , then Help. Tap View, All Installed Help, then Inbox or Connections. -
Page 129: Chapter Contents
Chapter 9 Spectrum24 Network Configuration Chapter Contents Introduction ..............9-3 NICTT . - Page 130 PPT 2800 Series Product Reference Guide...
-
Page 131: Introduction
Spectrum24 Network Configuration Introduction Wireless LANs allow PPT 2800 series terminals to communicate wirelessly, and to send captured data “real time” to a host device. Before a terminal can be used on a Spectrum24 LAN your facility must be set up with the equipment required to run the wireless LAN and the terminal must be properly configured. -
Page 132: Spectrum24 Settings Control Panel Applet
PPT 2800 Series Product Reference Guide The NICTT task tray icon appears at the top of the Start menu, and indicates terminal signal strength as follows. Icon Status Excellent signal strength Very good signal strength Good signal strength Fair signal strength... -
Page 133: Configuring The Ppt 2842 (2 Mb Radio)
Spectrum24 Network Configuration Configuring the PPT 2842 (2 MB Radio) Using NICTT on the PPT 2842 The NICTT property pages contain a variety of wireless network and service quality information. Select help for a detailed explanation within each NICTT property page. General Property Page Before the PPT 2842 can be used, it must be properly configured with the correct ESS ID. - Page 134 PPT 2800 Series Product Reference Guide Note: A PC Card adapter installation displays PCMCIA as the Adapter Type. Power Mode Property Page The Spectrum24 WLAN adapter Power Mode management properties allows automatic or manual setting of the adapter power management mode from Continuous Access Mode (CAM) to Power Save Polling (PSP) mode and controls the adapter Beacon Algorithm.
- Page 135 Spectrum24 Network Configuration Signal Strength Property Page The Signal page displays a real-time graph of the signal quality being received by the adapter, and displays a description of the signal quality. Figure 9-3. Signal Property Page...
- Page 136 PPT 2800 Series Product Reference Guide Transmission Quality Property Page The Transmission page displays a real-time graph as a series of ICMP ping tests initiated by the user. The transmission quality test does not run all the time because it consumes network bandwidth.
- Page 137 Spectrum24 Network Configuration Options Property Page The Options page controls system sounds, whether specified settings are temporary, and the NICTT exit option. Figure 9-5. Options Property Page Enable System Sounds You can enable or disable NICTT system sounds. NICTT uses standard wav-table sounds supplied by the Windows operating system.
-
Page 138: Using Spectrum24 Settings Control Panel Applet For The Ppt 2842
PPT 2800 Series Product Reference Guide Using Spectrum24 Settings Control Panel Applet for the PPT 2842 The Spectrum24 Settings Control Panel Applet allows you to view and edit Spectrum24 terminal settings. On the Start menu, select Settings, the System tab, then Spectrum24 Settings. - Page 139 Spectrum24 Network Configuration Mobile Unit Properties Figure 9-7. Mobile Unit Property Page The Mobile Unit page configures NIC ESSID, Power Management, Request To Send (RTS) Threshold, Preferred BSS ID, and Mandatory BSS ID values. These values control how the terminal associates and consumes power in the MU mode. To use the Power Management settings in the Spectrum24 Settings Control Panel Applet, disable Power Mode Management capabilities in NICTT as follows: 9-11...
- Page 140 PPT 2800 Series Product Reference Guide 1. In NICTT select the Power tab. Figure 9-8. Power Property Page 2. If checked, uncheck Switch power mode based on power source. 3. Select Power save polling mode. 4. Uncheck Let adapter manage power (recommended).
- Page 141 Spectrum24 Network Configuration WLAN Adapter Settings Figure 9-9. WLAN Adapter Property Page On the WLAN Adapter page, the Card Type (the only visible field), interrupt Number, IO Port Address and Memory Base Address are automatically selected in a Plug and Play environment and are not visible.
-
Page 142: Configuring The Ppt 2846 (11 Mb Radio)
PPT 2800 Series Product Reference Guide Configuring the PPT 2846 (11 MB Radio) Using NICTT on the PPT 2846 The NICTT property pages contain a variety of wireless network and service quality information.Select help for a detailed explanation within each NICTT property page. - Page 143 The Channel field and the Send Long Preamble Headers checkbox are not visible when the adapter is in Infrastructure mode. Infrastructure is the adapter default mode when Symbol Status initially displays • Enhanced Ad Hoc - Select Enhanced Ad Hoc when the highest throughput is required in an Ad Hoc network for testing adapter performance.
- Page 144 PPT 2800 Series Product Reference Guide Info Property Page Use the Info page to view version and operating mode information. All of the fields are read- only windows. There are no user configurable data fields. Figure 9-11. Info Property Page...
- Page 145 Spectrum24 Network Configuration IP Config Property Page Use the IP Config property page to view the current adapter IP configuration settings. Select DHCP (Dynamic Host Configuration Protocol) to obtain a leased IP address and network configuration information from a remote server. An access point sends out a DHCP request searching for a DHCP server to acquire the network configuration and firmware filenames.
- Page 146 PPT 2800 Series Product Reference Guide • Gateway: Used to connect to the corporate network. The network administrator usually has the IP address required for the default gateway. • DNS (Domain Name System): The IP address of a server containing a database of host names and their associated IP addresses so that when a host name is used, it can be resolved into its IP address.
- Page 147 Spectrum24 Network Configuration Power Mode Property Page The Power Mode management properties allow automatic or manual setting of the adapter power management mode. Figure 9-13. Power Property Page The adapter has two power consumption modes, Continuous Access Mode (CAM) and Power Save Poll (PSP) mode.
- Page 148 PPT 2800 Series Product Reference Guide Adjusting the adapter transmit power level enables users to expand or confine a transmission area in respect to interference or other wireless devices that could be operating nearby. Reducing a coverage area in high traffic areas improves transmission quality by reducing the number of missed beacons and noise in that coverage area.
- Page 149 Spectrum24 Network Configuration Options Property Page Use the Options property page to enable or disable suspend wireless network, system sounds, set temporary setting and set International roaming option. Figure 9-14. Options Property Page Select Allow Pocket PC to suspend when wireless network is used to suspend all functions when the adapter is still active to avoid drainage of battery power.
- Page 150 Select These settings are only temporary from the Optional Settings field to enter only Symbol Status temporary values. Temporary values apply to each property page and last until the system is restarted or the values are changed. If the checkbox is not selected, any value entered is saved and used by the adapter after the system is rebooted.
- Page 151 Spectrum24 Network Configuration Encryption Property Page Use the Encryption property page to set the adapter security level. The firmware supports Open System (no encryption), 40-bit Shared Key algorithm (40-bit), 128-bit Shared Key algorithm (128-bit) and Kerberos encryption algorithms. The absence of a physical connection makes wireless links vulnerable to information theft.
- Page 152 PPT 2800 Series Product Reference Guide Choose one of the following Encryption options from the Encryption Algorithm pull-down menu: • Open Systems (no encryption) - Use the Open System option as the default setting when no data packet encryption is needed over the network. Selecting Open System provides no security for the data being transmitted over the network.
- Page 153 Spectrum24 Network Configuration Ping Property Page Select the Ping property page to view the signal strength, data rate transmission, test statistics and to perform data transmission test. Figure 9-16. Ping Property Page Transmission quality tests send an ICMP ping packet across the network to a selected address to test data transmission between an adapter and an access point/adapter.
- Page 154 PPT 2800 Series Product Reference Guide • Tap Start Test to begin the test. Each ping displays the round trip time it took the ICMP ping to complete. The minimum, maximum and average values are displayed as results. A real-time bar graph indicates the signal strength and the data transmission rate.
- Page 155 Spectrum24 Network Configuration The Signal Property Page displays the following information: • A graph displays signal quality from 0 to 100 percent. The terminal continuously looks for a stronger signal from a different access point on the network, and roams to that access point if the quality of the radio signal drops below an acceptable level.
- Page 156 PPT 2800 Series Product Reference Guide View the AP MAC address, direct sequence channel of each located access point. If choosing to associate with one of the access points displayed, the adapter is required to use the same channel number and MAC address of the access point. If the current adapter signal strength is poor, one of the access points displayed could provide a stronger signal.
- Page 157 Spectrum24 Network Configuration Peers Property Page When Ad Hoc is selected as the operating mode from within the Mode property page, the Signal and APs property pages turn into the Peers property page. Figure 9-19. Peers Property Page Use the Peers property page to view the BSSID or MAC addresses of the other adapters in the network, their operating mode (PSP or CAM), their transmit rate, their supported data rate, supported data rate and length of time an adapter has been out of the Ad Hoc network.
-
Page 158: Using Spectrum24 Settings Control Panel Applet For Ppt 2846
PPT 2800 Series Product Reference Guide Using Spectrum24 Settings Control Panel Applet for PPT 2846 The Spectrum24 Settings Control Panel Applet allows you to view and edit Spectrum24 NIC settings. On the Start menu, select Settings, the System tab, then Spectrum24 Settings. - Page 159 Spectrum24 Network Configuration Mobile Unit Properties Figure 9-21. Mobile Unit Property Page The Mobile Unit page in the Advanced Properties window configures the terminal’s operating mode and ESS ID. Selecting an operating mode in NICTT disables the operating mode selected in NCPA. Use the Operating Mode pull-down menu to select one of the following operating modes for the terminal: •...
- Page 160 PPT 2800 Series Product Reference Guide • Select Pseudo IBSS (Proprietary Ad Hoc) for the highest throughput in an IBSS network for terminal testing. Pseudo IBSS does not support PSP terminals and does not use beacons or authentication. Each terminal must be on the same channel.
- Page 161 Spectrum24 Network Configuration There are two power consumption modes: Continuous Access Mode and Power Save Poll mode. CAM yields the best performance but uses the most power. CAM is the preferred mode for systems running on AC power. PSP saves significant amounts of power over CAM.
- Page 162 PPT 2800 Series Product Reference Guide operating nearby. Reducing a coverage area in high traffic areas improves transmission quality by reducing the number of missed beacons and noise in that coverage area. Use the 802.11 Tx Power Options field to set the transmission power level for adapters operating in Infrastructure mode.
- Page 163 Spectrum24 Network Configuration Encryption Select the Encryption tab in the Advanced Properties window to view the Encryption property page. Figure 9-24. Encryption Property Page Encryption is an efficient method of preventing data theft and improving data security in a wireless environment. Use the Encryption property page to configure WLAN adapter data packet Encryption settings.
- Page 164 PPT 2800 Series Product Reference Guide • Select 128-bit Encryption from the Encryption Algorithm pull-down menu and enter a 26 Hex digit password by spreading the 26 Hex digits across the six fields provided for each Encryption key. The 128-bit Encryption option provides the highest level of security.
- Page 165 Spectrum24 Network Configuration property pages password screen which appears when Advanced is selected from the Easy Setup window. Figure 9-26. Password Page To disable the password screen, enter the current password and leave the two new passwords fields blank. Select OK. To change the password, enter the current password and type a new password in the two new password fields.
- Page 166 PPT 2800 Series Product Reference Guide 9-38...
- Page 167 Chapter 10 Wireless Wide Area Network Configuration Chapter Contents Introduction ..............10-3 Configuring a CDPD WAN Connection (PPT 2833) .
- Page 168 PPT 2800 Series Product Reference Guide 10-2...
-
Page 169: Introduction
Wireless Wide Area Network Configuration Introduction Before a terminal can be used on a CDPD/GSM wireless network, you must select a provider and establish a service plan, and the terminal must be properly configured. Configuring a CDPD WAN Connection (PPT 2833) Before the PPT 2833 terminal can be used, you must get an account with an internet service provider. - Page 170 PPT 2800 Series Product Reference Guide At any time, you can choose to cancel the Configuration Wizard by tapping Cancel. If you do choose to cancel, the Configuration Wizard appears the next time the Modem Manager is selected. It is recommended that once you begin the setup process you continue until it is completed.
- Page 171 Wireless Wide Area Network Configuration 2. Select a Wireless Provider from the drop-down menu, and tap Next. The Contact Service Provider screen displays: Figure 10-3. Contact Service Provider Screen This screen tells you to note the modem Equipment ID number shown. Tap Next to continue.
- Page 172 PPT 2800 Series Product Reference Guide 3. The Enter Modem Settings screen displays: Figure 10-4. Enter Modem Settings Screen 4. Enter the required information and tap Next to continue. You are prompted to confirm the settings. Verify the information you entered is accurate and tap Next.
- Page 173 Wireless Wide Area Network Configuration Figure 10-5. Modem Configured Screen 5. After you have waited the appropriate amount of time indicated by your service provider, tap Next. The Checking Network screen tells you to wait for your modem to register with the network. 10-7...
- Page 174 PPT 2800 Series Product Reference Guide Figure 10-6. Checking Network Screen 6. A screen displays indicating that the modem successfully connected. Note: The Configuration Wizard does not proceed until a CDPD carrier selection is made. 10-8...
-
Page 175: Maintenance Screens And Menus
Wireless Wide Area Network Configuration Maintenance Screens and Menus The PPT 2833 terminal includes menu commands to make it fast and easy to configure and check the status of your modem. This section explains the menu commands specific to the Modem Manager. - Page 176 PPT 2800 Series Product Reference Guide The following information is available from this screen: Setting Description Cellular Signal When checked, it indicates that the modem has identified a Present cellular signal. CDPD Service When checked, it indicates that the modem has identified and Detected is synchronized to a CDPD signal in the area.
- Page 177 Wireless Wide Area Network Configuration Configuration Screen Figure 10-8. Modem Manager Configuration Screen On the Config tab, you can edit configuration settings. The following settings are available: Setting Description IP Address This is the current IP address of the modem. Tap to enter a new IP address.
- Page 178 PPT 2800 Series Product Reference Guide Setting Description Auto Power-Off When enabled, this shuts off the modem when the session is disconnected. Side Preference Drop-Down Setting Description A only The modem searches for a CDPD system on the "A" side only. For users who do not roam, this selection can sometimes speed the registration process, as the modem does not have to look on the "B"...
- Page 179 Wireless Wide Area Network Configuration Provider Screen Figure 10-9. Modem Manager Provider Screen On the Provider tab, you can modify provider settings. The following settings are available. Setting Description Selected Service Selects the CDPD channel’s System Provider’s Identifier. Provider Service Preference Configures the preferences for the service ID parameters.
- Page 180 PPT 2800 Series Product Reference Guide Service ID Preferences Setting Description Only use selected The modem attempts to detect only the system in the Service ID service provider parameters for registration. This is useful when you want to prevent roaming to any other system but your home system.
-
Page 181: Modem Menu
Wireless Wide Area Network Configuration Modem Menu Tap Modem to display the Modem Menu. Options are described below. Figure 10-10. Modem Menu Setting Description Save Settings Saves any settings made in the Modem Manager Configuration and Provider screens. Disconnect Terminates the active Network session with the modem. If you have configured the AutoOff preference to turn the modem off when the session is disconnected, the modem may also power down. -
Page 182: Advanced Menu
PPT 2800 Series Product Reference Guide Advanced Menu Tap Advanced to display the Advanced Menu. Options are described below Figure 10-11. Advanced Menu 10-16... - Page 183 Wireless Wide Area Network Configuration Modem Information Tap Modem Information to view the modem manufacturer, equipment ID and model, and firmware version. Figure 10-12. Modem Information Screen 10-17...
-
Page 184: Help
PPT 2800 Series Product Reference Guide Ping Screen Tap Ping to send a packet to a particular IP address to determine if it is online. From this screen you can send a PING request to another network device whose network address you already know. -
Page 185: Configuring A Gsm Wan Connection (Ppt 2834)
Wireless Wide Area Network Configuration Configuring a GSM WAN Connection (PPT 2837) To set up a new connection configuration: 1. Tap Settings from the Start menu. 2. Tap the Connections tab, and select Modem to display the Modem Connections screen. Figure 10-14. - Page 186 PPT 2800 Series Product Reference Guide 3. Tap New Connection.The Make New Connection screen displays. Figure 10-15. Make New Connection Screen 4. Enter a name for your connection, then select Virtual GSM modem on COM8 from the drop-down menu. 10-20...
- Page 187 Wireless Wide Area Network Configuration 5. Your modem settings and TCP/IP address should be set automatically, but if you need to set them manually, tap the Advanced button and enter the information in the Port Settings, TCP/IP, and Name Servers tabs. Figure 10-16.
- Page 188 PPT 2800 Series Product Reference Guide 7. Enter the phone number, and tap Next.. Figure 10-18. Dialing Settings 8. Set the dialing settings on the next screen, and tap Finish. Your new connection is created. 10-22...
-
Page 189: Connecting Via Gsm
Wireless Wide Area Network Configuration Connecting via GSM To connect using the GSM WAN connection you created: 1. Select Programs from the Start menu. 2. Tap the Connections icon. 3. Select the connection you created.. Figure 10-19. Personalizing your Connection 4. - Page 190 PPT 2800 Series Product Reference Guide 5. If you’d like to edit any dialing selections, tap Dialing Options. Figure 10-20. Dialing Options 6. Tap Dialing Patterns to edit country code, area code, or number dialing patterns. Figure 10-21. Dialing Patterns...
- Page 191 Wireless Wide Area Network Configuration 7. Tap OK until you return to your connection screen, and tap Connect. The terminal attempts to connect. 10-25...
- Page 192 PPT 2800 Series Product Reference Guide 10-26...
- Page 193 Symbol Windows CE SDK ........
- Page 194 PPT 2800 Series Product Reference Guide 11-2...
-
Page 195: Introduction
Software Installation on Development PC Introduction To develop applications to run on the PPT 2800, the Symbol Windows CE Software Developer’s Kit (SDK) is available. This SDK contains PPT 2800-specific software not available in the standard Microsoft Windows CE Platform SDK. -
Page 196: Installing The Sdk On The Development Pc
This Product Reference Guide. Installing the SDK on the Development PC The Symbol SDK installs through Windows in the directory C:\SYMBOL WINDOWS CE SDK, and also installs files in the Windows CE Tools directory (generated by the CE Tool Kit). - Page 197 Chapter 12 Configuring the Terminal Chapter Contents Introduction ..............12-3 Starting Terminal Configuration Manager .
- Page 198 PPT 2800 Series Product Reference Guide 12-2...
-
Page 199: Chapter 12. Configuring The Terminal
Configuring the Terminal Introduction This chapter describes the Terminal Configuration Manager (TCM), and how it is used to specify and load files into the flash memory of the PPT 2800 using the terminal’s Initial Program Loader (IPL). In TCM, you create a script that contains the information (commands to copy files) for building the image. -
Page 200: Starting Terminal Configuration Manager
PPT 2800 Series Product Reference Guide Starting Terminal Configuration Manager To start TCM, double click on the TCM icon in the SYMSDK group. The following screen appears, displaying two directory windows; Script1 and File Explorer. Each directory window is split; the left half (or pane) of the window displays the directory tree for the current drive, and the right half displays the directory contents for the current drive. - Page 201 Configuring the Terminal The following table lists the components of the TCM start-up screen. Table 12-1. TCM Screen Components Component Description Script Window Associated with a script file containing the information to create a Flash Disk image. This window is the target window, or the primary TCM window in which you can create a script or change a script file’s contents by copying, deleting, and renaming files and directories.
-
Page 202: Defining Script Properties
PPT 2800 Series Product Reference Guide Defining Script Properties Before a script is created, the script properties must be defined. This defines the type of terminal, flash type, number of disks being created, and the memory configuration of each disk volume. - Page 203 Configuring the Terminal Note: The options available under the disks drop-down menu changes depending on the flash type. Some flash types only have one option for the number of disk volumes, others have two options. 6. If you have selected three volumes under the Disk drop-down menu, you have the option to change the memory configuration of the second and third volumes.
-
Page 204: Creating The Script For The Hex Image
Note: If you open and make changes to an existing script, saving the changes writes over the existing script. If you wish to use an original or Symbol-supplied standard script as a base and save the changes in a new script, use Save As instead of Save after making the changes to save to a different filename. -
Page 205: Copy Components To The Script
Configuring the Terminal Copy Components to the Script Copy files or directories to the script being generated: 1. Click on the File Explorer Window to make it the active window. 2. Click on the source directory in the Directory Tree Pane. TCM displays the directory contents in the Contents Pane. -
Page 206: Building The Image
If you wish to use an original or Symbol-supplied standard script as a base and save the changes in a new script, use Save As instead of Save after making the changes, and save to a different filename. - Page 207 Configuring the Terminal 3. Select whether to build the partition table, or one volume. 4. Select ASCII format for your hex image, or Compression, which reduces the size of most hex images in order to speed downloading. Click OK. 5. TCM performs a check. If the script is has no errors, TCM proceeds with the build. If the Build Fails If the build fails, TCM displays a message indicating which file(s) are missing.
-
Page 208: Sending The Hex Image
PPT 2800 Series Product Reference Guide Sending the Hex Image Once the hex file is built, you are ready to download it to the terminal. A Hex image download requires both TCM and a program loader stored on the terminal. The terminal comes with a program loading utility, Initial Program Loader (IPL), stored in the terminal’s... -
Page 209: Setting Up Ipl To Receive The File
Configuring the Terminal 3. If the correct hex file is not displayed in the Hex File to Load field, click on the Browse button and navigate to the correct hex file to be downloaded. 4. Click on the Comm Port drop-down menu and select the COM port being used. Ports already in use display in the Unavailable Ports field. - Page 210 PPT 2800 Series Product Reference Guide 3. Continue to hold these buttons, including the battery door switch, until the IPL Baud Rate menu displays: IPL VER X.XX IPL Key Sequence -> 115,200 57,600 38,400 19,200 9600 Auto Baud Press Up/Down to...
- Page 211 Configuring the Terminal 5. IPL displays the Main Menu which lists the partitions/applications that can be downloaded. IPL Ver X.XX IPL Key Sequence Windows CE Platform Application Data Splash Screen Partition Table Auto Select Press Up/Down to select partition Press Action to begin download 6.
- Page 212 PPT 2800 Series Product Reference Guide downloaded is received from the host. While this screen is displayed, pressing the Action button returns IPL to the Main Menu screen. 8. Insert the terminal in a cradle, or connect it to a host PC with a serial cable.
- Page 213 Configuring the Terminal 12. If Auto Select was selected on the Main Menu, IPL immediately returns to the Waiting for Data Screen to wait for the next image. If any other selection was made on the Main Menu, IPL stays at the success screen until you press Action. Once the screen is acknowledged, IPL returns to the Main Menu to wait for a new selection.
-
Page 214: Error Messages
PPT 2800 Series Product Reference Guide Error Messages IPL Error Detection While receiving data, IPL performs many checks on the data to ensure that the data is received correctly. If an error is detected, IPL immediately aborts the download, and reports the error on an error screen: IPL VER X.XX... -
Page 215: Tcm Error Messages
Checksum Error occurs if an invalid checksum is detected in the record. Invalid Record occurs if a record is not defined in the Symbol Hex File Format. Connection Lost occurs if one of the handshaking lines is de- asserted during download. -
Page 216: Creating A Splash Screen
PPT 2800 Series Product Reference Guide Error Description Error - Source/ If the directory paths specified by the Source and Destination cells do Destination Path not exist, the cell containing the non-existent path turns red to highlight Verification the error. -
Page 217: Loading The Splash Screen Via Tcm
Configuring the Terminal Loading the Splash Screen via TCM To load the bitmap: 1. Click TCM.exe in the TCM directory. 2. Connect the PPT 2800 to the development PC and invoke IPL to prepare the terminal to receive the splash screen download. 3. - Page 218 PPT 2800 Series Product Reference Guide 12-22...
-
Page 219: Chapter 13. Maintenance And Troubleshooting
Chapter 13 Maintenance and Troubleshooting Chapter Contents Introduction ..............13-3 Maintaining the PPT 2800 . - Page 220 PPT 2800 Series Product Reference Guide 13-2...
-
Page 221: Introduction
Maintenance and Troubleshooting Introduction This chapter includes instructions on cleaning and storing your terminal, and provides troubleshooting solutions for potential problems during terminal operating. Maintaining the PPT 2800 For trouble-free service, observe the following tips when using your PPT 2800: •... -
Page 222: Troubleshooting
PPT 2800 Series Product Reference Guide Troubleshooting Table 13-1. Troubleshooting Problem Possible Solution PPT 2800 terminal does not turn Adjust the contrast control. Make sure batteries are installed properly. Replace the batteries. If your PPT 2800 terminal still does not operate, try a soft reset;... - Page 223 Verify that the terminal is loaded with a scanning application. scan input. See your System Administrator. Check to be sure the bar code symbol is not defaced. Be sure you are within proper scanning range. Be sure the terminal is programmed to accept the type of bar code you are scanning.
- Page 224 PPT 2800 Series Product Reference Guide Table 13-1. Troubleshooting (continued) Problem Possible Solution Your PPT 2800 is not dialing out. Remove the terminal from the cradle. The modem will not work if the terminal is actively connected to the desktop computer.
-
Page 225: Appendix A. Character Recognizer
Appendix A Character Recognizer Using Character Recognizer, you can write characters directly on your terminal screen with your stylus. These characters are translated into typed text. Use Character Recognizer to enter text, for example, to write a note or to fill in fields in a dialog box. The default writing mode for Character Recognizer is lowercase (Jot-compatible) mode. - Page 226 PPT 2800 Series Product Reference Guide (labeled abc) creates lowercase letters. Use the right area (labeled 123) for writing numbers, symbols, special characters, and punctuation. Figure A-1. Using Character Recognizer The following chart illustrates some of the characters you can write in lowercase mode (the dot on each character is the starting point for writing).
- Page 227 Character Recognizer example, if you write a lowercase "a" in the ABC area, an uppercase "A" displays on the screen. Figure A-2. Character Chart For more information on using Character Recognizer and for demos of all characters, on the Character Recognizer input panel.
- Page 228 PPT 2800 Series Product Reference Guide...
-
Page 229: Appendix B. Demo Program
A button-launch demo program illustrates how to use some of the terminal’s many applications. If the demo program is not already on your PPT 2800 (check the Start menu), you may download the program from the Symbol Windows CE Software Developer’s Kit (SDK). See... - Page 230 PPT 2800 Series Product Reference Guide To initiate the demo program, select PPT 2800 Demo from the Start menu. The initial demo program dialog box appears. Figure B-1. Main Dialog Box...
-
Page 231: Setup
Demo Program Setup Select the Setup button to display the following dialog box: Figure B-2. Symbol Setup Dialog Box Control Panel Select CtlPanel to display the Control Panel Test Program dialog box. This dialog box provides a convenient way to view and set terminal settings, such as scanner parameters,... -
Page 232: Nictt
PPT 2800 Series Product Reference Guide display settings, audio settings, printer settings, setting date and time, and aligning the touch screen. It also serves as a sample code on many of the Symbol-specific CAPI calls. Figure B-3. Control Panel Test Program Dialog Box... -
Page 233: Diagnostics
Demo Program Diagnostics Select Diagnostics to display the following dialog box: Figure B-4. Diagnostics Dialog Box This dialog box provides testing to ensure various aspects of the terminal are functioning correctly. The following options are available: • LED Test tests the green decode LED-on and LED cycle to ensure it is functioning properly. -
Page 234: Scanner
PPT 2800 Series Product Reference Guide Scanner The sample scanning application enables the terminal’s scanner, allows the user to change scan parameters, and displays scanned data. Figure B-5. Scan Sample Dialog Box Scanning Data Fields After a bar code is scanned, the following data appears in the dialog box: •... -
Page 235: Scanning Options
File Explorer is a file browser utility that provides similar Windows Explorer-like functionality on Symbol CE terminals. File Explorer allows the user to browse, cut, copy, paste, and delete files as well as execute the program. It also provides file transfer capability via the IrDA port. -
Page 236: Msr Sample
PPT 2800 Series Product Reference Guide MSR Sample This selection provides a sample MSR application. Figure B-6. MSR Sample Dialog Box... -
Page 237: Ce Apps
Demo Program CE Apps Select CE Apps button on the main menu to access the following standard Windows CE applications: • Voice Recorder • Calculator • Solitaire • Calendar. Figure B-7. CE Apps Dialog Box Chapter 5, Applications for information on these applications. About Select the About button on the demo program to view information about the demo program. - Page 238 PPT 2800 Series Product Reference Guide B-10...
-
Page 239: Appendix C. Gsm Demo Program
Appendix C GSM Demo Program Introduction GsmDemo allows you to explore what features GSM and the PPT 2837 terminal offer you, including sending and receiving SMS messages. GsmDemo Screens To start GsmDemo: 1. Select Programs from the Start menu. 2. Tap the GSM Demo icon. -
Page 240: Main Screen
PPT 2800 Series Product Reference Guide Main Screen When GsmDemo opens, it opens the internal serial port to the GSM modem and attempts to register with a network.The following screen displays. The Network Status field displays Searching, then Registered if the search is successful. -
Page 241: Read Sms
GSM Demo Program Read SMS To read your SMS messages: 1. Tap Read SMS on the main screen. The following screen displays: Figure C-2. Read SMS Screen 2. The terminal receives and displays the current message, then deletes it automatically. Tap the View Next Message button if more than one message has been recieved. -
Page 242: Send Sms
PPT 2800 Series Product Reference Guide Send SMS To send an SMS message: 1. Tap Send SMS on the main screen. Figure C-3. Send SMS Screen 2. Enter the phone number of the message recipient and the message. 3. Tap Send to send the message. A successful message screen displays. -
Page 243: Dial
GSM Demo Program Dial # The Dial # feature controls the dial properties of the modem. Select Dial on the main menu: Figure C-4. Dial Screen Number Phone number to dial. Status Indicates if modem is connected to the specified number. -
Page 244: Gsmdemo Menu Commands
PPT 2800 Series Product Reference Guide GsmDemo Menu Commands This section explains the menu commands specific to GsmDemo, accessed from the bottom of the screen. Options Menu Select Settings from the Options menu to view the status of the SIM card. -
Page 245: Help Menu
GSM Demo Program Help Menu Select About from the Help menu to view information about your GSM modem. Figure C-6. GsmDemo About Screen... - Page 246 PPT 2800 Series Product Reference Guide...
-
Page 247: Appendix D. Technical Specifications
Appendix D Technical Specifications Environment Table D-1 summarizes the PPT 2800’s intended operating environment. Table D-1. PPT 2800 Operating Environment Operating Temperature -20° C to 50° C (-4° F to 122° F) Storage Temperature -25° C to 50° C (-13° F to 122° F) Humidity 5% to 90% non-condensing Electrostatic Discharge... - Page 248 PPT 2800 Series Product Reference Guide...
- Page 249 Index text messages ....C-3 inbox ......5-14 accessories .
-
Page 250: Companion Programs
Excel contacting Symbol ....xiii pocket ......6-8 contacts application . - Page 251 Index IPL ......3-5 splash screen ....3-5 loading applications .
- Page 252 PPT 2800 Series Product Reference Guide operating environment ....D-1 S24 Settings Control Panel Applet ..9-3 scanning ......2-13 2D bar codes .
- Page 253 Index status icons ......2-5 tools and utilities stylus ......2-3 NICTT .
- Page 254 PPT 2800 Series Product Reference Guide Index-6...
- Page 255 We’d like to know what you think about this Manual. Please take a moment to fill out this questionnaire and fax this form to: (631) 738-3318, or mail to: Symbol Technologies, Inc. One Symbol Plaza M/S B-4 Holtsville, NY 11742-1300 Attention: Technical Publications Manager IMPORTANT: If you need product support, please call the appropriate customer support number provided.
Need help?
Do you have a question about the PPT 2800 series and is the answer not in the manual?
Questions and answers