Symbol PPT 2800 Series Product Reference Manual
Ppt 2800 series with windows mobile 2003 software for pocket pcs
Hide thumbs
Also See for PPT 2800 Series:
- Product reference manual (256 pages) ,
- Quick reference manual (45 pages) ,
- User manual (36 pages)

Related Manuals for Symbol PPT 2800 Series


Summary of Contents for Symbol PPT 2800 Series
- Page 1 ® PPT 2800 Series with Windows Mobile 2003 Software for Pocket PCs Product Reference Guide...
- Page 3 ® PPT 2800 Series with Windows Mobile 2003 Software for Pocket PCs Product Reference Guide 72E-67136-02 Revision A February 2005...
- Page 4 The software is provided strictly on an “as is” basis. All software, including firmware, furnished to the user is on a licensed basis. Symbol grants to the user a non-transferable and non-exclusive license to use each software or firmware program delivered hereunder (licensed program).
-
Page 5: Table Of Contents
Symbol Support Center ........ - Page 6 PPT 2800 with Windows Mobile 2003 Software for Pocket PCs Product Reference Guide Chapter 2. Operating the PPT 2800 Chapter Contents ............. . 2-1 Introduction .
- Page 7 Contents Chapter 3. Customizing the PPT 2800 Chapter Contents............. . 3-1 Introduction .
- Page 8 Symbol Settings ........
- Page 9 Contents Chapter 5. AirBEAM Smart Chapter Contents............. . 5-1 Introduction .
- Page 10 PPT 2800 with Windows Mobile 2003 Software for Pocket PCs Product Reference Guide Working with Contacts ............7-11 Chatting with Contacts .
- Page 11 Contents Chapter 11. Wireless Wide Area Network Configuration Chapter Contents............. 11-1 Introduction .
- Page 12 PPT 2800 with Windows Mobile 2003 Software for Pocket PCs Product Reference Guide Setting Up IPL to Receive the File ..........13-12 IPL Error Messages .
- Page 13 Contents Control Panel ............B-13 Appendix C.
- Page 14 PPT 2800 with Windows Mobile 2003 Software for Pocket PCs Product Reference Guide...
-
Page 15: About This Guide
The PPT 2800 Series with Windows Mobile 2003 Software for Pocket PCs Product Reference Guide provides information about the PPT 2800 Series terminal using the Windows Mobile 2003 operating system, and its accessories. The PPT 2800 Series includes the following models: •... -
Page 16: Notational Conventions
GSM/GPRS connection. • Chapter 12, Software Installation on Development PC provides information on the Symbol Mobility Developer Kit (SMDK), used to develop applications for the terminal. • Chapter 13, Configuring the Terminal describes how to install and use the Terminal Configuration Manager (TCM) and Initial Program Loader (IPL). -
Page 17: Related Documents
Service Information Contact the Symbol Support Center for any problems with the PPT 2800 equipment. If the problem cannot be resolved over the phone, the equipment may need to be returned for servicing. If that is necessary, special directions will be provided. -
Page 18: Symbol Support Center
PPT 2800 with Windows Mobile 2003 Software for Pocket PCs Product Reference Guide Note: Symbol Technologies is not responsible for any damages incurred during shipment if the approved shipping container is not used. Shipping the units improperly can possibly void the warranty. - Page 19 Kerkplein 2, 7051 CX Symbol Technologies Norway Postbus 24 7050 AA Hoybratenveien 35 C Varsseveld, Netherlands N-1055 OSLO, Norway 315-271700 (Inside Netherlands) +31-315-271700 (Outside Netherlands) Symbol’s repair depot and shipping address: Symbol Technologies Norway Enebakkveien 123 N-0680 OSLO, Norway +47 2232 4375 xvii...
- Page 20 Switchboard: 08 445 29 00 (domestic) Call Center: +46 8 445 29 29 (international) Support E-Mail: Sweden.Support@se.symbol.com If you purchased the Symbol product from a Symbol Business Partner, contact that Business Partner for service. For the latest version of this guide go to: http://www.symbol.com/manuals. xviii...
-
Page 21: Chapter Contents
Chapter 1 Getting Started Chapter Contents Introduction ..............1-3 Unpacking the Terminal . - Page 22 PPT 2800 with Windows Mobile 2003 Software for Pocket PCs Product Reference Guide...
-
Page 23: Introduction
Carefully remove all protective material from around the terminal and save the shipping container for later storage and shipping. Verify that you received all equipment listed on the packing slip and inspect the equipment. If any equipment is missing or damaged, contact the Symbol Technologies Support Center immediately. See page xvi... -
Page 24: Parts Of The Ppt 2800
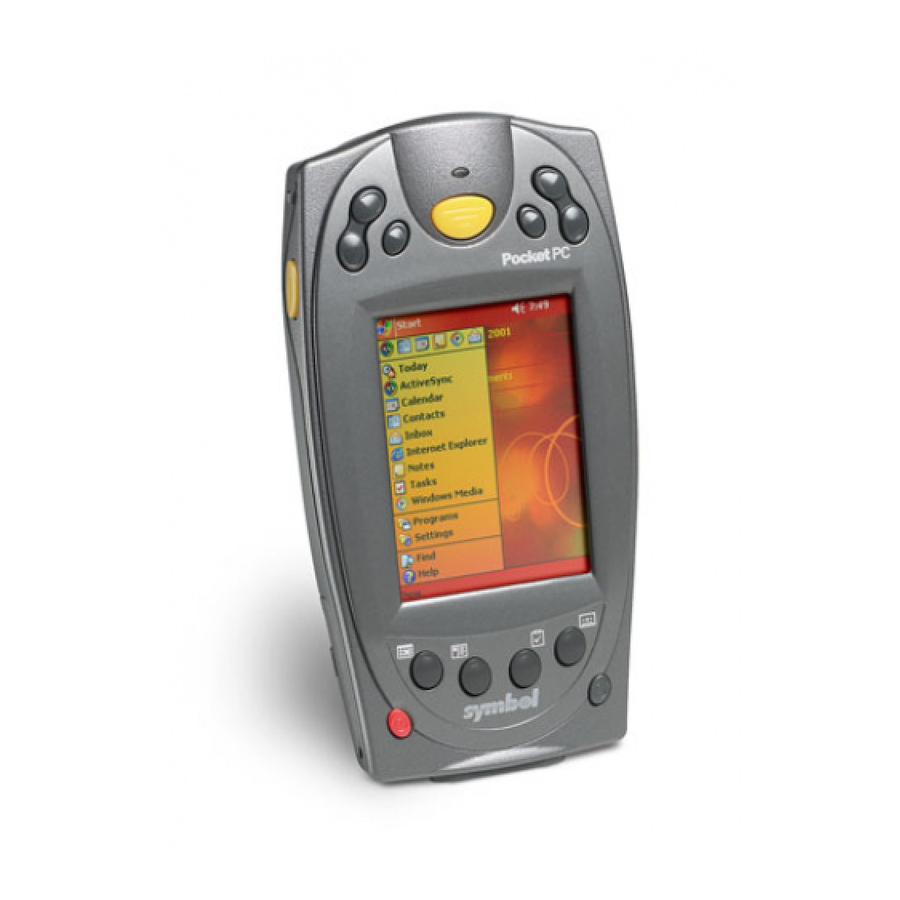
PPT 2800 with Windows Mobile 2003 Software for Pocket PCs Product Reference Guide Parts of the PPT 2800 Front View Scan Trigger WAN Antenna APP5 Button (Start Menu) Scan LED Scroll Button Scroll Button Right Scan Trigger Action Button LCD (monochrome) TFT LCD (color) Power Button Function Button... - Page 25 Getting Started Back View Stylus IR Port Stylus Silo Handstrap Connector Speaker Microphone Battery Cover Reset Button Switch Battery Lithium-Ion Battery Compartment Battery Cover Battery Cover Latch Latch Battery Cover Handstrap Connectors Bottom View Serial Port Top View Top View (2D Scanning Terminal) (1D Scanning Terminal) Scan Window...
-
Page 26: Accessories
• Symbol Mobility Developer Kit (SMDK) for eVC4, a development tool used to create native C and C++ applications for all Symbol terminals running the Microsoft Windows Mobile 2003 Software for Pocket PCs operating system. • Symbol Mobility Developer Kit (SMDK) for .NET, a development tool used to develop C# and VB.NET managed applications for Symbol terminals. -
Page 27: Installing The Sim Card (Ppt 2837 Only)
Getting Started Installing the SIM Card (PPT 2837 Only) Open the latches on the battery cover and lift it away from the PPT 2837. SIM Card Contact Area Metal Clip 2. Insert the card between the 1. Slide the metal clip to the right cardholder body and the metal to release the SIM cardholder, clip;... -
Page 28: Installing Batteries
PPT 2800 with Windows Mobile 2003 Software for Pocket PCs Product Reference Guide Installing Batteries Before using the PPT 2800, install the lithium-ion battery. The battery fits behind the battery cover on the back of the PPT 2800. To install the battery in the PPT 2800: 1. -
Page 29: Charging The Battery
Getting Started Note: Position the battery latches completely open while placing the battery cover on the terminal. Charge the battery in the terminal for approximately 2 1/2 hours before initial use. Charging the Battery Note: To charge the battery for your mobile device, battery and charger temperatures must be between +32°... -
Page 30: Using The Cradle To Charge The Battery
PPT 2800 with Windows Mobile 2003 Software for Pocket PCs Product Reference Guide Using the Cradle to Charge the Battery To charge the terminal’s battery using the CRD 2700 cradle: 1. Connect the power supply to the power port on the back of the cradle, and the other end of the power supply to a wall outlet. -
Page 31: Charging Spare Batteries
Getting Started 3. Insert the PPT 2800 terminal in the cradle. Terminal Charge LED Figure 1-9. Inserting the Terminal in the Cradle 4. The Terminal Charge LED turns red to indicate charging, then green when the battery is fully charged. Note: If the cradle is not connected to the desktop computer via serial cable, the Terminal Charge LED shuts off when the battery is fully charged. -
Page 32: Using The Synchronization Cable To Charge The Battery
PPT 2800 with Windows Mobile 2003 Software for Pocket PCs Product Reference Guide The Spare Battery Charge LED turns red to indicate charging, then green when the battery is fully charged. The battery is fully charged after approximately 2 1/2 hours. Spare Battery Charge LED Figure 1-10. - Page 33 Getting Started 2. Plug the power cable into a wall outlet and plug the other end into the battery charging receptacle on the side of the Synchronization Cable. Battery Charging Receptacle Figure 1-12. Connecting the Power Cable 1-13...
-
Page 34: Checking Battery Power
PPT 2800 with Windows Mobile 2003 Software for Pocket PCs Product Reference Guide Checking Battery Power To check whether the battery in the terminal is charged, tap Start - Settings - System - Power to display the Power window. Figure 1-13. Power Window To save battery power, set the terminal to turn off after a specified number of minutes on battery power. -
Page 35: Attaching The Handstrap
Getting Started Attaching the Handstrap The PPT 2800 has an optional handstrap which increases comfort when holding the terminal for extended periods of time. To attach the handstrap to the back of the terminal: 1. Thread the round metal piece through the metal handstrap connector on the back of the terminal. - Page 36 PPT 2800 with Windows Mobile 2003 Software for Pocket PCs Product Reference Guide 2. Slip the strap through the elastic band on the other side of the connector, and pull it through to secure the strap to the connector. Thread elastic band through this connector.
-
Page 37: Starting The Ppt 2800
Power Button Figure 1-16. Power Button As the terminal initializes its unique Flash File system, the Symbol splash screen displays for about a minute. When the Welcome screen appears, tap anywhere on the screen to continue to the Align screen. - Page 38 PPT 2800 with Windows Mobile 2003 Software for Pocket PCs Product Reference Guide 4. Follow the directions on the screen which provide a simple exercise illustrating how to use the stylus and pop-up menus. Figure 1-18. Using Pop-up Menus 5. Use the drop-down menu to set the time zone, and tap Next. Figure 1-19.
-
Page 39: Setting Time And Date
Getting Started Note: These initial setup windows appear upon each cold boot. Setting Time and Date The Time and Date window does not appear after setting the time zone. Use the clock control panel applet to set the time and date after a cold boot. Figure 1-20. - Page 40 PPT 2800 with Windows Mobile 2003 Software for Pocket PCs Product Reference Guide • To configure the PPT 2837 for WWAN support, see Chapter 11, Wireless Wide Area Network Configuration. • To install development software on the development PC, see Chapter 12, Software Installation on Development •...
-
Page 41: Chapter 2. Operating The Ppt 2800
Chapter 2 Operating the PPT 2800 Chapter Contents Introduction ..............2-3 Using the Power Button . - Page 42 PPT 2800 with Windows Mobile 2003 Software for Pocket PCs Product Reference Guide Finding Information ............2-25 Scanning .
-
Page 43: Introduction
Operating the PPT 2800 Introduction This chapter provides basic instructions for using and navigating the PPT 2800 terminal. Using the Power Button Press the red power button on the lower left-hand side of the terminal to turn the PPT 2800 on and off. -
Page 44: Ppt 2800 Application Buttons
PPT 2800 with Windows Mobile 2003 Software for Pocket PCs Product Reference Guide PPT 2800 Application Buttons Table 2-1 lists the default programs accessed by pressing an application button on the front of the terminal. The icons on the buttons identify the programs they access. Table 2-1. -
Page 45: Today Screen
Operating the PPT 2800 Today Screen When the terminal is turned on for the first time each day (or after 4 hours of inactivity), the Today screen appears. It can also display by tapping Start - Today. On the Today screen, important information for the day is displayed. -
Page 46: Using The Navigation Bar And Command Bar
PPT 2800 with Windows Mobile 2003 Software for Pocket PCs Product Reference Guide Using the Navigation Bar and Command Bar The navigation bar at the top of the screen displays the active program, various status icons (see Table 2-2) and current time. Use the command bar at the bottom of the screen to perform tasks in programs. -
Page 47: Status Icons
Operating the PPT 2800 Status Icons The status icons listed in Table 2-2 are located on the navigation bar at the top of the screen. Table 2-2. Status Icons Icon Function Description Speaker Turns all sounds on and off. Battery Backup battery is very low (not enabled). -
Page 48: Speaker Icon
PPT 2800 with Windows Mobile 2003 Software for Pocket PCs Product Reference Guide Speaker Icon To adjust the system volume use the Speaker icon in the Navigation bar. 1. Tap the Speaker icon. The Volume appears. window Figure 2-4. Volume Window 2. -
Page 49: Battery Icon
Operating the PPT 2800 Battery Icon Battery icons display on the Navigation Bar when the main battery or backup battery power falls below a predetermined level. A Battery also appears indicating the status of the window main or backup battery. On terminals with color displays, the Main Battery Low text is blue and the Main Battery Very Low text is red. -
Page 50: Connectivity Icon
PPT 2800 with Windows Mobile 2003 Software for Pocket PCs Product Reference Guide Connectivity Icon The Connectivity icon indicates the communication status of the terminal when it’s connecting to the internet or desktop computer. Figure 2-6. Connectivity Window 2-10... -
Page 51: Time Icon
Operating the PPT 2800 Time Icon The Time icon displays the current time in a digital or analog format. To change the time format, tap and hold the Time icon until a menu appears. Select the desired format. Digital Clock Analog Clock Figure 2-7. -
Page 52: Instant Message Icon
PPT 2800 with Windows Mobile 2003 Software for Pocket PCs Product Reference Guide The window displays the current date and time, the battery status and any upcoming appointments in the Calendar. Instant Message Icon The Instant Message icon provides notification when MSN Messenger receives a new message. -
Page 53: Multiple Notification Icon
Operating the PPT 2800 Multiple Notification Icon The Multiple Notification icon appears when two or more message notifications occur. Tap the icon to display the multiple notification icons. Figure 2-11. Multiple Notifications Icon 2-13... -
Page 54: Selecting Programs
PPT 2800 with Windows Mobile 2003 Software for Pocket PCs Product Reference Guide Selecting Programs To select a program, tap Start - Programs, then the program name. (To select which programs appear on the Program menu, see Chapter 3, Customizing the PPT 2800.) Figure 2-12. -
Page 55: Notifications
Operating the PPT 2800 To access a pop-up menu, hold the stylus on an item. When the menu appears, lift the stylus, and tap the action to perform, or tap outside the menu to close it without performing an action. Tap and hold to display the pop-up menu. -
Page 56: Entering Information
PPT 2800 with Windows Mobile 2003 Software for Pocket PCs Product Reference Guide Entering Information To enter information: • Use the input panel to enter typed text, either using the soft keyboard or writing characters. • Write directly on the screen. •... -
Page 57: Using The Soft Keyboard
Operating the PPT 2800 The terminal anticipates words as you enter them in the Input Panel and displays the anticipated word above the input panel. Tap the anticipated word to insert it into the text at the insertion point. The more you use the terminal, the more words it learns to anticipate. To change input settings, such as the number of words suggested at one time, tap Options from the Input Panel menu, and tap the tabs to see each setting window. -
Page 58: Using The Block Recognizer
PPT 2800 with Windows Mobile 2003 Software for Pocket PCs Product Reference Guide Using the Block Recognizer To use Block Recognizer: 1. Tap the arrow next to the Input Panel button, then Block Recognizer. 2. Write a letter in the left side of the box, or a number in the right side, using special character strokes. -
Page 59: Selecting Text
Operating the PPT 2800 Selecting Text To edit or format typed text, select it by dragging the stylus across the text. Cut, copy, and/ or paste text by holding the selected words then tapping an editing command on the pop- up menu, or by tapping the command on the Edit menu. -
Page 60: Converting Writing To Text
PPT 2800 with Windows Mobile 2003 Software for Pocket PCs Product Reference Guide Selecting Writing To select writing to edit or format: 1. Tap and hold the stylus next to the text to select until the insertion point appears. 2. Drag the stylus across the text. If you accidentally write on the screen, tap Tools - Undo and try again. -
Page 61: Writing Tips
Operating the PPT 2800 If the conversion is incorrect, select different words from a list of alternates or return to the original writing. Tap and hold the incorrect word only. On the pop-up menu, tap Alternates. A list of alternate words appears. Tap the word to use, or tap the writing at the top of the menu to return to the original writing. -
Page 62: Drawing On The Screen
PPT 2800 with Windows Mobile 2003 Software for Pocket PCs Product Reference Guide Drawing on the Screen Drawing on the screen is similar to writing on the screen. To create a drawing, cross three ruled lines on the first stroke. A drawing box appears. Subsequent strokes in or touching the drawing box become part of the drawing. -
Page 63: Recording A Message
Operating the PPT 2800 Recording a Message Record a message to capture thoughts, reminders, and phone numbers. In Calendar, Tasks, and Contacts, include a recording in the Notes tab. In the Notes program, either create a stand-alone recording or include a recording in a written note. To include the recording in a note, open the note first. -
Page 64: Using My Text
PPT 2800 with Windows Mobile 2003 Software for Pocket PCs Product Reference Guide Using My Text When using Inbox or MSN Messenger, use My Text to quickly insert preset or frequently used messages into the text entry area. To insert a message, tap My Text and tap a message. -
Page 65: Finding Information
Operating the PPT 2800 Finding Information The Find feature locates information. Tap Start - Find. Enter the search text, select a data type, then tap Go. To find information taking up storage space on the terminal, select Larger than 64 KB in Type. -
Page 66: Scanning
Scanning PDF417 Bar Codes The 2D scanning PPT 2800 terminal supports PDF417 bar code scanning. The raster pattern has multiple scanning rows to accommodate the PDF417 symbol’s multiple rows. 1. Point the scanner at the bar code and press the trigger. -
Page 67: Resetting The Ppt 2800 Terminal
Operating the PPT 2800 “Tall” PDF Bar Codes If the PDF417 symbol is “tall,” the vertical scan pattern may not be high enough to cover it. Move the scan pattern slowly down toward the bottom of the symbol, keeping the beam horizontal to the rows, then slowly back up toward the top. -
Page 68: Performing A Cold Boot
PPT 2800 with Windows Mobile 2003 Software for Pocket PCs Product Reference Guide To perform a warm boot, hold down both the up and down scroll buttons, then press the App 4 button. Up & Down Scroll Buttons App 4 Button Figure 2-29. - Page 69 Button Figure 2-30. Cold Boot Buttons 3. Replace the battery cover and press the Power button. 4. As the terminal initializes its unique Flash File system, the Symbol splash screen displays for about a minute. 5. See Aligning the Screen on page 1-17 to perform an initial setup of the terminal.
- Page 70 PPT 2800 with Windows Mobile 2003 Software for Pocket PCs Product Reference Guide 2-30...
-
Page 71: Chapter Contents
Chapter 3 Customizing the PPT 2800 Chapter Contents Introduction ..............3-3 Adjusting Settings . - Page 72 Symbol Settings ........
-
Page 73: Introduction
Customizing the PPT 2800 Introduction This chapter provides basic instructions for customizing the terminal by adjusting settings and installing additional software. Adjusting Settings To view available options for terminal settings, tap Start - Settings, then the Personal or System tab at the bottom of the screen. Adjust the following: •... -
Page 74: Adding Programs
PPT 2800 with Windows Mobile 2003 Software for Pocket PCs Product Reference Guide Adding Programs Install the appropriate software on the desktop computer before installing it on the terminal. 1. Tap Start, then Settings - System tab - About. In the Version tab, note the information in Processor. -
Page 75: Adding A Program To The Start Menu
Customizing the PPT 2800 Adding a Program to the Start Menu Tap Start - Settings - Menus - Start Menu tab, then the check box for the program. Figure 3-1. Menus Window If the program does not appear, either use File Explorer to move the program to the Start Menu folder or use ActiveSync on the desktop computer to create a shortcut to the program and place the shortcut in the Start Menu folder. -
Page 76: Adjusting Settings
PPT 2800 with Windows Mobile 2003 Software for Pocket PCs Product Reference Guide Note: Avoid placing direct links in the Start Menu to programs located in flash memory (Application or Platform). Copy these programs to the Windows folder first. Using ActiveSync to Add to the Start Menu 1. - Page 77 Customizing the PPT 2800 Table 3-1 lists the applications available in the Personal tab. Table 3-1. Personal Tab Applications Icon Description Customize Up/Down key control. See Buttons on page 3-11 for more information. (The Program Buttons tab in this window is currently not supported.) Switch input methods and set input options.
-
Page 78: System Tab
PPT 2800 with Windows Mobile 2003 Software for Pocket PCs Product Reference Guide System Tab Color Display Monochrome Display Figure 3-3. Settings - System Tab Table 3-2 lists the applications available in the System tab. Table 3-2. System Tab Applications Icon Description Provides device information and name. - Page 79 Remove loaded programs from RAM. See Remove Programs on page 3-48 for more information. Align the touch screen and enable ClearType fonts. See Screen on page 3-49 for more information. Change settings unique to the terminal. See Symbol Settings on page 3-50 for more information.
-
Page 80: Connections Tab
PPT 2800 with Windows Mobile 2003 Software for Pocket PCs Product Reference Guide Connections Tab Figure 3-4. Settings - Connections Tab Table 3-3 lists the applications available in the Connections tab. Table 3-3. Connections Tab Applications Icon Description Modify IrDA connection settings. Change connection information. -
Page 81: Buttons
Customizing the PPT 2800 Buttons The physical application buttons on the front of the terminal access, by default, Calendar, Contacts, Tasks and Notes. To re-assign a different application to a button: 1. Tap Start - Settings - Personal tab - Buttons icon. Figure 3-5. -
Page 82: Up/Down Control
PPT 2800 with Windows Mobile 2003 Software for Pocket PCs Product Reference Guide Up/Down Control To set the key repeat rate: 1. Tap Start - Settings - Personal tab - Buttons icon - Up/Down Control tab. Figure 3-6. Buttons Window - Up/Down Control Tab 2. -
Page 83: Input
Customizing the PPT 2800 Input Use the Input window to switch input methods and set input options. Input Method To select an input method: 1. Tap Start - Settings - Personal tab - Input icon - Input Method tab. Figure 3-7. Input Window - Input Method Tab 2. -
Page 84: Word Completion
PPT 2800 with Windows Mobile 2003 Software for Pocket PCs Product Reference Guide Word Completion To adjust how suggested words pop-up in a window above the input panel: 1. Tap Start - Settings - Personal tab - Input icon - Word Completion tab. Figure 3-8. -
Page 85: Options
Customizing the PPT 2800 Options To adjust the options for writing and recording: 1. Tap Start - Settings - Personal tab - Input icon - Options tab. Figure 3-9. Input Window - Options tab 2. Make the desired changes to the settings. 3. -
Page 86: Menus
PPT 2800 with Windows Mobile 2003 Software for Pocket PCs Product Reference Guide Menus Use the Menus window to change the items that appear in the Start menu. Start Menu To change the items that appear in the Start menu: 1. -
Page 87: New Menu
Customizing the PPT 2800 New Menu To enable the New menu: 1. Tap Start - Settings - Personal tab - Menus icon - New Menu tab. Figure 3-11. Menus Window - New Menu Tab 2. Select the Turn on the New button menu check box. 3. -
Page 88: Owner Information
PPT 2800 with Windows Mobile 2003 Software for Pocket PCs Product Reference Guide Owner Information Use the Owner Information window to enter information about the owner. The information can be displayed when the terminal is turned on. Identification To enter personal information: 1. -
Page 89: Notes
Customizing the PPT 2800 Notes To add more information about the owner: 1. Tap Start - Settings - Personal tab - Owner Information icon - Notes tab. Figure 3-13. Owner Information Window - Notes Tab 2. Enter information in the Notes: box. 3. - Page 90 PPT 2800 with Windows Mobile 2003 Software for Pocket PCs Product Reference Guide After the information is entered and the Show information when device is turned on check boxes are selected, the Welcome window appears whenever the terminal is powered on. Tap the screen with the stylus to exit the Welcome window. Figure 3-14.
-
Page 91: Passwords
Customizing the PPT 2800 Passwords Use the Password window to set a password to disable unauthorized access to the terminal. Password If the terminal is configured to connect to a network, use a strong (difficult to figure out) password to help protect network security. Password cracking tools continue to improve and the computers used to crack passwords are more powerful than ever. - Page 92 PPT 2800 with Windows Mobile 2003 Software for Pocket PCs Product Reference Guide 4. Select either Simple 4 digit password or Strong alphanumeric password radio button to set a password. 5. For a simple password, In the Password field, enter a four digit password. 6.
-
Page 93: Hint
Customizing the PPT 2800 Hint Set a password hint: 1. Tap Start - Settings - Personal tab - Password icon - Hint tab. Figure 3-17. Password Window - Hint Tab 2. In the text box, enter a password hint. 3. Tap ok. 3-23... -
Page 94: Sounds & Notifications
PPT 2800 with Windows Mobile 2003 Software for Pocket PCs Product Reference Guide Sounds & Notifications Use the Sounds & Notifications window to set event sounds and volume options. Volume To adjust the system volume and enable event sounds: 1. Tap Start - Settings - Personal tab - Sounds & Notifications icon - Volume tab. Figure 3-18. -
Page 95: Notifications
Customizing the PPT 2800 Notifications Use the Notifications tab to customize event notifications. 1. Tap Start - Settings - Personal tab - Sounds & Notifications icon - Notifications tab. Figure 3-19. Sounds & Notifications Window - Notifications Tab 2. Select the event name from the Select an event drop-down menu. 3. -
Page 96: Today
PPT 2800 with Windows Mobile 2003 Software for Pocket PCs Product Reference Guide Today Use the Today window to customize the Today screen. Appearance To change the appearance of the Today screen: 1. Tap Start - Settings - Personal tab - Today icon - Appearance tab. Figure 3-20. -
Page 97: Items
Customizing the PPT 2800 Items To select items that appear on the Today screen: 1. Tap Start - Settings Personal tab - Today icon - Items tab. Figure 3-21. Today Window - Items Tab 2. Select the items to appear on the Today screen. To customize the information further, select an information type and then tap Options (not available for all information types). -
Page 98: About
PPT 2800 with Windows Mobile 2003 Software for Pocket PCs Product Reference Guide About Use the About window to view general system properties, change memory settings, input device name and view copyright information. Version The Version tab displays general system settings: 1. -
Page 99: Device Id
Customizing the PPT 2800 Device ID Use the Device ID tab to customize the name and description of the terminal: 1. Tap Start - Settings - System tab - About icon - Device ID tab. Figure 3-23. About Window - Device ID Tab 2. -
Page 100: Copyrights
PPT 2800 with Windows Mobile 2003 Software for Pocket PCs Product Reference Guide Copyrights Use the Copyrights tab to view any relevant copyright information. 1. Tap Start - Settings - System tab - About icon - Copyrights tab. Figure 3-24. About Window - Copyrights Tab 2. -
Page 101: Backlight
Customizing the PPT 2800 Backlight Use the Backlight window to conserve battery power, to turn off the backlight when the terminal is idle and to adjust the brightness level. There are also options to turn on the backlight when you tap the screen or press a key. Battery Power To set the backlight settings when using battery power: 1. -
Page 102: External Power
PPT 2800 with Windows Mobile 2003 Software for Pocket PCs Product Reference Guide Table 3-4. Battery Power Backlight Settings Status Conditions of Light On/Off Default (Cold Boot) On Battery Power Select the Turn off backlight if device is not Check box is selected. used for check box to turn off the backlight Default time is one minute. -
Page 103: Brightness
Customizing the PPT 2800 2. Make the desired selections. See Table 3-5 for backlight settings. 3. Tap ok. Table 3-5. External Power Backlight Settings Status Conditions of Light On/Off Default (Cold Boot) On External Power Select the Turn off backlight if device is not Check box is not selected. -
Page 104: Certificates
PPT 2800 with Windows Mobile 2003 Software for Pocket PCs Product Reference Guide 2. Select a brightness level from the menu. 3. Tap ok. Note: When performing a cold boot all settings selected in this view return to the default settings. The settings are maintained after a warm boot. -
Page 105: Root
Customizing the PPT 2800 The list box displays the name of the certificate issuer and the expiration date. 2. To view more information about a certificate, select it from the list box. 3. To delete a certificate, tap and hold it in the list box and then tap Delete. 4. -
Page 106: Clock
PPT 2800 with Windows Mobile 2003 Software for Pocket PCs Product Reference Guide Clock Use the Clock window to change the date, time, time zone and set alarms. Time To set the date, time and time zone: 1. Tap Start - Settings - System tab - Clock icon - Time tab. Figure 3-30. - Page 107 Customizing the PPT 2800 6. To set the date, tap in the date field. 7. Tap the down arrow to the right of the date field. The calendar appears. Figure 3-31. Calendar 8. To select the month and year, tap the arrows to the right or left of the month until the current month displays.
-
Page 108: Alarms
PPT 2800 with Windows Mobile 2003 Software for Pocket PCs Product Reference Guide Alarms To use the terminal as a travel alarm clock, set a wake-up alarm. 1. Tap Start - Settings - System tab - Clock icon - Alarms tab. Figure 3-33. - Page 109 Customizing the PPT 2800 5. Select the Play sound check box to enable a sound when the alarm starts. 6. From the drop-down list, select the sound that plays when the alarm goes off. 7. Select Repeat sound check box to repeat the sound notification. 8.
-
Page 110: Memory
PPT 2800 with Windows Mobile 2003 Software for Pocket PCs Product Reference Guide Memory Use the Memory window to adjust RAM allocation, view storage card memory use and stop active programs. Main To temporarily adjust the allocation of storage and program memory: 1. -
Page 111: Storage Card
Customizing the PPT 2800 Storage Card The Storage Card tab displays how much memory is available in a partition in the terminal. 1. Tap Start - Settings - System tab - Memory icon - Storage Card tab. Figure 3-37. Memory Window - Storage Card Tab 2. -
Page 112: Running Programs
PPT 2800 with Windows Mobile 2003 Software for Pocket PCs Product Reference Guide Running Programs The Running Programs tab displays the list of currently active programs. 1. Tap Start - Settings - System tab - Memory icon - Running Programs tab. Figure 3-38. -
Page 113: Power
Customizing the PPT 2800 Power Use the Power window to view the status of the main and backup batteries and set power management options. Battery To check the main battery and backup battery status: 1. Tap Start - Settings - System tab - Power icon. Figure 3-39. -
Page 114: Optimizing Battery Life
PPT 2800 with Windows Mobile 2003 Software for Pocket PCs Product Reference Guide Optimizing Battery Life Under normal conditions, a single charge provides many hours of use. To optimize the battery life: • Use external power whenever possible, especially when: •... -
Page 115: Regional Settings
Customizing the PPT 2800 Regional Settings Use regional settings to change the way the terminal displays dates, times, currency amounts, large numbers and numbers with decimal fractions. Metric or U.S. system of measurement is also selectable. When switching to another input locale, some programs offer special features, such as font characters or spell checkers designed for different languages. - Page 116 PPT 2800 with Windows Mobile 2003 Software for Pocket PCs Product Reference Guide 3. Select the Number tab. Figure 3-41. Regional Settings Window - Number Tab 4. Select the desired options. The characteristics available depend on the region selected on the Region tab. 5.
- Page 117 Customizing the PPT 2800 7. Select the Time tab. Figure 3-43. Regional Settings Window - Time Tab 8. Select the desired options. The characteristics available depend on the region selected on the Region tab. 9. Select the Date tab. Figure 3-44. Regional Settings Window - Date Tab 10.
-
Page 118: Remove Programs
PPT 2800 with Windows Mobile 2003 Software for Pocket PCs Product Reference Guide Remove Programs Use the Remove Programs window to remove programs that were loaded onto the terminal: 1. Tap Start - Settings - System tab - Remove Programs icon. Figure 3-45. -
Page 119: Screen
Customizing the PPT 2800 Screen Use the Screen window to align the screen and to enable ClearType fonts. 1. Tap Start - Settings - System tab - Screen icon. Figure 3-46. Screen Window 2. Tap Align Screen. 3. Tap each target with the stylus and following the on-screen messages. 4. -
Page 120: Symbol Settings
The terminal can be configured to wake up by pressing the Trigger key or any button on the terminal. To set up this configuration: 1. Tap Start - Settings - System tab - Symbol Settings - Wakeup tab. Figure 3-47. Symbol Setting Window - Wakeups Tab 2. -
Page 121: Settings
Settings Use this window to configure the terminal’s backlight and external power supply: 1. Tap Start - Settings - System tab - Symbol Settings - Settings tab. Figure 3-48. Symbol Setting Window - Settings Tab 2. Select the checkbox to invert the display when the backlight is on. -
Page 122: System And Configuration
System and Configuration The System and Configuration tabs display terminal system and configuration information. 1. Tap Start - Settings - System tab - Symbol Settings, then the System tab or Config tab. Figure 3-49. Symbol Setting Window - System and Config Tabs 2. -
Page 123: Chapter Contents
Chapter 4 Communications Chapter Contents Introduction ..............4-3 Installing ActiveSync Software. - Page 124 PPT 2800 with Windows Mobile 2003 Software for Pocket PCs Product Reference Guide...
-
Page 125: Introduction
Communications Introduction The terminal uses ActiveSync to synchronize its information with information on the desktop computer. The PPT 2846 can also connect to the Internet across a wireless network using the Mobile Companion application. Installing ActiveSync Software Use ActiveSync (version 3.7 or higher) to synchronize the information on the terminal with the information on the desktop computer. -
Page 126: Setting Up A Partnership
PPT 2800 with Windows Mobile 2003 Software for Pocket PCs Product Reference Guide Setting up a Partnership After ActiveSync installation is complete, the ActiveSync Setup Wizard helps connect the terminal to the desktop computer, set up a partnership to synchronize information between the terminal and desktop computer and customize synchronization settings. - Page 127 Communications 4. The desktop computer and the terminal attempt to synchronize. The New Partnership window appears. Figure 4-2. New Partnership Window 5. Click the Standard partnership radio button and then select Next. The New Partnership/Specify how to synchronize data window appears. Figure 4-3.
- Page 128 PPT 2800 with Windows Mobile 2003 Software for Pocket PCs Product Reference Guide 6. Click the Synchronize with this desktop computer radio button and select Next. The New Partnership/Select Number of Partnerships window appears. Figure 4-4. How To Sync Window 7.
- Page 129 Communications 9. Select Next. The New Partnership/Setup Complete window appears. Figure 4-6. Setup Complete Window 10. Select Finish. The Microsoft ActiveSync window appears showing the connection status and the data synchronized. Figure 4-7. ActiveSync Connected Window During the first synchronization, information stored on the desktop computer is copied to the terminal.
-
Page 130: Performing An Activesync For The First Time
To retain partnerships after a cold boot, capture partnership registry information in a .reg file and save it in the Flash File System. See the Windows CE Help File for Symbol Terminals for details. For more information about using ActiveSync, start ActiveSync on the desktop computer and see ActiveSync Help. -
Page 131: Performing Activesync Using The Cradle
Communications 3. Connect the other end of the cable to the serial communications port on the desktop computer. Serial Port Figure 4-9. Connecting the Synchronization Cable to the Computer Note: The synchronization cable requires a dedicated port. It cannot share a port with an internal modem or other device. - Page 132 PPT 2800 with Windows Mobile 2003 Software for Pocket PCs Product Reference Guide To perform an ActiveSync operation for the first time using the cradle: 1. After installing the ActiveSync software, restart the desktop computer. 2. Connect the CRD 2700 cradle to the computer by plugging the cable from the cradle into the serial communications port on the desktop computer.
-
Page 133: Performing Subsequent Activesync Operations
Communications 3. Turn on the PPT 2800 terminal and slide it into the cradle. Figure 4-11. Inserting the Terminal in the Cradle The curved edge on the bottom of the PPT 2800 terminal should align smoothly with the cradle when it is inserted properly. 4. -
Page 134: Performing A Remote Activesync
PPT 2800 with Windows Mobile 2003 Software for Pocket PCs Product Reference Guide Performing a Remote ActiveSync To synchronize the PPT 2800 remotely using a modem, first see Connecting to an ISP or a Network on page 9-5 to set up the terminal for a modem ActiveSync. Before leaving the desktop computer, prepare the computer for a remote ActiveSync: 1. - Page 135 Communications 2. Tap Tools - Options on the ActiveSync window to display the PC Synchronization window - PC tab. Figure 4-13. PC Synchronization Window - PC Tab 3. Tap Options to display the PC Synchronization Options window. Figure 4-14. PC Synchronization Options Window 4.
-
Page 136: Setting Up A Connection On The Desktop Computer
PPT 2800 with Windows Mobile 2003 Software for Pocket PCs Product Reference Guide 7. Tap ok to exit the PC Synchronization Options window and tap ok to exit the PC Synchronization window. 8. Ensure that ActiveSync is installed on the desktop computer and a partnership was created. - Page 137 Communications 2. In the ActiveSync window, select File - Connection Settings. Figure 4-16. Connection Settings Window 3. In the Connection Settings window, select the appropriate check box for the type of connection being used. If using a serial connection, select the COM port from the drop-down list.
-
Page 138: Installing Econnect
Setting up a Partnership on page 4-4). 2. Download the latest version of the eConnect software from http://devzone.symbol.com to the desktop computer. 3. On the desktop computer, display the ActiveSync Explorer and copy the .cab file to the My Pocket PC Temp folder. -
Page 139: Host Computer Configuration
Communications 9. On the terminal tap Start - Settings - System tab and tap the eConnect icon to display the Settings - eConnect window. Figure 4-17. Settings Windows 10. Set the Serial Port Baud Rate: to the appropriate value using the drop-down menu. 11. -
Page 140: Dhcp Server Configuration
PPT 2800 with Windows Mobile 2003 Software for Pocket PCs Product Reference Guide Note: Before communicating through an Ethernet connection, create a partnership between the terminal and the desktop computer via a serial connection. See Setting up a Partnership on page 4-4 for detailed instructions. -
Page 141: Connecting To The Internet On A Wireless Network
Communications Connecting to the Internet on a Wireless Network The PPT 2846 can connect to the Internet across a wireless network. To set up a wireless connection: 1. Tap the Mobile Companion icon on the task tray. The Mobile Companion menu appears. - Page 142 PPT 2800 with Windows Mobile 2003 Software for Pocket PCs Product Reference Guide 5. The Mobile Companion Mode tab appears. Figure 4-20. Mobile Companion - Mode Tab 6. The profile name and ESSID name appear in the respective fields. 7. In the Operating Mode: list, select Infrastructure. 8.
- Page 143 Communications 10. Tap the IP Config tab. Figure 4-22. Mobile Companion - IP Config Tab (DHCP) 11. Select either DHCP or Static from the IP Type drop-down list. 12. If Static IP is selected, enter the required data in the fields that appear in the window.
- Page 144 PPT 2800 with Windows Mobile 2003 Software for Pocket PCs Product Reference Guide 16. Tap Network Card. The Configure Network Adapters window appears. Figure 4-24. Configure Network Adapters Window 17. Select The Internet from the My network card connects to: drop-down list. 18.
- Page 145 Communications 19. Tap ok. A notification window appears indicating that the next time the adapter (radio card) is used it will have the new settings. Figure 4-26. Adapters Message Window 20. Tap ok. 21. Tap ok. 22. Tap ok. 23. Tap Start - Programs - Internet Explorer. The Pocket Internet Explorer window appears.
- Page 146 PPT 2800 with Windows Mobile 2003 Software for Pocket PCs Product Reference Guide 4-24...
-
Page 147: Chapter Contents
Chapter 5 AirBEAM Smart Chapter Contents Introduction ..............5-3 AirBEAM Package Builder . - Page 148 PPT 2800 with Windows Mobile 2003 Software for Pocket PCs Product Reference Guide...
-
Page 149: Chapter 5. Airbeam Smart
AirBEAM Smart Introduction The AirBEAM Smart product allows specially designed software packages to be transferred between a host server and Symbol wireless handheld terminals. Before transfer, AirBEAM Smart checks and compares the package version, so that only updated packages are loaded. -
Page 150: Airbeam Smart Client
PPT 2800 with Windows Mobile 2003 Software for Pocket PCs Product Reference Guide For detailed instructions on how to define, generate and install AirBEAM packages to the server, refer to the AirBEAM Package Builder Product Reference Guide, p/n 72-55769-xx. AirBEAM Smart Client The AirBEAM Smart Client installed on the handheld terminal is configured with the server access information, the names of the packages to be downloaded and other controlling parameters. - Page 151 AirBEAM Smart Use the configuration window to view and edit AirBEAM Smart Client configurations. This window has six tabs that can be modified - Packages(1), Packages(2), Server, Misc(1), Misc(2) and Misc(3). Packages(1) Tab Use this tab to specify the package name of the first four of eight packages that are to be loaded during the AirBEAM synchronization process.
-
Page 152: Server Tab
PPT 2800 with Windows Mobile 2003 Software for Pocket PCs Product Reference Guide Server Tab Use this tab to specify the configurations of the server to which the client connects during the package synchronization process. Field Description IP Address The IP Address of the server. It can be a host name or a dot notation format. Directory The directory on the server that contains the AirBEAM package definition files. - Page 153 AirBEAM Smart Field Description Auto-load Use this drop-down list to specify how to automatically invoke the AirBEAM Smart Client when the client device is rebooted. Options are: Disable: the AirBEAM Smart Client is not invoked automatically during the boot sequence. Interactive: the boot sequence automatically invokes the AirBEAM Smart Client and starts the package synchronization process.
-
Page 154: Misc Tab
PPT 2800 with Windows Mobile 2003 Software for Pocket PCs Product Reference Guide Misc(2) Tab Use this tab to configure various miscellaneous features. Field Description Auto-retry Use this field to specify whether the AirBEAM Smart Client automatically retries if there is a failure during synchronization. If this feature is enabled, the AirBEAM Smart Client displays a popup window indicating the attempt of a retry. -
Page 155: Synchronizing With The Server
AirBEAM Smart Misc(3) Tab Use this tab to configure various miscellaneous features. Field Description Use DHCP This check box specifies whether the AirBEAM Smart Client uses the DHCP server response option 66 to specify the IP address of the FTP/TFTP server. If enabled, special RF network registry settings are required to force the DHCP server to return the "TFTP server name"... -
Page 156: Automatic Synchronization
PPT 2800 with Windows Mobile 2003 Software for Pocket PCs Product Reference Guide 3. Once connected, the AirBEAM Synchronize window appears. • The Status List displays status messages that indicate the progress of the synchronization process. • Tap ok to return to the Main Menu. This button remains inactive until the synchronization process is complete. -
Page 157: Airbeam Staging
AirBEAM Smart AirBEAM Staging The AirBEAM Smart staging support is intended to speed up and simplify the process of staging custom or updated operating software onto mobile devices directly from manufacturing. The staging support is part of the AirBEAM Smart CE Client integrated in the terminal, and is beneficial in that many devices can be simultaneously loaded over the RF network. - Page 158 PPT 2800 with Windows Mobile 2003 Software for Pocket PCs Product Reference Guide 5-12...
-
Page 159: Chapter Contents
Chapter 6 Applications Chapter Contents Introduction ..............6-3 Calendar . - Page 160 PPT 2800 with Windows Mobile 2003 Software for Pocket PCs Product Reference Guide...
-
Page 161: Chapter 6. Applications
Applications Introduction The terminal includes Calendar, Contacts, Tasks, Inbox, and Notes applications. Use these programs individually or together. For example, use e-mail addresses stored in Contacts to address e-mail messages in Inbox. Use ActiveSync to synchronize information in these applications between the desktop computer and the terminal. -
Page 162: Creating Appointments
PPT 2800 with Windows Mobile 2003 Software for Pocket PCs Product Reference Guide Note: To customize the Calendar display, such as changing the first day of the week, tap Tools - Options. Creating Appointments To create an appointment: 1. To select Calendar, press the App1 button or tap Start - Calendar. 2. -
Page 163: Using The Summary Window
Applications Note: If you select Remind me in an appointment, the terminal provides a reminder according to the options set in Start - Settings - Personal tab - Sounds & Notifications. Using the Summary Window Tap an appointment in Calendar to view a summary window. Tap Edit to change the appointment. -
Page 164: Contacts
PPT 2800 with Windows Mobile 2003 Software for Pocket PCs Product Reference Guide The meeting notice is created and placed in the Outbox folder. For more information on sending and receiving meeting requests, see Calendar Help and Inbox Help on the terminal. - Page 165 Applications 2. Tap New. Tap to return to the contact list (the contact is saved automatically). Scroll to see more fields. Notes is a good place for maps and directions. Figure 6-5. Creating a Contact 3. Using the input panel, enter a name and other contact information. Scroll down to see all fields.
-
Page 166: Using The Summary Window
PPT 2800 with Windows Mobile 2003 Software for Pocket PCs Product Reference Guide Using the Summary Window Tap a contact in the contact list to view a summary window. Tap Edit to change the information. View contact details. Tap to view notes. Tap to change contact information. -
Page 167: Tasks
Applications Tasks Use Tasks to keep a “to do” list. Select the category of tasks displayed in the list. Select the sort order of the list. Indicates high priority. Tap to display or edit the task details. Tap and hold to display a pop-up menu of actions. - Page 168 PPT 2800 with Windows Mobile 2003 Software for Pocket PCs Product Reference Guide 2. Tap New. Tap to return to the task list (the task is saved automatically). Tap to choose from predefined subjects. Notes is a good place for maps and directions.
-
Page 169: Using The Summary Window
Applications Using the Summary Window Tap a task in the task list to view a summary window. To change the task, tap Edit. View task details. Tap to show and hide additional summary information. View notes. Tap to change task. Figure 6-9. -
Page 170: Notes
PPT 2800 with Windows Mobile 2003 Software for Pocket PCs Product Reference Guide Notes Capture thoughts, reminders, ideas, drawings and phone numbers with Notes. Entries can include text, drawing, or a recording. If a note is open when you create the recording, it is included in the note as an icon. - Page 171 Applications To create a note: 1. Tap Start - Notes to open the application. 2. Tap New. 3. Create a note by writing, drawing, typing, and recording. For more information about using the input panel, writing and drawing on the screen, and creating recordings, see Chapter 2, Operating the PPT 2800.
-
Page 172: Inbox
PPT 2800 with Windows Mobile 2003 Software for Pocket PCs Product Reference Guide Inbox Use Inbox to send and receive e-mail messages in the following ways: • Synchronize e-mail messages with Microsoft Exchange or Outlook on the desktop computer. • Send and receive e-mail messages by connecting directly to an e-mail server through an Internet service provider (ISP) or a network. - Page 173 Applications Messages received directly from an e-mail server are linked to the e-mail server rather than the desktop computer. When a message is deleted on the terminal, it's also deleted from the e-mail server on the next connect. Work online or offline. When working online, you read and respond to messages while connected to the e-mail server.
-
Page 174: Using The Message List
PPT 2800 with Windows Mobile 2003 Software for Pocket PCs Product Reference Guide Using the Message List Received messages display in the message list box. By default, the most recently received messages are listed first. Select the service and folder to display. - Page 175 Applications Tap a received message in the list to open it. Unread messages appear in bold. Tap to return to the message list. Tap to delete this message. Tap to view the previous or next message. Tap to reply to or forward this message.
-
Page 176: Creating E-Mail Messages
PPT 2800 with Windows Mobile 2003 Software for Pocket PCs Product Reference Guide Creating E-mail Messages To create an e-mail message: 1. Tap New. 2. In the To field, enter an e-mail or SMS address of one or more recipients, separating each with a semicolon, or select a name from the contact list by tapping the Address Book icon. -
Page 177: Managing E-Mail Messages And Folders
Applications Managing E-mail Messages and Folders By default, messages are displayed in one of five folders for each account: Inbox, Deleted Items, Drafts, Outbox and Sent Items. The Deleted Items folder contains messages that were deleted on the terminal. The behavior of the Deleted and Sent Items folders depends on the options selected. - Page 178 PPT 2800 with Windows Mobile 2003 Software for Pocket PCs Product Reference Guide 6-20...
-
Page 179: Chapter Contents
Chapter 7 Companion Programs Chapter Contents Introduction ..............7-3 Pocket Word . - Page 180 PPT 2800 with Windows Mobile 2003 Software for Pocket PCs Product Reference Guide...
-
Page 181: Chapter 7. Companion Programs
Companion Programs Introduction The PPT 2800 contains the companion programs Microsoft Pocket Word, Microsoft Pocket ® Excel, Microsoft Money, and MSN Messenger. To select a companion program, tap Start - Programs, then the program name. Note: Microsoft Reader is not included in this implementation of Windows Mobile 2003 for Pocket PCs. -
Page 182: Typing Mode
PPT 2800 with Windows Mobile 2003 Software for Pocket PCs Product Reference Guide Pocket Word contains a list of the files stored on the terminal. Tap a file in the list to open it. To delete, make copies of, or send a file, tap and hold a file in the list. Then, select the appropriate action on the pop-up menu. - Page 183 Companion Programs To format or edit text, select the text using the stylus instead of the mouse to drag across the text. To search a document for the text, tap Edit - Find/Replace. Tap to return to the Tap and hold to see a document list (changes are pop-up menu of actions.
-
Page 184: Writing Mode
PPT 2800 with Windows Mobile 2003 Software for Pocket PCs Product Reference Guide Writing Mode In writing mode, use the stylus to write directly on the screen. Ruled lines are displayed as a guide, and the zoom magnification increases to ease writing. For more information, see Writing on the Screen on page 2-19. -
Page 185: Recording Mode
Companion Programs drawing. Every subsequent stroke within or touching the drawing box becomes part of the drawing. For more information, see Drawing on the Screen on page 2-22. Select Shape on the pop- up menu to convert objects to proper shapes. Resize an object by dragging the selection handles. -
Page 186: Pocket Excel
PPT 2800 with Windows Mobile 2003 Software for Pocket PCs Product Reference Guide Pocket Excel Pocket Excel works with Microsoft Excel on the desktop computer to provide easy access to copies of workbooks. Create new workbooks on the PPT 2800, or copy workbooks from the desktop computer to the PPT 2800. -
Page 187: Tips For Working In Pocket Excel
Companion Programs Pocket Excel provides fundamental spreadsheet tools, such as formulas, functions, sorting, and filtering. To display the toolbar, tap View - Toolbar. Cell contents appear here as they are entered. Format button. AutoSum button. Zoom button. Figure 7-5. Using Pocket Excel If a workbook contains sensitive information, protect it with a password. -
Page 188: Msn® Messenger
PPT 2800 with Windows Mobile 2003 Software for Pocket PCs Product Reference Guide For more information on using Pocket Excel, tap Start - Help. ® Messenger With the MSN Messenger instant messaging program on the PPT 2800 you can: • see who is online •... -
Page 189: Working With Contacts
Companion Programs Working with Contacts The MSN Messenger window is divided into Online and Not Online categories. From this view, while connected, you can chat, send e-mail, block the contact from chatting with you, or delete contacts from the list using the pop-up menu. Tap a contact to start a chat. - Page 190 PPT 2800 with Windows Mobile 2003 Software for Pocket PCs Product Reference Guide Enter a message. Tap to send a message. Figure 7-7. Sending a Message To switch back to the main window without closing a chat, tap Contacts. To revert back to the chat window, tap Chats and select the MSN Messenger contact to chat with.
-
Page 191: Windows Media Player
Companion Programs For more information on using MSN Messenger, tap Start - Help. Windows Media Player Play digital audio and video files stored on the terminal with Windows Media Player. To switch to Windows Media Player, tap Start - Windows Media. Indicates the progress of the current track. - Page 192 PPT 2800 with Windows Mobile 2003 Software for Pocket PCs Product Reference Guide 7-14...
- Page 193 Chapter 8 Pocket Internet Explorer Chapter Contents Introduction ..............8-3 Mobile Favorites.
- Page 194 PPT 2800 with Windows Mobile 2003 Software for Pocket PCs Product Reference Guide...
-
Page 195: Chapter 8. Pocket Internet Explorer
Pocket Internet Explorer Introduction Use Microsoft Pocket Internet Explorer to view Web or WAP pages in the following ways: • During synchronization with the desktop computer, download favorite links and mobile favorites stored in the Mobile Favorites subfolder in Internet Explorer on the desktop computer. -
Page 196: Saving Memory On The Terminal
PPT 2800 with Windows Mobile 2003 Software for Pocket PCs Product Reference Guide favorite, then click Properties. On the Download tab, specify the number of links deep to download. To conserve terminal memory, only go one level deep. 6. Synchronize the terminal and desktop computer. Mobile favorites stored in the Mobile Favorites folder in Internet Explorer are downloaded to the terminal. -
Page 197: Using Avantgo Channels
Pocket Internet Explorer Using AvantGo Channels AvantGo is a free interactive service that provides access to personalized content and thousands of popular Web sites. Subscribe to AvantGo channels directly from the terminal, then synchronize with the desktop computer, or connect to the Internet to download the content. -
Page 198: Using Pocket Internet Explorer
PPT 2800 with Windows Mobile 2003 Software for Pocket PCs Product Reference Guide Using Pocket Internet Explorer Use Pocket Internet Explorer to browse mobile favorites and channels downloaded to the terminal without connecting to the Internet. Or connect to the Internet through an ISP or a network connection and browse the Web. -
Page 199: Browsing The Web
Pocket Internet Explorer To view mobile favorites and channels, tap the Favorites icon to display the list of favorites, then tap the page to view. Tap the favorite. Tap to add or delete a folder or favorite link. Figure 8-2. Mobile Favorites The page that was downloaded during the last synchronization with the desktop computer displays. -
Page 200: Pictures
PPT 2800 with Windows Mobile 2003 Software for Pocket PCs Product Reference Guide Note: If Pocket Internet Explorer was selected before setting up the network connections, a connection settings screen may appear. After selecting the settings, return to Pocket Internet Explorer. To add a favorite link while using the terminal, go to the Web page, tap and hold on the page and tap Add to Favorites. -
Page 201: Set Picture As Background
Pocket Internet Explorer Set Picture as Background Use any .jpg picture as the background on the Today screen. Also specify display parameters, such as adjusting the transparency level. 1. In Pictures, tap the picture to be set as the background. 2. - Page 202 PPT 2800 with Windows Mobile 2003 Software for Pocket PCs Product Reference Guide 8-10...
- Page 203 Chapter 9 Connections Chapter Contents IIntroduction ..............9-3 Transferring Items Using Infrared .
- Page 204 PPT 2800 with Windows Mobile 2003 Software for Pocket PCs Product Reference Guide...
-
Page 205: Chapter 9. Connections
Connections Introduction The terminal can exchange information with other Windows-powered devices via the cradle or cable, or through the following connection options: • Use the infrared (IR) port to send and receive files between two terminals. SeeTransferring Items Using Infrared on page 9-4. -
Page 206: Transferring Items Using Infrared
PPT 2800 with Windows Mobile 2003 Software for Pocket PCs Product Reference Guide Transferring Items Using Infrared Using infrared (IR), two Windows-powered devices can exchange information, such as contacts and appointments. To send information: 1. Open the program where you created the item to send, and locate the item in the list. -
Page 207: Connecting To An Isp Or A Network
Connections Connecting to an ISP or a Network You can use a modem to connect to an Internet Service Provider (ISP). Once connected, you can send and receive e-mail messages and view Web or WAP pages. To create a modem connection to an ISP or network, use the modem cradle or snap-on modem. - Page 208 PPT 2800 with Windows Mobile 2003 Software for Pocket PCs Product Reference Guide 4. Enter a name for the connection. In the Select a modem: drop-down menu, select Hayes Compatible on COM1, then tap Next. Figure 9-2. Selecting a Connection 5.
- Page 209 Connections 6. If necessary, enter the user name, password, and domain. Figure 9-4. Entering User Information 7. The settings in Advanced should not need to be changed. Most ISPs now use a server-assigned address. If the ISP does not use a server-assigned address, tap Advanced.
- Page 210 PPT 2800 with Windows Mobile 2003 Software for Pocket PCs Product Reference Guide b. Review the TCP/IP and Servers tabs and enter the addresses per their instructions. When finished, tap ok. Figure 9-6. Advanced Settings - TCP/IP and Servers Tabs 8.
-
Page 211: Disconnecting
Connections 3. Tap and hold the connection name, then select Connect from the menu that appears. The modem attempts to connect. Figure 9-8. Connecting The following programs connect the terminal automatically: • Send and receive e-mail messages using Inbox. Before using Inbox, provide the information it needs to communicate with the e-mail server. -
Page 212: Connecting Directly To An E-Mail Server
PPT 2800 with Windows Mobile 2003 Software for Pocket PCs Product Reference Guide Connecting Directly to an E-mail Server Set up a connection to an e-mail server to send and receive e-mail messages using a modem or network connection and Inbox on the terminal. Note: The ISP or network must use a POP3 e-mail server and an SMTP gateway. - Page 213 Chapter 10 Spectrum24 Network Configuration Chapter Contents Introduction ..............10-3 Mobile Companion .
- Page 214 PPT 2800 with Windows Mobile 2003 Software for Pocket PCs Product Reference Guide 10-2...
-
Page 215: Chapter 10. Spectrum24 Network Configuration
Spectrum24 Network Configuration Introduction Wireless LANs allow PPT 284X terminals to communicate wirelessly, and to send captured data “real time” to a host device. Before a terminal can be used on a Spectrum24 LAN your facility must be set up with the equipment required to run the wireless LAN and the terminal must be properly configured. -
Page 216: Mobile Companion
PPT 2800 with Windows Mobile 2003 Software for Pocket PCs Product Reference Guide Mobile Companion Use the Mobile Companion utility to configure the terminal’s wireless network settings. The Mobile Companion utility starts automatically and appears as an icon on the task tray. The status icon changes in real-time to reflect the signal strength and availability of the adapter and the wireless network. - Page 217 Spectrum24 Network Configuration When the menu opens, select Status, WLAN Profiles, Find WLANs or Options from menu. Table 10-1. Mobile Companion Menu Descriptions Menu Item Description Status Displays the current status and information for the wireless connection. Signal tab view - displays radio signal transmission strength from the adapter (using its current profile) to the associated AP.
-
Page 218: Finding Wlans
PPT 2800 with Windows Mobile 2003 Software for Pocket PCs Product Reference Guide Table 10-1. Mobile Companion Menu Descriptions (Continued) Menu Item Description Displays settings for configuring battery consumption avoidance Options capabilities, system sounds, AP and terminal association capabilities, profile roaming options, as well as the password protecting the Mobile Companion utility. - Page 219 Spectrum24 Network Configuration 3. Tap Connect. The Mode tab appears. Ad Hoc Mode Infrastructure Mode Figure 10-3. Mode Tab 4. The Profile Name: and 802.11 ESSID: fields contain the name and (WLAN) identifier of the network connection. Change the Profile Name if desired. Use the Profile Name field to enter the name of the terminal profile used to transmit with either an AP or another networked computer.
- Page 220 This ensures the terminal is using country code information compatible with the country code data used by the associated AP. Select International if using the terminal with a non-Symbol AP or a pre AP 4131 model. 7. Select the Encryption tab to set the terminal profile security level.
- Page 221 Spectrum24 Network Configuration 128-bit Shared Select 128-bit encryption and enter a 26-digit hex encryption key. The 128-bit encryption option provides a higher level of security than 40-bit encryption while maintaining an 11 Mbps data rate. Tap Reset Keys to set the encryption key to the default values.
- Page 222 PPT 2800 with Windows Mobile 2003 Software for Pocket PCs Product Reference Guide LEAP LEAP (Lightweight Extensible Authentication Protocol) is an 802.1X authentication type for wireless LANs that supports strong mutual authentication between the client and a RADIUS server. It provides dynamic per-user, per-session Wired Equivalent Privacy (WEP) key enhancements to mitigate a variety of network attacks.
- Page 223 Spectrum24 Network Configuration Figure 10-6. Mobile Companion - IP Config Tab (Static) IP Address The Internet is a collection of networks with users that communicate with each other. Each communication carries the address of the source and destination networks and the particular machine within the network associated with the user or host computer at each end.
- Page 224 PPT 2800 with Windows Mobile 2003 Software for Pocket PCs Product Reference Guide ® WINS WINS is a Microsoft Net BIOS name server. WINS eliminates the broadcasts needed to resolve computer names to IP addresses by providing a cache or database of translations. 10.
-
Page 225: Status
Spectrum24 Network Configuration • Select Minimum power to set the terminal to the lowest transmission power level. Use the minimum power level when communicating with other devices in very close proximity. Additionally, select minimum power in instances where little or no radio interference from other devices is anticipated. - Page 226 PPT 2800 with Windows Mobile 2003 Software for Pocket PCs Product Reference Guide Note: The Signal tab is view only and is not available in Ad Hoc operating mode. Missed Beacons Displays the amount of beacons (uniform system packets broadcast by the AP to keep the network synchronized) missed by the terminal.
- Page 227 Spectrum24 Network Configuration Version Displays the terminal's software, driver, firmware and Information hardware versions as well as country information. This data is consistent for the terminal regardless of which terminal profile is the current profile. Current Status Displays the terminal’s current Profile Name, ESSID, and Encryption mode.
- Page 228 PPT 2800 with Windows Mobile 2003 Software for Pocket PCs Product Reference Guide IP Address The Internet is a collection of networks with users that communicate with each other. Each communication carries the address of the source and destination networks and the particular machine within the network associated with the user or host computer at each end.
- Page 229 Spectrum24 Network Configuration 5. Select the Ping tab to send and receive ICMP ping packets across the network to the specified IP address. Figure 10-11. Mobile Companion - Ping Tab 6. Select a target device IP address from the IP drop-down list. 7.
- Page 230 PPT 2800 with Windows Mobile 2003 Software for Pocket PCs Product Reference Guide Select the Set Mandatory item to prohibit the terminal from associating with a different AP. The letter M displays on top of the icon when the Set Mandatory option is selected.
-
Page 231: Setting Options
Spectrum24 Network Configuration Setting Options Select Options from the Mobile Companion menu to enable or disable international roaming, configure consumption avoidance capabilities, enable system sounds, and set temporary settings. Figure 10-14. Mobile Companion - Option Settings 1. Select the Access AP networks check box to display available AP networks and their signal strength within the Available WLAN Networks tab. -
Page 232: Changing Profiles
PPT 2800 with Windows Mobile 2003 Software for Pocket PCs Product Reference Guide 5. To create a password, tap Change Password. Figure 10-15. Mobile Companion - Change Password 6. Enter a case sensitive password (10 characters maximum) in the Current Password field and tap OK. -
Page 233: Deleting A Profile
Spectrum24 Network Configuration Editing a Profile To change the ESSID and operating mode for the profile, select a profile from the list box and tap Edit to display the Mode tab. Use the Encryption, IP Config, and Power tabs as necessary to edit the profile power consumption and security parameters. -
Page 234: Configuring The Radio Using A Registration File
PPT 2800 with Windows Mobile 2003 Software for Pocket PCs Product Reference Guide Configuring the Radio Using a Registration File Default settings for the Spectrum24 radio card can be set on the terminal using a registration (.reg) file. A sample .reg file is provided as part of the DCP. Edit the file using a text editor. -
Page 235: Chapter Contents
Chapter 11 Wireless Wide Area Network Configuration Chapter Contents Introduction ..............11-3 Establishing a GPRS Connection . - Page 236 PPT 2800 with Windows Mobile 2003 Software for Pocket PCs Product Reference Guide 11-2...
-
Page 237: Chapter 11. Wireless Wide Area Network Configuration
Wireless Wide Area Network Configuration Introduction The PPT 2837 can be used on a GSM/GPRS wireless network. Global System for Mobile Communication (GSM) networks deliver mobile voice and data services (such as SMS/Text Messaging) with full roaming capabilities across the world. General Packet Radio Service (GPRS) enabled networks offer Internet-based content and packet-based data services. - Page 238 PPT 2800 with Windows Mobile 2003 Software for Pocket PCs Product Reference Guide Installing the GSM Demo Application Ensure the GSMDemo application is installed on the terminal. Tap Start - Programs - File Explorer and navigate to the Applications folder. If GSMDemo is not listed, see GSM Demo Installation on page C-1 for installation instructions.
- Page 239 Wireless Wide Area Network Configuration 4. If the Network Status field displays Searching... and a connection is not made: a. Tap Options - Settings - Change Band. Figure 11-2. Change Band Window b. Make the appropriate selection, depending on the location: •...
- Page 240 PPT 2800 with Windows Mobile 2003 Software for Pocket PCs Product Reference Guide 5. A successful registration, indicated by signal strength (as shown below), ensures the functionality of the SIM card. Figure 11-3. Main GSM Demo Window GPRS availability, through the network, is indicated by the GPRS icon. Editing GPRS Parameters 1.
- Page 241 Wireless Wide Area Network Configuration 2. Make the appropriate changes, as per Table 11-1, on the PDP Context tab. Figure 11-4. GPRS Parameters - PDP Context Tab Table 11-1. PDP Context Tab Fields Field Name Description Table Version System generated. Contains internal version number representing the structure of the registry file.
- Page 242 PPT 2800 with Windows Mobile 2003 Software for Pocket PCs Product Reference Guide Table 11-1. PDP Context Tab Fields (Continued) Field Name Description Data Compression Information obtained from service provider. • If provider supports data compression, select • If provider supports data compression, select Yes.
- Page 243 Wireless Wide Area Network Configuration Note: If the value of the fields is set too high, a connection may not be established. Table 11-2. Min. Qos. Tab Fields Field Name Description Precedence Information obtained from service provider. A parameter describing the relative priority of maintaining the service.
- Page 244 PPT 2800 with Windows Mobile 2003 Software for Pocket PCs Product Reference Guide 4. Tap the Req. Qos. tab and make the appropriate changes, as per Table 11-3. This tab configures the quality of service requested. Figure 11-6. GPRS Parameters - Req. Qos. Tab Table 11-3.
- Page 245 Wireless Wide Area Network Configuration 5. Tap ok when all options are selected. 6. You are asked to confirm the change. Tap Yes. 7. You are asked if you want to overwrite the default GPRS settings permanently. • Tap No to apply the new settings to the active parameters settings only. In this case the new parameters are used for all subsequent PDP contexts until a cold boot occurs.
- Page 246 PPT 2800 with Windows Mobile 2003 Software for Pocket PCs Product Reference Guide Creating a New Registry File 1. Open any text editing application, such as Microsoft Notepad. 2. Create the content of the registry file. You can use the sample registry file included on the terminal as a base for the new file (also included below, see Sample Network Parameter Registry File...
- Page 247 Wireless Wide Area Network Configuration A sample registry file is included below. See Sample Network Parameter Registry File on page 11-13. 3. Save the file. If using Microsoft Notepad, click File - Save to save it under the current name or click File - Save As to save it under a different name. Note: When saving the file, do not change the file type, i.e., save the file as a .reg file only.
- Page 248 PPT 2800 with Windows Mobile 2003 Software for Pocket PCs Product Reference Guide "APN"="internet3.voicestream.com" "PDPAddress"="" "DataCompression"=dword:0 "HDRCompression"=dword:0 "QosMinPrecedence"=dword:0 "QosMinDelay"=dword:0 "QosMinReliability"=dword:3 "QosMinPeak"=dword:0 "QosMinMean"=dword:0 "QosReqPrecedence"=dword:0 "QosReqDelay"=dword:0 "QosReqReliability"=dword:3 "QosReqPeak"=dword:0 "QosReqMean"=dword:0 [HKEY_LOCAL_MACHINE\Drivers\BuiltIn\Seriald3\Context2] ; 2nD of 3 selectable Contexts "ContextID"=dword:2 "ContextName"="Telstra" "PDPType"="IP" "APN"="telstra.internet" "PDPAddress"="" "DataCompression"=dword:0 "HDRCompression"=dword:0 "QosMinPrecedence"=dword:0 "QosMinReliability"=dword:0...
-
Page 249: Wireless Wide Area Network Configuration
Wireless Wide Area Network Configuration "QosReqReliability"=dword:0 "QosReqPeak"=dword:0 "QosReqMean"=dword:0 [HKEY_LOCAL_MACHINE\Drivers\BuiltIn\Seriald3\Context3] ; Last of 3 selectable Contexts "ContextID"=dword:3 "ContextName"="OmniTel" "PDPType"="IP" "APN"="web.omnitel.it" "PDPAddress"="" "DataCompression"=dword:0 "HDRCompression"=dword:0 "QosMinPrecedence"=dword:0 "QosMinDelay"=dword:0 "QosMinReliability"=dword:0 "QosMinPeak"=dword:0 "QosMinMean"=dword:0 "QosReqPrecedence"=dword:2 "QosReqDelay"=dword:4 "QosReqReliability"=dword:3 "QosReqPeak"=dword:6 "QosReqMean"=dword:1f 11-15... -
Page 250: Configuring A Gprs Wan Connection
PPT 2800 with Windows Mobile 2003 Software for Pocket PCs Product Reference Guide Configuring a GPRS WAN Connection To set up a new connection configuration: 1. Tap Start - Settings - Connections tab - Connections icon. 2. In the Connections window, select Add a new modem connection. Figure 11-7. - Page 251 Wireless Wide Area Network Configuration 5. Enter the access phone number in the My Connection window and tap Next. Figure 11-9. Entering Phone Number 6. If necessary, enter the user name, password, and domain. Figure 11-10. Entering User Information 7. The settings in Advanced should not need to be changed. Most ISPs now use a server-assigned address.
- Page 252 PPT 2800 with Windows Mobile 2003 Software for Pocket PCs Product Reference Guide a. On the General and Port Settings tabs, select connection settings such as baud rate, data bits, and parity. Dialing options are also available. Tap ok when finished.
-
Page 253: Connecting Via Gprs
Wireless Wide Area Network Configuration Connecting via GPRS 1. Ensure a SIM card is installed in the terminal. See Installing the SIM Card (PPT 2837 Only) on page 1-7. 2. Ensure GPRS parameters are configured appropriately. See GPRS Parameters Configuration on page 11-3. - Page 254 PPT 2800 with Windows Mobile 2003 Software for Pocket PCs Product Reference Guide 6. Tap and hold GPRS, then select Connect from the menu that appears. Figure 11-14. Selecting the GPRS Connection 7. Tap ok. There is no username or password for a GPRS connection. Note: If the SIM card is protected with a PIN number, a window appears, requesting the appropriate PIN number to unlock the SIM card.
-
Page 255: Establishing A Gsm Csd Connection
Wireless Wide Area Network Configuration 8. Once a connection is established, launch Internet Explorer by tapping Start - Internet Explorer. 9. To end a connection, tap the double arrows on the Navigation bar and tap End. Establishing a GSM CSD Connection To establish a GSM circuit switched data (CSD) connection: 1. - Page 256 PPT 2800 with Windows Mobile 2003 Software for Pocket PCs Product Reference Guide Figure 11-16. GSM Demo Main Window The Network Status field displays the following messages as the modem attempts to connect: Opening GSM com port, Initializing modem, Checking SIM Card and Configuring modem.
- Page 257 Wireless Wide Area Network Configuration b. Make the appropriate selection, depending on the location: • Select 1900Mhz for North America • Select 900/1800Mhz for Europe, Asia, Australia and Africa. If necessary, contact the service provider to confirm the band information. c.
-
Page 258: Configuring A Gsm Wan Connection
PPT 2800 with Windows Mobile 2003 Software for Pocket PCs Product Reference Guide Configuring a GSM WAN Connection To set up a new connection configuration: 1. Tap Start - Settings - Connections tab - Connections icon. 2. In the Connections window, select Add a new modem connection. Figure 11-19. - Page 259 Wireless Wide Area Network Configuration 5. Enter the access phone number in the My Connection window and tap Next. Figure 11-21. Entering Phone Number 6. If necessary, enter the user name, password, and domain. Figure 11-22. Entering User Information 7. The settings in Advanced should not need to be changed. Most ISPs now use a server-assigned address.
- Page 260 PPT 2800 with Windows Mobile 2003 Software for Pocket PCs Product Reference Guide a. On the General and Port Settings tabs, select connection settings such as baud rate, data bits, and parity. Dialing options are also available. Tap ok when finished.
-
Page 261: Connecting Via Gsm
Wireless Wide Area Network Configuration Connecting via GSM 1. Ensure a SIM card is installed in the terminal. See Installing the SIM Card (PPT 2837 Only) on page 1-7. 2. Ensure a GSM WAN connection is properly configured. See Configuring a GSM WAN Connection on page 11-24 3. - Page 262 PPT 2800 with Windows Mobile 2003 Software for Pocket PCs Product Reference Guide 6. On the Tasks tab, tap Manage existing connections to use the connection. Figure 11-26. Connections Window 7. Tap and hold GSM, then select Connect from the menu that appears. Figure 11-27.
- Page 263 Wireless Wide Area Network Configuration The Connecting window appears. Figure 11-28. GSM Connection Window 9. Once a connection is established, launch Internet Explorer by tapping Start - Internet Explorer. 10. To end a connection, tap the double arrows on the Navigation bar and tap End. 11-29...
- Page 264 PPT 2800 with Windows Mobile 2003 Software for Pocket PCs Product Reference Guide 11-30...
-
Page 265: Chapter Contents
Chapter 12 Software Installation on Development PC Chapter Contents Introduction ..............12-3 Required System Configurations . - Page 266 PPT 2800 with Windows Mobile 2003 Software for Pocket PCs Product Reference Guide 12-2...
-
Page 267: Introduction
The SMDK for eVC4 is a development tool used to create native C and C++ applications for all Symbol terminals running the Microsoft Windows Mobile 2003 Software for Pocket PCs operating system. It includes documentation, header files (.H), and library files (.LIB) for native code application development that targets Symbol value-add APIs. -
Page 268: Smdk For Evc4
Table 12-1. Table 12-1. SMDK for eVC4 Contents and Locations Components Directory Location API Help file and \Program Files\Symbol Mobility Developer Kit v1.1 for eVC4\ Readme file Sample applications \Program Files\Symbol Mobility Developer Kit v1.1 for for quick-start eVC4\Samples\evc\ development... - Page 269 Software Installation on Development PC Table 12-1. SMDK for eVC4 Contents and Locations (Continued) Components Directory Location Start Menu \Documents and Settings\All Users\Start Menu\Programs Readme Help Samples WEB Updates * The header files and lib files are time and date stamped so they can be easily identified in the armv4 directories.
-
Page 270: Smdk For .Net
\Program Files\Microsoft Visual Studio .NET assemblies 2003\CompactFrameworkSDK\v1.0.5000\Windows CE Forms source code \Program Files\Symbol Mobility Developer Kit for .NET\v1.1\Windows CE\Source Sample applications \Program Files\Symbol Mobility Developer Kit for .NET\v1.1\Windows CE\Samples Help files \Program Files\Symbol Mobility Developer Kit for .NET\v1.1\Windows CE\Help Files Updates to native \Program Files\Symbol Mobility Developer Kit for .NET\v1.1\Windows... -
Page 271: Dcp For Ppt 2800W
The DCP for PPT 2800w contains the components listed in Table 12-3. Table 12-3. DCP Contents and Locations Components Directory Location Files that make up Program Files\Symbol Device Configuration Packages\PPT2800w the flash partitions \v1.0\Flash Folders File used to create \Program Files\Symbol Device Configuration Packages\PPT2800w terminal splash \v1.0\Flash Folders\Splash... -
Page 272: Installing Other Development Software
Readme WEB Updates The SMDK for eVC4, SMDK for .NET and DCP for PPT 2800w are available from the Symbol Developer’s Zone web site, http://devzone.symbol.com. Installing Other Development Software Developing applications for the terminal may require installing other development software such as application development environments on the development PC. -
Page 273: Chapter Contents
Chapter 13 Configuring the Terminal Chapter Contents Introduction ..............13-3 Starting Terminal Configuration Manager . - Page 274 PPT 2800 with Windows Mobile 2003 Software for Pocket PCs Product Reference Guide 13-2...
-
Page 275: Chapter 13. Configuring The Terminal
The DCP for the PPT 2800 includes scripts used by Symbol Technologies to build the standard factory installed Platform and Application partitions provided on the terminal. The standard Platform partition contains drivers;... -
Page 276: Starting Terminal Configuration Manager
PPT 2800 with Windows Mobile 2003 Software for Pocket PCs Product Reference Guide Starting Terminal Configuration Manager On the desktop computer, click the Windows start menu TCM icon to start TCM. The TCM window appears displaying two child windows: Script1 and File Explorer. The Script1 window contains a newly created script and the File Explorer window contains a file explorer view used for selecting files to be placed in the script. - Page 277 Configuring the Terminal The following table lists the components of the TCM window. Table 13-1. TCM Components Icon Component Function Script Window Display the files to be used in the creation of the partition(s). File Explorer Window Used to select the files to be added to the script. Create button Create a new script file.
- Page 278 PPT 2800 with Windows Mobile 2003 Software for Pocket PCs Product Reference Guide Table 13-1. TCM Components (continued) Icon Component Function About button Display version information for TCM. Properties button View/change the current script properties. Build button Build the current script into a set of hex files. Check button Check the script for errors (files not found).
-
Page 279: Defining Script Properties
Configuring the Terminal Defining Script Properties Before a script is created, define the script properties, i.e., the type of terminal, flash type, number of disks being created and the memory configuration of each disk partition. To define the script properties: 1. -
Page 280: Creating The Script For The Hex Image
On start-up, TCM displays the TCM window with the Script1 window and File Explorer window pointing to the following directory: Symbol Windows CE SDK(xxxx)\SymbolPlatforms\PPTxxxx\TCMScripts The Script1 window directory pane displays two partitions: Platform and Application. Depending on the type of flash chip, the number of partitions can change. Files can be added to each of the partitions. -
Page 281: Opening A New Or Existing Script
DCP for PPT 2800). If you open an existing script and make changes, saving the changes overwrites the original script. To use an original or Symbol supplied standard script as a base and save the changes in a new script, use the Save As function to save the script using a different file name. -
Page 282: Building The Image
PPT 2800 with Windows Mobile 2003 Software for Pocket PCs Product Reference Guide Building the Image After creating the script, build the hex image defined by the script. As part of the build, TCM performs a check on the script which verifies that all files referenced in the script exist. -
Page 283: Sending The Hex Image
Configuring the Terminal • Files defined in the script can not be found. This error can occur when the files referenced by the script are no longer stored on the development computer or the folders where they are stored were renamed. •... -
Page 284: Setting Up Ipl To Receive The File
PPT 2800 with Windows Mobile 2003 Software for Pocket PCs Product Reference Guide Setting Up IPL to Receive the File To set up IPL on the terminal to receive the files being downloaded via TCM: 1. Cold boot the terminal by pressing the reset button inside the battery compartment while holding down the Function button. - Page 285 Configuring the Terminal 5. IPL displays the Main Menu which lists the partitions/applications that can be downloaded. IPL Ver X.XX IPL Key Sequence Windows CE Platform Application Data Splash Screen Partition Table Auto Select Press Up/Down to select partition Press Action to begin download 6.
- Page 286 PPT 2800 with Windows Mobile 2003 Software for Pocket PCs Product Reference Guide 7. The following screen displays: IPL VER X.XX Partition Name Waiting for Data at Baud Rate XXX,XXX Press Action to return to Main Menu Partition Name reflects the selection made on the Main Menu, and Baud Rate XXX,XXX displays the selection chosen from the baud rate menu.
- Page 287 Configuring the Terminal 12. As soon as the first character of data is received, IPL displays the receiving screen: IPL VER X.XX Partition Name Downloading Data Processing XXXXX KB of YYYYY KB image Note: If the Pre-erase Attribute bit is set on the partition being downloaded, the message “Pre-Erasing Flash”...
-
Page 288: Ipl Error Messages
PPT 2800 with Windows Mobile 2003 Software for Pocket PCs Product Reference Guide 15. When all partitions are downloaded successfully, cold boot the terminal by pressing the reset button inside the battery compartment while holding down the Function button. IPL Error Messages While receiving data, IPL performs many checks on the data to ensure that the data is received correctly. - Page 289 Checksum Error occurs if an invalid checksum is detected in the record. Invalid Record occurs if a record is not defined in the Symbol Hex File Format. Connection Lost occurs if one of the handshaking lines is de- asserted during download.
-
Page 290: Tcm Error Messages
PPT 2800 with Windows Mobile 2003 Software for Pocket PCs Product Reference Guide TCM Error Messages TCM validates the cells in the partition table when you click the Execute button. Cells highlighted in red contain an error. Partition loading is disabled until all errors are corrected. Table 13-2. - Page 291 Configuring the Terminal Table 13-2. TCM Error Messages (continued) Error Description/Solution Incorrect disk sizes in The total disk size specified in the script does not match the total disk TCM.ini file size defined in the corresponding TCM.ini section. Check if the script is corrupt or the TCM.ini has changed after the script was created.
-
Page 292: Creating A Splash Screen
PPT 2800 with Windows Mobile 2003 Software for Pocket PCs Product Reference Guide Creating a Splash Screen To generate a custom splash screen, use a bitmap editor, such as Paintbrush. Creating a Splash Screen on Color Terminals 1. Create a color bitmap with dimensions of BX x BY where: •... -
Page 293: Flash Storage
The two FFS partitions appear as two separate folders in the Windows CE file system and are as follows: • Platform: The Platform FFS partition contains Symbol-supplied programs and Dynamic Link Libraries (DLLs). This FFS is configured to include DLLs that control system operation. Since these drivers are required for basic terminal operation, only experienced users should modify the content of this partition. - Page 294 PPT 2800 with Windows Mobile 2003 Software for Pocket PCs Product Reference Guide RegMerge.dll RegMerge.dll is a built-in driver that allows registry edits to be made to the Windows CE Registry. Regmerge.dll runs very early in the boot process and looks for registry files (.reg files) in certain Flash File System folders during a cold boot.
-
Page 295: Non-Ffs Partitions
“>”. The following example from the file application.cpy is contained on the demo application partition included in the DCP for PPT 2800. It can also be obtained from the Symbol web site at http://devzone.symbol.com/. -
Page 296: Downloading Partitions To The Terminal
PPT 2800 with Windows Mobile 2003 Software for Pocket PCs Product Reference Guide • Partition Table: Identifies where each partition is loaded in the terminal. Downloading Partitions to the Terminal TCM is used to specify a hex destination file for each partition and download each file to the terminal. -
Page 297: Upgrade Requirements
Configuring the Terminal Upgrade Requirements Upgrade requirements: • The hex files to be downloaded (on the development computer) • A connection from the host computer and the terminal (either serial or wireless) • TCM (on the development computer) to download the files. Once these requirements are satisfied, invoke IPL and navigate the menus to upgrade the terminal. - Page 298 PPT 2800 with Windows Mobile 2003 Software for Pocket PCs Product Reference Guide 13-26...
-
Page 299: Chapter Contents
Chapter 14 Maintenance and Troubleshooting Chapter Contents Introduction ..............14-3 Safely Maintaining the PPT 2800. - Page 300 PPT 2800 with Windows Mobile 2003 Software for Pocket PCs Product Reference Guide 14-2...
-
Page 301: Chapter 14. Maintenance And Troubleshooting
Maintenance and Troubleshooting Introduction This chapter includes instructions on cleaning and storing the terminal, and provides troubleshooting solutions for potential problems during terminal operating. Safely Maintaining the PPT 2800 For trouble-free service, observe the following tips when using the PPT 2800: •... -
Page 302: Terminal And Cradle Connector Cleaning Guidelines
PPT 2800 with Windows Mobile 2003 Software for Pocket PCs Product Reference Guide Terminal and Cradle Connector Cleaning Guidelines This section explains the proper way to clean the connector area of the PPT 2800 terminal and cradle. Required Materials Use the following cleaning materials: •... - Page 303 Maintenance and Troubleshooting 4. Insert the cotton portion of the cotton tipped applicator inside the connector on the bottom of the terminal as shown in Figure 14-1. (Ensure the tip of the cotton touches the back of the connector.) Figure 14-1. Inserting the Cotton Tipped Applicator 5.
- Page 304 PPT 2800 with Windows Mobile 2003 Software for Pocket PCs Product Reference Guide 9. Spray compressed air in the connector area by pointing the tube/nozzle approximately 1/2 inch away from the surface. 1/2" Figure 14-3. Air Spray Terminal Connector ARNING Do not point the tube/nozzle at yourself and others.
-
Page 305: Cleaning The Cradle Connector
Maintenance and Troubleshooting Cleaning the Cradle Connector To clean the cradle connector, follow the steps below. 1. Remove the power to the cradle by unplugging the DC cable. 2. Position the cradle as shown in Figure 14-4. Figure 14-4. Preparing the Cradle 3. - Page 306 PPT 2800 with Windows Mobile 2003 Software for Pocket PCs Product Reference Guide 5. All sides of the connector should also be scrubbed with the cotton tipped applicator, illustrated by the arrows in Figure 14-6. Figure 14-6. Cleaning the Cradle Connector 6.
- Page 307 Maintenance and Troubleshooting 9. If grease and other dirt is found on other areas of the cradle, use a lint free cloth and alcohol to remove. 10. Allow at least 10-30 minutes (depending on ambient temperature/humidity) for the alcohol to air dry before apply power to cradle. Note: If temperature is low and humidity is high, longer drying time is needed.
-
Page 308: Troubleshooting
PPT 2800 with Windows Mobile 2003 Software for Pocket PCs Product Reference Guide Troubleshooting Table 14-1. Troubleshooting Problem Possible Solution PPT 2800 terminal does not turn Adjust the contrast/backlight. Make sure batteries are installed properly. Replace the batteries. If the PPT 2800 terminal still does not operate, try a soft reset;... - Page 309 Verify that the terminal is loaded with a scanning application. scan input. See the System Administrator. Check to be sure the bar code symbol is not defaced. Stay within the proper scanning range. Be sure the terminal is programmed to accept the type of bar code you are scanning.
- Page 310 Confirm the host modem is receiving a call when you dial out. Ensure you have set the modem up properly (see Chapter 9, Connections). Note: If, after performing these checks, the terminal is still not reading symbols, contact the distributor or Symbol Technologies. 14-12...
-
Page 311: Appendix A Block Recognizer Characters
Appendix A Block Recognizer Characters Use the Block Recognizer to write characters directly on the terminal screen with the stylus. These characters are translated into typed text. Use Block Recognizer to enter text, for example, to write a note or to fill in fields in a window. Figure A-2 provides examples of how to write characters in lowercase. - Page 312 PPT 2800 with Windows Mobile 2003 Software for Pocket PCs Product Reference Guide The following chart illustrates some of the characters (the dot on each character is the starting point for writing). Figure A-2. Character Chart For specific instructions on using Block Recognizer, with Block Recognizer open, tap the question mark next to the writing area.
-
Page 313: Appendix B Demo Program
The PPT 2800’s demo program illustrates how to use some of the terminal’s many applications. If the demo program is not already on the PPT 2800 (check the Start menu), download the program from the Symbol Mobility Developer Kit (SMDK) for eVC4. See Chapter 3, Customizing the PPT 2800 for instructions on adding programs to the terminal. - Page 314 PPT 2800 with Windows Mobile 2003 Software for Pocket PCs Product Reference Guide To initiate the demo program, select Start - PPT 2800 Demo. The initial demo program window appears. Figure B-1. Main Demo Window...
-
Page 315: Scan Demo (Vc Scan
Demo Program Scan Demo (VC Scan) The Visual C/C++ sample scanning application enables the terminal’s scanner, allows the user to change scan parameters, and displays scanned data. To access the demo, tap VC Scan on the main demo window. Figure B-2. Scan Sample Window Scanning Data Fields After a bar code is scanned, the following data appears in the screen: •... -
Page 316: Scanning Options
(tone) • LED-on time (length of time LED remains on upon decode) • Code ID (AIM, Symbol) • Wav File (sound of decode beep). • Codes selects the code types the terminal is able to decode, and sets the options for each code type. -
Page 317: Html Scan Demo
Demo Program HTML Scan Demo The HTML Scan demo provides the HTML application ScanBrowse. Also use this application to turn the Scan Wedge in ScanBrowse on and off. To access the demo, tap HTML Scan on the main demo window. Figure B-3. -
Page 318: Scanbrowse
PPT 2800 with Windows Mobile 2003 Software for Pocket PCs Product Reference Guide ScanBrowse ScanBrowse uses Pocket Internet Explorer to render the HTML code and the Scan Wedge to scan data into scan enabled fields. Figure B-4. Scan Browse Window In this sample HTML application, the scan wedge is configured (via ScanWedge.reg) to bracket all scanned data with “{{“... -
Page 319: Files
Demo Program Files Tap Files on the main demo window for a file browser utility, File Explorer, that provides Windows Explorer-like functionality on Pocket PC terminals. File Explorer allows you to browse, cut, copy, paste, and delete files as well as execute the program. It also provides file transfer capability via the IrDA port. -
Page 320: Magstripe Reader
PPT 2800 with Windows Mobile 2003 Software for Pocket PCs Product Reference Guide MagStripe Reader Select MagStripe on the demo’s main menu for a sample MagStripe application. Figure B-6. MagStripe Window... -
Page 321: Sounds (Audio Sample
Tap Sounds on the main demo window for an audio sample, which demonstrates how to record, play back, and save sounds. Figure B-7. Audio Sample Window Audio Files are opened from and saved to \Application\wav\ by default, and are configured by the following registry key: HLCU\software\Symbol\settings “WavDirectory” = “\\Application\wav”... -
Page 322: Images (Imageviewer Sample
PPT 2800 with Windows Mobile 2003 Software for Pocket PCs Product Reference Guide Images (ImageViewer Sample) Tap Images on the main demo window for an ImageViewer sample, which demonstrates how to manipulate displayed image files. Figure B-8. ImageViewer Window ImageViewer supports color .bmp files, and both color and mono .jpg files. The application uses screen swiping and buttons to control images. -
Page 323: Ce Apps
Demo Program Button Description Button Description Set mode to “fine panning.” Set mode to “rough panning.” Open an image file. Exit the Image Viewer application. Save the current image. About window. CE Apps Tap CE Apps on the main menu to access the following standard Windows CE applications: •... -
Page 324: About
PPT 2800 with Windows Mobile 2003 Software for Pocket PCs Product Reference Guide About Select the About button on the demo’s main window to view information about the demo program. Utilities Tap Utilities on the main demo window for diagnostic options that ensure various aspects of the terminal are functioning correctly. -
Page 325: Control Panel
Demo Program Control Panel Tap Configure on the Utilities window to access the Control Panel, used to specify the terminal settings. Figure B-11. Control Panel Window About and System Versions Tap About on the Control Panel to view the version of the Control Panel. Tap System Versions to view version information for the applications on the terminal. -
Page 326: Unique Unit Id
Tap Unique Unit ID on the Control Panel to view the terminal’s unique unit ID (a 16-byte hex number identifier), and the version numbers for RCM (Resource Coordinator Manager) API, Rescoord (Resource Coordinator) DLL, UUID DLL, and Temperature DLL. Figure B-13. Unique Unit ID Window Note: PPT 2800 Series Terminals do not support the Temperature DLL. B-14... - Page 327 Demo Program Persist Persist allows changes made by the Control Panel to remain in effect after a cold boot. When enabled, Persist creates .reg files which save specific settings that are made and restore the settings to the registry after a cold boot. Toggle Persist to Yes to retain these changes after a cold boot.
-
Page 328: Touch Calibrate
PPT 2800 with Windows Mobile 2003 Software for Pocket PCs Product Reference Guide Touch Calibrate Select Touch Calibrate to re-align the screen. Figure B-15. Align Screen Printer Settings Select Printer Settings on the Control Panel to select the printer and specify printer settings. Figure B-16. -
Page 329: Communication Settings
Demo Program • To change the printer, tap Selected Printer to scroll through the available printers. • To set the communication parameter associated with the selected printer, tap the Printer Parameter field, then select the communication parameter for the printer. •... -
Page 330: Display Settings
PPT 2800 with Windows Mobile 2003 Software for Pocket PCs Product Reference Guide Display Settings Select Display Settings on the Control Panel to customize the display contrast and backlight. Figure B-18. Display Settings Window (Color Terminal Shown) • Tap Display Contrast (monochrome terminals only) to increment the contrast value. The terminal’s display changes along with the value. -
Page 331: Audio Settings
Demo Program Audio Settings Select Audio Settings on the Control Panel to specify the beeper volume and view the version numbers for the Audio and Notify APIs. Figure B-19. Audio Settings Window • Tap Beeper Volume to toggle the beeper volume between low, medium, and high. The beeper sounds to demonstrate each level selected. -
Page 332: Scanner Settings
PPT 2800 with Windows Mobile 2003 Software for Pocket PCs Product Reference Guide Scanner Settings Select Scanner Settings on the Control Panel to specify scanner-related parameters. Figure B-20. Scanner Settings Window Tap Scanner Version to view the version numbers for the hardware, decoder, PPD, MDD, and API. -
Page 333: Appendix Cgsm Demo Program
GPRS parameters. GSM Demo Installation 1. Download GSM Demo Application to the host computer from http://devzone.symbol.com. 2. Establish an ActiveSync connection between the host computer and the terminal. Depending on the accessory used for the connection, see the appropriate section Chapter 4, Communications. -
Page 334: Gsm Demo Windows
PPT 2800 with Windows Mobile 2003 Software for Pocket PCs Product Reference Guide GSM Demo Windows To start GSM Demo: 1. Tap Start - Programs - File Explorer on the terminal. 2. Navigate to the Applications folder, and select GSM Demo. Main Window When GSM Demo opens, it opens the internal serial port to the GSM modem and attempts to register with a network.The following window displays. -
Page 335: Dial # Window
GSM Demo Program Dial # Sets dial properties and places call (see Dial # Window on page C-3). Send SMS Launches the Send SMS window so you can send a message to another terminal or modem (see Send SMS Window on page C- Read SMS Displays a message from another terminal or modem (see... -
Page 336: Send Sms Window
PPT 2800 with Windows Mobile 2003 Software for Pocket PCs Product Reference Guide Send SMS Window To send an SMS message: 1. Tap Send SMS on the main window. Figure C-3. Send SMS Window 2. Enter the phone number of the message recipient and the message. 3. -
Page 337: Read Sms Window
GSM Demo Program Read SMS Window To read SMS messages: 1. Tap Read SMS on the main window. The following window displays, listing the messages available for viewing: Figure C-4. SMS Inbox Window 2. Tap a message, then tap Read to open the message. Figure C-5. -
Page 338: Gsm Demo Menu Commands
PPT 2800 with Windows Mobile 2003 Software for Pocket PCs Product Reference Guide GSM Demo Menu Commands This section explains the menu commands specific to GSM Demo, accessed from the bottom of the screen. File Menu To exit the GSM Demo application, tap File - Exit. Note that tapping X in the top corner of the main window causes the demo application to run in the background, and does not shut off the modem or close the application. - Page 339 GSM Demo Program On the Service center address window, enter the new service center number in the New address field and tap Enter Address. Figure C-7. Service Center Address Window Enter Pin Address Tap Enter PIN on the Settings window to enter a new PIN number. Enter the PIN # in the Enter PIN number: field and tap Enter Pin.
- Page 340 PPT 2800 with Windows Mobile 2003 Software for Pocket PCs Product Reference Guide Change Band Window Tap Change Band on the Settings window to make any changes. Tap Change to register the change. Figure C-9. Change Band Window Note: The modem resets (power cycles) when you change the band, indicated in the Network Status window.
- Page 341 GSM Demo Program Change Power Mode Window Tap Change Power Mode to enable low power mode on the modem. On the Change Mode Dialog window, select the desired power mode and tap Change. If you select Low Power Mode, enter the desired number of seconds in the Seconds before low power mode field.
- Page 342 PPT 2800 with Windows Mobile 2003 Software for Pocket PCs Product Reference Guide GPRS Parameters Window PDP Context Tab Figure 3-11. GPRS Parameters - PDP Context Tab Field Name Description Table Version System generated. Contains internal version number representing the structure of the registry file.
- Page 343 GSM Demo Program Field Name Description Header Compression Information obtained from service provider. • If provider supports header compression, select No. • If provider supports header compression, select Yes. Current Active Context Select the number representing the context to use for the connection. Min.
- Page 344 PPT 2800 with Windows Mobile 2003 Software for Pocket PCs Product Reference Guide Req. Qos. Tab Figure 3-13. GPRS Parameters - Req. Qos. Tab Field Name Description Precedence Information obtained from service provider. A parameter describing the relative priority of maintaining the service. Delay Information obtained from service provider.
-
Page 345: Help Menu
GSM Demo Program Help Menu The Help menu provides information about the GSM modem. Figure C-14. GSM Demo Help Menu About Window Select About on the Help menu for version information regarding the GSM Demo. Figure C-15. GSM Demo About Window C-13... - Page 346 PPT 2800 with Windows Mobile 2003 Software for Pocket PCs Product Reference Guide Modem Info Window Select Modem Info on the Help menu for specific modem information. Figure C-16. GSM Demo Modem Info Window DLL Info Select DLL Info on the Help menu for specific DLL information. Figure C-17.
-
Page 347: Appendix D Technical Specifications
Appendix D Technical Specifications Environment Table D-1 summarizes the PPT 2800’s intended operating environment. Table D-1. PPT 2800 Operating Environment Operating Temperature -20° C to +50° C (-4° F to +122° F) Storage Temperature -25° C to +50° C (-13° F to +122° F) Battery Charging Temperature 0°... - Page 348 PPT 2800 with Windows Mobile 2003 Software for Pocket PCs Product Reference Guide Table D-1. PPT 2800 Operating Environment Weight (including battery) 1-D Scanning Terminal: 10.3 oz. / 288 gm (batch); 11.8 oz. / 330 gm (wireless) 2-D Scanning Terminal: 13.8 oz.
-
Page 349: Com Port Definitions
Technical Specifications COM Port Definitions Table D-2. PPT 2800 COM Port Definitions COM Port Definition COM1 Serial/Cradle COM2 Raw IrDA COM3 IRComm COM4 Scanning COM5 Reserved COM6 COM7 VCOM Ext Power COM8 V2COM Ext Power... -
Page 350: Pin-Outs
PPT 2800 with Windows Mobile 2003 Software for Pocket PCs Product Reference Guide Pin-Outs Pin 1 Figure D-1. ActiveSync Port (COM1) Table D-3. PPT 2800 ActiveSync Port (COM1) Pin-Outs Description ext ±5 volts RS232_gnd Power_GND 9 Volts_In... - Page 351 Index Numerics Misc(1) tab ..... 5-6 Misc(2) tab ..... 5-8 128-bit shared key .
- Page 352 PPT 2800 with Windows Mobile 2003 Software for Pocket PCs Product Reference Guide audio settings ..... . B-19 channels ......8-5 AvantGo channels .
- Page 353 Index performing ActiveSync ... . . 4-9 drawing on screen ....2-22 performing modem ActiveSync ..4-12 creating messages .
- Page 354 PPT 2800 with Windows Mobile 2003 Software for Pocket PCs Product Reference Guide Initial Program Loader ..13-11, 13-23 input method ..... . . 3-13 gateway .
- Page 355 Index cold boot ..... 13-22 favorite links ....8-3 mobile favorites .
- Page 356 ..... 3-33 Symbol settings ..... . 3-9 buttons .
- Page 357 Index Terminal Configuration Manager ..13-1 time ......3-36 warm boot .
- Page 358 PPT 2800 with Windows Mobile 2003 Software for Pocket PCs Product Reference Guide Index-8...
- Page 359 We’d like to know what you think about this Manual. Please take a moment to fill out this questionnaire and fax this form to: (631) 738-3318, or mail to: Symbol Technologies, Inc. One Symbol Plaza M/S B-4 Holtsville, NY 11742-1300 Attention: Technical Publications Manager IMPORTANT: If you need product support, please call the appropriate customer support number provided.
- Page 362 ® PPT 2800 Series with Windows Mobile 2003 Software for Pocket PCs Product Reference Guide 72E-67136-02 Revision A — February 2005 Symbol Technologies, Inc. One Symbol Plaza, Holtsville N.Y. 11742-1300 http://www.symbol.com/manuals...
Need help?
Do you have a question about the PPT 2800 Series and is the answer not in the manual?
Questions and answers