Symbol PDT 8100 Series Quick Reference Manual
Pdt 8100 series
Hide thumbs
Also See for PDT 8100 Series:
- Product reference manual (402 pages) ,
- Supported equipment manual (102 pages) ,
- Product reference manual (321 pages)
Table of Contents
Advertisement
Quick Links
Advertisement
Table of Contents

Related Manuals for Symbol PDT 8100 Series


Summary of Contents for Symbol PDT 8100 Series
- Page 2 Symbol reserves the right to make changes to any product to improve reliability, function, or design. Symbol does not assume any product liability arising out of, or in connection with, the application or use of any product, circuit, or application described herein.
-
Page 3: Table Of Contents
This guide describes how to set up and use the terminal. The term PDT 8100 refers to the batch 1D scanning terminal, and the Spectrum24 terminal. Specific topics covered include: • Parts of the PDT 8100 Series on page 3 • Installing Batteries on page 5 •... - Page 4 • Troubleshooting on page 28. The PDT 8100 Product Reference Guide (p/n 72-50932-xx), available from your Reseller or from Symbol Technologies, details the applications available for the PDT 8100. Accessories Each PDT 8100 requires one 1550 mAh lithium-ion battery. The...
-
Page 5: Parts Of The Pdt 8100 Series
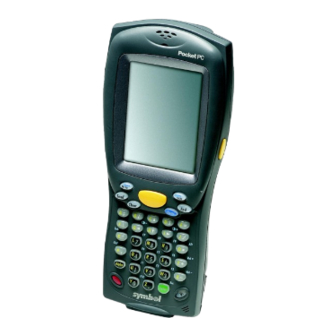
Q u i c k R e f e r e n c e Parts of the PDT 8100 Series Front View Side View Speaker Scan LED LCD (Screen) Earphone jack Scan Triggers Handstrap Power Backlight Button Button Top View... - Page 6 P D T 8 1 0 0 S e r i e s Parts of the PDT 8100 Series (continued) Back View Stylus IrDA Port Stylus Silo Reset Button Battery Cover Switch Battery Lithium-ion Compartment Battery Battery Door Battery Door...
-
Page 7: Installing Batteries
Q u i c k R e f e r e n c e Installing Batteries 1. Slide the latches on the battery door up and lift the battery door away from the PDT 8100. Latches 2. Insert the lithium-ion battery in the battery compartment with the battery tether positioned properly (as shown below), making sure the battery snaps into place. -
Page 8: Charging The Battery
P D T 8 1 0 0 S e r i e s Charging the Battery Before using your PDT 8100 for the first time, charge the lithium- ion battery in the terminal for about 2 1/2 hours, using the CRD 8100 Cradle or the Synchronization Cable. - Page 9 Q u i c k R e f e r e n c e 2. Insert the PDT 8100 terminal in the cradle. Terminal Status LED 3. The Terminal Status LED turns red (may take up to one minute) to indicate charging, then turns off when the battery is fully charged.
- Page 10 P D T 8 1 0 0 S e r i e s approximately 2 1/2 hours. See the CRD 8100-1000S Quick Reference Guide (p/n 72-50974-xx) for more information. Spare Battery LED Charging the Battery Using the Synchronization Cable 1. Insert the Synchroniza- tion cable into the bot- tom of the terminal.
-
Page 11: 15-Pin Serial Port Connector
Q u i c k R e f e r e n c e 15-Pin Serial Port Connector To connect to the Micro-D RS-232 port at the top of the terminal, use an ITT Cannon brand mil-spec connector (MDM-15SSB) with captivated jack screws (mil p/n M83513/5-6) to protect the connector’s contacts from damage during insertion and removal. -
Page 12: Inserting A Compact Flash Card
P D T 8 1 0 0 S e r i e s Inserting a Compact Flash Card The PDT 8100 contains a slot for a standard compact flash card, which includes a locking mechanism that prevents the card from coming loose if the PDT 8100 is dropped. -
Page 13: Removing A Compact Flash Card
Hard Reset on page Power Button As the terminal initializes its unique Flash File system, the Symbol splash screen displays for about 10 seconds. When the Welcome screen appears, tap anywhere on the screen to continue to the Align screen. Note that these screens also... -
Page 14: Aligning The Screen
P D T 8 1 0 0 S e r i e s Aligning the Screen To align your PDT 8100 so the cursor on the touch screen aligns with the tip of your stylus: 1. If necessary, adjust the contrast on the PDT 8100 so the screen is readable. -
Page 15: Using The Pdt 8100
Q u i c k R e f e r e n c e Using the PDT 8100 Controlling the Backlight Turn the backlight on and off by pressing the Backlight button. Power Button Backlight Button Adjusting the Contrast Keyboard Keys Description 28-key... -
Page 16: Using The Keyboard
P D T 8 1 0 0 S e r i e s Using the Keyboard Note: Key functions can be changed by an application. Your keyboard may not function exactly as described. For more detailed keyboard information, refer to the PDT 8100 Product Reference Guide. - Page 17 Q u i c k R e f e r e n c e Action Note: Press Func, then another key to produce the value or function above that key. See individual key descriptions in this table for additional Function key usage.
- Page 18 P D T 8 1 0 0 S e r i e s Using the 37-Key Keyboard The 37-key keyboard uses an alphanumeric keypad that produces the 26-character alphabet (A-Z), numbers (0-9), and assorted characters. The keyboard is color-coded to indicate which modifier key (Alpha-Numeric, Func) to press to produce a particular character or action.
- Page 19 Q u i c k R e f e r e n c e Action App4 Press Func + J to activate the APP4 key. Backlight Controlling the Backlight on page Caps/Shift Press Shift when in alpha mode, then another key to capitalize the letter on that key.
- Page 20 P D T 8 1 0 0 S e r i e s Using the 47-Key Keyboard The 47-key keyboard uses an alphanumeric keypad that produces the 26-character alphabet (A-Z), numbers (0-9), and assorted characters. The keyboard is color-coded to indicate which modifier key (Alpha-Numeric, Func) to press to produce a particular character or action.
-
Page 21: Using The Stylus
Q u i c k R e f e r e n c e Action Caps/Shift Press Shift when in alpha mode, then another key to capitalize the letter on that key. Press Func + Shift to toggle All Caps on and off. Func + Shift also erases all entered data from the screen. -
Page 22: Today Screen
P D T 8 1 0 0 S e r i e s Today Screen When you turn on your terminal for the first time each day (or after 4 hours of inactivity), the Today screen appears. You can also display it by tapping , then Today. -
Page 23: Navigation Bar And Command Bar
Q u i c k R e f e r e n c e Navigation Bar and Command Bar The navigation bar at the top of the screen displays the active program and current time, and allows you to switch to programs and close screens. -
Page 24: Input Methods
P D T 8 1 0 0 S e r i e s Input Methods Enter information in any program by typing with the 28-, 37-, or 47- key keyboard, the soft keyboard, or writing using Character Recognizer. The Character Recognizer input panel is divided into three writing areas. - Page 25 Q u i c k R e f e r e n c e Recognizer and for demos of all characters, tap on the Character Recognizer input panel.
- Page 26 P D T 8 1 0 0 S e r i e s Scanning with the PDT 8100 The PDT 8100 has an integrated scanner which collects data by scanning bar codes. See the PDT 8100 Product Reference Guide for information on configuring your terminal for scanning. To scan bar codes with the PDT 8100: 1.
- Page 27 Func Key (37-key Reset keyboard Button pictured) 3. Replace the battery cover and press the Power button. 4. As the terminal reboots, the Symbol splash screen displays for about 10 seconds.
- Page 28 With a hard reset, Formats, Preferences, and other settings are restored to their factory default settings. Host Communications The PDT 8100 Series terminal can communicate with a host PC either directly through its communications port using an RS-232 ® serial cable, the cradle, or wirelessly via the Spectrum24 wireless LANs.
- Page 29 Q u i c k R e f e r e n c e 1. Attach an RS-232 serial cable to the serial port in the bottom of the PDT 8100. 2. Attach the other end of the cable to the serial port on the printer.
-
Page 30: Troubleshooting
P D T 8 1 0 0 S e r i e s Troubleshooting Problem Cause Solution PDT 8100 does Lithium-ion bat- Charge or replace the lithium-ion not turn on. tery not charged. battery in the PDT 8100. Lithium-ion bat- Ensure battery is installed properly. - Page 31 Q u i c k R e f e r e n c e Problem Cause Solution Fail to communi- Distance from Bring the terminal closer to the cate with IrDA printer is more printer and attempt communica- printer. than 1 meter (39 tions again.
- Page 32 P D T 8 1 0 0 S e r i e s Problem Cause Solution PDT 8100 turns PDT 8100 is inac- Your PDT 8100 turns off after a pe- itself off. tive. riod of inactivity. This period can be set from one to five minutes, in one-minute intervals.
- Page 33 Q u i c k R e f e r e n c e Problem Cause Solution A message ap- Too many files Delete unused memos and pears stating that stored on the ter- records. You can save these your PDT 8100 minal.
- Page 34 See your accept scan in- System Administrator. put. Unreadable bar Be sure the symbol is not defaced. code. Distance be- Be sure you are within proper tween exit window scanning range. and bar code is in- correct.
- Page 35 Q u i c k R e f e r e n c e END-USER LICENSE AGREEMENT MICROSOFT WINDOWS FOR POCKET PC DATA EXCHANGE COMPONENT: MICROSOFT ACTIVESYNC, VERSION 3.1 IMPORTANT-READ CAREFULLY: This End-User License Agreement (“EULA”) is a legal agreement between you (either an individual or a single entity) and the manufacturer (“Manufacturer”) of the special purpose computing device (“SYSTEM”) with which you acquired the Microsoft software product(s) identified above (“SOFTWARE”).
- Page 36 P D T 8 1 0 0 S e r i e s 2. DESCRIPTION OF OTHER RIGHTS AND LIMITATIONS. • Speech/Handwriting Recognition. If the SOFTWARE includes speech and/or handwriting recognition component(s), you should understand that speech and handwriting recognition are inherently statistical processes; that recognition errors are inherent in the processes;...
- Page 37 Q u i c k R e f e r e n c e 4. COPYRIGHT. All title and intellectual property rights in and to the SOFTWARE (in- cluding, but not limited to, any images, photographs, animations, video, audio, mu- sic, text, and “applets”...
-
Page 38: Power Supply
Cet appareil numérique de la classe B est conforme à la norme NMB-003 du Canada. Power Supply Note: Use only a Symbol-approved power supply (p/n 50-14000-107) output rated 9 Vdc and minimum 2A. The power supply is certified to EN60950 with SELV outputs. - Page 39 Q u i c k R e f e r e n c e CE Marking and European Union Compliance Products intended for sale within the European Union are marked with the CE Mark which indicates compliance to applicable Directives and European Normes (EN), as follows.
- Page 40 P D T 8 1 0 0 S e r i e s Safety Information The GSM version gives off radio frequency signals in the 900 MHz, 1800 MHz and 1900 MHz frequency bands. The following recommendations are in line with guidelines concerning public exposure to radio frequency electromagnetic energy, issued by various European and International agencies.
- Page 41 Obey all signs and instructions. Laser Devices Symbol products using lasers comply with US 21CFR1040.10, and IEC825-1:1993, EN60825-1:1994+A11:1996. The laser classification is marked on one of the labels on the product.
- Page 42 P D T 8 1 0 0 S e r i e s Scanner Labeling...
- Page 43 The majority of Symbol’s RF devices are type approved and do not require the user to obtain license or authorization before using the equipment. Any changes or modifications to Symbol Technologies equipment not expressly approved by Symbol Technologies could void the user’s authority to operate the equipment.
- Page 44 P D T 8 1 0 0 S e r i e s • France - Restrict Frequency Range for use in France: 2.4465 - 2.4835 GHz, identified on PDT 8100 by the -FR suffix to the model number found on the product label •...
- Page 45 Class 2 equipment identifier The technical documentation relevant to the above equipment can be made available for inspection on application to: Symbol Technologies EMEA, Symbol Place, Winnersh Triangle, Berkshire, RG 41 5TP, UK Dornu Narnor (name) Director, Regulatory and Technical Sales...
- Page 46 P D T 8 1 0 0 S e r i e s...
- Page 47 This warranty is provided to the original owner only and is not transferable to any third party. It shall not apply to any product (i) which has been repaired or altered unless done or approved by Symbol, (ii) which has not been maintained in accordance with any operating or handling instructions...
- Page 48 +44 208 945 7360 tions Customer support is available 24 hours a day, 7 days a week. For the latest version of this guide go to:http://www.symbol.com/ manuals. 72-52269-01 Revision A — June 2001 Symbol Technologies, Inc. One Symbol Plaza Holtsville, NY 11742-1300...
Need help?
Do you have a question about the PDT 8100 Series and is the answer not in the manual?
Questions and answers