Airwell Aqu@Scop Advance R410A Installation And Maintenance Manual
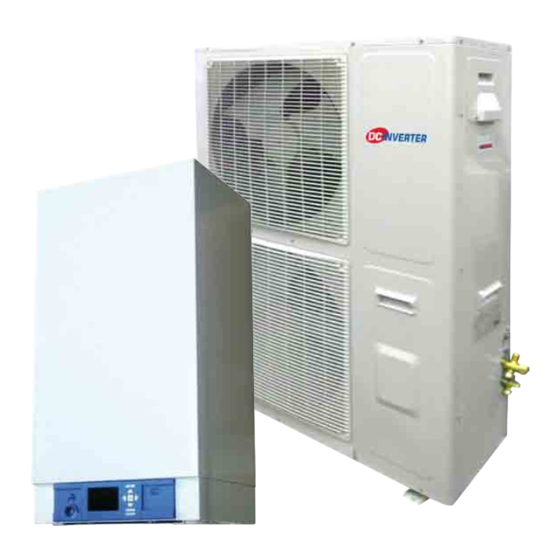
Aqu@scop advance split dci series
Hide thumbs
Also See for Aqu@Scop Advance R410A:
- User & installation manual (134 pages) ,
- Installation manual (96 pages) ,
- Installation instructions manual (76 pages)
Advertisement
Quick Links
Installation and maintenance manual
Manuel d'installation et de maintenance
Installations- und Wartungshandbuch
Manuale di installazione e di manutenzione
Manual de instalación y de mantenimiento
Aqu@Scop Advance Split DCI
5 ÷ 14
English
Air-water SPLIT Heat Pump
5.3
Pompe à Chaleur SPLIT air-eau
Ü
14.5kW
Splitwärmepumpe Luft-Wasser
Pompa di Calore SPLIT aria-acqua
4.4
Bomba de Calor SPLIT aire-agua
Ü
14.0kW
IOM AQHAS 01-N-6
IOM AQHAS
Part number / Code / Teil Nummer / Codice / Código : 3990649
Part number / Code / Teil Nummer / Codice / Código :
Supersedes / Annule et remplace / Annulliert und ersetzt /
Supersedes / Annule et remplace / Annulliert und ersetzt /
Annulla e sostituisce / Anula y sustituye : IOM AQHAS 01-N-5
Annulla e sostituisce / Anula y sustituye : IOM AQHAS
Français
01-N-6GB
Deutsch
Italiano
3990649GB
01-N-5GB
Español
Advertisement
Chapters

Related Manuals for Airwell Aqu@Scop Advance R410A


Summary of Contents for Airwell Aqu@Scop Advance R410A
- Page 1 Installation and maintenance manual Manuel d’installation et de maintenance Installations- und Wartungshandbuch Manuale di installazione e di manutenzione Manual de instalación y de mantenimiento Aqu@Scop Advance Split DCI 5 ÷ 14 English Français Deutsch Italiano Español Air-water SPLIT Heat Pump Pompe à...
- Page 3 INSTALLATION INSTRUCTION NOTICE D’INSTALLATION INSTALLATIONSHANDBUCH ISTRUZIONI INSTALLAZIONE INSTRUCCIONES DE INSTALACIÓN...
-
Page 4: Table Of Contents
CONTENTS 1. GENERAL RECOMMENDATIONS ..........................3 1.1. SAFETY DIRECTIONS ....................................3 1.2. WARNING ........................................3 1.3. EqUIpmENT SAFETY DATA .................................... 4 2. INSPECTION AND STORAGE ............................. 5 3. WARRANTY................................5 4. CONTENTS OF PACKAGE ............................5 5. PRODUCT PRESENTATION ............................5 6. -
Page 5: General Recommendations
POWER SUPPLY MUST BE SWITCHED OFF BEFORE STARTING WORK IN THE ELECTRIC CONTROL BOX 1. GENERAL RECOMMENDATIONS The purpose of this manual is to provide users with instructions for installing, commissioning, using and maintaining the units. It does not contain the complete description of all the maintenance operations guaranteeing the unit’s long life and reliability. -
Page 6: Equipment Safety Data
1.3. EQUIPMENT SAFETY DATA Safety Data R410A Toxicity In contact with skin Skin contact with the rapidly evaporating liquid may cause tissue chilblains. In case of skin contact with the liquid, warm the frozen tissue with water and call a doctor. Remove contaminated clothing and footwear. -
Page 7: Inspection And Storage
2. INSPECTION AND STORAGE At the time of receiving the equipment carefully cross check all the elements against the shipping documents in order to ensure that all the crates and boxes have been received. Inspect all the units for any visible or hidden damage. In the event of shipping damage, write precise details of the damage on the shipper’s delivery note and send immediately a registered letter to the shipper within 48 hours, clearly stating the damage caused. -
Page 8: Technical Specifications
6. TECHNICAL SPECIFICATIONS ² Domestic Hot Water tank (temperature probe to be ordered separately) ² DHW temperature probe ² Ambience Terminal ² mixing tank with temperature probe (temperature probe to be ordered separately) (obligatory for a boiler relief installation) ² mixing tank temperature probe ²... -
Page 9: Refrigeration Specifications
9. REFRIGERATION SPECIFICATIONS 9.1. INDOOR AND OUTDOOR UNIT LINKS AWSI- AWSI- AWSI- AWSI- HvD005_08-R11 HvD012_14-R11 HvD005_08-H11 HvD012_14-H11 AWAU- YvD005-H11 (5 kW) AWAU- YvD008-H11 (8 kW) AWAU- YvD012-H11 (12 kW) AWAU- YvD014-H11 (14 kW) 9.2. PHYSICAL CHARACTERISTICS 9.2.1. OUTDOOR UNIT AWAU AWAU AWAU AWAU... -
Page 10: Electric Specifications
9.3. ELECTRIC SPECIFICATIONS 9.3.1. OUTDOOR UNIT AWAU- AWAU- AWAU- AWAU- YvD005-H11 YvD008-H11 YvD012-H11 YvD014-H11 Rated voltage, compressor 1/N/pE 230 V/50 Hz Rated current, compressor (max.) Starting current,compressor 10.5 Starting current,compressor with stalled armature Fuse, internal 3.15 3.15 Ip rating Recommended power cable 3 x 2.5 mm²... -
Page 11: Operating Limits
9.4. OPERATING LIMITS 9.4.1. HEATING MODE Outdoor air temperature (°C) 9.4.2. COOLING MODE Outdoor air temperature (°C) 10. REFRIGERATION AND HYDRAULIC DIAGRAM SEE APPENDIX... -
Page 12: Installation
11. INSTALLATION The unit is not designed to withstand weights or stresses from adjacent equipment, pipe work or constructions. Any foreign weight or stress on the unit structure could lead to a malfunction or a collapse with dangerous consequences for personnel and property. In such an event, the warranty shall be null and void. - Page 13 11.1.2. CLEARANCE When choosing the location for the appliance, take care to leave sufficient free clearance on all sides to ensure easy access for maintenance work. The minimum free clearance dimensions indicated must be observed to ensure both proper system operation and allow access for maintenance and cleaning. DIMENSION AIR FLOW 100mm...
-
Page 14: Indoor Unit
11.2. INDOOR UNIT 11.2.1. SITING THE INSTALLATION The unit has been designed for indoor applications and must be sited in a location protected from bad weather and without any risk of freezing during winter months. The premises must be clean, dry and properly ventilated. The appliance must be sited with its anti-vibration pads on a level, solid and preferably masonry, floor. -
Page 15: Hydraulic Links
2. Attach the wall bracket (2 screws Ø 7). 3. Hang the indoor unit. 12. HYDRAULIC LINKS When choosing and installing water pipes, you must consult and observe all current local standards, regulations and instructions. 12.1. GENERAL RECOMMENDATIONS You must design the pipe network with the minimum number of bends and keep the number of changes in height to the strict minimum. - Page 16 12.1.1. EXPANSION TANK Aqu@Scop Advance Split DCI units are equipped with an expansion tank with the following volumes and pre- pressurisation pressures: AWSI-HvD005_08-R11 AWSI-HvD012_14-R11 AWSI-HvD005_08-H11 AWSI-HvD012_14-H11 Volume pre-pressurisation pressure 0.95 0.95 1. Check of the required volume 2. Adjustment of the pressurisation pressure It is important to make sure that the pressure in the water supply system is sufficient to enable the installation to be filled correctly.
-
Page 17: Standard Circuits
12.2. STANDARD CIRCUITS 12.2.1. AQU@SCOP ADvANCE SPLIT DCI ONLY Layout 1: underfloor heating application without individual room regulation This layout is recommended when the Aqu@Scop Advance Split DCI water flow is continuous and close to the nominal value (no thermostatic valves). The buffer tank (2) provides extra circulating water volume to maintain the minimum volume. - Page 18 Layout 2: underfloor heating application without individual room regulation This layout is recommended for heating installations with wide operating water flow variations (radiator thermostatic valves present in the system). We strongly recommend including the buffer tank (2) as it guarantees that the heating loop capacity is higher than the minimum volume when the maximum number of thermostatic valves are closed.
- Page 19 Layout 3: radiator application or underfloor heating application with individual room regulation This layout is also recommended for heating installations with wide operating water flow variations (radiator thermostatic valves present in the system). minimum system volume is guaranteed by a mixing tank (10). Take care when calculating the volume of water in the installation and only take account of 50% of the mixing tank's volume.
- Page 20 12.2.2. AQU@SCOP ADvANCE SPLIT DCI WITH BOILER To ensure optimum operation, the Heat pump must always be connected to the radiator or under-floor heating return water pipe via a secondary circuit to avoid affecting the water flow in the existing heating network. This type of layout meets the following three criteria: ²...
- Page 21 1. Stop cocks 3. Filter or sludge trap 4. Relief valve 5. Domestic Hot Water tank 6. Safety devices 7. Re c yc l i n g c i rcu l a t i on p um p (optional) 8. Circulation pump 9.
- Page 22 1. Stop cocks 3. Filter or sludge trap 4. Relief valve 5. Domestic Hot Water tank 6. Safety devices 7. Re cy cl i ng ci rc ul at i o n p um p (optional) 8. Circulation pump 9. mixing tank 10.
-
Page 23: Water Treatment Warning
12.3. WATER TREATMENT WARNING Using untreated or inadequately treated water in this appliance can lead to a build-up of limescale, algae or sludge deposits and cause corrosion and erosion. As the manufacturer is not aware of the components used in the hydraulic network, or of the quality of water used, the installer or the owner should contact a specialised water treatment company. -
Page 24: Filling The System With Water
12.6. FILLING THE SYSTEM WITH WATER All installation works must be completed and the system cleaned and drained, before filling the water circuit in accordance with current best practices. The system should be filled to obtain a service pressure not exceeding 2.5 bars. - Page 25 12.7.2. WATER FLOW CALCULATION GRAPH pump output (flow) is adjustable in relation to the system's pressure losses, by means of the internal pump speed selector. 12.7.3. WATER CIRCUIT BLEEDING ² At the air vent valve of the secondary circuit B , connect the on- site hose to prevent damage to electrical components.
-
Page 26: Refrigeration Links
13. REFRIGERATION LINKS 13.1. PIPE LINKS TO BE CREATED ON SITE This work must be performed by qualified personnel in accordance with the best heating and air conditioning engineering practices (brazing, vacuum draining, filling, etc.). ² Only use refrigeration quality copper pipe. ²... -
Page 27: Assembly
13.2.1. AWAU-YvD005-H11 1/2" 1/4" A: Gas line E: Flare union B: Liquid line F: Adapter supplied with the unit C: pipe insulation 13.2.2. AWAU-YvD008-H11 - AWAU-YvD012-H11 - AWAU-YvD014-H11 5/8" 3/8" A: Gas line C: pipe insulation E: Flare union B: Liquid line 13.3. -
Page 28: Vacuum Of Cooling Pipes And Indoor Unit
13.4. vACUUM OF COOLING PIPES AND INDOOR UNIT Only the outdoor unit is charged with refrigerant fluid., iit is imperative to vacuum the linking pipes and the indoor unit and always leave both the stop cocks on the outdoor modules in the closed position. -
Page 29: Wiring Diagram And Legend
N°2 outlet water temperature probe IN : IN probe EP : pressure transducer OAT : Outdoor air temperature installation probe AvI : Card Airwell interface 14.2.1.1. OPTION BOILER : Boiler FS : flow detector BTT : Buffer tank temperature probe (boiler relief installation) -
Page 30: Electrical Connections
15. ELECTRICAL CONNECTIONS WARNING Before carrying out any work on the equipment, make sure that the electrical power supply is disconnected and that there is no possibility of the unit being started inadvertently. Non-compliance with the above instructions can lead to injury or death by electrocution. The electrical installation must be performed by a fully qualified electrician, and in accordance with local electrical standards and the wiring diagram corresponding to the unit model. -
Page 31: Outdoor Unit
15.1. OUTDOOR UNIT Remove the outdoor unit casing. Thread the cables through the cable openings built in to the unit. Install cable and fittings corresponding to the cable section in order to ensure a good contact. Connect the cables as indicated. AWAU-YvD012-H11 AWAU-YvD005-H11 AWAU-YvD008-H11... -
Page 32: Connections Between Outdoor And Indoor Units
15.3. CONNECTIONS BETWEEN OUTDOOR AND INDOOR UNITS Inside the indoor unit there is an interface board, used for the communication line between outdoor and indoor units, according following wiring instruction. C N L COM Ni Li C2 C1 3 X 1.5mm² 3 X 1.5mm²... -
Page 33: Electrical Connections For A Boiler Relief Installation
15.5. ELECTRICAL CONNECTIONS FOR A BOILER RELIEF INSTALLATION The boiler relief function involves the installation and connection of the following elements: ² BRV zone valve ² KBR relay ² Resistance R ² Buffer tank temperature probe (BTT) ² Temperature probe installed on the heating circuit water outlet (SFT) The BTT probe measures the temperature near the mixing tank. -
Page 34: Domestic Hot Water Probe Fitting
15.6. DOMESTIC HOT WATER PROBE FITTING Installation of the the Domestic Hot Water function involves replacing the existing temperature probe in the Domestic Hot water tank with a special probe required for the Aqu@Scop Advance Split DCI. 1. Open the access hatch situated on the upper part of the tank. 2. -
Page 35: Commissioning
16. COMMISSIONING 16.1. PRE-START CHECK LIST Before commissioning the system, you must carry out a certain number of installation checks to ensure that the appliance will operate in the best possible conditions. The following list of checks is not exhaustive and only serves as a minimum reference guide. -
Page 36: Regulation
17. REGULATION 17.1. USER INTERFACE The front part of the instrument acts as a system interface to perform all the operations associated with its use, and notably to: ² Set the operating values. ² manage alarm situations. ² Check the state of the inputs/outputs The selected option is displayed on a white background. -
Page 37: Menus
17.2. MENUS There are two levels of control available to you: the "Basic menu" and the "Extended menu". 17.2.1. BASIC MENU To open the "Basic menu ": ² The screensaver is active: press any key. ² At any point in the menu, press several times to return to the "Basic menu". - Page 38 17.2.1.1. SET AMBIENT TEMPERATURE Change from CC2 (Heating) or CRS (Cooling) circuit. Adjust the set temperature for the CC1 circuit. 17.2.1.2. OPERATING PROGRAMME To change the programme: ² Select another programme The symbol and confirm with OK. shows the current programme.
- Page 39 17.2.1.3. LIvING ROOM MODE This function enables you to alter the ambient temperature of a heating/cooling circuit for a few hours, for example, when guests stay later in the evening. With this function it is not necessary to alter the regulation settings. The rooms are heated or cooled to the desired temperature.
- Page 40 17.2.1.5. DOMESTIC HOT WATER Adjust the set temperature and confirm with OK. 1 Press OK once to turn off. 1 Press OK again to restart. S y m b o l i s e s D H W p r o d u c t i o n activation.
- Page 41 17.2.1.6. INFORMATION Depending on the components connected and the settings, you can consult the temperatures, settings, operating modes and operating mode at any point. Direct information display. T h e a r r o w i n d i c a t e s f u r t h e r information available.
- Page 42 17.2.2. EXTENDED MENU To open the "Extended menu": The screensaver is activated: press any key then press At any point in the menu, press several times to return to the "Basic menu". Extended Menu Heating Heat/Cool. Installation Information Hot water Settings Buffer tank programme Set ambient temperature...
- Page 43 17.2.2.1. REDUCED MODE SET AMBIENT TEMPERATURE C h o o s e t h e circuit on which the setting is to be made. Adjust the set temperature (ECO) for the CC1 Heating circuit. 17.2.2.2. DAILY PROGRAMMING Start by defining the days of the week covered by the programming: ²...
- Page 44 Timer settings for room Heating/Cooling are broken down into time periods. For each time period, select the operating mode ("Economy", "Normal", "Fixed Value"). The factory settings correspond to room heating 24 hours a day (a time period from 0h00 to 24h00 for every day of the week in "Normal"...
- Page 45 17.2.2.3. HOLIDAY PROGRAMMING To save energy during an extended absence, e.g. holidays, you can activate the "Holiday programme". In this case, the heat pump regulation works to ensure that the Holiday programme acts on all the heating circuits. Depending on the chosen operating programme, the Holiday programme can have different repercussions: ²...
- Page 46 17.2.2.4. HEATING CURvE MODIFICATION The way in which your heat pump provides Heating is influenced by the slope and the parallel of the heating curve selected. Factory settings: ² Slope: 0.6 ² Heating curve parallel: 0 ² Normal (set) ambient temperature: 20º C ²...
- Page 47 17.2.2.5. DHW PROGRAMMING To engage Domestic Hot Water production, the operating programme must be set accordingly for at least one heating circuit. (Refer to § OpERATING pROGRAmmE). Timer programming for Domestic Hot Water production is split into time periods. Select an operating mode ("Upper", "Normal", "2 temp"*) for each time period.
- Page 48 17.2.2.6. START OPTIMISATION Start time optimisation guarantees that the hot water is already at the desired temperature at the beginning of a time period. Comment: This function is only active if the timer has been programmed. Example: You need hot water for the shower from 06h00 in the morning. Set the start of the time period at 06h00. With the start optimisation function, Domestic Hot Water production will start automatically a little earlier in order to ensure that hot water at the desired temperature is available at 06h00 precisely.
- Page 49 17.2.2.9. INFORMATION Information is categorised by groups. ² Installation ² N° 1 Heating circuit (CC) ² N° 2 Heating circuit (CC) ² Cooling circuit (CRS) ² Hot water ² Solar ² Heat pump ² All information for the various groups are listed in the overview in the §...
-
Page 50: Message Screens
17.3. MESSAGE SCREENS For special events or operating conditions involving your heat pump or heating installation, the heat pump regulation system displays comments, warning or fault messages. The corresponding symbol flashes on the screen alongside the clear text message. Comment: You should take account of the information, but the system is totally operational. -
Page 51: Starting The Appliance
18. STARTING THE APPLIANCE After checking all the electrical connections and making any rectifications as required, proceed with starting up the installation. 18.1. SIMPLIFIED START-UP OR COMMISSIONING PROCEDURE Various parameters have to be set and checked as part of the initial appliance start-up procedure. There is a special menu on the indoor unit regulator to complete this procedure. - Page 52 18.1.1. CODING LEvEL 1 List of the various groups of parameters and their associated code prefixes. Parameter Code Installation definition 70.. Compressor 50.. External heat generator 7B.. Domestic Hot Water 60.. Back-up electric heating 79.. Internal hydraulic circuit 73.. Buffer tank 72..
- Page 53 18.1.1.2. PARAMETERS TO BE DEFINED AT COMMISSIONING PARAMETER CODE DESCRIPTION SETTINGS Consult the § "12.2. This parameter provides STANDARD CIRCUITS", information for the regulation 7000 HYDRAULIC LAYOUT page 15 and "18.1.1.1. system on the type of hydraulic INSTALLATION installation put in place. DEFINITION", page 50 Confirms presence or absence of I N S T A L L A T I O N...
- Page 54 PARAMETER CODE DESCRIPTION SETTINGS Ambient temperature setting for Adjustment between 10° C AmBIENT TEmpERATURE 2000 normal operating conditions and + 30°C (normal set temperature). (100 = 10°C) Ambience terminal activation. An ambience terminal can be 0 (without terminal) REmOTE CONTROL 2003 installed on each of the heating 1 (with a terminal)*...
-
Page 55: Operating Check List
19. OPERATING CHECK LIST 19.1. GENERAL Check for any unusual noises or vibration in the running components, particularly the indoor fan drive system. 19.2. OPERATING vOLTAGE: 1. Recheck voltage at unit supply terminals. 19.3. CONTROL 1. Verify all sensor inputs, using the controller display. 19.4. -
Page 56: Maintenance
23. MAINTENANCE The user is responsible for ensuring that the appliance is in a proper working condition and that technical installation as well as the regular maintenance operations are performed by properly trained technicians and in accordance with the instructions contained in this manual. Some alarms can only be cancelled by switching the Aqu@Scop Advance Split DCI to OFF. -
Page 57: Servicing Checklist
23.5. SERvICING CHECKLIST 23.5.1. CASING 1. Clean the outer panels. 2. Remove the panels. 3. Check that the insulation is not damaged. Repair as required. 23.5.2. REFRIGERATION CIRCUIT 1. Check the absence of gas leaks. This equipment must be subjected to regular tightness checks conducted by qualified personnel. please refer to national requirements to determine the frequency of these checks. -
Page 58: List Of Settings
24. LIST OF SETTINGS pARAmETER ADDRESS DESCRIpTION 2000 Standard room temperature 2001 Reduced room temperature 2006 Remote control 200A Heating curve level 200B Heating curve slope 200E Influence room temperature hook-up 2022 Room temperature hook-up 5000 max. correction flow temperature heating circuit 5030 max. - Page 59 pARAmETER ADDRESS DESCRIpTION 7103 min. flow temperature cooling 7104 Influence room temperature hook-up cooling circuit 7110 Cooling curve level 7111 Cooling curve slope 71FE Active cooling function on site 7200 Enable buffer cylinder/low loss header 7202 Temp. in operating status fixed value for buffer cyl 7203 Hysteresis temperature heating buffer cylinder 7204...
-
Page 60: Alarm List Available On The Display
25. ALARM LIST AvAILABLE ON THE DISPLAY Fault Fault Fault text Fault text number number No faults Heating Circuit (CC3) amb. temp. probe System error Cooling Circuit (CRS) amb. temp. probe RAZ after data error Solar panel temp. probe Configuration error Solar inlet temp. -
Page 61: Faulty Diagnosis Guide
26. FAULTY DIAGNOSIS GUIDE 26.1. STEPS IF THE ROOM TEMPERATURE IS TOO LOW 1. Vent the heating circuits. 2. Check throughput of affected heating circuits. Recommended temperature differential between heating flow and return approx. 8 K. 3. Hydraulically balance the connected heating circuits. 4. - Page 62 26.2.2. OUTDOOR UNIT 26.2.2.1. AWAU-YvD005-H11 Q Fan R Condenser (cooling mode) / evapo- rator (heating mode) S 4-way diverter valve heating/cooling T Electronic expansion valve (EEV) U Liquid separator v Compressor 26.2.2.2. AWAU-YvD008-H11 Q Fan R Condenser (cooling mode) / evapo- rator (heating mode) S 4-way diverter valve heating/cooling T Electronic expansion valve (EEV)
-
Page 63: Draining The Heat Pump On The Primary/Secondary Side
26.2.2.3. AWAU-YvD012-H11 - AWAU-YvD014-H11 Condenser (cooling mode) / evapo- rator (heating mode) 4-way diverter valve heating/cooling Electronic expansion valve (EEV) Liquid separator Compressor 26.3. DRAINING THE HEAT PUMP ON THE PRIMARY/SECONDARY SIDE 1. Close on-site BDF valve. 2. Drain heat pump at drain valve on primary/secondary side... -
Page 64: Checking Sensors
26.4. CHECKING SENSORS Chek that: ² the sensor connections to the controller and sensor pCB. ² the position of the sensors in the heatpump. 26.4.1. TEMPERATURE SENSORS TYPE NI 500 Capturing element: "Ni 500" ² Outside temperature sensor (F0) ² Flow temperature sensor, cooling circuit (direct heating circuit A1 or separate cooling circuit) (F14) ²... - Page 65 APPENDIX / ANNEXE / ANLAGE / ALLEGATO / ANEXO APPENDIX ANNEXE ANLAGE ALLEGATO ANEXO...
- Page 66 APPENDIX / ANNEXE / ANLAGE / ALLEGATO / ANEXO APPENDIX DIMENSIONS ................................III REFRIGERATION AND HYDRAULIC LINKS DIAGRAM ....................vII WATER FLOW CALCULATION GRAPH ........................... XI WIRING DIAGRAM ............................... XII ANNEXE DIMENSIONS ................................III SCHéMA FRIGORIFIQUE ET HYDRAULIQUE .........................vII ABAQUE DE CALCUL DE DéBIT D'EAU .......................... XI SCHEMAS ELECTRIQUES ..............................
-
Page 67: Dimensions
APPENDIX / ANNEXE / ANLAGE / ALLEGATO / ANEXO DIMENSIONS DIMENSIONS ABMESSUNGEN DIMENSIONI DIMENSIONES AWAU YvD005-H11... - Page 68 APPENDIX / ANNEXE / ANLAGE / ALLEGATO / ANEXO AWAU YvD008-H11...
- Page 69 APPENDIX / ANNEXE / ANLAGE / ALLEGATO / ANEXO AWAU YvD012-H11 / AWAU YvD014-H11...
- Page 70 APPENDIX / ANNEXE / ANLAGE / ALLEGATO / ANEXO AWSI-HvD005_08-R11 / AWSI-HvD005_08-H11 AWSI-HvD012_14-R11 / AWSI-HvD012_14-H11 230 V~ 400 V~ <42 V >42 V...
-
Page 71: Refrigeration And Hydraulic Links Diagram
APPENDIX / ANNEXE / ANLAGE / ALLEGATO / ANEXO REFRIGERATION AND HYDRAULIC LINKS DIAGRAM SCHéMA FRIGORIFIQUE ET HYDRAULIQUE KüHL- UND HYDRAULIKDIAGRAMM SCHEMA FRIGORIFERO ED IDRAULICO ESQUEMA FRIGORÍFICO E HIDRÁULICO AWAU YvD005-H11 / AWAU YvD008-H11 Compressor Compresseur Kompressor Compressore Compresor Switchover valve Vanne d’inversion Umschaltventil Valvola di inversione... - Page 72 APPENDIX / ANNEXE / ANLAGE / ALLEGATO / ANEXO AWAU YvD012-H11 / AWAU YvD014-H11 Compressor Compresseur Kompressor Compressore Compresor Switchover valve Vanne d’inversion Umschaltventil Valvola di inversione Válvula de inversión Finned heat exchanger Echangeur à ailettes Flügeltauscher Scambiatore ad alette Intercambiador de aletas Fans ventilateurs...
- Page 73 APPENDIX / ANNEXE / ANLAGE / ALLEGATO / ANEXO AWSI-HvD005_08_12_14-R11 θ θ θ θ ρ Temperature probe (inlet Sonde de température Temperatursonde Sonda di temperatura Sonda de temperatura hot water) (eau chaude retour) (Warmwasserrücklauf) (acqua calda ritorno) (agua caliente retorno) pump pompe pumpe...
- Page 74 APPENDIX / ANNEXE / ANLAGE / ALLEGATO / ANEXO AWSI-HvD005_08_12_14-H11 θ θ θ θ ρ Temperature probe (inlet Sonde de température Temperatursonde Sonda di temperatura Sonda de temperatura hot water) (eau chaude retour) (Warmwasserrücklauf) (acqua calda ritorno) (agua caliente retorno) pump pompe pumpe...
-
Page 75: Berechnungskurve Der Wasserdurchflussmenge
APPENDIX / ANNEXE / ANLAGE / ALLEGATO / ANEXO WATER FLOW CALCULATION GRAPH ABAQUE DE CALCUL DE DéBIT D'EAU BERECHNUNGSKURvE DER WASSERDURCHFLUSSMENGE ABACO DI CALCOLO DELLA PORTATA DELL'ACQUA ÁBACO DE CÁLCULO DE CAUDAL DE AGUA mbar AWSI-HvD005_08-R11 0.00 0.50 1.00 1.50 2.00 2.50... -
Page 76: Esquema Electrico
APPENDIX / ANNEXE / ANLAGE / ALLEGATO / ANEXO WIRING DIAGRAM SCHEMAS ELECTRIQUES STROMLAUFPLANS SCHEMA ELETRICO ESQUEMA ELECTRICO TAKE CARE! These wiring diagrams are correct at the time of publication. manufacturing changes can lead to modifications. Always refer to the diagram supplied with the product. ATTENTION Ces schémas sont corrects au moment de la publication. - Page 77 APPENDIX / ANNEXE / ANLAGE / ALLEGATO / ANEXO AWSI-HvD005_08_12_14-R11 XIII...
- Page 78 APPENDIX / ANNEXE / ANLAGE / ALLEGATO / ANEXO AWSI-HvD005_08_12_14-R11 AWSI-HvD005_08_12_14-H11...
- Page 79 APPENDIX / ANNEXE / ANLAGE / ALLEGATO / ANEXO AWSI-HvD005_08_12_14-H11...
- Page 80 APPENDIX / ANNEXE / ANLAGE / ALLEGATO / ANEXO AWAU YvD005-H11...
- Page 81 APPENDIX / ANNEXE / ANLAGE / ALLEGATO / ANEXO AWAU YvD008-H11 XvII...
- Page 82 APPENDIX / ANNEXE / ANLAGE / ALLEGATO / ANEXO AWAU YvD012-H11 / AWAU YvD014-H11 DISPALY OFAN_UP OFAN_DN XvIII...
- Page 83 The meaning of the above logo Le logo ci-dessus représentant Die Bedeutung des Logos mit Il significato del logo qui sopra El significado de este logo que representing a crossed-out wheeled une "poubelle barrée" signifie qu’il der durchgestrichenen mülltonne r a p p r e s e n t a t o i n d i c a c h e i l representa un cubo de basura con bin is that this unit must not be ne faut pas se débarrasser de...
- Page 84 AIRWELL I ndustrIe rance Route de Verneuil 27570 Tillières-sur-Avre FRANCE : +33 (0)2 32 60 61 00 & : +33 (0)2 32 32 55 13 As part of our ongoing product improvement programme, our products are subject to change without prior notice. Non contractual photos.
Need help?
Do you have a question about the Aqu@Scop Advance R410A and is the answer not in the manual?
Questions and answers