Table of Contents
Advertisement
www.the-mspa.com
MSpa® ELITE
Owner's Manual
and Warranty Card
EN
DO NOT RETURN MERCHANDISE TO YOUR DEALER STORE DIRECTLY. CALL MSPA AFTER
SALES SERVICE CENTER FOR PRODUCT QUESTIONS OR CONTACT MSPA AT
info@the-mspa.com
Due to MSpa continuous product improvement, MSpa reserves the right to change
specifications and product appearance, which may result in updates to the instruction
manual without notice.
®
Where Luxury Is Affordable
JB-301 Rêve
Advertisement
Table of Contents

Related Manuals for mspa JB-301


Summary of Contents for mspa JB-301
- Page 1 Owner's Manual and Warranty Card JB-301 Rêve DO NOT RETURN MERCHANDISE TO YOUR DEALER STORE DIRECTLY. CALL MSPA AFTER SALES SERVICE CENTER FOR PRODUCT QUESTIONS OR CONTACT MSPA AT info@the-mspa.com Due to MSpa continuous product improvement, MSpa reserves the right to change specifications and product appearance, which may result in updates to the instruction manual without notice.
-
Page 2: Table Of Contents
To guide you in your initial MSpa experience, we are pleased to present you with this instruction manual. Please carefully and thoroughly read this manual entirety before using the product for the first time. We are delighted to welcome you to the MSpa family, and look forward to sharing with you the full spectrum of our expertise. -
Page 3: Safety Precautions
SAFETY PRECAUTIONS For your own safety and that of your product, make sure to following the safety precautions below. Fail to follow the instruction may result in serious injury, property damage or death. Improper installation or operation will void the warranty. READ, UNDERSTAND AND FOLLOW ALL INSTRUCTIONS DANGER Risk of Accidental Drowning. - Page 4 Residential electrical connection box must be located safely with a distance of at least 2m away from the spa. Electric installation should fulfill the local requirement or standards. Do not press down or uplift the control panel or put any heavy items on the control panel after installations.
- Page 5 several degrees above the normal body temperature 37°C(98.6°F). The symptoms of hyperthermia include an increase in the internal temperature of body, dizziness, lethargy, drowsiness, and fainting. The effect of hyperemia include failure to perceive heat; failure to recognize the need to exit spa; unawareness of impending hazard;...
- Page 6 For water already used, discharge it in time or use water chemicals for cleaning. Usually,change water every 3-5 days. Use MSpa chemical kit for disinfection in accordance with manufacture's instructions. Do not leave or set up the spa in temperature lower than 4°C(39°F) if heater is not operating.
- Page 7 Warning: Water protection levels of appliance at different product zones are different see the following scheme. ( Installation regulations comply to IEC 60364-7-702) 2.5 m Zone 2 Zone 1 Zone 2 2.5 m Zone 0 Zone 0 1.5 m 2.0 m 2.0 m 1.5 m NOTE-The measured zone dimensions are limited by walls and fixed partitions.
-
Page 8: Specifications And Product Overview
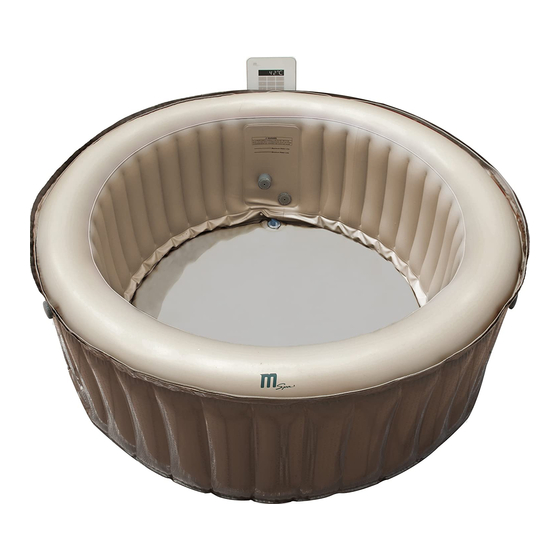
Inside Shape Height Weight / Code Capacity Capacity Dimensions Dimensions 700Ltr. 1.80m 1.40m 0.70m 36.5kg JB-301 / Rêve Round (184gal) (71") (55") (28") (80lbs) Control System Specs JB-301 Control System AC 220-240V / 50Hz Total Power 2300W Heater 1500W 220-240V / 150W (75W X 2sets, jet pressure: above 0.5 bar, 4 high efficiency hydrojets) - Page 9 PRODUCT OVERVIEW Packaging content ® ® ® NOTE: Drawings for illustration purpose only. Actual product may vary. Not to scale.
-
Page 10: First Use And Set-Up Preparation
REF. NO. PARTS DESCRIPTION QTY. PART NO. Spa cover with aluminum foil inside B9300884 Spa tub B9300868 Control panel with air pipe B9300109N Heat preservation bubble mat B9300672 Digital lock B9300671 Inflation hose B9300637 Manometer B0301964 Filter cartridge set (twin pack) B0301969 Spa cover inflatable bladder B9300670... - Page 11 Additional requirements for outdoor installation Make sure to set up the spa on a firm, level and smooth surface that is strong enough to support the full weight of the filled spa and maximum occupants. Do not set up the spa on grass or dirt, as this increases the amount of debris entering the spa, and damage the spa floor.
-
Page 12: Spa Set-Up
Lay out all the parts on the ground and make sure all parts are accounted for. Make sure the spa tub is right side up. (*For missing or damaged part, contact the MSpa Service Center) Spread the Heat Preservation Ground Mat over a cleared area. Spread out the spa liner over the ground mat. - Page 13 6.4 Press the Bubble button to inflate the spa tub until it is firm to tough. CAUTION: Do not over inflate. Over inflation may cause spa leakage and void the warranty. 6.5 Pay attention to the Manometer. The Yellow section appears when the spa is properly inflated. The Green section shows when water filling is completed.
- Page 14 NOTE: Deflation Instruction Spa Deflation 1. Unscrew the air valve cap on the spa pool to deflate the spa. 2. Once the deflation is completed, replace the cap back. Spa Bladder Deflation 1. Pull the valve cap out and squeeze the valve at its base until deflated. 2.
- Page 15 10.2 Turn the jet control knob (b) clockwise or anticlockwise to change the water stream power. The maximum power combo is air and water together. The minimum power is water jet only. There are 2 jet control knobs for the JB-301 spa. 10.1...
-
Page 16: Control Panel Operation
CONTROL PANEL OPERATION 1. ON/OFF Button 2. Jet Button 3. Bubble Button - Adjust the bubble level by pressing the button (L1:300W, L2: 500W, L3:720W) 4. Filter Button 5. Heater Button 6. Temperature UP & DOWN Button 7. Celsius/Fahrenheit Toggle Button 8. - Page 17 Step 2: Connect the power supply, press RESET button on the RCD. Step 3: If E3 shows, contact the MSpa System failure Service Center. If E3 is flashing, press ON/OFF, C/F,TEMP+ buttons once insequence, enter to the self-checking system.
-
Page 18: Water Maintenance And Chemicals
WATER MAINTAINCE AND CHEMICALS Water Sanitation The spa owner must regularly check and keep the spa water sanitized with scheduled maintenance (daily, if necessary). Adding sanitizer or other chemical will control bacteria and viruses present in the spa water. The maintenance of a proper water balance through appropriate use of sanitizers is the most important factor in maximizing the life and appearance of the spa as well as ensuring clean, healthy and safe water. - Page 19 Thoroughly dissolve each chemical before adding one to the water. MSpa Water Treatment Kit (*Optional) B0301858 MSpa Chemical Starter Kit (20 X 20g Bromine Tablets + 500ml Algaecide + Floating Dispenser) Disinfectant for water spas and pools. disinfectant, algaecide and bactericide.
-
Page 20: Drainage, Cleaning And Storage
DRAINAGE, CLEANING and STROAGE Spa Drainage 1. Turn off all the buttons (heater, filter and bubble) on the control panel unit. 2. Connect the drain valve adapter to a garden hose and point the other end of the garden hose to a suitable draining area with local environmental regulations (Fig.1) 3. -
Page 21: Disposal And Environmental Protection
NOTE: Glue is not included. pin hole pin hole Storage and Prepare for the Next Time Use 1. Drain and clean the spa by following the “Drainage” and “Spa Cleaning” sections 2. Reserve the set up instructions to deflate and disassemble the spa tub, spa control unit and air bladder 3. -
Page 22: Troubleshooting
Check power source RCD/PRCD is off Reset RCD/PRCD NO DISPLAY ON THE CONTROL RCD/PRCD broken Contact the MSpa Service Center PANEL Press the Reset button, control Contact the MSpa Service Center panel is not displayed Digital cable Connect the digital cable once again,... - Page 23 Increase filtration frequency WATER NOT CLEAN Dirty filter cartridge Clean or replace the filter cartridge in time Refer to the chemical manufacture's Improper water maintenance instruction CONTACT YOUR LOCAL MSPA DEALER OR SERVICE CENTER FOR ANY PRODUCT RELATED QUESTIONS OR PROBLEMS.
-
Page 24: Mspa Limited Warranty Policy
The warranty period begins on the date of purchase and MSpa requires presentation of the original proof to purchase to ascertain the date. During the warranty period, MSpa will either repair or replace, at its discretion, any defective products. Replacement products or repaired parts will be warranted for only the unexpired portion of the original warranty. -
Page 25: Mspa Service Center Locations
MSpa Service Center Locations Company Name / Address Country Tel. / Fax E-mail Pro prodejn í a poprodejní Czech Republic VHUYLV Y þHVNp 5HSXEOLFH D & na Slovensk u Tel.: +420 774 055 672 info@hanscraft.com Slovakia prosímkontaktujte HANSCRAFT, s.r.o. MSPA NORGE AS... -
Page 26: Mspa Warranty Card
For Spa pool (body) problem – Picture of defect part need to be attached along with the mail-in warranty card and is MANDATORY to claim the warranty For electric part(s) or control box problem – Send the control box to your local MSpa Service Center. See the Service Center Contact List in the manual.
Need help?
Do you have a question about the JB-301 and is the answer not in the manual?
Questions and answers