mspa OSLO Owner's Manual
Hide thumbs
Also See for OSLO:
- Owner's manual (19 pages) ,
- Owner's manual (100 pages) ,
- Quick installation manual (7 pages)
Table of Contents
Advertisement
Advertisement
Table of Contents

Related Manuals for mspa OSLO


Summary of Contents for mspa OSLO
- Page 1 Owner’s Manual OSLO F-OS063W...
-
Page 2: Table Of Contents
For FAQ, Manuals, Videos or Spare Parts, please visit www.the-mspa.com/support Due to MSpa's continuous product improvement process, MSpa reserves the right to change the specifications and appearance of its products, which may result in updates to the instruction manual without prior notice. MSpa Official Site... -
Page 3: Safety Precautions
SAFETY PRECAUTIONS For your own safety and that of your product, please make sure to follow the safety precautions below. Failure to follow the instructions may result in serious injury, property damage or death. Improper installation or operation will void the warranty. PLEASE ENSURE THAT YOU READ, UNDERSTAND AND FOLLOW ALL INSTRUCTIONS KEEP THIS MANUAL FOR FUTURE REFERENCE DANGER... - Page 4 ● Children being supervised not to play with the appliance. ● Make sure that the floor is able to support the expected load, which can be found on the specifications sheet. You will need to calculate the expected water capacity load plus the total weight. ●...
- Page 5 ● Do not use the spa if it is damaged on delivery and/or if it malfunctions in any way. ● Contact the MSpa service center for further instructions. ● Keep all pets away from the spa to avoid any damage.
- Page 6 Warning: The appliance's water protection levels vary across different product zones, as shown in the following diagram. (The installation regulations comply with IEC 60364-7-702.) 2.5 m Zone 2 Zone 1 Zone 2 2.5 m Zone 0 Zone 0 1.5 m 2.0 m 2.0 m 1.5 m...
-
Page 7: Specifications
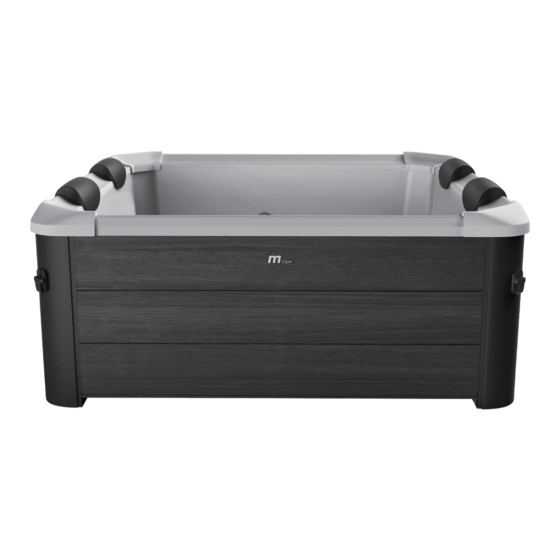
Notify customer service of any damaged or missing parts at the time of purchase. Plastic wood panel *3 Spa liner with Corner Open-end panel *1 Top trim *4 One with MSpa Logo LED light strip beam *4 Bottom seal *4 Buckle spa cover Foldable foam mat... -
Page 8: First Use And Setup Preparation
FIRST USE AND SETUP PREPARATION Site preparation and requirements ● The spa can be installed indoors or outdoors in around 15 minutes by 2 persons. For household use only. ● The spa must be set up on a flat, smooth, and supporting surface that can bear the maximum load of the filled spa with the listed maximum number of occupants. -
Page 9: Spa Setup
SPA SETUP... - Page 10 BUBBLE min. DOWN Long press the BUBBLE button for more than 3 seconds to stop inflation. Connect the light strip cable to the control box.
-
Page 11: Control Operation
CONTROLLER OPERATION Wi-Fi Icon Low Temperature Warning LED Display Filter Button HEATER Button Ozone Button BUBBLE Button Timer Button Adjust the bubble level by pressing the button (L1:300W, L2:500W, L3:720W ) Up Button DOWN Button JET Button UVC Button LED display °C °F Once powered-up, press the RESET on the PRCD. - Page 12 IMPORTANT: The following conditions will lead to slow water heating ● An ambient temperature lower than 10°C (50°F). ● An outdoor wind speed above 3.5-5.4m/s (8-12mph). ● If the air bubble function is activated when the heater is on. ● If the spa cover is not properly in place when the heater is on.
-
Page 13: Led Light Strip Operation
Celsius/Fahrenheit Toggle Button The temperature can be displayed in either Celsius or Fahrenheit. Press the DOWN button for 3 seconds to toggle between the two options. SAFETY LOCK Press the UP and DOWN buttons at the same time for 3 seconds to lock/unlock the controller. In safety lock mode, the controller is disabled and the spa retains all previous settings. -
Page 14: Water Maintenance And Chemicals
WATER MAINTENANCE AND CHEMICALS CAUTION: ALWAYS ENSURE THE SPA IS UNPLUGGED BEFORE STARTING ANY MAINTENANCE WORK TO AVOID THE RISK OF INJURY OR DEATH. FILTER CARTRIDGE MAINTENANCE 1. Inspect and clean the filter cartridge gently after each use. Follow the steps below: NOTE: Change the filter cartridge every 3-5 days, if the filter cartridge remains soiled and discolored. -
Page 15: Drainage, Cleaning And Storage
Water Treatment: ● It is good practice with an existing spa to keep all air jets open and valves closed to allow chemically treated water to flush through all pipework. ● Always follow the chemical manufacturer's instructions and health and hazard warnings. ●... - Page 16 Disassemble Instructions Remove all the parts in the reverse order of the installation steps. NOTE: To remove the liner, use an L-wrench to pry the retaining block out of the side panel slot. Do not drag the liner directly. Spa Bladder Deflation 1.
-
Page 17: Precautions For Winter Use
Storage and Preparation for Future Use 1. Drain and clean the spa by following the “Drainage” and “Spa Cleaning” sections. 2. Refer to the instructions to deflate air bladder. 3. Make sure all the spa components and accessories are thoroughly clean and dry before storage. -
Page 18: Troubleshooting
Tighten the in&outlet connection securely tight SPA WATER Drainage valve is not closed LEAKING Close the drainage valve. Contact the MSpa Service Center, completely if the spa is still leaking Temperature set too low Set a higher temperature Dirty filter cartridge... -
Page 19: Mspa Limited Warranty
● This warranty is valid only in the country of purchase in such countries where MSpa sells and services the same model with identical technical specifications.Warranty service outside the country of purchase is limited to the terms and conditions of the corresponding warranty in the country of service.
Need help?
Do you have a question about the OSLO and is the answer not in the manual?
Questions and answers