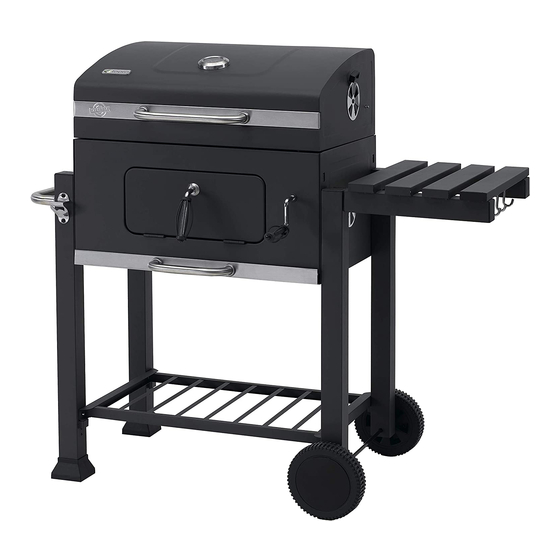
tepro TORONTO Instruction Manual
Trolley bbq
Hide thumbs
Also See for TORONTO:
- Instruction manual (12 pages) ,
- Instruction manual (72 pages) ,
- Instruction manual (32 pages)
Chapters
Table of Contents

Related Manuals for tepro TORONTO


Summary of Contents for tepro TORONTO
- Page 1 Bedienungsanleitung Grillwagen „TORONTO“ Holzkohlengrill t Instruction Manual TORONTO Trolley BBQ „ “ Version 2017/ Charcoal grill Art. Nr. 1061 P160157-TEPRO_1061_Toronto_DE_GB.indb 1 20/9/16 8:28 AM...
- Page 2 P160157-TEPRO_1061_Toronto_DE_GB.indb 2 20/9/16 8:28 AM...
-
Page 3: Table Of Contents
Inhalt Bevor Sie das Gerät benutzen ..................4 Lieferumfang ....................... 4-6 Bestimmungsgemäßer Gebrauch ................. 6 Zu Ihrer Sicherheit ....................... 6-8 Signalsymbole ......................6 Allgemeine Sicherheitshinweise ................. 6 Sicherheitshinweise ....................6-8 Montage ........................8-12 Vorbereitung ........................ 8 Benötigtes Werkzeug ....................8 Grill zusammenbauen .....................9-12 Grill aufstellen ....................... -
Page 4: Bevor Sie Das Gerät Benutzen
Bevor Sie das Gerät be- 1 Standbein LF, nutzen vorne links (5) Prüfen Sie nach dem Auspacken sowie vor jedem Gebrauch, ob der Artikel Schä- 1 Standbein LB, den aufweist. hinten links (6) Sollte dies der Fall sein, benutzen Sie den Artikel nicht, sondern benachrichtigen Sie 2 Endkappe für bitte Ihren Händler. - Page 5 1 Griffblende (17) 1 Seitenablage, für Holzkohletür rechts, mit 4 Haken (28) 1 Türgriff für (vormontiert) Holzkohletür (18) 1 Asche- auffangschale (29) 4 Lüftungsregler (19) 1 Griff für Asche- auffangschale (30) 2 Unteres Scharnier (20) 1 Warmhaltegitter (31) 1 Wagengriff (21) 1 Grillrost mit Rosteinsatz (32) 2 Wagengriffblende...
-
Page 6: Bestimmungsgemäßer Gebrauch
Zu Ihrer Sicherheit 9 Mutter M6 (H) Signalsymbole 2 Mutter M10 (I) Gefahr Hohes Risiko! Missachtung Warnung 2 Scharnierstift (J) kann zu Schäden für Leib und Leben führen. 3 Splint (K) Achtung Mittleres Risiko! Missachtung der Warnung kann 13 Unterlegscheibe Sachschäden verursachen. - Page 7 – Grundsätzlich einen Feuerlöscher und Beschädigungen, Reparaturen einen Erste-Hilfe-Kasten bereithalten oder anderen Problemen am Grill an und auf den Fall eines Unfalls oder unsere Servicestelle oder an einen Feuers vorbereitet sein. Fachmann vor Ort wenden. – Grill auf eine ebene, waagerechte, –...
-
Page 8: Montage
Gefahr Gesundheitsgefahr! Achtung Beschädigungsgefahr! Verwenden Sie keine Farblöse- Während des Gebrauchs kön- mittel oder Verdünner, um Fle- nen sich die Verschraubungen cken zu entfernen. Diese sind allmählich lockern und die Sta- gesundheitsschädlich und dür- bilität des Grills beeinträchtigen. fen nicht mit Lebensmitteln in –... -
Page 9: Grill Zusammenbauen
Grill zusammenbauen Schritt 4 Grill auspacken Den Grill auspacken und sämtliche Ver- packungsfolien entfernen. Das Verpa- ckungsmaterial außer Reichweite von Kindern aufbewahren und nach dem Zu- sammenbau des Grills den Vorschriften entsprechend entsorgen. Befolgen Sie die folgenden Schritte, um den Grill zusammenzubauen. Schritt 5 Schritt 1 Schritt 2... - Page 10 Schritt 7 Schritt 10 Schritt 8 Befestigen Sie die Kohlerostkurbel (15) von Innen mit der Bolzenschraube (N). Schritt 11 Hinweis: Für Schritt 8 werden 2 Personen benötigt. Schritt 9 Hinweis: Das Schließblech (16) muss vertikal mit dem Türgriff der Holzkohletür (18) positioniert werden. Schritt 12 Hinweis: Den Kohlerost (14) anheben, um ihn zu po- sitionieren und den Scharnierstift (J) einzusetzen.
- Page 11 Schritt 13 Schritt 16 Schritt 14 Schritt 17 Hinweis: Falls die Bohrlöcher im Standbein nicht exakt mit den Bohrlöchern im Flaschenöffner über- einstimmen, setzen Sie zuerst eine Schraube locker ein. Drehen Sie anschließend die zweite Schraube ein und ziehen Sie dann beide Schrauben gleichmä- ßig an, bis der Flaschenöffner fest sitzt.
- Page 12 Schritt 19 Schritt 20 c Schritt 21 Schritt 20 a Schritt 22 Schritt 20 b Wichtig: Alle Schrauben müssen fest angezogen sein. P160157-TEPRO_1061_Toronto_DE_GB.indb 12 20/9/16 8:28 AM...
-
Page 13: Grill Aufstellen
Grill aufstellen Bedienung Achtung Beschädigungsgefahr! Gefahr Verbrennungsgefahr! Während des Gebrauchs kön- Grill, sich darin nen sich die Verschraubungen befindliche Kohle und das allmählich lockern und die Sta- Grillgut werden während des bilität des Grills beeinträchti- Betriebs sehr heiß, so dass gen. -
Page 14: Wartung Und Reinigung
Wartung und Reinigung 6. Den Grillrost mit Rosteinsatz auflegen gewünschte Höhe Ihr Grill ist aus hochwertigen Materialien Kohlerostes mit der Kohlerostkurbel gefertigt. Um die Oberflächen zu reinigen (15) einstellen. und zu pflegen, beachten Sie bitte die folgenden Hinweise: 7. Legen Sie das Grillgut erst auf, wenn die Holzkohle mit einer hellen Gefahr Verbrennungsgefahr! Ascheschicht... -
Page 15: Entsorgung
Sie die Asche aus der Feuerschale entfernen, bevor sich Feuchtigkeit mit Produkt: Art. Nr. 1061, der kalten Asche verbindet, da dies zu Rostschäden führt. Grillwagen „Toronto“ • WICHTIG: Der Grill sollte immer vor Feuchtigkeit geschützt aufbewahrt Netto Gewicht: ca. 26 kg werden. -
Page 16: Garantie
Garantie Inverkehrbringer tepro Garten GmbH Sie haben einen qualitativ hochwertigen Grill gekauft. TEPRO GARTEN GmbH Carl-Zeiss-Straße 8/4 garantiert für ihre Grills im Rahmen ihrer D-63322 Rödermark Garantiebedingungen, normaler, Email: info@tepro-gmbh.de oder freizeitmäßiger und nicht gewerblicher backoffice@tepro-gmbh.de Nutzung für 24 (vierundzwanzig) Monate Web: www.tepro-gmbh.de... -
Page 17: Passendes Zubehör (Nicht Im Lieferumfang Enthalten)
Passendes Zubehör (nicht im Lieferumfang enthalten) Erhältlich im stationären- und Online-Handel. Guss-Grillrost-Einleger tepro Artikelnummer 8571 – zum Einlegen in das Rost in Rost System rund Ø 57 cm – Guss-Grillrost, ca. Ø 30,5 cm P160157-TEPRO_1061_Toronto_DE_GB.indb 17 20/9/16 8:28 AM... - Page 18 Guss-Pfanne-Einleger tepro Artikelnummer 8573 – zum Einlegen in das Rost in Rost System rund Ø 57 cm – Guss-Pfanne, ca. Ø 31,7 x 3,5 cm Pizzastein-Einleger tepro Artikelnummer 8572 – zum Einlegen in das Rost in Rost Sys- tem rund Ø 57 cm –...
- Page 19 Weiteres passendes Zubehör (nicht im Lieferumfang enthalten) Erhältlich im stationären- und Online-Handel. Universal-Guss-Grillrostset tepro Artikelnummer 8551 – emaillierte Guss-Grillroste – Set bestehend aus 2 Stück – Grillfläche: 2 x 41,5 x 27,5 cm Universal Abdeckhaube tepro Artikelnummer 8600 – aus hochwertig, strapazierfähigem Polyestergewebe 300x250D –...
- Page 20 Grillreinigungsbürste tepro Artikelnummer 8504 – Messingborsten – Kunststoff-Griff – zum Reinigen von Grillrosten Grillbesteck 3-teilig tepro Artikelnummer 8534 – bestehend aus Gabel, Wender und Zange – Wender mit Schneidvorrichtung und Flaschenöffner – Edelstahl – mit Kunststoff-Griffen – Länge: 42-45 cm P160157-TEPRO_1061_Toronto_DE_GB.indb 20...
- Page 21 Grillspieße 4er-Set tepro Artikelnummer 8535 – mit Kunststoff-Griffen – mit Grillgut-Schiebern – Länge: 45,5 cm Grillplanken Zedernholz 2er Set tepro Artikelnummer 8558 – Grillplanken sorgen für ein leichtes rauchiges Grillaroma – 2er Set je ca. 30 x 15 x 1,1 cm –...
- Page 22 Contents Before using the device ....................23 Scope of delivery ...................... 23-25 Intended use ........................25 For your safety......................25-27 Signal symbols ......................25 General safety instructions ..................25 Safety instructions ....................25-27 Assembly........................27-31 Preparation ........................ 27 Required tools ......................27 Assembling the BBQ .....................
-
Page 23: Before Using The Device
Before using the device 1 Support leg LF, left After unpacking and before every use, front (5) check whether the item shows any signs of damage. Should this be the case, do not use the 1 Support leg LB, left item, but notify your retailer. - Page 24 4 Handle bezel for lid 1 Locking plate, and ash collecting charcoal door (16) tray (27) 1 Side rack, right, with 1 Handle bezel (17) 4 hooks (28) for charcoal door (pre-assembled) 1 Ash collecting tray 1 Door handle for (29) charcoal door (18) 1 Handle for ash...
-
Page 25: Intended Use
For your safety 2 Screw (M5x28) Signal symbols Danger High risk! 4 Bolt (M6) (G) Failure to observe the warning can lead to potentially fatal 9 M6 Nut (H) injuries. 2 M10 Nut (I) Attention Moderate risk! Disregarding this warning can lead to property damage. - Page 26 – Place the BBQ on an even, horizontal, The BBQ, the charcoal, and the BBQ meat become very hot during use. Any contact secure, heat-resistant clean can result in serious burns. surface. – Keep sufficient distance from the hot – Set up the BBQ with at least 1 m parts, since any contact can lead to clearance from...
-
Page 27: Assembly
Danger Risks to children! Attention Risk of damage! While playing, children Do not use any strong or can become caught in the grinding solvents or abrasive pads, since these can attack packaging film and choke. the surfaces and leave behind –... -
Page 28: Assembling The Bbq
Assembling the BBQ Step 4 unpack BBQ Unpack the BBQ and dispose of all packaging materials. Keep the packaging materials out of the reach of children and dispose of them according to regulations after BBQ assembly. Take the following steps to assemble the BBQ. - Page 29 Step 7 Step 10 Step 8 Attach the charcoal grate crank (15) from the inside using the bolt (N). Step 11 Please note: For step 8, two people are required. Please note: The locking plate (16) must be positioned Step 9 vertically with the charcoal door (18).
- Page 30 Step 13 Step 16 Step 14 Step 17 Please note: If the boreholes in the support leg do not align perfectly with the boreholes in the bottle opener, insert one screw first. Next, screw in the second screw and then tighten both screws evenly until the bottle opener is sitting securely in place.
- Page 31 Step 19 Step 20 c Step 21 Step 20 a Step 22 Step 20 b Important: All screws must be tightly fastened. P160157-TEPRO_1061_Toronto_DE_GB.indb 31 20/9/16 8:28 AM...
-
Page 32: Setting Up The Bbq
Setting up the BBQ Operation Attention Risk of damage! Danger Risk of burning! During use, the screws can The BBQ, the charcoal and loosen slowly and impair the BBQ meat become very hot BBQ’s stability. during use. Any contact can result in serious burns. -
Page 33: Maintenance And Cleaning
6. Put the cooking grid in place and Danger Health risk! adjust the charcoal grate to the Do not use any decolourants desired height using the charcoal or thinners to remove stains. grate crank (15). These are harmful to health and must not come into contact 7. -
Page 34: Disposal
Clean possible rust Product: Item. No. 1061, spots and repair them with oven paint “Toronto” Trolley BBQ or paint that is heat-resistant up to at least 600 °C. It is important that you Net weight: approx. 26 kg... -
Page 35: Warranty
Distributor imperfections and differences in colour of the enamel coating and paint delamination tepro Garten GmbH caused by burnt grease, slight corrosions Carl-Zeiss-Straße 8/4 such as rust bloom. All other costs incurred, D-63322 Rödermark such as required working time, shipping, Email: info@tepro-gmbh.de or... -
Page 36: Matching Accessories (Not Included In The Delivery Scope)
(not included in the delivery scope) Available over-the-counter and online. Cast Iron BBQ Grate Insert tepro Item Number 8571 – For inserting into the grate in the grate system, approx. Ø 57 cm – Cast iron BBQ grate, approx. Ø 30.5 cm P160157-TEPRO_1061_Toronto_DE_GB.indb 36... - Page 37 Cast Iron Pan Insert tepro Item Number 8573 – For inserting into the grate in the grate system, approx. Ø 57 cm – Cast iron pan, approx. Ø 31.7 x 3.5 cm Pizza Stone Insert tepro Item Number 8572 – For inserting into the grate in the grate system, approx.
- Page 38 Further matching accessories (not included in the delivery scope) Available over-the-counter and online. universal cast-iron BBQ grate set tepro Item Number 8551 – enamelled cast-iron BBQ grate – set consists of 2 pieces – Grill surface: 2 x 41.5 x 27.5 cm...
- Page 39 BBQ Cleaning brush tepro Item Number 8504 – brass bristles – plastic handle – for cleaning BBQ grates BBQ skewers, 4-piece set tepro Item Number 8535 – with plastic handles – with meat sliders – Length: 45.5 cm BBQ planks, cedar wood, 2-piece set tepro Item Number 8558 –...
- Page 40 P140200-TEPRO_1061_Toronto_20141023 P160157-TEPRO_1061_Toronto_DE_GB.indb 40 20/9/16 8:28 AM...
Need help?
Do you have a question about the TORONTO and is the answer not in the manual?
Questions and answers