Table of Contents
Advertisement
Quick Links
Network Attached Storage
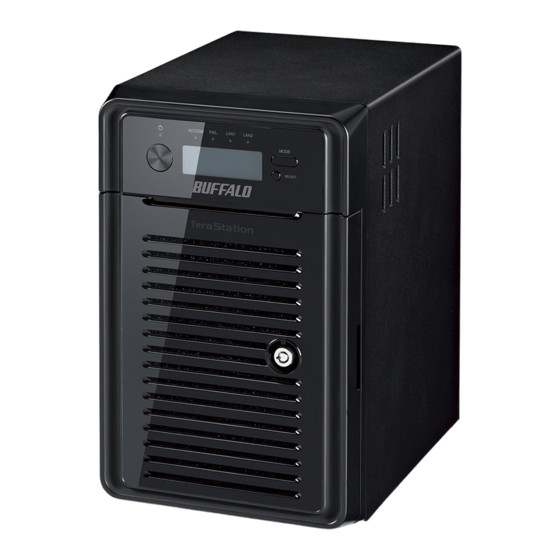
TeraStation WSS HR WSH5000N2 Series
User Manual
Americas: www.buffaloamericas.com
Europe: www.buffalo-technology.com
Please make sure to read this manual before using and follow the instructions. If you have any inquiries about
the product, contact the number on the warranty statement or the packing box. Do not discard this manual, the
warranty statement, or the packing box.
35021116-01
2016.05
Advertisement
Table of Contents

Related Manuals for Buffalo TeraStation WSS HR WSH5000N2 Series


Summary of Contents for Buffalo TeraStation WSS HR WSH5000N2 Series
- Page 1 Network Attached Storage TeraStation WSS HR WSH5000N2 Series User Manual Americas: www.buffaloamericas.com Europe: www.buffalo-technology.com Please make sure to read this manual before using and follow the instructions. If you have any inquiries about the product, contact the number on the warranty statement or the packing box. Do not discard this manual, the warranty statement, or the packing box.
-
Page 2: Table Of Contents
Installing Antivirus Software ............14 Chapter 2 Preinstalled Software ........ 15 RAID Builder .................. 15 Buffalo Dashboard ................ 16 Errors and Statuses on Buffalo Dashboard ..........18 Email Notification ................. 19 Buffalo Replication ............... 20 TeraStation Backup and Replication Folder Settings ....21 Chapter 3 Managing Storage........ - Page 3 Preparing a Backup Destination .............25 Recovering Backup Data .................31 Replication ..................35 Differences Between Buffalo Replication and DFS Replication ...35 Before Using Replication .................35 Buffalo Replication ..................36 DFS Replication ..................38 Chapter 5 Additional Settings ........61 Changing Server Name, Workgroups, and Domains ....61 Changing the Password ..............
- Page 4 Chapter 7 Utilities ............92 NAS Navigator2 for Windows ............92 Changing the IP Address .................94 NAS Navigator2 for Mac OS ............95 Changing the IP Address .................96 NovaBACKUP ................. 96 Chapter 8 Troubleshooting ......... 98 TeraStation Cannot Be Set Up ............98 Shared Folders Suddenly Do Not Open ........
- Page 5 Chapter 10 Regulatory Compliance Information ..105 For Customers in the United States ........... 105 For Customers in Europe ............105...
-
Page 6: Chapter 1 Getting Started
Fail LED If there is an error on the drives, this LED glows amber. Open Buffalo Dashboard to see error messages. LAN1 LED When LAN port 1 is connected, this LED glows green. It blinks when the connection is active. - Page 7 UPS Port Connect to a UPS. USB 3.0 Port Compatible Buffalo USB 3.0 hard drives, USB memory devices, and USB UPSs can be connected. USB hubs are not supported. USB 2.0 Port Compatible Buffalo USB hard drives, USB memory devices, and USB UPSs can be connected. USB hubs are not supported.
-
Page 8: Opening Windows Storage Server
Use this slot to secure your TeraStation with a cable lock (not included). Link LED Glows amber when the unit is connected to a network. Act LED This LED shows network activity. It blinks amber when the TeraStation is accessed over the network. Opening Windows Storage Server To connect Windows Storage Server, follow the procedure below. -
Page 9: Changing Settings
Changing Settings Configuring Date and Time Click the time in the system tray of Windows Storage Server. Click Change date and time settings - Change date and time, select the current date and time, and click OK. Note: In the Internet Time tab, click Change settings, then select Synchronize with an Internet time server. The date and time can be obtained automatically. - Page 10 Right-click Shares and click New Share. Click Next. Enter the path of an existing folder or a new folder, then click Next. Notes: • Enter "D:\Share" into the folder path to create the shared folder for the first time. • If the message "The system cannot find the specified path. Do you want to create it?" is displayed, click Yes.
- Page 11 Enter a name for the share and a description (optional), then click Next. Check Customize permissions, then click Custom.
- Page 12 Choose Everyone and check Allow for "Change".
- Page 13 In the Security tab, click Edit - Add. Enter "Everyone" under "Enter the object names to select", then click OK.
- Page 14 Choose "Everyone", then check Allow for Modify. Click OK - OK - Finish - Finish. Click Local Users and Groups in Computer Management. Double-click Users - Guest. In the General tab, uncheck Account is disabled, then click OK. Notes: Enable a guest account: (1) From the Windows Storage Server Start menu, open Administrative Tools, then double-click Computer Man- agement.
-
Page 15: Turning The Terastation On And Off
Turning the TeraStation On and Off Press the power button on the TeraStation to turn it on and off. Or you can turn off your TeraStation by following the procedure below. From the Windows Storage Server Start menu, point the cursor to the upper-right hand corner of the screen, then click the icon. -
Page 16: Chapter 2 Preinstalled Software
Chapter 2 Preinstalled Software The following software is preinstalled on the TeraStation. • RAID Builder • Buffalo Dashboard • Email Notification • Buffalo Replication • TeraStation Backup and Replication Folder Settings RAID Builder RAID Builder is used to create RAID arrays. See the "Managing Storage" section in chapter 3 for more details. To launch RAID Builder, you must be logged in as a member of the Administrators group in Windows Storage Server. -
Page 17: Buffalo Dashboard
Buffalo Dashboard Buffalo Dashboard displays system information and dismounts hard drives. To launch it, double-click the Buffalo Dashboard icon in the system tray. Note: This software cannot be accessed by multiple users at the same time. Before launching it, make sure that... - Page 18 Firmware: Displays the firmware version of the TeraStation. Check for updates: Enables or disables checking for new firmware releases. When a new firmware version is available, you will be notified here. Manufacturer: Displays "Buffalo Inc.". Temperature Displays the temperature of the system. Displays the fan rpm.
-
Page 19: Errors And Statuses On Buffalo Dashboard
Displays error or information codes. For more detail information, refer ERROR to the "Errors and Statuses on Buffalo Dashboard" section below. Note: "Options" and "Check for updates" functionalities are only available when logged in as an administrator. Errors and Statuses on Buffalo Dashboard... -
Page 20: Email Notification
Message Description Corrective Action Make sure that the backup job is configured correctly, and that the NAS is on and not in standby mode. If the backup job still fails, A backup job has failed. check the status of NAS, the network, and the Backup Failure backup source and destination. -
Page 21: Buffalo Replication
Your TeraStation can be synchronized with another TeraStation, replicating most data. See the "Replication" section in chapter 4 for more details. To launch Buffalo Replication, you must be logged in as a member of the Administrators group in Windows Storage Server. -
Page 22: Terastation Backup And Replication Folder Settings
TeraStation Backup and Replication Folder Settings Before using it as a backup device on the network, configure your TeraStation in "TeraStation Backup and Replication Folder Settings". To launch TeraStation Backup and Replication Folder Settings, you must be logged in as a member of the Administrators group in Windows Storage Server. - Page 23 Items Descriptions To remove a folder from the list of available backup targets, select the folder and click this button. Save Saves the settings. Close Exits TeraStation Backup & Replication Folder Settings.
-
Page 24: Chapter 3 Managing Storage
Chapter 3 Managing Storage Creating Volumes Notes: • To create a RAID volume, use RAID Builder instead of the Disk Management option in Windows Storage Server. • When volumes are deleted or formatted, or the RAID mode is changed, all data stored on the volumes is erased. - Page 25 You can also format the existing RAID array using Format RAID on RAID Builder. Note: When the "Drive Rebuilding" message is displayed under "Error" on Buffalo Dashboard, a new RAID array cannot be created. Wait until the message disappears, then try again.
-
Page 26: Chapter 4 Backup And Replication
Any data stored in the TeraStation or LinkStation may be lost through hard drive failure or wrong operation. To avoid losing data accidentally, back up your data regularly. You can back up data using the following functions: • Windows Server Backup • Buffalo Replication • DFS Replication Back Up in Windows Storage Server Preparing a Backup Destination... - Page 27 In Server Manager, click Tools - Windows Server Backup. The "Windows Server Backup" wizard will start. Click Local Backup. If "Reading data; please wait..." is displayed, please wait until any messages disappear.
- Page 28 Right-click on "Local Backup" and select Backup Schedule..The "Backup Schedule Wizard" will start. Click Next. Select "Custom" and click Next.
- Page 29 Click Add Items. Select the backup source folders or drives and click OK.
- Page 30 Click Next.
- Page 31 Specify the schedule to run the backup and click Next.
-
Page 32: Recovering Backup Data
Select the backup destination and click Next. Step through the wizard to finish. Recovering Backup Data Follow the procedure below to recover the backup data to the TeraStation. Note: Bare-metal recovery is not supported for the backup data stored using the backup function of Windows Storage Server. - Page 33 In Server Manager, click Tools - Windows Server Backup. The "Windows Server Backup" wizard will start. Click Local Backup. If "Reading data; please wait..." is displayed, please wait until any messages disappear.
- Page 34 Right-click on "Local Backup" and click Recover..The recovery wizard will start. Select where the backup data is saved and click Next. When "A backup stored on another location" is selected, specify the folder of the backup data in the next page.
- Page 35 Select the date when a data backup occurred and click Next.
-
Page 36: Replication
Differences Between Buffalo Replication and DFS Replication To use DFS Replication, your TeraStation needs to be joined to an Active Directory, while Buffalo Replication does not require joining an AD domain. Buffalo Replication can also specify another TeraStation or LinkStation as a replication target. -
Page 37: Buffalo Replication
170 characters may not be copied correctly. Buffalo Replication If using Buffalo Windows Storage Server-installed TeraStations as both the replication source and target, start from step 1. If using a different TeraStation as the replication target, refer to that TeraStation's user manual to configure it as a replication target. - Page 38 LAN port or changing the IP address of the replication source or target TeraStation. If the network settings are changed, refresh the list of TeraStations and LinkStations as follows. Click Buffalo Replication in the Start menu on Windows Storage Server. Click Refresh and refresh the detected TeraStations and LinkStations list.
-
Page 39: Dfs Replication
DFS Replication DFS (Distributed File System) is a set of client and server services that allows Windows users to organize many distributed SMB file shares into a distributed file system. To use DFS Replication, the TeraStation must be joined to an Active Directory domain. Make the necessary settings as detailed below to use DFS Replication on Windows Storage Server. - Page 40 Select "Domain", enter a domain name, and click OK. Enter a administrator username and password for the Active Directory domain controller.
- Page 41 Click OK when the following message is displayed. Click OK again. Click Close.
- Page 42 Click Restart Now and restart your computer to apply settings. Installing DFS In Server Manager, click Dashboard - Add roles and features. Click Next.
- Page 43 Select "Role-based or feature-based installation" and click Next. Click Next.
- Page 44 Select "DFS Namespaces" and "DFS Replication" in "File and Storage Services" - "File and iSCSI Services". Select "Include management tools (if applicable)" and click Add Features.
- Page 45 Click Next. Click Install.
- Page 46 Click Close to finish. Creating Namespaces In Server Manager, click Tools - DFS Management.
- Page 47 Click Namespaces - New Namespace. Enter a hostname for the namespace server and click Next.
- Page 48 Enter a name for the namespace and click Next.
- Page 49 Select Domain-based namespace and click Next. Click Create. Click Close when the New Namespace Wizard finishes. In DFS Management, click Namespaces and the name you created through the wizard. Then click New Folder.
- Page 50 Enter a folder name and click OK. Enter a path to the folder or select from the list by clicking Browse. Click OK. Click OK again.
- Page 51 Configuring DFS Replication In Server Manager, click Tools - DFS Management. Click Replication Click New Replication Group.
- Page 52 Select the type of replication group and click Next.
- Page 53 Enter a name for the replication group and click Next.
- Page 54 Enter the hostname of the file server for the replication source and click Next.
- Page 55 Click Add.
- Page 56 Enter the path of the replication source and click OK.
- Page 57 Click Next.
- Page 58 Enter the hostname of the file server for the replication target and click Next.
- Page 59 Enter the path of the replication target. Alternatively, click Browse and select the folder from the list. Click Next.
- Page 60 Click Next again. Note: You have options to specify the network band and the date and time. To configure bandwidth, select Replicate continuously using the specified bandwidth and the bit rate from the drop-down list. To configure the schedule time, select Replicate during the specified days and times and click Edit Schedule. You can select the date and time in the displayed window.
- Page 61 Click Create. Click Close when finished. DFS replication is now configured. Note: It may take some time before actual replication is caught up.
-
Page 62: Chapter 5 Additional Settings
Chapter 5 Additional Settings Changing Server Name, Workgroups, and Domains From the Windows Storage Server Start menu on the Windows Storage Server, right-click This PC and choose Properties. Click Change settings under Computer name, domain, and workgroup settings. In the Computer Name tab, click Change. -
Page 63: Changing The Password
Enter the computer name, choose domain or workgroup, and click OK. Note: The computer name should have 16 characters or less. If more than 16 characters are entered, all characters from the 17th character on are ignored. Changing the Password The default password for the TeraStation's administrator account is "password". -
Page 64: Changing Other Users' Password
Click Change a password. Enter the current administrator's password and a new password (twice), then press the Enter key. Changing Other Users' Password From the Windows Storage Server Start menu on the Windows Storage Server, open Administrative Tools, then double-click Computer Management. Click Local Users and Groups, then double-click Users. - Page 65 Right-click the user whose password will be changed and click Set Password. Click Proceed.
-
Page 66: Adding A User
Enter a new password (twice). Adding a User From the Windows Storage Server Start menu, open Administrative Tools, then double-click Computer Management. Click Local Users and Groups. - Page 67 Right-click Users and click New User.
-
Page 68: Connecting To Windows Storage Server With Standard Accounts
Enter the desired settings and click Create. Click Close. Connecting to Windows Storage Server with Standard Accounts Accounts not belonging to the Administrators group cannot connect to Windows Storage Server through the remote desktop. Those accounts must be added to the "Remote Desktop Users" group. Follow the procedure below to add accounts to the group. - Page 69 Double-click Remote Desktop Users. Click Add.
- Page 70 Click Advanced. Click Find Now.
-
Page 71: Adding A Group
Select the user to be joined as a group member and click OK. Click OK twice. Adding a Group From the Windows Storage Server Start menu, open Administrative Tools, then double-click Computer Management. Click Local Users and Groups. - Page 72 Right-click Groups and choose New Group. Enter a group name and click Add.
- Page 73 Click Advanced. Click Find Now.
- Page 74 Select the users to be registered to the group, then click OK. Click OK.
-
Page 75: Email Notification
Click Create. Click Close. Email Notification Your TeraStation can send you email reports daily, or when settings are changed or an error occurs. Notification emails may be triggered by any of the following events: • Hard drive status at scheduled time • Hard drive read error • TeraStation booted • Fan error... - Page 76 Select the "Enable email notification" check box. Click New and enter an email address. Enter your mail server settings and choose what events will trigger notification. Click Apply to finish the email notification settings. You can send a test email when clicking Test Message. Items Descriptions Enable email notification...
-
Page 77: Specifying Replication Event Ids
If you select "Specify event ID" in the email notification settings, a notification email will be sent when the specified event occurs. If using Buffalo Replication, enabling this function is recommended. From the Windows Storage Server Start menu, click Email Notification. - Page 78 Event ID Type Description 1003 Error Could not connect to the replication target. 1004 Error Timeout occurred. 1005 Error Could not authenticate with the replication target using the password. 1006 Error Replication target not found. 1017 Error Connection disconnected. 1026 Error Replication target device not found.
-
Page 79: Acquiring Windows Event Logs
Event ID Type Description 4001 Error Could not read the configuration file. 4002 Error Could not open the configuration file. Repeat steps 4 through 7 for the number of events to be added. Click Apply. Click New. Select "Application from the "Log Type" list. Enter "TeraSync"... - Page 80 Double-click Windows Logs. Right-click on either "Application", "Security", "Setup", or "System" in the left-side menu to determine the logs to be saved. Click Save All Events As. Specify the desired location and enter a filename, then click Save. Note: Do not change the file type. When the "Display Information"...
-
Page 81: Chapter 6 Replacing Hard Drives
"SYSTEM DOWN" message will be displayed on the LCD panel. Notes: • For the replacement drive, use a Buffalo OP-HDBN/B series drive. The new drive should be the same size as the replacement drive. - Page 82 Open the front cover with the included key. Verify the status LEDs. The LED for the failed drive glows amber. Push the unlock button of the drive whose status LED is glowing amber and swing the locking mechanism out. Do not unplug and remove the hard drives with the status LED lit green. If you do, it may cause data loss or the unit to malfunction.
- Page 83 Pull out the drive cartridge and remove it from the unit. Remove the drive from the cartridge. Install a new drive into the cartridge. Replace the four screws.
-
Page 84: Two Drive Down" Is Displayed On The Lcd Panel
Insert the new drive into the empty slot, slide the drive in with the the locking mechanism open, and swing the lock back down until it clicks into the place. Close the front cover with the key. The "RAID-x RECOVERING 0%" message will be displayed on the LCD panel after 3 minutes. RAID-6 RECOVERING 0% When "RAID-x NORMAL"... - Page 85 Open the front cover with the included key. Verify the status LEDs. The LED for the failed drive glows amber. Push the unlock button of the drive whose status LED is glowing amber and swing the locking mechanism out. Do not unplug and remove the hard drives with the status LED lit green. If you do, it may cause data loss or the unit to malfunction.
- Page 86 Pull out the drive cartridge and remove it from the unit. Remove the drive from the cartridge. Install a new drive into the cartridge. Replace the four screws.
- Page 87 Insert the new drive into the empty slots, slide the drive in with the locking mechanism open, and swing the lock back down until it clicks into the place. The "RAID-6 RECOVERING 0%" message will be displayed on the LCD panel after 3 minutes. RAID-6 RECOVERING 0% When "RAID-6 ONE DRIVE DOWN"...
-
Page 88: System Down" Is Displayed On The Lcd Panel
The "RAID-6 RECOVERING 0%" message will be displayed on the LCD panel after 3 minutes. RAID-6 RECOVERING 0% When "RAID-6 NORMAL" is displayed, hard drive replacement is finished. RAID-6 NORMAL "SYSTEM DOWN" Is Displayed on the LCD Panel Note: If the "SYSTEM DOWN" is displayed, the data may be lost. If you can access the TeraStation, back up data before replacing drives. - Page 89 Do not unplug and remove the hard drives with the status LED lit green. If you do, it may cause data loss or the unit to malfunction. Pull out the drive cartridge and remove it from the unit. Remove the drive from the cartridge.
- Page 90 Install a new drive into the cartridge. Replace the four screws. Insert the new drive into the empty slots, slide the drive in with the locking mechanism open, and swing the lock back down until it clicks into the place.
- Page 91 Close the front cover with the key. Turn the TeraStation off first, then turn it on while holding down the mode button. "RAID-0 NORMAL" will be displayed on the LCD panel. RAID-0 NORMAL Create a RAID volume. Refer to the "Creating a RAID Volumes" section in chapter 3. For RAID 6 Volume: Open the front cover with the included key.
- Page 92 Close the front cover with the key. Turn the TeraStation off, then turn it on while holding down the mode button. "RAID-6 NORMAL" will be displayed on the LCD panel. RAID-6 NORMAL If either "RAID-6 ONE DRIVE DOWN", "RAID-6 TWO DRIVE DOWN", or "SYSTEM DOWN" is displayed, try the procedure described in each section above.
-
Page 93: Chapter 7 Utilities
Chapter 7 Utilities NAS Navigator2 for Windows NAS Navigator2 is a utility program that makes it easy to display Windows Storage Server, change the IP address, or check its hard drive in remote desktop. If you installed the TeraStation with the TeraNavigator, NAS Navigator2 was installed automatically. - Page 94 Name Description Assigns all the LinkStations' and TeraStations' shared folders Map All Remote Shares to as network drives. This is available only when a shared Drive Letters folder has been created. Creates a desktop shortcut to the selected LinkStation's or Create Desktop Shortcut TeraStation's shared folders.
-
Page 95: Changing The Ip Address
Name Description Opens the selected LinkStation's or TeraStation's shared Browse Shares folders. Open Remote Desktop Opens Windows Storage Server in remote desktop. NAS Name Opens the selected LinkStation's or TeraStation's properties Properties page. Creates a desktop shortcut to the selected LinkStation's or Create Shortcut TeraStation's shared folders. -
Page 96: Nas Navigator2 For Mac Os
NAS Navigator2 for Mac OS NAS Navigator2 is a utility program that makes it easy to display Windows Storage Server, change the IP address, or check its hard drive in remote desktop. If you installed the TeraStation with the TeraNavigator, NAS Navigator2 was installed automatically. -
Page 97: Changing The Ip Address
NovaBACKUP is a Windows utility that lets you back up the data on your computer or TeraStations. The NovaBACKUP installer is available from http://d.buffalo.jp/WSH5000N2/. Select the region and model to go to your specific model's d.buffalo website. Download the NovaBACKUP installer and install it onto your computer. - Page 98 To download the installer, you will need the serial number of your TeraStation. The serial number is printed on the label on the back of the unit.
-
Page 99: Chapter 8 Troubleshooting
Chapter 8 Troubleshooting TeraStation Cannot Be Set Up If the TeraStation could not be located on NAS Navigator2 or connected to through the remote desktop, refer to the possible causes and corrective actions below: • Cause 1. The cables are not connected correctly: The cables are not physically connected, or there may be a contact defect. -
Page 100: Shared Folders Cannot Be Accessed Or System Is Unstable
Shared Folders Cannot Be Accessed or System Is Unstable This usually happens because too many software applications are running in Windows Storage Server, causing a memory shortage. Exit or uninstall some of the software running in Windows Storage Server, then restart the TeraStation. -
Page 101: Errors On The Lcd Panel
If the error still remains, contact Buffalo technical support. A work memory error occurred on the array controller. Shut off the unit, wait Work RAM Error 10 seconds, then turn it back on. If the error still remains, contact Buffalo System Halted technical support. -
Page 102: Characters Added When "One Down" Or "System Down" Occurs
Divide or FPP or Invalid Code Err System INTERRUPT Error System SBI INT Occur System RIE INT:0x000 Internal error. The unit cannot be accessed. Contact Buffalo technical System AE INT:0x000 support. System TRAP Error Buffer Manager Queue Error Cache Buffer... - Page 103 "Replacing Hard Drives" section in chapter 6. Drive disconnected. Reconnect the drive. Note: If "S", "Z", or "z" is displayed, the hard drives may be malfunctioning. Contact Buffalo technical support while keeping the TeraStation power on. For Software Errors Replace the hard drive by referring to the The hard drives may be malfunctioning.
-
Page 104: Chapter 9 Appendix
Note: For other installed roles and features, see "ROLES AND FEATURES", which you can reach by clicking "Local Server" on the left side menu in "Server Manager". Specifications Check the Buffalo website for information about the latest products and specifications. Installed System Microsoft Windows Storage Server 2012 R2 Standard IEEE 802.3ab (1000BASE-T) - Page 105 UPS Port 1 D-sub 9 pin (male) If a hard drive in the TeraStation malfunctions, replace it with a Buffalo OP-HDBN/B Internal Hard Drive series of the same capacity. The drives are available from the Buffalo website. Power Supply AC 100–240 V, 50/60 Hz...
-
Page 106: Fcc Statement
Chapter 10 Regulatory Compliance Information For Customers in the United States FCC Statement This equipment has been tested and found to comply with the limits for a Class A digital device, pursuant to part 15 of the FCC Rules. These limits are designed to provide reasonable protection against harmful interference when the equipment is operated in a commercial environment. - Page 107 Dette produkt kan forårsage interferens hvis det bruges i beboelsesområder. En sådan anvendelse skal undgås, medmindre brugeren tager specielle foranstaltninger for at reducere elektromagnetiske emissioner for at forhindre interferens med modtagelse af radio- og tv-udsendelser. Der må kun bruges de kabler og det tilbehør der er inkluderet i pakken. Der må ikke bruges andet tilbehør eller kabler, medmindre det er udtrykkeligt beskrevet i dokumentationen.
- Page 108 Italiano Questo è un prodotto di Classe A. In ambienti domestici il prodotto può causare radiointerferenza, nel qual caso potrebbe rendersi necessaria l'adozione di opportune misure. Questo prodotto può causare interferenze se usato in zone residenziali. Evitare l'uso in queste zone a meno che l'utente non intraprenda azioni specifiche per ridurre le emissioni elettromagnetiche e impedire le interferenze alla ricezione di trasmissioni radio-televisive.
- Page 109 Svensk Detta är en Klass A-produkt. I en hushållsmiljö kan denna produkt orsaka radiostörningar, och användaren kan i så fall begäras att vidta lämpliga åtgärder. Den här produkten kan oraka störningar om den används i bostadsområden. Sådan användning måste undvikas om inte användaren vidtar speciella åtgärder för att minska elektromagnetiska sändningar för att förhindra störningar i mottagningen av radio- och tv-sändningar.
Need help?
Do you have a question about the TeraStation WSS HR WSH5000N2 Series and is the answer not in the manual?
Questions and answers