Table of Contents
Advertisement
Quick Links
Advertisement
Table of Contents

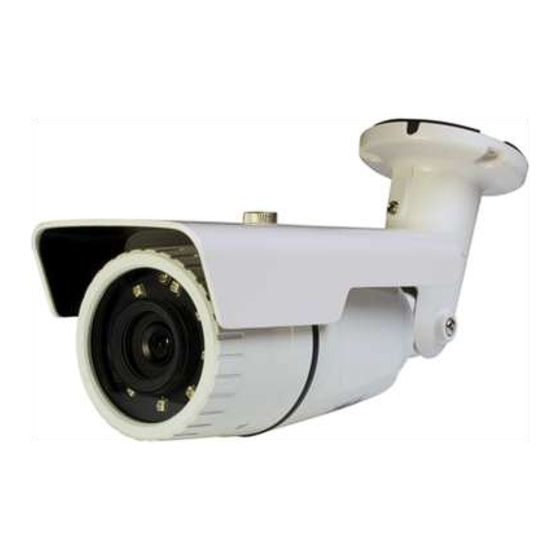
Summary of Contents for Riva RC6802HD-6211
- Page 1 RC6802HD-6211 Installation Guide www.rivatech.de...
- Page 2 INFORMATION TO USER CAUTION RISK OF ELECTRIC SHOCK, DO NOT OPEN CAUTION: TO REDUCE THE RISK OF ELECTRIC SHOCK, DO NOT REMOVE COVER (OR BACK). NO USER SERVICEABLE PARTS INSIDE. REFER SERVICING TO QUALIFIED SEERIVCE PERSONEL. This symbol is intended to alert the user to the presence of un-insulated “dangerous voltage”...
-
Page 3: Table Of Contents
Table of Contents 1. FEATURES ......................4 2. PACKAGE CONTENTS ..................5 3. PART NAMES ....................6 4. INSTALLATION ....................7 4.1. Installation Template ..............8 4.2. Adjust the angle of the camera ............9 4.3. Setting the Image Attribute ............. 9 5. -
Page 4: Features
1. FEATURES Camera Full HD Indoor/Outdoor IR Bullet IP Camera High quality compression in real time streaming 1/2.9” High Quality CMOS Image Sensor True day & night and digital WDR ONVIF Support Streaming Dual streaming mode ... -
Page 5: Package Contents
2. PACKAGE CONTENTS The package contains main camera, DC power adaptor, Universal plugs, screws, anchors, quick installation guide, hex wrench driver, and silicon waterproof band. Unpack carefully and handle the equipment with care. Camera DC power adaptor Universal plugs Screws and anchors Quick installation guide Hex wrench driver Silicon waterproof band... -
Page 6: Part Names
3. PART NAMES Green: DI White : DI Com Orange: DO Yellow: DO Com ⑥ * Models herein and their appearance are subject to change without any prior notice. 1 Sunshield Position the sunshield to prevent direct sunshine. 2 Reset button The reset button can be used for restarting the device or resetting it to Factory 6.3. -
Page 7: Installation
4. INSTALLATION Place the installation template (paper) that is included in the package on the desired installation surface. Drill three holes in correct positions based on the template paper, and insert anchor blocks into the holes. Place the camera body and match three alignment holes with three anchor... -
Page 8: Installation Template
on template 4.1. Installation Template (Unit: mm) Installation template image’s size scale in this installation guide is not 1:1. The correct-size template design paper can be found inside the Caution package separately. www.rivatech.de... -
Page 9: Adjust The Angle Of The Camera
4.2. Adjust the angle of the camera 1) Adjust the camera to the desired angle by unscrewing the joints referring to the following pictures. Adjust this joint to Tilting adjustment Panning install it on the adjustment wall 2) Connect to the web page of the device to see its real-time image in order to check 6.2. -
Page 10: Connections
5. CONNECTIONS GREEN : DI WHITE : DI ORNAGE : DO YELLOW : DO DC 12V www.rivatech.de... - Page 11 1 Sensor (DI) connection The camera provides 1 channel D/I. It can be connected to either a voltage type sensor or a relay type sensor as the following figures. Settings can be done through the camera’s webpage. Input voltage range: 0VDC minimum to 5VDC maximum, Max 50mA Input voltage: VIL=0.8V(max), VIH=2.0V(min) Do not exceed the maximum input voltage or relay rate.
-
Page 12: Configuration
6. CONFIGURATION 6.1. Set up network environment The default IP address of the device is 192.168.XXX.XXX. Users can identify the IP address of the device from converting the MAC address’s hexadecimal numbers, which is attached to the device. Be sure that the device and PC are on a same area network before running the installation. -
Page 13: Custom Ip Environment
2. Start the Microsoft® Internet Explorer web browser and enter the address of the device. 3. Web streaming and device configurations are supported through ActiveX program. When the ActiveX installation window appears, authorize and install the ActiveX. 6.1.2. Custom IP Environment IPAdminTool and the manual can download from homepage. -
Page 14: View Video On Web Page
3. In the IP Setup’s window, information under ‘Local Network information’ displays the user/PC’s network area information. Those information need to be incorporated to the IP Address, Subnet Mask, Gateway, and DNS boxes, except the last 2 sets of IP Address, which are to be the unique numbers for the device. Refer to the image above for the setting 4. -
Page 15: Access Through Ipadmin Tool
6.2.1. Access through IPAdmin Tool IPAdminTool automatically searches all activated network encoders and IP cameras and shows the product name, IP address, MAC address and etc. IPAdminTool and the manual can download from homepage. www.rivatech.de 1. From the IPAdminTool’s product list, select the device by highlighting it. 2. -
Page 16: Reset
Password: pass More Information To learn more about using other features of your devices, refer to the manuals as “RIVA Web Interface Manual Full HD Series” or “VCAsys Manual Full HD Series”, which is available on homepage. www.rivatech.de www.rivatech.de... -
Page 17: Appendix (A): Specifications
APPENDIX (A): SPECIFICATIONS Summary Camera Module Image Sensor 1/2.9” 1080p CMOS Effective Pixels 1920x1080 CMOS Scanning Progressive scanning system Resolution 1920 x 1080 Min. ELECTRICAL Color: 1.0 lux, BW: 0 lux (IR LED On) Illumination AGC Control Auto Lens 4.3mm F2.0 Day &... -
Page 18: Electrical Characteristics
Electrical Characteristics Power Source DC 12V / PoE Power Consumption 4.44W @ DC 12V Video Output Audio Input Audio Output Max 50mA@5VDC, TTL level, VIL=0.8V(max), VIH=2.0V(min) Max 100mA@24VDC On-state resistance: 50 Ω (max continuous) Environment Condition Operating Range Operating Temperature [DC12V] -20°C ~ 50°C (-4°F ~ 122°F) [PoE] -20°C ~ 45°C (-4°F ~ 113°F) Operating Humidity... -
Page 19: Appendix (B): Dimensions
APPENDIX (B): DIMENSIONS (Unit: mm) www.rivatech.de... -
Page 20: Appendix (C): Hexadecimal-Decimal Conversion Table
APPENDIX (C): HEXADECIMAL- DECIMAL CONVERSION TABLE Refer to the following table when you convert the MAC address of your device to IP address. www.rivatech.de... -
Page 21: Revision History
REVISION HISTORY MAN# DATE(M/D/Y) Comments 01A.01 07/05/2013 First release version www.rivatech.de...

Need help?
Do you have a question about the RC6802HD-6211 and is the answer not in the manual?
Questions and answers