Gigaset Maxwell 10 Administration Manual
Gigaset pro series
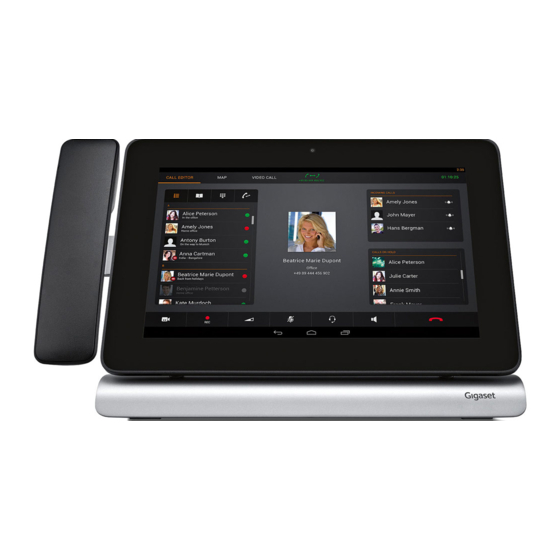
Hide thumbs
Also See for Maxwell 10:
- Online manual (38 pages) ,
- Installation manual (11 pages) ,
- Manual (11 pages)
Table of Contents
Advertisement
Quick Links
Advertisement
Table of Contents

Related Manuals for Gigaset Maxwell 10


Summary of Contents for Gigaset Maxwell 10
- Page 1 Maxwell 10 Administration...
-
Page 2: Table Of Contents
Contents Contents Overview ............... . . 4 Connectors . - Page 3 Contents Service (Customer Care) ............40 Questions and answers .
-
Page 4: Overview
Overview Overview Front Camera Camera Status LED Microphone Loudspeaker Connectors LAN (PoE) USB (headset, camera, mouse, keyboard) HDMI (projector, TV) Handset Headset EHS Headset Power Supply Unit... -
Page 5: Sd Card
Overview SD card In order to extend the internal memory and store personal data, images, videos or music, you can insert a microSD card (not included) into your phone. ¤ Open the left cover on the back side of the device ¤... -
Page 6: Display Key
Overview Display key You can use the display key to switch the display on or off or to capture a screenshot of the display currently shown. If the screenshot feature is activated: A screenshot of the display currently shown is captured. If the screenshot feature is not activated: The display is switched on/off. -
Page 7: Using The Phone In Different Scenarios
Using your phone in a professional environment with phone system and server structure If you use your Maxwell 10 in a corporate network with a telephone infrastructure, your phone incor- porates functions and data from the phone system and servers. - Page 8 Using the phone in different scenarios Using your phone in a simplified environment without a phone system You can also use your Maxwell 10 without a phone system. Internet ISDN,S2M §§1§§ Gigaset IP telephone with integrated gigabit switch (Maxwell 10).
-
Page 9: First Steps
First steps First steps For information on unpacking and installing the device please refer to the Maxwell 10 Installation Guide. Your device will start automatically as soon as it is connected to the mains power supply. Please be aware that if the device is powered by PoE (Power over Ethernet) it is supplied with power as soon as it is connected to an Ethernet switch with PoE-functionality. - Page 10 First steps Ethernet configuration Configure Ethernet device ¤ Tap on Ethernet Configuration. Network Type If the network connection is established, the configu- IPV4 ration information, e.g. the IP address, is displayed. IPV6 If the network connection has not been established Connection Type automatically, you can enter the configuration data DHCP...
-
Page 11: Configuring Internet Telephony
First steps Configuring Internet telephony Before you can use the device to phone anyone you need the services of a VoIP provider. Prerequisite: You have a phone system in your network that provides VoIP accounts for your device, or You have registered with a VoIP provider (e.g., via your PC) and set up a VoIP account. The device searches the network for a provisioning file and checks whether VoIP accounts already exist. -
Page 12: Web Configurator - Configuring The Phone On A Pc
Web configurator – configuring the phone on a PC The Web configurator provides you with a user interface that you can use to configure your Maxwell 10 on the PC. Prerequisites: Your phone is connected to the local network ( The Web server is enabled on the phone. -
Page 13: Understanding The Web Configurator Menu Tree
Web configurator – configuring the phone on a PC Understanding the Web configurator menu tree Settings Network and Connections LAN Settings p. 14 Phone Systems p. 16 Quality of Service (QoS) p. 17 VoIP Settings p. 18 Security Settings p. 19 Telephony Connections p. -
Page 14: Network And Connectors
Network and connectors Network and connectors All of the settings for connecting your phone to the local network must be correct to enable commu- nication with other devices in the network and phone calls via the Internet. If you use the Web configurator, your phone is already connected to the local network. You can use the Network and Connections menu to change and extend these settings. - Page 15 Network and connectors ¤ Select one of the following options for Use VLAN tagging: No If you are not using a VLAN (default). LAN Port only If you are operating the phone and PC in the same VLAN. LAN and PC Port If you are operating the phone and PC in dif- ferent VLANs.
-
Page 16: Phone Systems
¤ If your phone is connected to a phone system, select what type of phone system it is, e.g.: Gigaset T500/300 The phone is connected to a Gigaset T500 PRO or Gigaset T300 PRO. Call Manager If your phone is connected to a phone system you can descide how to handle incoming and outgoing calls for different situations. -
Page 17: Qos Settings (Quality Of Service)
Using BLF pickup it is possible to answer an incoming call for all lines at the Maxwell 10 that the phone is allowed to monitor. Which BLF features are configured for the phone is defined on the phone system. -
Page 18: Voip Settings
Network and connectors VoIP settings On this screen you configure the ports for establishing VoIP connections. Settings Network and Connections VoIP Settings "Listen ports" for VoIP connections ¤ Select the ports on which your phone expects incoming VoIP connections. Use random ports ¤... -
Page 19: Security Settings
Network and connectors Security settings This screen is where you create security settings for your phone. Settings Network and Connections Security Settings Remote management ¤ Select whether you want to Allow access from other networks to the web configurator (Yes) or not (No). -
Page 20: Telephony
Telephony Telephony The Telephony menu provides the following setting options: £ Connections This is where you can configure your VoIP connections and establish new connections. £ Audio settings On this screen you can optimise the voice quality of your VoIP connections. £... - Page 21 Telephony Setting up a new connection via Auto Configuration The configuration process for VoIP connections is automated for some VoIP providers. The provider creates a configuration file with all required VoIP access data (the general VoIP provider data and your personal account data).
- Page 22 To configure VoIP accounts you need the relevant information about your provider for Internet telephony. Provider profiles with the general provider data are available to download from the Gigaset configuration server for the main VoIP providers. ¤ In the Connection name or number field enter a name of your choice or the phone number for this connection.
- Page 23 Telephony Network provider data The phone needs to know its public address in order to receive caller voice data. The SIP protocol recognises the following options: The phone requests the public address from a STUN server on the Internet (Simple Transversal of UDP over NAT).
- Page 24 Telephony DTMF in VoIP connections To send DTMF signals via VoIP, you must first define how key codes should be converted into and sent as DTMF signals: as audible information via the speech channel or as a "SIP Info" message. Ask your provider which type of DTMF transmission is supported.
-
Page 25: Audio Settings
– especially if two VoIP calls are made simul- taneously – so that the transmission no longer takes place smoothly. The following settings allow you to adjust your Gigaset to your individual DSL connection. Settings... -
Page 26: Video Settings
Telephony Video settings The video quality of your phone is determined by the resolution and the codec used for the transmis- sion. Settings Telephony Video ¤ Select the Video resolution to be used from the drop-dow list. ¤ Select the required codecs and define the sequence in which they should be used. The following video codecs are supported by your phone: H.264 Video compression format for streaming internet sources, such as videos from... -
Page 27: Local Settings
Telephony Local settings On this screen, you provide details about the location of your phone. These are used to determine the international and local area dialling codes as well as country-specific tones (e.g., dialling tone or ring- back tone). Settings Telephony Local Settings Selecting the country... -
Page 28: Dialling Plans
Telephony Dialling plans You can use dialling plans to define which phone numbers should be called using which configured VoIP account and whether an area code should be dialled first. Settings Telephony Dialling Plans ¤ Enter the Phone number that the dialling plan is to apply to. ¤... -
Page 29: Do Not Disturb (Dnd)
Telephony Do Not Disturb (DND) Block individual phone numbers and/or all anonymous calls. You will then be unavailable for these calls; your phone will not ring. Settings Telephony Do Not Disturb ¤ Select Yes to activate the Do Not Disturb function. ¤... -
Page 30: Services
You can operate one or more door interphones with video surveillance using the phone. Enter the data for the door interphone on this page. The door interphone can also be set up for your phone using the Gigaset phone sys- tem. If automatic configuration is permitted, configuration is carried out automatically on your phone. -
Page 31: Ldap Directory
Services ¤ Activate the service(s) you wish to use: – White Pages: A public directory supplied on the Internet by the provider entered above. – Yellow Pages: Yellow pages supplied on the Internet by the provider entered above. – Private NetDirectory: A private directory supplied on the Internet by the provider entered above. - Page 32 Services Filter Using the filter, you can define criteria against which specific entries can be searched in the LDAP database. One filter consists of one or more search criteria. A search criterion contains the query for an LDAP attribute, e. g. sn=%. The percent symbol (%) is a placeholder for the user entry. LDAP name filter The name filter decides which attribute is used for the search.
-
Page 33: Function Keys
Settings Function Keys Your Maxwell 10 allows you to assign frequently used functions or phone numbers to up to 100 keys so that you can access them with one key press. All available function keys are shown with Key setting. - Page 34 ¤ Enter the Phone number for the shared line. ¤ If you wish you accept calls with the key, enter the Directed call pickup code. For a Gigaset phone system this code is *8. ¤ Enter a name for the key.
-
Page 35: System Settings
System settings System settings You can create the following settings in the System menu: Define the date and time or time server Security – Change passwords for user identification ( Rebooting the system and restoring factory settings Auto Provisioning – Start configuration setting via Auto Provisioning ( Saving and restoring telephone data Updating firmware –... -
Page 36: Security
System settings Security Access to the Web configurator or the Broadsoft configurator functions on the phone is password- protected for security purposes. Default setting for the web configuration password: admin Settings System Security For security reasons, you should always change the password after getting started with your device and then at regular intervals. -
Page 37: Saving And Restoring Telephone Data
Click on Restore. Updating firmware Firmware updates are available from the Gigaset server profile.gigaset.net/device so you can ensure your phone is always up to date. You can find the current version of your firmware on the Device sta- tus screen ( 39). -
Page 38: Screenshot
System settings Updating manually ¤ Download the new firmware from the Internet onto your PC and then open the firmware update screen. ¤ Click on Browse and select the file from the file system on your PC. ¤ Click on Load to start the update process. When the firmware update is started, the device first checks whether the prerequisites are in place for successfully downloading the firmware. -
Page 39: Checking The Status Of The Phone
Checking the status of the phone Checking the status of the phone You will find information about the status of the phone and diagnostic information in the Status menu. Device Status Device This screen shows general information about your phone. IP configuration IP address The phone's current IP address within the local network. -
Page 40: Service (Customer Care)
Protecting our environment Our environmental mission statement We, Gigaset Communications GmbH, bear social responsibility and are actively committed to a better world. Our ideas, technologies and actions serve people, society and the environment. The aim of our global activity is to secure sustainable life resources for humanity. We are committed to taking responsibility for our products throughout their entire life cycle. -
Page 41: Appendix
Appendix Appendix Care Wipe the device with a damp cloth or an antistatic cloth. Do not use solvents or microfibre cloths. Never use a dry cloth; this can cause static. In rare cases, contact with chemical substances can cause changes to the device’s exterior. Due to the wide variety of chemical products available on the market, it was not possible to test all substances. -
Page 42: Open Source Software
With regard to Open Source software, the granting of usage rights that go beyond the operation of the device in the form supplied by Gigaset Communications GmbH is governed by the relevant license conditions of the Open Source software. -
Page 43: Index
..... Gigaset T500 ........ - Page 44 Index HDMI Park + Orbit, assigning a function key ..........
- Page 45 Index System settings ....... date and time ......Web configurator .
- Page 46 Gigaset Communications GmbH Frankenstraße 2a, D-46395 Bocholt © Gigaset Communications GmbH 201 All rights reserved. Subject to availability. www.gigaset.com A31008-N4001-R102-1-20...
Need help?
Do you have a question about the Maxwell 10 and is the answer not in the manual?
Questions and answers