Gigaset C430 Quick Start Manual
Hide thumbs
Also See for C430:
- User manual (74 pages) ,
- Quick user manual (34 pages) ,
- Manual (76 pages)
Advertisement
Quick Links
Quick Start Guide
C430 - C430
A
C530 - C530
A
Congratulations
By purchasing a Gigaset, you have chosen a brand that is
fully committed to sustainability.
This product's packaging is eco-friendly!
To learn more, visit www.gigaset.com.
GIGASET HELPLINE: 084503 18190
Preparing the handset
1
3
2
¤
¤
Insert the batteries
First insert the battery
To open the battery cover,
with the polarity in
cover on the top 1.
for example to change the
¤
the right direction
batteries:
Then press the cover
¤
(for correct +/-
2
until it clicks into
Grip the notch on the
direction, see
place.
cover
3
diagram).
downwards 4.
Charging the battery
The battery is supplied with a partial charge. Please charge it completely before use.
¤
Charge the handset in the base for 8.5 hours.
8.5 h
C430A-C530A
C430-C530
Please note
The handset must only be placed in the designated base or charger.
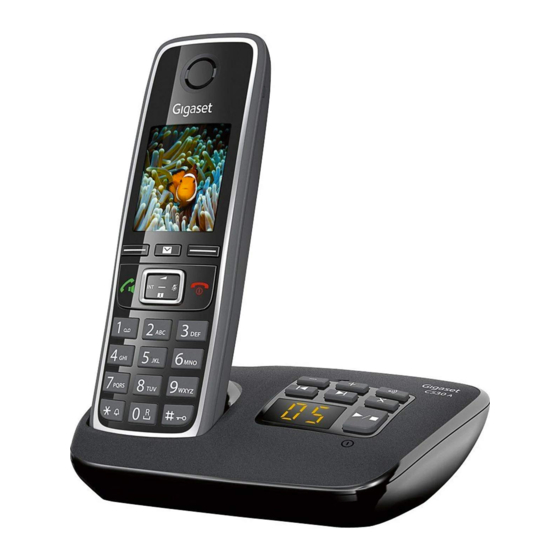
Pack contents
C430A-C530A
C430-C530
1
3
4
6
1
one Gigaset Base station
6
one battery cover
2
one power adapter for the base
7
one belt clip
3
one Gigaset handset
8
one user guide plus one quick start
guide
4
one phone cord
5
two batteries
If you have purchased a model with
9
multiple handsets, the package
should contain two batteries, one
battery cover, one belt clip and one
charger
9
with a power adapter
J
for each additional handset.
Setting the date and time
Set the date/time so that the correct date and time can be assigned to incoming calls, and so
that you can use the alarm.
¤
Press the key Time below the display screen to
open the input field.
Calls
Time
(If you have already set the date/time, open the
input field via the menu:
Ï
v
¤
4
Date/Time
Date:
The submenu Date/Time is shown on the display.
¤
15.01.2013
The active input position flashes.
Time:
Enter the day, month and year as an
and slide it
00:00
e.g.
4
Q2Q
3
8-digit number via the keypad,
for 14.10.2013.
Back
Save
Press the right or left control key to
change the input position, e.g. to
correct an entry.
8.5 h
¤
Press the down control key to switch to the
Date/Time
time input field.
Date:
14.10.2013
¤
Enter the hours and minutes in 4-digit format
Time:
via the keypad e.g., QM
5 for
07:15
07:15 am.
Change the input position with the control key
if necessary.
Back
Save
¤
Press the key Save below the display screen to
save the entry.
Connecting the base station
¤
2
Insert the phone cable into the
connection socket
at the rear of
1
the base until it clicks into place and
feed under the cable protection.
¤
Insert the power cable for the
power adapter into the connection
socket
2
at the rear of the base and
rotate the right-angle plug under
the cable protection.
¤
Connect the power adapter 3.
¤
5
Connect the phone jack 4.
Please note:
¤
The power adapter must always be
connected, as the phone will not
operate without a power supply.
¤
Use only the power adapter and
7
8
phone cord supplied. Pin
connections on telephone cables
can vary.
Connecting the handset charger (if included)
2
4
1
3
J
Handset registration
Handsets contained in the package have already been registered to the base.
If, however, a handset has not been registered (display "Please register handset" or "Place
handset in base"), you must register it to the base.
if your handset is flashing the text "No Base" then it can be that:
u
Your base station is not switched on, please check if the power supply is connected
properly.
¤
¤
¤
OK
Date/Time
OK)
u
There is too much distance between the handset and the base.
If the handset has not been pre-registered or you want to register an additional handset
to your base station, use the registration procedure below.
u
Automatically registering the Gigaset C430-C530
handset to base station:
¤
Place the handset in the base.
If automatic registration does not work, the handset
will have to be registered manually.
u
Manually registering the handset:
¤
On the base: Press and hold (min. 3 seconds) the
Registration/paging key 1.
¤
On the C430-C530 handset, press the display key
Register.
Ï
v
Or:
q Registration
¤
¤
¤
OK
¤
¤
Register Handset
Display shows: Searching for a base in registration mode.
The connection to the base will be established; this may
take some time.
¤
Enter the system PIN if required (factory setting: 0000)
¤
OK
You can register up to six handsets to your base. You can
also register other Gigaset handsets and handsets from
other devices with GAP functionality.
The dial tone will only be heard when pressing the call button
will open the redial list.
Q: There is no dial tone.
C430A-C530A
A: Press call button for 2 seconds (long press) to obtain dial tone.
A short press opens the redial list.
Q: The line is crackling / not clear.
4
3
1
A: Have you used the new line cable provided? Please do not use an old cable.
2
Q: The display is not clear / seems to be broken.
A: The display is protected by a plastic film, please make sure you have removed
the protective film.
Q: The handset is not registered.
A: If your handset is not registered, please follow the Registration handset procedure.
(see user manual)
C430-C530
Q: The caller ID is not working.
A: Have you subscribed to this service (CLIP) from your provider?
Q: Message indicator flashing and I cannot retrieve my message.
A: Message indicator will flash to indicate missed calls as well as new messages of text mes-
sages. (see user manual)
2
1
Please check:
Have you used the phone cord supplied
Have you fully inserted the power cable into the base station
Have you inserted the batteries correctly
Have you charged the battery for 8.5 hours
Have you set up the Date/Time
¤
Connect the flat plug to the charging cradle 1.
¤
Plug the power adapter into the power socket 2.
If you have to remove the plug from the charger
again:
¤
To download the latest manuals, visit our web-site: http://www.gigaset.com
Disconnect the power adapter from the mains
power supply.
¤
Press the release button
3
and disconnect the
plug 4.
Issued by
Gigaset Communications GmbH
Frankenstr. 2a
D-46395 Bocholt
Any messages you receive are saved in the message lists. An
advisory tone sounds as soon as a new entry appears on a list.
The Message key also flashes. Icons for message types and the
number of new messages are shown on the idle display.
New messages available:
Ã
u
network mailbox
™ In the missed calls list
u
In the missed alarms list
u
Open the message list by pressing the Message key f.
C430A-C530A
1
Activating/deactivating the answer machine
v
¤
Activation: r On / Off
¤
If activated:
¤
Mode:
¤
r Answer & record / Answer only / Alternating
OK
C430-C530
OK
– Answer & record: The caller can leave a message;
– Answer only: The caller only hears an announcement
1
– Alternating:
¤
Save
Dial Tone
c
for 2 seconds. A short press
Frequently asked questions
If you have problems setting up or operating this product please call
GIGASET UK HELPLINE 084503 18190
GIGASET IRL HELPLINE 0818 200 033
© Gigaset Communications GmbH 2013
All rights reserved. Subject to availability.
Rights of modification reserved.
www.gigaset.com
Message lists
Example
i
Ã
INT 1
On the answer machine (only C430A-C530A)/
™
Ã
02
10
Calls
Answer machine
Example
Ì
q Activation (μ= activated)
¤
¤
¤
OK
Change
Answer Machine
Activation:
On
Mode:
<Alternating
Record from:
08:00
and cannot leave a message;
x
Back
If activated, Record from: s / Record until: Enter the
length of time in which messages are recorded.
V
07:15
14 Oct
08
Calendar
>
Save
Advertisement


Need help?
Do you have a question about the C430 and is the answer not in the manual?
Questions and answers