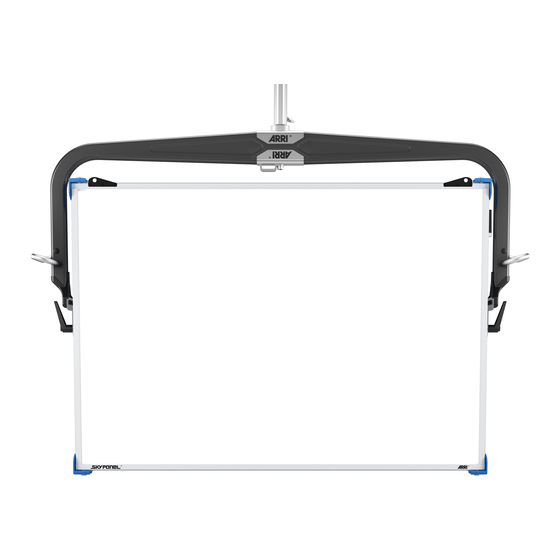
ARRI SkyPanel S30 User Manual
Hide thumbs Also See for SkyPanel S30:

Advertisement

User Manual
October 2016

Advertisement

Table of Contents
loading

Summary of Contents for ARRI SkyPanel S30

  • Page 1 User Manual October 2016...
  • Page 2 © 2015 - 2016 Arnold & Richter Cine Technik GmbH & Co. Betriebs KG (ARRI). All rights reserved. Information subject to change without notice. ARRI and all affiliated companies disclaim liability for any injury, damage, direct or indirect loss, con- sequential or economic loss or any other loss occasioned by the use of, inability to use or reliance on the information contained in this document.
  • Page 3: Dimensions

    Dimensions SkyPanel S30 (manual version)
  • Page 4 SkyPanel S30 (P.O. version)
  • Page 5 SkyPanel S60 (manual version)
  • Page 6 SkyPanel S60 (P.O. version)
  • Page 7 SkyPanel S120-C (manual version)
  • Page 8 SkyPanel S120-C (P.O. version)
  • Page 9: Table Of Contents

    Content Dimensions ..............................3 Safety Information ............................11 Replacing the Light Source ..............14 Firmware Downgrade .
  • Page 10 Error Codes ..............................51 ARRI Lighting Service Manager ........................52 Protocol ................................. 53 Specification ..............................72...
  • Page 11: Safety Information

    ® • Please contact a trained ARRI service technician to do any service and maintenance not described in this manual. Explanation of Warning Signs and Indications •...
  • Page 12 Never attempt to repair any part of the product on your own. Maintenance and repair work is only to be Read and understand all safety information and oper- carried out by an authorized ARRI service center. ation instructions before you operate or install the product or the system.
  • Page 13 AC power does not match. 0.5 m (1.65 ft.). Use only a genuine ARRI PSU and connection cable WARNING: Intense light. Do not stare at the operat- designed for the SkyPanel.The use of a third-party ing light source.
  • Page 14: Replacing The Light Source

    • Keep electric contacts clean and replace corroded parts. Please observe the information given in the „Safety leaflet Intended use ARRI lampheads“ (L5.40731.E). The leaflet is available for download on our web site www.arri.com. This product is intended to illuminate persons and objects in a dry environment.
  • Page 15: Introduction

    Introduction Features Light Field Thank you for selecting the SkyPanel LED softlight from ARRI. The SkyPanel offers the same functionality as a conventional The SkyPanel is a compact, ultra-bright and high-quality LED softlight. softlight. It is much more efficient than a softlight with a conven- Even Light Field tional light source.
  • Page 16: Properties

    Properties Unpacking Guiding Rails The SkyPanel is supplied with: Diffuser plates and other accessories for shaping the light like • External power supply unit (PSU) a barndoor are inserted in the locking guiding rails at the front • Power cable with a powerCON TRUE1 connector and a of the fixture.
  • Page 17: Overview

    Overview Fixture menu Spigot Manual Version Stirrup Handle Tilt lock Top latches Diffusor or remote phosphor panel Connector panel Tilt lock lever Figure 1: Front and back view, manual version (the figure shows the S60)
  • Page 18 P.O. Version Spigot Fixture menu Handle Stirrup Top latches Diffusor or remote phosphor panel Connector panel P.O. drives Figure 5: Power supply unit S30 Figure 2: Front and back view, P.O. version (the figure shows the S30)
  • Page 19 Power in 48 V = Boot USB-A Ethernet Battery in 23 - 36 V = mode port connector Thru Figure 3: Connector panel...
  • Page 20 Power Supply Unit S60 / S120 Power Supply Unit S30 Front panel Power out 48 V = Main switch Back panel Power out Power in and thru Main switch 48 V = Power in and thru Figure 5: Power supply unit S30 Figure 4: Power supply unit S60 / S120...
  • Page 21: Physical Installation

    Physical Installation IMPORTANT! Do not illuminate the display and the diffuser plate by high power light beams from a short distance. The display and the light engine are dam- WARNING! Attach an approved safety-cable to aged by high brightness and heat radiation within secure the product and accessories against clamp or very short time.
  • Page 22 To Mount the Stirrup To Mount the Safety Loop Brackets • Place the SkyPanel with the lighting aperture facing down- The stirrup holders can be used to attach the safety loop brack- wards on an even and clean surface. ets in conjunction the Center mount yoke (L2.0008078) and Fixed center mount yoke (L2.0008080).
  • Page 23 To Install the SkyPanel Always observe all safety information given above when mounting the SkyPanel and accessories. Keep care that: • Both guiding rails are locked. • Tripods are set up in a stable position. Tripods need to be ap- proved for the load they need to carry.
  • Page 24: Basic Features

    Basic Features both safety catches snap in. To mount a barndoor on the S120: Pan and Tilt • Un-lock both top latches by sliding both levers completely Loose the mounting screw of the tripod or the appropriate fixing inwards and open the cover strip (see Figure 8). screw of the mounting clamp to pan the SkyPanel.
  • Page 25: Control Options

    To do so you need Art-Net page 40 a software tool, the ARRI Lighting Service Manager ALSM and ALSM page 52 an RJ45 network cable to connect your PC with the SkyPanel. Download the ALSM free of charge from the ARRI web site...
  • Page 26: To Power The Skypanel

    To Power the SkyPanel AC Power The SkyPanel is powered by an external power supply unit WARNING! Use only an ARRI power supply unit and (PSU). The PSU is an auto-sensing switch-mode power supply an ARRI connector cable. The use of other power...
  • Page 27: To Use A Battery Pack

    ® Power Through To Insert and Remove the PowerCON Cable Connector • The external power supply is equipped with a Neutrik® • Line up the raised key of the connector and the keyway of the ® PowerCON True1 power output socket to supply other ex- input socket.
  • Page 28 The product has a 4-pin XLR male connector for battery power To Insert and Remove the 4-pin XLR Cable Connector and DMX data input. The pin-out is: To insert the 4-pin XLR cable connector: • The main switch of the battery pack must be turned off, Assignment if possible.
  • Page 29: Fixture Menu

    Fixture Menu DATA-LED (2): Color Indication Overview Blue The fixture receives a valid DMX signal. Purple Master mode active White Receiving valid Art-Net signal, Gateway active Green Receiving valid Art-Net signal, Gateway not active No communication between fixture menu and controller board.
  • Page 30 INTENSITY/SELECTOR (I/S, 4) MODE (8) The INTENSITY/SELECTOR encoder I/S has two functions: MODE swaps between CCT, HSI and GEL mode (only Sky- Panel-C). Press the MODE long to open „Light Mode“. • Fixture menu closed: Setting the intensity. DISPLAY (9) •...
  • Page 31 To Set the Operation Mode (only SkyPanel-C) table below. Press the MODE button (8) to switch from CCT to HSI to GEL Rosco mode. In CCT mode the SkyPanel generates white light with opti- Color Correction Color Correction mized color rendition. In HSI mode the SkyPanel generates CalColor Color Filters colored light.
  • Page 32 • Logarithmic: The resolution is low at lower intensity levels flickering when used with cameras shooting at high frame and high at higher intensity levels. Use this dimming curve rates. when you need a high resolution at high intensity levels. •...
  • Page 33 Master/Slave Mode Please note when using the master/slave mode: In Master/Slave mode the slave fixtures mimic the master fix- • Art-Net is de-activated on all fixtures in the data link. ture without delay. The master fixture generates a DMX signal •...
  • Page 34 • Turn I/S, until „DMX Settings“ is displayed. Press I/S to open Option Description the menu. The last received DMX values are used • Turn I/S, until „DMX Protocol“ is displayed. Press I/S to open for 2 minutes. After 2 minutes the fixture Hold for 2 min.
  • Page 35 Stand-Alone Lighting Effects (only SkyPanel-C) open the menu. Select the desired contrast by turning I/S. • Press the MENU button (10) to open the fixture menu. Press I/S to confirm the setting. • Turn I/S, until „Lighting Effects“ is displayed. Press I/S twice •...
  • Page 36 To save and load a Preset List • Connect an USB memory stick with one or more preset lists to the USB-A connector of the SkyPanel. Note: Disconnect all DMX cables from the product before using an USB memory stick. The data transfer between the product •...
  • Page 37 • Select „Yes“ and press I/S to confirm the setting. Select „No“ and service log to the ARRI service. The log files can be down- to abort saving the fixture settings. loaded to an USB memory stick. The file name contains the date, time and serial number of the •...
  • Page 38 To Perform a Factory Reset • Press the MENU button (10) to open the fixture menu. • Turn I/S, until „Factory Reset“ is displayed. Press I/S to open the menu. • Turn I/S to choose the option „Yes“ and perform a factory re- set.
  • Page 39: Fixture Control

    Simple mode for controlling the overall intensity and the red, green, blue and white intensity when only a limited number of ARRI recommends the use of the 16 bit modes in combination channels is available. with controllers supporting 16 bit resolution to obtain best re- sults.
  • Page 40: Art-Net

    Art-Net Art-Net Merge Mode The Art-Net protocol allows multiple nodes or controllers to transmit ArtDmx data to the same universe.Merging is limited From firmware version 2.0 the SkyPanel supports Art-Net. Art- to two sources, any additional sources will be ignored by the Net is a network protocol for controlling devices.
  • Page 41: Dmx

    Tips for a Reliable Data Transmission • Use shielded twisted-pair cable designed for RS-485 devices To control the SkyPanel via DMX you need a DMX data link. or CAT 6 network cables. Standard microphone cable cannot The SkyPanel has 5-pin locking XLR sockets for DMX / RDM transmit control data reliably over long runs.
  • Page 42: Fixture Menu

    Fixture Menu From firmware version 2.5 Note: Open and close the fixture menu the MENU button. BACK closes a sub menu and aborts an action. Rotate INTENSITY / SELECTOR to scroll. Press INTENSITY / SELECTOR to select an item Level 1 Level 2 Level 3 Level 4...
  • Page 43 Level 1 Level 2 Level 3 Level 4 Explanation (default setting = bold) Exponential Exponential dimming curve Linear Linear dimming curve Dimming Curve Logarithmic Logarithmic dimming curve Combination of exponential and logarithmic dimming „S“ Curve curve Flicker free light Light Control Low End Mode Optimized dimming behavior at low intensity levels Special Modes...
  • Page 44 Level 1 Level 2 Level 3 Level 4 Explanation (default setting = bold) Always On Display illumination always on Display Illumination Display illumination douses 10 sec. after last menu Off After 10 Sec. action Display Brightness 0 - 10 Brightness of the display illumination Display Contrast 01 - 03 - 10 Contrast of the display content...
  • Page 45 Level 1 Level 2 Level 3 Level 4 Explanation (default setting = bold) Art-Net Net 0 - 127 Select Art-Net net (see page 40) Art-Net Subnet 0 - 15 Select Art-Net subnet in Art-Net net Art-Net Universe 0 - 15 Select Art-Net universe in Art-Net subnet Select Merge-Mode „LTP“...
  • Page 46 Display Version x.xx.xx.xxxx The displays firmware version Normal USB port powered USB port not powered. Do not change this setting USB Mode Service unless being asked by ARRI service. Risk of dam- age! Abort action Factory Reset Load factory settings...
  • Page 47: Rdm Commands

    RDM commands From firmware version 2.0 Command Description Discover Unique Branch Searches RDM device Discover Mute Mutes the RDM device, no response messages Discover Unmute Activates device for response messages Supported Parameters Shows a list of all supported RDM commands Shows a list of commands that are not standard rdm commands, mostly commands Parameter Description from manufacturer.
  • Page 48 A text description of up to 32 characters for the model type of the fixture. SkyPanel- Device Model Description C, SkyPanel RP Manufacturer Label Display the company name ARRI Lighting Boot Software Version ID PrBo SW Version e.g. „2.03.00“ Boot Software Version Label Shows text from PrBo Bootloader, e.g.
  • Page 49 Command Description Lamp Hours Shows the actual lamp hours of the fixture Factory Defaults This command deletes all user parameters and sets the fixture to factory default Device Power Cycles Shows the power cycle value, counts every cold start (switch or power-up) Reset Device Fixture makes a software reset (warm start) and carries out a reboot Power state of the fixture, supported power states:...
  • Page 50 Command Description Supported values from -1 to +1 If the DMX signal gets lost or the DMX device is unplugged the LED fixture holds the last valid signal, or it holds the last valid signal for two minutes and then douses or RDM DMX Signal Lost Mode switches off immediately.
  • Page 51: Error Codes

    If the fixture menu is working, error E.011 can be ignored. However, if the fixture menu Fixture menu module not be E.011 remains dark (no LED lights up) we recommend to contact the ARRI service. They can detected. then carry out detailed analyses.
  • Page 52: Arri Lighting Service Manager

    ARRI Lighting Service Manager Please find information about the features and the functionality of the ARRI Lighting Service Manager in the user manual for the ARRI Lighting Service Manager, which can be downloaded with the ARRI Lighting Service Manager software-bundle from the...
  • Page 53: Protocol

    Channel Value Percent Function Protocol V4.2 is set as default. Use the ALSM to change to Pro- tocol V4.1 or V3.4. ARRI recommends to reserve 4 channels Master Intensity 0 %  100% (open) 0-65.535 0-100 more for each fixture when using Protocol V3.4. This way you...
  • Page 54 SkyPanel-C Mode 1: CCT & RGBW, 8 bit Resolution per Function From Firmware-Version 2.5 - Overview Channel Value Percent Function Master Intensity 8 bit, 1 channel 16 bit, 2 chan- Coarse/fine, 1-2 chan- 0 %  100% (open) 0-255 0-100 per function nels per function nels per function...
  • Page 55 Mode 2: CCT, 8 bit Resolution per Function Mode 3: CCT & HSI, 8 bit Resolution per Function Channel Value Percent Function Channel Value Percent Function Master Intensity Master Intensity 0 %  100% (open) 0 %  100% (open) 0-255 0-100 0-255...
  • Page 56 Mode 4: RGBW, 8 bit Resolution per Function Mode 5: HSI, 8 bit Resolution per Function Channel Value Percent Function Channel Value Percent Function Master Intensity Master Intensity 0 %  100% (open) 0 %  100% (open) 0-255 0-100 0-255 0-100 Intensity red...
  • Page 57 Mode 7: CCT, 16 bit Resolution per Function Channel Value Percent Function GN saturation Channel Value Percent Function 0-5.000 neutral / no effect 5.001-10.000 8-15 full minus green Master Intensity -99%  -1% 0 %  100% (open) 10.001-29.999 16-46 0-65.535 0-100 30.000-40.000...
  • Page 58 Mode 8: CCT & HSI, 16 bit Resolution per Function Mode 9: RGBW, 16 bit Resolution per Function Channel Value Percent Function Channel Value Percent Function Master Intensity Master Intensity 0 %  100% (open) 0 %  100% (open) 0-65.535 0-100 0-65.535...
  • Page 59 Mode 10: HSI, 16 bit Resolution per Function Channel Value Percent Function GN saturation Channel Value Percent Function 0-10 neutral / no effect 11-20 full minus green Master Intensity -99%  -1% 0 %  100% (open) 21-119 8-46 0-65.535 0-100 120-145 47-57...
  • Page 60 Mode 12: CCT, Coarse / Fine per Function Channel Value Percent Function Channel Value Percent Function Master Intensity coarse Color temperature CCT 0 %  100% (open) 0-255 0-100 coarse 0-255 0-100 2.800 K  10.000 K 0-255 0-100 Master Intensity fine 0-255 0-100 Color temperature fine...
  • Page 61 Mode 14: RGBW, Coarse / Fine per Function Mode 15: HSI, Coarse / Fine per Function Channel Value Percent Function Channel Value Percent Function Master Intensity coarse Master Intensity coarse 0 %  100% (open) 0 %  100% (open) 0-255 0-100 0-255...
  • Page 62 Overview of typical CCT values as DMX values Mode 16: GEL, 8 bit per function, Base channels CCT- Channel Value Percent Function DMX-value (8 bit) DMX-value (16 bit) value Master Intensity 0 %  100% (open) 0-255 0-100 Sky- panel Gel 1,CCT Selection 0-128 0-50...
  • Page 63 Channel Value Percent Function Channel Value Percent Function Gel 1 Gel 2 0-255 0-100 See tables below 0-255 0-100 See tables below Xfade to Gel Gel Transition Type Gel 1  Gel 2 0 - 255 0 - 100 0 – 51 0 –...
  • Page 64 Channel Value Percent Function Mode 17: GEL, 16 bit per function, Base channels Gel 1 0-255 0-100 See tables below Channel Value Percent Function Xfade to Gel Master Intensity 0 - 65.535 0 - 100 Gel 1  Gel 2 0 % ...
  • Page 65 Category 1, Rosco, Color correction, continued Channel Value Percent Function Gel 2 Chan. Value Gel name Number 0-255 0-100 See tables below Gel Transition Type 22 - 23 1/8 CTO 3410 0 – 51 0 – 20 Direct 24 - 25 Double CTO 3420 52 –...
  • Page 66 Category 2, Rosco, CalColor Category 3, Rosco, Storaro Selection Chan. Value Gel name Number Chan. Value Gel name Number 0 - 1 15 Blue 4215 0 - 1 VS Red 2001 2 - 3 30 Blue 4230 2 - 3 VS Orange 2202 4 - 5...
  • Page 67 Category 4, Rosco Cinelux, continued Category 1, LEE Color Correction Chan. Value Gel name Number Chan. Value Gel name Number 30 - 31 Light Red 0 - 1 Double CTB 32 - 33 No Color Pink 2 - 3 Full CTB 34 - 35 Blush Pink 4 - 5...
  • Page 68 Category 1, LEE Color Correction, continued Category 2, LEE Color Filters, continued Chan. Value Gel name Number Chan. Value Gel name Number 68 - 69 1/8 Plus Green 46 - 47 Mist Blue 70 - 71 LEE Minus Green 48 - 49 Pale Blue 72 - 73 1/2 Minus Green...
  • Page 69 Category 2, LEE Color Filters, continued Category 3,LEE 600 Series Chan. Value Gel name Number Chan. Value Gel name Number 116 - 117 Pale Green 0 - 1 Arctic White 118 - 119 Summer Blue 2 - 3 Silver 120 - 121 Pale Violet 4 - 5 Platinum...
  • Page 70 Category 5,LEE 700 Series Category 5,LEE 700 Series, continued Chan. Value Gel name Number Chan. Value Gel name Number 0 - 1 Perfect Lavender 54 - 55 Easy White 2 - 3 Provence 56 - 57 Seedy Pink 4 - 5 Special Pale Lavender 58 - 59 Wheat...
  • Page 71 Mode 18: xy Coordinates, 8 bit Resolution per Function Mode 19: xy Coordinates, 16 bit Resolution per Function Channel Value Percent Function Channel Value Percent Function Master Intensity Master Intensity 0 %  100% (open) 0-255 0-100 0 %  100% (open) 0-65.535 0-100 X1 Coordinate...
  • Page 72: Specification

    Light source Type ......ARRI LED Light Engine Typ. LED lifetime L70 ......50.000 h Physical, SkyPanel S30 White light.
  • Page 73 Housing ......Composite and aluminum 230 V, 50 Hz......200 W (SkyPanel S30) Protection rating .
  • Page 74 Pole operation for pan and tilt S60-RP, MAN, blue/silver, 3.200 K, Schuko - Set ..L0.0007069 ARRI SkyPanel S30-C S60-RP, MAN, blue/silver,3.200 K, China - Set ..L0.0007070 S30-C, MAN, blue/silver, Edison - Set ... . . L0.0007711 S60-RP, MAN, blue/silver,3.200 K, PSE Japan - Set.
  • Page 75 S120-C, Center Mount, blue/silver, Schuko - Set..L0.0012948 Please find a detailed overview of all accessories available in the „SkyPanel Accessories Guide“ on the ARRI web site. S120-C, Center Mount, blue/silver, China - Set ..L0.0012951 S120-C, Center Mount, blue/silver, PSE, Japan - Set .

This manual is also suitable for:

Skypanel s60Skypanel s120-c

Table of Contents