
Related Manuals for ClipperCreek CS-40


Summary of Contents for ClipperCreek CS-40
- Page 1 ClipperCreek, Inc. Innovative Infrastructure for Electric and Hybrid Vehicles User’s Manual • • • • • • • Model CS-40...
- Page 2 PLEASE NOTE This user’s manual includes the latest information at the time of printing. ClipperCreek, Inc. reserves the right to make changes to this product without further notice. Changes or modifications to this product by other than an authorized service facility may void the product warranty.
-
Page 3: Table Of Contents
CS-40 User’s Manual CONTENTS IMPORTANT SAFETY INSTRUCTIONS Safety Guidelines ........1 FCC INFORMATION . -
Page 4: Important Safety Instructions
CS-40 User’s Manual IMPORTANT SAFETY INSTRUCTIONS Carefully read these instructions and the charging instructions in your vehicle owner’s handbook before charging your electric vehicle. The following symbols may be found in your handbook or on labels affixed to your conductive charge station: Note This means pay particular attention. -
Page 5: Fcc Information
Note Those vehicles which follow the SAE J1772 standard for communica- tion with the charging station can inform the CS-40 that they require an exhaust fan. The CS-40 is not equipped to control ventilation fans. If an exhaust fan is requested, the CS-40 will not charge the vehicle. If... -
Page 6: Operation
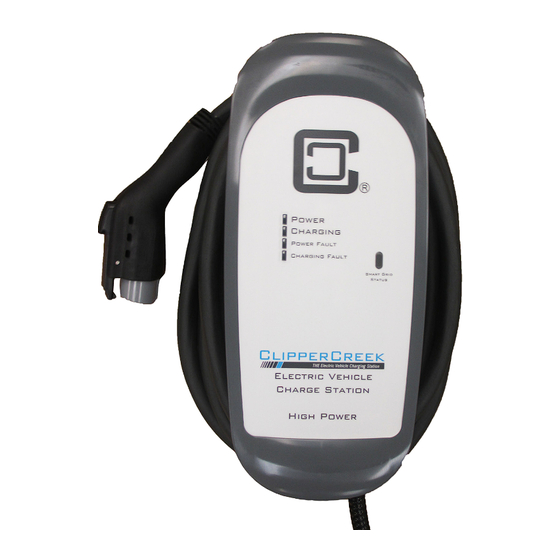
Now you can remove the connector. Front Panel The front panel has a GREEN and a RED light to indicate the status of the CS-40. The operational state of the unit can be known just by looking at the panel lights, and comparing them with table 1 on page 4. -
Page 7: In Case Of Difficulty
CS-40. Wait a few seconds and switch the circuit breaker back on again. If the Red PROTECTION light does not come back on, re-connect the cable to the vehicle. -
Page 8: Features
EV owners who charge in the late evening. If a timer is installed, you do not have to wait until the late evening to plug the CS-40’s connector into the vehicle. You may plug in at any time. Even though the vehicle may... -
Page 9: External Error Indication
High/Off pin will remove all power from the vehicle until the Off- Peak Charging time arrives. The correct pin can easily be identified by looking at the wiring diagram for the CS-40 on page 11. The other two pins on the terminal block are the relay contacts for the External Indicator. -
Page 10: Installation
Notice that L1, L2, & Gnd are labeled on each diagram. Those transformer outputs correspond to the same inputs on the CS-40. Also, each of the two 3- phase diagrams shows an L3 output, which is not used. Do not connect all three phases of a 3-phase secondary to the CS-40. - Page 11 CS-40 User’s Manual Warning Local electrical codes must always be followed when installing the grounding stake. The following diagrams illustrate the 3 service transformer secondary connec- tions most common in the United States. Figure 3. 220/240V Single Phase 120V NEUTRAL...
- Page 12 With a wye-connected secondary, any two of the legs can be used to provide 208V to the CS-40. For example, L1 & L2, or L1 & L3, or L2 & L3. Leave the unused leg open. Do not connect it to a Neutral bar, or to Ground.
-
Page 13: Mounting Procedures
CS-40 User’s Manual Mounting Procedures Figure 6. Wall mounting of CS-40. Locate the wall mounting position of the EVSE: • Position the bottom of the charge station 38 inches above the ground. • The mounting holes are spaced 16" apart to accommodate wall studs. -
Page 14: Wiring
T15 Torx L Driver. Wiring Before connecting wires to the CS-40, please carefully read the section of this manual titled Service Connections, on page 7. If you are unsure of the type of power provided at the service panel, please consult with your local utility or call your Service Representative for assistance. -
Page 15: Testing After Installation
Personnel Protection circuit that is the equivalent and specifically designed for use with electric vehicles. Only 3 wires are needed to wire the CS-40 (Line 1, Line 2, and Service Ground), as shown in Fig 8. Wire the unit from the breaker panel using wire sized according to local electrical codes. -
Page 16: For The Service Technician
If the CS-40 detects an internal failure, the Diagnostic LED will blink at a faster rate. One of the other LEDs may also be lit and indicate the nature of the problem, such as an inoperative Ground Fault circuitry, or a missing Service Ground. - Page 17 CS-40 User’s Manual Ground Missing: Lit when the unit has detected a missing Service Ground. The CS-40 will not close the contactor until a proper Service Ground has been connected. The front panel Red PROTECTION light will be lit, and the Diagnostic LED will be flashing at a faster rate.
-
Page 18: Specifications
CS-40 User’s Manual SPECIFICATIONS for CS-40 Line Input Power - Service Entrance Voltage & Wiring 240V AC single-phase - L1, L2, and Safety Ground 208V AC 3-phase, wye-connected - Any 2 phases, and Safety Ground 240V AC 3-phase, delta-connected. With center-tap on one leg, must use only the two phases on either side of the center-tap. - Page 19 Fig. 9 below. Grounding High/Off will completely inhibit charging until it is released. Grounding High/Low will tell the CS-40 to send a signal to the vehicle instructing it not to charge, but instead to draw only a minimum amount of current for auxilliary uses such as cooling down the battery pack, or pre-heating the cab in the early morning.
-
Page 20: Warranty Information
If this product is not as warranted above, your sole and exclusive remedy shall be repair or replacement as provided above. In no event will ClipperCreek, any of its authorized sales and service representatives, or its parent company be liable to customer or any third party for any damages in excess of the purchase price of the product. - Page 21 This warranty gives you specific legal rights, and you may also have other rights which may vary from state to state. To obtain warranty service: Call your nearest authorized Service Representative or ClipperCreek at the above number. You will receive information as to how service for the product will be provided.
-
Page 22: Customer Support
Place Contact Information Sticker Here. MAINTENANCE The CS-40 requires no periodic maintenance other than occasional cleaning. Warning To reduce the risk of electrical shock or equipment damage, do not allow liquid to enter the unit while cleaning it. 1. Turn off your charge station at the circuit breaker before cleaning. - Page 23 ClipperCreek, Inc. 11850 Kemper Rd., Suite E Auburn, CA 95603 www.ClipperCreek.net...
Need help?
Do you have a question about the CS-40 and is the answer not in the manual?
Questions and answers