Nikon KEYMISSION 360 Reference Manual
Hide thumbs
Also See for KEYMISSION 360:
- Quick start manual (178 pages) ,
- User manual (64 pages) ,
- Manual (11 pages)
Table of Contents
Advertisement
Quick Links
DIGITAL CAMERA
Reference Manual
Read this manual thoroughly before using the camera.
To ensure proper use of the camera, be sure to read "For
Your Safety" (page x), "<Important> Notes About
Shockproof, Waterproof, and Dustproof Performance and
Condensation" (page xiv), and "Notes About Wireless
Communication Functions" (page 48).
After reading this manual, keep it in a readily accessible
place for future reference.
Advertisement
Table of Contents

Related Manuals for Nikon KEYMISSION 360


Summary of Contents for Nikon KEYMISSION 360
- Page 1 DIGITAL CAMERA Reference Manual Read this manual thoroughly before using the camera. To ensure proper use of the camera, be sure to read “For Your Safety” (page x), “<Important> Notes About Shockproof, Waterproof, and Dustproof Performance and Condensation” (page xiv), and “Notes About Wireless Communication Functions”...
-
Page 2: Quick Topic Search
Quick Topic Search You can return to this page by tapping or clicking in the lower right of any page. Main Topics The KeyMission 360 ......................iii SnapBridge ..........................v Introduction ...........................vii Table of Contents ......................xviii Parts of the Camera ....................... 1 Getting Started........................ -
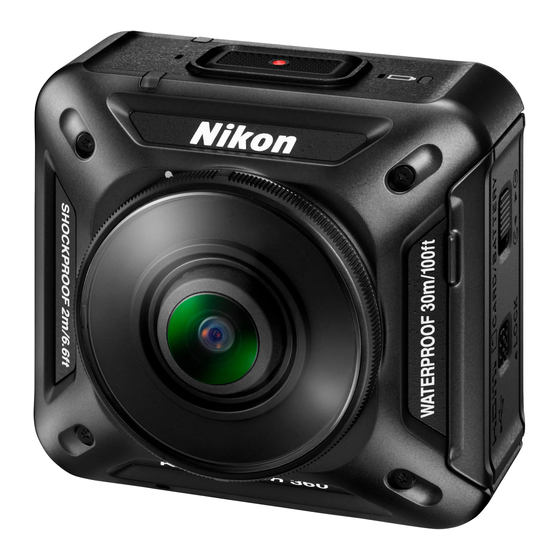
Page 3: The Keymission 360
The KeyMission 360 The KeyMission 360 is a new concept camera that is slightly different from the cameras before it. Create 360° content The camera combines two images captured by lenses with an angle of view of about 180 degrees so that you can enjoy creating 360°... - Page 4 Playing Back Images Playing back using the SnapBridge 360/170 app, the KeyMission 360/170 Utility, or a TV (HDMI connection): Part of the single image that was processed in the camera is displayed and you can play back while moving the point of view.
-
Page 5: Snapbridge
SnapBridge Your images. The world. Connected Welcome to SnapBridge — Nikon’s new family of services to enrich your image experience. SnapBridge connects your camera and compatible smart device, through a combination of Bluetooth® low energy (BLE) technology and a dedicated app. The stories you capture with your Nikon camera and lenses are automatically transferred to the device as they are taken. - Page 6 Upload of photos and thumbnail images to the NIKON IMAGE SPACE cloud service Movies cannot be automatically transferred. NIKON IMAGE SPACE does not support the viewing of 360° content by moving the point of view. A range of services that enriches your imaging life, including: Camera remote control Automatic update of camera’s date and...
-
Page 7: Introduction
Introduction Read This First Thank you for purchasing the Nikon KeyMission 360 digital camera. Using “SnapBridge 360/170” The dedicated app “SnapBridge 360/170” is required to connect the camera and your smartphone or tablet. Before setting up the camera, install the dedicated app on your smartphone or tablet (Av). -
Page 8: Information And Precautions
Before taking pictures on important occasions (such as at weddings or before taking the camera on a trip), take a test shot to ensure that the camera is functioning normally. Nikon will not be held liable for damages or lost profits that may result from product malfunction. - Page 9 Nikon will not be held liable for any damages resulting from the use of this product. While every effort was made to ensure that the information in these manuals is accurate and complete, we would appreciate it were you to bring any errors or omissions to the attention of the Nikon representative in your area (address provided separately).
-
Page 10: For Your Safety
For Your Safety To prevent damage to property or injury to yourself or to others, read “For Your Safety” in its entirety before using this product. Keep these safety instructions where all those who use this product will read them. Failure to observe the precautions marked DANGER with this icon carries a high risk of death or... - Page 11 Do not let your skin remain in prolonged contact with this product while it is on or plugged in. Failure to observe this precaution could result in low- temperature burns. Do not use this product in the presence of flammable dust or gas such as propane, gasoline or aerosols.
- Page 12 Do not leave the product where it will be exposed to extremely high temperatures, for an extended period such as in an enclosed automobile or in direct sunlight. Failure to observe this precaution could result in fire or product malfunction. Check that the equipment is mounted correctly and inspect it for wear and damage at regular intervals.
- Page 13 Discontinue use immediately should you notice any changes in the batteries, such as discoloration or deformation. Cease charging if they do not charge in the specified period of time. Failure to observe these precautions could result in the batteries leaking, overheating, rupturing, or catching fire.
-
Page 14: Important> Notes About Shockproof, Waterproof, And Dustproof Performance And Condensation
Notes About Shockproof Performance This camera has passed Nikon’s in-house test (drop test from a height of 200 cm (6 ft 6 in.) on a 5 cm (2 in.) thick plywood panel) compliant with the MIL-STD 810F Method 516.5-Shock... -
Page 15: Notes About Shockproof, Waterproof, And Dustproof Performance
Notes About Shockproof, Waterproof, and Dustproof Performance Do not drop the camera, strike it against a hard object such as a rock, or throw it against a water surface. Do not subject the camera to shock when using it underwater. - Do not subject the camera to water pressure by exposing it to rapids or waterfalls. -
Page 16: Notes About Operating Temperature, Humidity, And Condensation
Notes About Operating Temperature, Humidity, and Condensation The operation of this camera has been tested at temperatures from −10°C to +40°C (14°F to 104°F). When you use the camera in cold climate regions or at high altitudes, observe the following precautions. Battery performance deteriorates temporarily when cold. -
Page 17: Inspection And Repair
If the camera is exposed to shock, it is recommended to consult your retailer or Nikon-authorized service representative to confirm the waterproof performance (charged service). If the waterproofing packing begins to deteriorate, consult your retailer or Nikon- authorized service representative. The waterproof performance of the waterproofing packing may start to deteriorate after one year. -
Page 18: Table Of Contents
Table of Contents Quick Topic Search ....................... ii Main Topics..................................ii Common Topics ................................ii The KeyMission 360 ......................iii SnapBridge ..........................v Introduction .......................... vii Read This First ............................vii Using “SnapBridge 360/170” ..........................vii Symbols and Conventions Used in This Manual ..................vii Information and Precautions .......................... - Page 19 Connecting the Camera to a TV or Computer ............40 Utilizing Images............................. 41 Viewing Images on a TV ........................42 Transferring Images to a Computer (KeyMission 360/170 Utility)........43 Installing KeyMission 360/170 Utility ......................43 Transferring Images to a Computer ......................43...
- Page 20 Technical Notes........................45 Notices..............................46 Notes About Wireless Communication Functions ..............48 Caring for the Product ........................51 The Camera................................... 51 The Battery ..................................52 The Charging AC Adapter............................ 53 Memory Cards................................54 Cleaning and Storage.......................... 55 Cleaning after Using the Camera Underwater..................55 Cleaning after Using the Camera in Conditions Other than Underwater ......
-
Page 21: Parts Of The Camera
Parts of the Camera The Camera Body ........................2 Lamp Display ........................... 3 Parts of the Camera... -
Page 22: The Camera Body
The Camera Body Front Back Bottom Lens protector mounting mark ..23 10 Waterproofing packing Lens 11 Micro-USB connector......8, 41 Speaker 12 Airplane mode switch ......15 Status lamp..........4, 26 13 HDMI micro connector (Type D).... 41 Movie button ..........26 14 Microphone (stereo) Power-on lamp ..........3, 8 15 Photo button............. -
Page 23: Lamp Display
Lamp Display You can check the status of the camera by looking at the lamps. Use c Camera M Camera settings M LED brightness in the SnapBridge 360/170 app (A34) to change the brightness of the lamps. Power-On Lamp Status Color Description The battery level is within 30% to 100%. -
Page 24: Status Lamp
Status Lamp Status Color Description The camera is connected to a TV with an HDMI Green cable. The camera is recording a movie in Standard movie or Time-lapse movie mode. On at the same time Green The camera is on standby for pairing (A11). Alternately flashing Pairing is complete. -
Page 25: Getting Started
Getting Started Inserting the Battery and Memory Card................. 6 Charging the Battery......................8 Turning the Camera On or Off ..................10 Pairing with a Smartphone or Tablet ................11 Wi-Fi Connections (for iOS Users)...................19 Attaching the Silicone Jacket...................22 The Lens Protector/Underwater Lens Protector ............23 Getting Started... -
Page 26: Inserting The Battery And Memory Card
Inserting the Battery and Memory Card Battery latch Memory card slot Unlock the battery-chamber/memory card slot cover latch (1), move the battery- chamber/memory card slot cover latch release to the y position (2), and then open the battery-chamber/memory card slot cover (3). With the battery’s positive and negative terminals oriented correctly, move the orange battery latch (4), and fully insert the battery (5). -
Page 27: Removing The Battery Or Memory Card
Formatting a Memory Card The first time you insert a memory card that has been used in another device into this camera, insert the memory card into the camera, and make sure to format it using the SnapBridge 360/170 app. Note that formatting a memory card permanently deletes all images and other data on the memory card. -
Page 28: Charging The Battery
Charging the Battery Charging AC Adapter Power-on lamp Electrical outlet USB cable (included) If a plug adapter* is included with your camera, securely connect it to the Charging AC Adapter. Once the two are connected, attempting to forcibly remove the plug adapter could damage the product. - Page 29 Notes About Charging with a Computer When c Camera M Camera settings M Charge by computer is set to Auto in the SnapBridge 360/170 app (A34), connecting the camera to a computer that is running will automatically charge the battery inserted into the camera using power supplied by the computer.
-
Page 30: Turning The Camera On Or Off
Turning the Camera On or Off Turning On the Camera Press and hold down the movie button for about 3 seconds to turn on the camera. Shooting starts when the camera turns on by pressing the movie button or photo button. When the camera turns on, the power-on lamp turns on. -
Page 31: Pairing With A Smartphone Or Tablet
Turning Off the Camera During Remote Photography The buttons of the camera are disabled during remote photography with the SnapBridge 360/170 app. To turn off the camera, exit remote photography. See the SnapBridge 360/170 app online help for details about remote photography. Pairing with a Smartphone or Tablet Here, pairing refers to the setting used to connect the camera and smartphone or tablet (below, “smart device”) through Bluetooth. -
Page 32: Initial Pairing
Initial Pairing Perform initial pairing in the following situations: When pairing for the first time after purchasing the camera When pairing for the first time after updating the camera’s firmware For iOS or NFC-incompatible Android Devices Prepare for pairing (A11). Make sure that the camera is off (the power-on lamp is off). - Page 33 When the screen shown on the right is Connect to Camera displayed, tap the camera name. Camera name KeyMission 360_xxxxxxxx For iOS: When the accessory selection screen is displayed after tapping the camera name, wait for the Bluetooth icon at the top right corner of the screen to change from white to gray, and then tap the camera name.
- Page 34 SnapBridge 360/170 app when the camera is turned on next time (except when unpairing KeyMission 360 using the menus below or the camera’s firmware is updated). - a Connect M Connection options M End pairing...
- Page 35 When You Cannot Pair Press and hold the movie button on the camera for about 3 seconds to turn it off. When the camera turns off, the power-on lamp turns off. Close the SnapBridge 360/170 app. For iOS, remove the Bluetooth device (registered as the camera name) in the Bluetooth setting screen of the smart device.
-
Page 36: Re-Pairing
Re-pairing Perform re-pairing in the following situations: When pairing again with the same smart device after removing the camera using one of the following menus in the SnapBridge 360/170 app: - a Connect M Connection options M End pairing - c Camera M Camera settings M Reset all - c Camera M Camera settings M Network menu M Restore default settings For iOS or NFC-incompatible Android Devices... - Page 37 It may take a while before the camera name is displayed. If pairing is successful, the screen shown on the right is Connect displayed. KeyMission 360 Getting Started Pairing with a Smartphone or Tablet...
- Page 38 Y (N-Mark) on the camera. The SnapBridge 360/170 app starts. When Camera name acquired. Connect? is displayed, select OK. If pairing is successful, the screen shown on the right Connect is displayed. KeyMission 360 Getting Started Pairing with a Smartphone or Tablet...
-
Page 39: Wi-Fi Connections (For Ios Users)
Wi-Fi Connections (for iOS Users) If a Wi-Fi Connection Prompt Is Displayed A Wi-Fi connection prompt is displayed when the SnapBridge 360/170 app requires a Wi-Fi connection. Follow the procedure below to connect to the camera via Wi-Fi. Tap Go on the prompt. Wi-Fi has been enabled on the camera. - Page 40 If prompted for a password, input the password registered to the camera (the default is “NikonKeyMission”). The “N”, “K”, and “M” are capitalized. When a Wi-Fi connection is established, a Wi-Fi icon will be Camera displayed in Paired cameras on the SnapBridge 360/170 app. Paired cameras The Password We recommend that you change the default password to protect your privacy.
-
Page 41: If You Cannot Use Remote Photography Or Download Selected Pictures
If You Cannot Use Remote Photography or Download Selected Pictures If you cannot use remote photography or download selected pictures even after pairing and establishing a Wi-Fi connection, you may be able to solve the problem with the following operations: Switch the tabs in the SnapBridge 360/170 app Exit and start the SnapBridge 360/170 app again End pairing, remove the device, and then pair again... -
Page 42: Attaching The Silicone Jacket
We recommend attaching the silicone jacket to soften physical impacts to the camera. Attach by inserting the camera from the side of the silicone jacket so that the Nikon logos of the camera and silicone jacket overlap. If the Nikon logos do not overlap, the silicone jacket may appear in the images. -
Page 43: The Lens Protector/Underwater Lens Protector
The Lens Protector/Underwater Lens Protector Make sure to attach the lens protectors or underwater lens protectors to protect the lens because they are made of glass. Lens protector: Used to protect the lens (attached to the camera at time of factory shipment). Although the camera can be used underwater because it is waterproof, captured images may be blurred. - Page 44 Notes About the Lens Protectors and Underwater Lens Protectors Be careful not to subject the protectors to physical impacts or rubbing. Doing so could cause scratches or damage. When you are not using the camera, insert it into a case made of soft cloth material with the lens protectors or underwater lens protectors attached.
-
Page 45: Using The Camera
Using the Camera Recording Movies or Shooting Still Images..............26 Selecting a Movie Mode.....................30 Playing Back Images......................32 Changing the Settings......................34 Using the Base Adapter and Base Mount ..............37 Using the Camera... -
Page 46: Recording Movies Or Shooting Still Images
Recording Movies or Shooting Still Images Before shooting, check the orientation of the camera (the side with the Nikon logo is the front). Your hands will appear in images during hand-held photography because this camera captures 360° content. To reduce the appearance of hands, use the base adapter (A37) to stabilize the camera and shoot. -
Page 47: Shooting With A Smart Device
Shooting with a Smart Device Pair the camera and the smart device (A11). Tap c Camera M Remote photography in the SnapBridge 360/170 app. When a confirmation dialog for the Wi-Fi connection is displayed, tap OK. For iOS, select the camera SSID under Settings M Wi-Fi to initiate a Wi-Fi connection (if prompted, enter a password;... - Page 48 Number of Images That Can Be Saved The approximate number of images that can be saved can be checked on the shooting screen of the SnapBridge 360/170 app. Note that due to JPEG compression, the number of images that can be saved may vary greatly depending on the image content, even when using memory cards with the same capacity and the same image size settings.
- Page 49 Notes About Movie Recording Notes About Recorded Movies The following phenomena may be saved in movies. - Banding may occur in images under fluorescent, mercury-vapor, or sodium-vapor lighting. - Subjects that move quickly from one side of the frame to the other, such as a moving train or car, may appear skewed.
-
Page 50: Selecting A Movie Mode
Selecting a Movie Mode Select the desired type of movie to record by using Movie mode (A35) in the SnapBridge 360/170 app. Standard movie: Record normal movies. Superlapse movie: The camera records movies and saves them in fast motion (960/30p or 960/25p). Use to record a movie while moving the camera. - Page 51 Time-lapse movie: The camera can automatically capture still images at a specified interval to create time-lapse movies. When NTSC/PAL (A35) is set to NTSC, 300 images are captured. When set to PAL, 250 images are captured. Time required for shooting Type Interval time NTSC...
-
Page 52: Playing Back Images
Playing Back Images Playing Back Images Saved in the Camera Pair the camera and the smart device (A11). Tap c Camera M Download selected pictures in the SnapBridge 360/170 app. When a confirmation dialog for the Wi-Fi connection is displayed, tap OK. For iOS, select the camera SSID under Settings M Wi-Fi to initiate a Wi-Fi connection (if prompted, enter a password;... -
Page 53: Playing Back Images Transferred To A Smart Device
Editing Images on a Computer If you transfer captured images to a computer, you can edit the images using KeyMission 360/170 Utility. See the KeyMission 360/170 Utility online help for more information. Using the Camera Playing Back Images... -
Page 54: Changing The Settings
Changing the Settings Perform the following operations in the SnapBridge 360/170 app to change the camera settings. Pair the camera and smart device in advance (A11). c Camera M Camera settings Option Description Date and time Set the camera clock. Set the volume of sounds during operation. - Page 55 Option Description Shooting options Change settings related to shooting. Select the desired movie option to record. Standard movie Movie mode Superlapse movie: 2×, 4×, 6×, 10×, 15× (A30) Loop recording: 5 min, 10 min, 30 min, 60 min Time-lapse movie: 2 s, 5 s, 10 s, 30 s, Night sky Set the movie image size.
- Page 56 Option Description Change the color tone of images that will be saved. Standard (default setting): Standard processing for balanced results. Recommended for most situations. Color options Vivid: Images are enhanced for a vivid, photoprint effect. Select for images that emphasize primary Shooting colors, such as blue, red, and green.
-
Page 57: Using The Base Adapter And Base Mount
Using the Base Adapter and Base Mount Attaching the base adapter to the camera allows you to use special accessories such as a base mount. To increase the adhesive strength, attach the base mount for 24 hours or longer before using the camera. Align the camera screw with the tripod socket of the camera (1), and tighten the screw knob (2). - Page 58 Adjust the camera angle. Loosen the plate lock (1), set the camera angle (2), and then tighten the lock (3). Make sure that there are no foreign substances on the surface to which the base mount will be attached. If there are foreign substances such as dust or water, remove them. Peel off the release liner from the back of the base mount, and firmly press the base mount so that the entire surface is attached.
- Page 59 Base Mount The base mount is an accessory that is used to easily attach and detach a base adapter mounted with the camera. Attach the base mount to places where you want to mount the camera. Use the flat or curved type depending on the surface to which the base mount will be attached.
-
Page 60: Connecting The Camera To A Tv Or Computer
Connecting the Camera to a TV or Computer Utilizing Images ........................41 Viewing Images on a TV.....................42 Transferring Images to a Computer (KeyMission 360/170 Utility)......43 Connecting the Camera to a TV or Computer... -
Page 61: Utilizing Images
You can transfer images and movies to a computer for viewing and editing. Connection method: Connect the camera to the computer’s USB port with the USB cable. Before connecting to a computer, install KeyMission 360/170 Utility on the computer. Notes About Connecting Cables to the Camera Micro-USB connector... -
Page 62: Viewing Images On A Tv
Viewing Images on a TV Turn off the camera and connect it to the TV. Check the shape and direction of the plugs and do not insert or remove the plugs at an angle. HDMI micro connector (Type D) to HDMI jack Set the TV’s input to external input. -
Page 63: Transferring Images To A Computer (Keymission 360/170 Utility)
Transferring Images to a Computer (KeyMission 360/170 Utility) Installing KeyMission 360/170 Utility KeyMission 360/170 Utility is free software that enables you to transfer images and movies to your computer for viewing and editing. You can also change the camera’s settings. - Page 64 Images saved in the camera are displayed. If the memory card contains a large number of images, it may take a while for KeyMission 360/170 Utility to start. Wait until KeyMission 360/170 Utility starts. Select the images that you want to transfer, and click x.
-
Page 65: Technical Notes
Technical Notes Notices............................46 Notes About Wireless Communication Functions ...........48 Caring for the Product ......................51 The Camera ........................51 The Battery ........................52 The Charging AC Adapter..................53 Memory Cards.......................54 Cleaning and Storage ......................55 Cleaning after Using the Camera Underwater..........55 Cleaning after Using the Camera in Conditions Other than Underwater...56 Storage ..........................56 Functions That Cannot Be Used Simultaneously When Shooting .....57 Error Messages ........................58... -
Page 66: Notices
CAUTIONS Modifications The FCC requires the user to be notified that any changes or modifications made to this device that are not expressly approved by Nikon Corporation may void the user’s authority to operate the equipment. Interface Cables Use the interface cables sold or provided by Nikon for your equipment. Using other interface cables may exceed the limits of Class B Part 15 of the FCC rules. - Page 67 Handling the cord on this product will expose you to lead, a chemical known to the State of California to cause birth defects or other reproductive harm. Wash hands after handling. Nikon Inc., 1300 Walt Whitman Road, Melville, New York 11747-3064, U.S.A. Tel: 631-547-4200...
-
Page 68: Notes About Wireless Communication Functions
(products purchased in the EU or EFTA can be used anywhere within the EU and EFTA). Nikon does not accept liability for use in other countries. Users who are unsure as to the original country of sale should consult with their local Nikon service center or Nikon-authorized service representative. - Page 69 Some studies have suggested that some biological effects might occur, but such findings have not been confirmed by additional research. KeyMission 360, which is equipped with a TYPE1FJ (FCC ID:VPYLB1FJ / IC ID:772C- LB1FJ) Wireless LAN Module, has been tested and found to comply with FCC/IC...
- Page 70 Notice for Customers in Singapore This device complies with radio-frequency regulations. Complies with IDA Standards DA103423 Technical Notes Notes About Wireless Communication Functions...
-
Page 71: Caring For The Product
Caring for the Product Observe the precautions described below in addition to the warnings in “For Your Safety” (Ax-xiii), “<Important> Notes About Shockproof, Waterproof, and Dustproof Performance and Condensation” (Axiv), and “Notes About Wireless Communication Functions” (A48) when using or storing the device. The Camera Do Not Apply Strong Impact to the Camera The product may malfunction if subjected to strong shock or vibration. -
Page 72: The Battery
If you notice any abnormalities such as excessive heat, smoke, or an unusual smell coming from the battery, immediately discontinue use and consult your retailer or Nikon- authorized service representative. After removing the battery from the camera or optional battery charger, put the battery in a plastic bag, etc. -
Page 73: The Charging Ac Adapter
Charging an Exhausted Battery Turning the camera on or off while an exhausted battery is inserted in the camera may result in reduced battery life. Charge the exhausted battery before use. Storing the Battery Always remove the battery from the camera or optional battery charger when it is not being used. -
Page 74: Memory Cards
Memory Cards Precautions for Use Use only microSD, microSDHC, and microSDXC memory cards (A7). Be sure to follow the precautions described in the documentation included with the memory card. Do not put labels or stickers on memory cards. Formatting Do not format the memory card using a computer. The first time you insert a memory card that has been used in another device into this camera, be sure to format it with this camera. -
Page 75: Cleaning And Storage
Cleaning and Storage Cleaning after Using the Camera Underwater Follow the procedure below to rinse the camera with fresh water within 60 minutes after using it underwater or at the beach. The underwater lens protectors are used here as an example. -
Page 76: Cleaning After Using The Camera In Conditions Other Than Underwater
Cleaning after Using the Camera in Conditions Other than Underwater Use a blower or air duster to remove any dust or lint that adheres to the lenses, lens protectors, silicone jacket, camera body, special accessories, etc. To remove fingerprints or other stains, gently wipe the parts with a soft dry cloth. -
Page 77: Functions That Cannot Be Used Simultaneously When Shooting
Functions That Cannot Be Used Simultaneously When Shooting Some functions cannot be used with other menu settings. Restricted function Setting Description When Superlapse movie is selected, Movie options is fixed at 960/30p (when set to NTSC) or 960/25p (when set to PAL). When Loop recording is set to 60 min, Movie options Movie mode... -
Page 78: Error Messages
Error Messages Refer to the table below if an error message is displayed on the smart device screen. Display Cause/Solution Battery temperature is elevated. The The camera turns off automatically. Wait until the camera will turn off. camera or battery temperature has cooled before –... - Page 79 An error occurred in the camera’s internal circuitry. Turn the camera off, remove and reinsert the battery, System error and turn the camera on. If the error persists, contact your retailer or Nikon-authorized service representative. Technical Notes Error Messages...
-
Page 80: Troubleshooting
Troubleshooting If the camera fails to function as expected, check the list of common problems below before consulting your retailer or Nikon-authorized service representative. Camera Issues Problem Cause/Solution Wait for recording to end. If the problem persists, turn the camera off. - Page 81 Problem Cause/Solution The battery is exhausted. 8, 52 Out of memory. Insert a memory card with sufficient free space. The camera has run out of file numbers. Change the The camera beeps memory card, or format the memory card. three times. An error occurred while accessing the memory card.
- Page 82 SnapBridge 360/170 App Issues Problem Cause/Solution Enable Bluetooth and Wi-Fi on the smart device. When – using NFC on an NFC-compatible Android device, enable NFC. Turn off the camera. The camera cannot enter pairing The camera standby mode when the camera is on. cannot be paired.
- Page 83 Problem Cause/Solution Colors are White balance is not adjusted properly. unnatural. Randomly spaced The subject is dark and the shutter speed is too slow or ISO bright pixels (“noise”) – sensitivity is too high. appear in image. Adjust exposure compensation using c Camera M Camera The images are settings M Shooting options M Shooting options M too dark or too...
-
Page 84: File Names
File Names Images or movies are assigned file names as follows. File name: DSCN0001.JPG (1) Identifier DSCN: Movies, still images Assigned in ascending order, starting with “0001” and ending with (2) File number “9999.” Indicates file format. (3) Extension .JPG: Still images .MP4: Movies Technical Notes File Names... -
Page 85: Accessories
Accessories MH-65P Battery Charger Battery Charger Charging time is about 2 hours and 30 minutes for a fully exhausted battery. EH-62F AC Adapter (connect as shown) AC Adapter Fully insert the power connector cable into the groove of the AC adapter before inserting the AC adapter into the battery chamber. - Page 86 AA-1A Base Adapter (A37) AA-5 Vented Helmet Strap Mount AA-6 Wrist Mount AA-7 Handlebar Mount AA-8 Chest Mount* AA-9 Surfboard Mount AA-10 Backpack Mount Clip* AA-11 Suction Cup Mount Technical Notes Accessories...
- Page 87 AA-12 Base Mount Set AA-13 Wristband for Remote Controls (3 Flat + 3 Curved) (A37) AA-14A Lens Protector (A23) AA-15A Underwater Lens Protector (A23) CF-AA1 Silicone Jacket (A22) ML-L6 Remote Control (A68) MP-AA1 Handy Grip * The range blocked by the user becomes wider in images captured with this accessory attached. Availability may vary with country or region.
-
Page 88: Using The Ml-L6 Remote Control (Available Separately)
Using the ML-L6 Remote Control (Available Separately) You can use the ML-L6 Remote Control to record movies and take pictures from a distance. You can also use it to turn on the camera. Parts and Functions of the Remote Control Battery-chamber cover Part Function... - Page 89 Inserting the Battery in the Remote Control Insert a 3V CR2032 lithium battery. Use a coin (1) to turn the battery-chamber cover counterclockwise (2) and open Insert the battery with the positive side face up (3). Make sure that the battery is firmly inserted at the center of the battery chamber (4).
- Page 90 Pairing the Camera and Remote Control Before using the remote control for the first time, it must be paired with the camera. * In this manual, “pairing” refers to the establishment of a Bluetooth connection between the camera and remote control. The camera can only be paired with one remote control at a time.
- Page 91 Switching Between Smart Device and Remote Control The camera cannot be operated by both the remote control and a smart device at the same time. Follow the procedure below to switch from one to the other. Switching from Smart Device to Remote Control Switch the connection from a smart device to a paired remote control.
-
Page 92: Remote Control
Notes About Waterproof Performance of the Remote Control The remote control is rated equivalent to JIS/IEC waterproof class 7 (IPX7), and it is confirmed that water does not seep inside when soaked underwater at a depth of 1 m (3.2 ft) for up to 30 minutes. - The remote control cannot be used underwater. -
Page 93: Specifications
Specifications Nikon KeyMission 360 Digital Camera Type Compact digital camera Number of effective 23.9 million (Image processing may reduce the pixels number of effective pixels.) Image sensor 1/2.3-in. type CMOS; approx. 21.14 million total pixels ×2 Lens NIKKOR lens ×2 Focal length 1.6 mm (equivalent to 8.2 mm lens in 35mm [135] format) - Page 94 Interface Micro-USB connector (Do not use any USB cable other than USB connector the included UC-E21 USB Cable.), Hi-Speed USB HDMI output HDMI micro connector (Type D) connector Wi-Fi (Wireless LAN) Standards IEEE 802.11b/g (standard wireless LAN protocol) Operating frequency 2412–2462 MHz (1–11 channels) Authentication Open system, WPA2-PSK...
- Page 95 Battery life does not reflect the use of SnapBridge 360/170 and may vary with the conditions of use, including temperature and the interval between shots. The camera can be used up to a water depth of about 20 m (65 ft) when the lens protectors are attached.
- Page 96 Dimensions (W × H × D) (excluding projections) Weight Approx. 22.6 g (0.8 oz) (including battery) Nikon will not be held liable for any errors this manual may contain. The appearance of this product and its specifications are subject to change without notice. Technical Notes...
-
Page 97: Trademark Information
Corporation in the United States and/or other countries. ® word mark and logos are registered trademarks owned by Bluetooth SIG, Inc. and any use of such marks by Nikon Corporation is under license. Apple®, App Store®, the Apple logos, Mac, OS X, iPhone®, iPad®, iPod touch®... - Page 98 “Made for iPod,” “Made for iPhone,” and “Made for iPad” mean that an electronic accessory has been designed to connect specifically to iPod, iPhone, or iPad, respectively, and has been certified by the developer to meet Apple performance standards. Apple is not responsible for the operation of this device or its compliance with safety and regulatory standards.
-
Page 99: Index
Index Symbols Y N-Mark ............2 KeyMission 360/170 Utility ... 41, 43 AC adapter..........41, 65 Lamp ..............3 Accessories............65 Lens............2, 56, 73 Airplane mode switch......... 2 Lens protector..........23 Auto off.............. 10 Lens protector mounting mark..... 2 Li-ion rechargeable battery..... - Page 100 Underwater lens protector....23 USB cable .......... 8, 41, 43 Waterproofing packing ......2 Technical Notes Index...
- Page 101 No reproduction in any form of this manual, in whole or in part (except for brief quotation in critical articles or reviews), may be made without written authorization from NIKON CORPORATION. CT6L04(11) 6MQA1311-04...
Need help?
Do you have a question about the KEYMISSION 360 and is the answer not in the manual?
Questions and answers