Table of Contents
Advertisement
Available languages
Available languages
Quick Links
Advertisement
Chapters
Table of Contents

Related Manuals for AEG LW 60.0


Summary of Contents for AEG LW 60.0
- Page 1 LaDegerät BeDIeNUNgSaNLeItUNg CHarger INStrUCtIONS FOr USe CHargeUr MODe D’eMPLOI CarICaBatterIe MaNUaLe D’IStrUZIONI Nabíječka NÁVOD K OBSLUZe Nabíjačka NÁVOD Na OBSLUHU 97012 LaDegerät LW 60.0...
- Page 2 DE - Seite 3 Vor jeder Benutzung unbedingt lesen. anleitung und ratschläge befolgen. GB - Page 23 read these instructions before using the charger. Follow all instructions and recom- mendations. FR - Page 41 Veuillez lire les présentes instructions avant toute utilisation de l’appareil et suivre les conseils mentionnés ici.
-
Page 3: Table Of Contents
INHaLt einleitung ..........4 Bestimmungsgemäßer gebrauch . -
Page 4: Einleitung
eINLeItUNg erklärung der Symbole und Signalworte, die in dieser Bedienungsanleitung und/ oder am gerät verwendet werden: Beachten Sie diese Bedienungsanleitung bei der Verwendung des geräts. Lebens- und Unfallgefahr für Kinder! Beachten Sie Warn- und Sicherheitshinweise! gerät nur an witterungsgeschützten Standorten verwenden! Schutzisoliertes gehäuse entsorgen Sie Verpackung und gerät umweltgerecht! Berührungsschutz durch gehäuse. -
Page 5: Bestimmungsgemäßer Gebrauch
Kontrollieren Sie unmittelbar nach dem auspacken den Lieferumfang. Prüfen Sie das gerät sowie alle teile auf Beschädigungen. Nehmen Sie ein defektes gerät oder teile nicht in Betrieb. ▪ Ladegerät LW 60.0 inkl. Polanschlusskabel mit Klemmen ▪ 6 Schrauben 3 x15 mm ▪... -
Page 6: Technische Daten
Technische Daten Modell LW 60.0 artikelnummer 97012 eingangsspannung 220 - 240 V aC, 50/60 Hz eingangsstrom ausgangsspannung 12 / 24 V DC Ladespannung (max.) 14,7 V / 29,4 V Ladestrom (max.) +/-10 % 12 V: 60 a / 24 V: 30 a empfohlene Batteriekapazität (24h Komfort) - Page 7 Warnung! Lebens- und Unfallgefahr für Kleinkinder und Kinder. Lassen Sie Kinder niemals unbeaufsichtigt mit dem Verpackungsmaterial allein. es besteht erstickungsgefahr. Lassen Sie Kinder nicht mit Kabeln spielen – Strangula- tionsgefahr! Lassen Sie Kinder nicht mit den Bau- und Befestigungsteilen spielen, sie könnten verschluckt werden und zum erstickungstod führen.
- Page 8 Explosions- und Brandgefahr! ▪ Beim Laden der Batterie kann Knallgas (gasförmiger Wasserstoff und Sauerstoff) entstehen. Beim Kontakt mit offenem Feuer (Flamme, glut, Funken) kann es zu explosionen kommen. ▪ Laden Sie die Batterie niemals in der Nähe von offenem Feuer oder an Orten auf, wo es zu Funkenbildung kommen kann.
- Page 9 ▪ entfernen Sie das gerät und die Polanschlusskabel mit Klemmen von der Batterie, bevor Sie mit Ihrem Fahrzeug fahren. ▪ Ziehen Sie das Kabel nur am Stecker aus der Netzsteckdose. Das Kabel kann beschädigt werden. ▪ Verwenden Sie kein beschädigtes gerät. Beschädigungen des Netzkabels, des geräts oder der Polanschlusskabel erhöhen das risiko eines Stromschlags.
-
Page 10: Produktübersicht
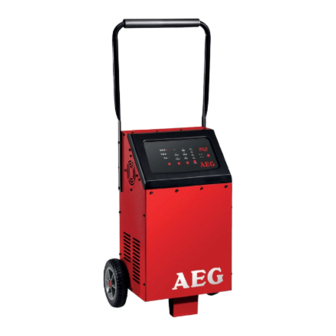
PrODUKtÜBerSICHt 60 A BOOST Full Charge 20 A Charge Error SELECT Charge Battery DISPLAY DISPLAY DISPLAY 60 A START SELECT SELECT SELECT STOP STOP RATE RATE RATE MODE MODE MODE TYPE TYPE TYPE 26 24 Bezeichnung Funktion Polanschlusskabel (-) Zum anschluss des Ladegeräts an mit Klemme (schwarz) die Batterie (- Pol) Polanschlusskabel (+) - Page 11 Bezeichnung Funktion Lüfter zur Kühlung der Lade-elektronik anzeigefeld Zur Bedienung des geräts griff Zum Schieben des geräts 60 a / LeD rot Zum Laden von Batterien mit hoher max. Ladestrom: Kapazität (z. B. von Booten oder 12 V: 60 a / 24 V: 30 a große deep-cycle-Batterien) oder zur Schnellladung von Batterien mittlerer Kapazität.
-
Page 12: Funktionen
Bezeichnung Funktion error / LeD rot Leuchtet, wenn die angeschlossene Batterie falsch angeschlossen ist (verpolt). Bad Battery / LeD rot Leuchtet, wenn die angeschlossene Batterie defekt ist. Display Zeigt die Ladespannung oder Ladezu- stande der Batterie an. taste SeLeCt DISPLaY zum Umschalten der anzeige V / LeD rot Ladespannung % / LeD blau... -
Page 13: Sicherheitsfunktionen
Sicherheitsfunktionen Das Ladegerät ist mit folgenden Schutzeinrichtungen versehen, um Beschädigungen des Ladegeräts und der Batterie oder des Fahrzeugs zu vermeiden: ▪ Kurzschluss (defekte Batterie) ▪ Falschanschluss (anschluss mit umgekehrter Polarität) ▪ Funkenbildung ▪ Überhitzung ▪ Überstrom ▪ Überladung BeDIeNUNg Vor dem Gebrauch Vorsicht! Beim Herausnehmen aus der Verpackung besteht Verletzungsgefahr z. -
Page 14: Gerät Anschließen
Gerät anschließen 1. Schließen Sie das rote (+) Polanschlusskabel (2) am positiven Pol der Batterie 2. Schließen Sie das schwarze (-) Polanschlusskabel (1) am negativen Pol der Batterie an. Hinweis: Das schwarze Polanschlusskabel kann auch an die Fahrzeug-Karosserie ange- schlossen werden (Beachten Sie dabei die Bedienungsanleitung des Fahrzeugs!). Stellen Sie sicher, dass beide Klemmen guten Kontakt haben und fest sitzen. -
Page 15: Ladevorgang Stoppen
3. Wählen Sie durch wiederholtes Drücken der taste SeLeCt rate (29) den gewünschten Ladestrom aus. Die auswahl wird Ihnen durch die LeD (9, 10, 11) angezeigt. 4. Drücken Sie die taste Start-StOP (26) um den Ladevorgang zu starten. Die LeD „Charge“ (19) leuchtet über die gesamte Zeit des Ladeprozesses auf. 5. -
Page 16: Umschaltung Der Anzeige
Umschaltung der Anzeige Während des Ladevorgangs können Sie durch wiederholtes Drücken der taste SeLeCt DISPLaY (23) folgende Parameter anzeigen: ▪ V = Ladespannung (24) ▪ % = Ladezustand der Batterie (25) Vor dem Ladevorgang kann nur die aktuelle Batteriespannung und nach dem Lade- vorgang nur der Ladezustand der Batterie angezeigt werden. -
Page 17: Ladevorgang Beenden Und Ladegerät Trennen
Ladevorgang beenden und Ladegerät trennen 1. Ziehen Sie immer zuerst den 230 V Netzstecker (4) aus der 230 V Netzsteck- dose. 2. trennen Sie das schwarze (-) Polanschlusskabel (1) vom negativen Pol der Batterie ab. 3. trennen Sie das rote (+) Polanschlusskabel (2) vom positiven Pol der Batterie ab. LaDePHaSeN Das Prinzip des Ladevorgangs wird ausgehend von einer 12 V Batterie erklärt. -
Page 18: Boost-Modus
Schritt 8: Starthilfefunktion (Boost-Modus) Die Starthilfefunktion des Ladegerätes kann verwendet werden,um Fahrzeuge mit schwacher Batterie beim Startvorgang zu unterstützen. BOOST-Modus Wenn die angeschlossene Batterie unter 14,7 V hat, erfolgt automatisch zuerst ein Ladevorgang, bevor das Ladegerät in den BOOSt-Modus schaltet. Wird die taste Start-StOP (26) für 3 Sekunden gedrückt, wechselt das Ladegerät ohne einen Ladevorgang direkt in den BOOSt-Modus. -
Page 19: Reinigung, Pflege Und Wartung
Fehler/Problem Mögliche Ursache Abhilfe Lange Ladedauer Bei sehr niedrigen temperaturen Batterie unter nor- (unter 0 C) wird nur mit sehr malen Bedingungen º geringem Ladestrom geladen. laden. Dadurch verlängert sich die Lade- explosionsgefahr! dauer. erwärmt sich die Batterie, Keine gefrorene wird der Ladestrom entsprechend Batterie laden. -
Page 20: Service
Service Sollten Sie trotz Studiums dieser Bedienungsanleitung noch Fragen zur Inbetriebnah- me oder Bedienung haben, oder sollte wider erwarten ein Problem auftreten, setzen Sie sich bitte mit Ihrem Fachhändler in Verbindung. Entsorgung Die Verpackung besteht aus umweltfreundlichen Materialien, die Sie über die örtlichen recyclingstellen entsorgen können. - Page 23 taBLe OF CONteNtS Introduction ..........24 Normal use.
-
Page 24: Introduction
INtrODUCtION explanation of symbols and signal words used in these operating instructions and/ or the device: Follow instructions when using the machine. risk of bodily or fatal injury to children! Follow warnings and safety instructions! Only use device in locations protected from weather! Double-insulated casing Consider the environment when disposing of the packaging! electric shock protection from the housing. -
Page 25: Normal Use
Be sure to verify contents immediately upon opening the product. Check the product and all parts for damage. Do not use a defective product or parts. ▪ LW 60.0 Charger incl. clamp terminal connection cable ▪ 6 screws 3 x15 mm ▪... -
Page 26: Technical Data
Technical data Model LW 60.0 Item number 97012 Input 220 - 240 V aC, 50/60 Hz Input current Output 12 / 24 V DC Charging voltage (max.) 14,7 V / 29,4 V Charging current +/-10 % 12 V: 60 a / 24 V: 30 a... -
Page 27: Safety
SaFetY General Safety Guidelines read all safety guidelines and instructions. Noncompliance with safety guidelines and instructions can cause electric shock, fire and / or serious injury.Keep all safety guidelines and instructions for future reference. Warning! Life-threatening danger to infants and children! Never leave children un- supervised with the packing material as this can cause suffocation. - Page 28 Risk of chemical burns! ▪ Batteries contain acid, which could damage the eyes and skin. Charging batter- ies further generates gasses and vapours hazardous to the health. ▪ avoid any contact with caustic battery acid. Immediately thoroughly flush skin and any objects which have come into contact with acid. If eyes have come into contact with battery acid, flush eyes with running water at least 5 minutes.
- Page 29 Risk of electrical shock! ▪ Chargers may interfere with the operation of active electronic implants, e.g. pacemakers, thus pose a personal hazard. ▪ avoid pouring or dripping water or other liquids over it. If water penetrates electrical devices, the risk of electric shock increases. ▪...
-
Page 30: Product Overview
PrODUCt OVerVIeW 60 A BOOST Full Charge 20 A Charge Error SELECT Charge Battery DISPLAY DISPLAY DISPLAY 60 A START SELECT SELECT SELECT STOP STOP RATE RATE RATE MODE MODE MODE TYPE TYPE TYPE 26 24 Description Function terminal connection cable (-) to connect the charger to with clamp (black) the battery (- terminal) - Page 31 Description Function for cooling the charging electronics Display For operating the device Handle For pushing the device 60 a / LeD red For charging high capacity batteries max. charging current: (e.g. marine or large deep-cycle 12 V: 60 a / 24 V: 30 a batteries) or to quick-charge medium capacity batteries.
-
Page 32: Funktionen
Description Function Bad Battery / LeD red Lights up if the connected battery is defective. Display Shows the battery’s charging current or the charge condition. SeLeCt DISPLaY button for switching the display V / LeD rot Charging voltage % / LeD blue Battery charge condition Start-StOP button to start or stop the selected charging function (indi- cated by LeD) -
Page 33: Safety Functions
Safety functions the charger features the following safety features to prevent damage to the charger and the battery or the vehicle: ▪ Short circuit (defective battery), ▪ incorrect connection (connected with reversed polarity), ▪ sparking ▪ overheating ▪ excess current ▪... -
Page 34: Connecting The Device
Connecting the device 1. Connect the red (+) pole connector cable to the positive pole of the battery. 2. Connect the black (-) pole connector cable to the negative pole of the battery. Note: the black (-) clamp can also be connected to the vehicle chassis (Please refer to the auto maker‘s instructions!). -
Page 35: Stopping Charging
Note: Once the battery is fully charged, the charger will switch to trickle charge to main- tain the charging status and protect the battery from overcharging. Stopping charging Press the Start-StOP (26) button. Using the jump start function (BOOST mode) the charger’s jump start function can be used to help start vehicles with a weak battery. -
Page 36: Completing Charging And Disconnecting The Charger
Charging time in hours (approx.) Output 12 V / 24 V 12 V 24 V Charging current 20 A 60 A 30 A (max.) Battery size 10 Ah 25 Ah 50 Ah 100 Ah 150 Ah 200 Ah 300 Ah 400 Ah 600 Ah Completing charging and disconnecting the charger... -
Page 37: Charging Phases
CHargINg PHaSeS Step 1: Diagnosis Diagnostic function which automatically checks the battery status and recognises the voltage. Step 2: Precharging the battery is gently charged with a low charging current to return the battery to a chargeable state Step 3: Soft start the battery is gently charged with a low charging current. -
Page 38: Boost Mode
BOOST mode If the connected battery has less than 14.7 V, first a charging process will automati- cally be used before the device switches to BOOSt mode. When pressing and holding the Start-StOP (26) button for 3 seconds the charger will enter BOOSt mode directly without charging. -
Page 39: Cleaning, Care And Maintenance
Error/Problem Possible cause Correction Battery voltage Battery wasn’t charged long ensure the battery too low enough. is charged long enough. CLeaNINg, Care aND MaINte- NaNCe ▪ Clean clamps after every charging. to prevent corrosion, wipe off any battery fluid which may have come into contact with the clamps. ▪... - Page 41 taBLe DeS MatIèreS Introduction ..........42 Utilisation conforme .
-
Page 42: Introduction
INtrODUCtION explication des symboles et mots d’avertissements qui sont utilisés dans la présente notice d’explication et/ou sur l’appareil: Lorsque vous utilisez l’appareil, veuillez vous conformer à la présente notice d’utilisation. risque d’accident et danger de mort pour les enfants ! Veuillez respecter les consignes de mise en garde et de sécurité... -
Page 43: Utilisation Conforme
Contrôlez le volume de livraison immédiatement après le déballage. Contrôlez l’appareil et les pièces pour dépister tout endommagement. Ne mettez pas un appareil endommagé en marche. ▪ Chargeur LW 60.0 avec câbles de branchement aux pôles avec pinces ▪ 6 vis 3 x15 mm ▪... -
Page 44: Caractéristiques Techniques
Caractéristiques techniques Modèle LW 60.0 Numéro d’article 97012 tension d’entrée 220 - 240 V aC, 50/60 Hz Courant d’entrée tension de sortie 12 / 24 V DC tension de charge (max.) 14,7 V / 29,4 V Courant de charge (max.) +/-10 % 12 V: 60 a / 24 V: 30 a Capacité... -
Page 45: Sécurité
SÉCUrItÉ Consignes generales de sécurité Veuillez lire toutes les consignes de sécurité et les instructions. Le nonrespect des consignes de sécurité et des instructions peut provoquer un choc électrique, des brûlures et / ou des blessures graves. Conservez toutes les consignes de sécurité et des instructions afin de pouvoir les consulter ultérieurement. - Page 46 Risque de brûlure ! ▪ Les batteries contiennent des acides qui peuvent brûler les yeux et la peau. Lors de la charge de la batterie, des gaz et des vapeurs nocifs pour la santé se forment également. ▪ Évitez tout contacter avec l’acide irritant de la batterie. Nettoyez immédiatement à...
- Page 47 Risque de choc électrique ! ▪ Les chargeurs peuvent gêner le fonctionnement des implants électroniques comme les pacemakers cardiaques et ainsi mettre en danger les personnes. ▪ Veillez à empêcher que de l’eau d’autres liquides ne soient renversés sur l’appa- reil.
-
Page 48: Aperçu Du Produit
▪ avant d’utiliser l’appareil, veuillez observer la notice d’utilisation et tous les avertissements de sécurité de la batterie à charger et du véhicule. Risque de dégradation ! ▪ Ne placez jamais l’appareil au-dessus ou près de la batterie à charger. Les gaz s’échappant de la batterie peuvent endommager l’appareil. - Page 49 Dénomination Fonction Câble de branchement au pôle Pour le branchement du chargeur à la batterie (pole -) avec pince (noire) Câble de branchement au pôle Pour le branchement du chargeur à la batterie (pole +) avec pince (rouge) Boîtier Boîtier métallique avec fentes de ventilation Fiche secteur 230 V Pour brancher sur une...
- Page 50 Dénomination Fonction BOOSt 12 V / LeD rouge Pour l’assistance au démarrage de (courant de démarrage max. véhicules et appareils possédant une 540 a) batterie faible. Charge 12 V / LeD bleu Pour la charge de batteries 12 V Charge 24 V / LeD bleu Pour la charge de batteries 24 V geL / LeD rouge pour batteries avec électrolyte gel...
-
Page 51: Fonctions
Dénomination Fonction % / LeD bleu etat de charge de la batterie touche Start-StOP pour démarrer et arrêter la fonction de charge réglée (affichage par voyant LeD) touche SeLeCt tYPe pour la commutation du type de batterie (affichage par voyant LeD) touche SeLeCt MODe pour la commutation de tension de charge (affichage par voyant LeD) touche SeLeCt rate pour la commutation du courant de charge (affi-... -
Page 52: Utilisation
UtILISatION Avant l’utilisation Attention ! Lors de l’extraction hors de l’emballage, il existe un risque de blessure p. ex. pour cause de coincement ou de chutes de pièces. extrayez à deux le chargeur hors de son emballage et faites attention aux pièces mobiles et lâches. Monter la poignée remarque : Un tournevis cruciforme est nécessaire au montage. -
Page 53: Démarrer Le Processus De Charge
3. Branchez la fiche d’alimentation du chargeur dans un prise secteur 230 V. Les voyants LeD suivants sont allumés : ▪ 5 a (vert) ▪ 12 V (bleu) ▪ StD (rouge) Si la batterie est reconnue comme étant défectueuse ou si elle a été branchée avec une polarité... -
Page 54: Arrêter Le Processus De Charge
Arrêter le processus de charge Presser la touche Start-StOP (26). Utiliser la fonction d’assistance au démarrage (mode BOOST) La fonction d’assistance au démarrage du chargeur peut être utilisée afin d’aider lors du démarrage des véhicules possédant une faible batterie. rechargez la batterie pendant au moins 5 minutes en cas de très basses tempéra- tures ou lorsque la tension est inférieure à... -
Page 55: Terminer Le Processus De Charge Et Débrancher Le Chargeur
Durée de charge en heures (env.) tension de sortie 12 V / 24 V 12 V 24 V Courant de charge (max.) 20 A 60 A 30 A Dimension de batterie 10 Ah 25 Ah 50 Ah 100 Ah 150 Ah 200 Ah 300 Ah 400 Ah... -
Page 56: Phases De Charge
PHaSeS De CHarge Étape 1 : Diagnostic Fonction de diagnostic permettant de manière automatique la vérification de l’état de batterie ainsi que la reconnaissance de la tension. Étape 2 : Précharge La batterie est chargée progressivement à l’aide d’un faible courant de charge afin de l’amener vers un état de charge possible. -
Page 57: Mode Boost
Mode BOOST Lorsque la tension de batterie branchée est inférieure à 14,7 V, un premier proces- sus de charge est effectué automatiquement avant que le chargeur ne commute en mode BOOSt. Si la touche Start-StOP (26) est pressée pendant 3 secondes, le chargeur passe directement en mode BOOSt sans processus de charge. -
Page 58: Nettoyage, Entretien Et Maintenance
Erreur/Problème Cause possible Remède Durée de charge en cas de basses températures Charger la batterie élevée. (sous C), la charge s’effectue dans des conditions º uniquement avec un très faible normales. courant. La durée de charge est risque d’explosion ! donc plus élevée. -
Page 59: Mise Au Rebut
Mise au rebut L’emballage est composé de matériaux respectueux de l’environnement que vous pourrez éliminer dans les points de recyclages locaux prévus à cet effet. Ne jetez pas les appareils électriques avec vos déchets ménagers ! Conformément à la directive européenne 2002 / 96 / eC relative aux appareils électriques et électroniques usagés et à... - Page 61 SOMMarIO Introduzione ..........62 Uso conforme .
-
Page 62: Introduzione
INtrODUZIONe Spiegazione dei simboli e dei termini di avvertenza utilizzati in queste istruzioni per l’uso e/o sul dispositivo: Per l’utilizzo del dispositivo attenersi a queste istruzioni. Pericolo di vita e di incidenti per i bambini! rispettare le istruzioni e le avvertenze per la sicurezza! Utilizzare il dispositivo esclusivamente in ambienti non soggetti agli agenti atmosferici! alloggiamento isolato... -
Page 63: Uso Conforme
Controllare la fornitura subito dopo averla aperta. Controllare se il dispositivo o i componenti sono danneggiati. Non utilizzare il dispositivo o componenti guasti. ▪ Caricabatterie LW 60.0 incl. cavo collegamento polo con morsetti ▪ 6 viti 3 x 15 mm ▪... -
Page 64: Dati Tecnici
Dati tecnici Modello LW 60.0 Codice articolo 97012 Potenza assorbita 220 - 240 V aC, 50/60 Hz Corrente in entrata Potenza 12 / 24 V DC tensione di carica (max.) 14,7 V / 29,4 V Corrente di carica +/-10% 12 V: 60 a / 24 V: 30 a Capacità... -
Page 65: Sicurezza
SICUreZZa Indicationi di sicurezza generali Leggere tutte le indicazioni e le istruzioni di sicurezza. Omissioni nell’osservanza delle indicazioni di sicurezza e delle istruzioni possono provocare scosse elettriche, ustioni e/o gravi lesioni. Conservare per future consultazioni tutte le indicazioni di sicurezza e le istruzioni. Attenzione! Pericolo di vita e di incidenti per i bambini piccol i! Non lasciare mai il materiale d’imballaggio in mano a bambini senza la supervisione di un adulto. - Page 66 Pericolo di corrosione! ▪ Le batterie contengono acido dannoso per gli occhi e per la pelle. Durante il processo di ricarica vengono emessi gas e vapori dannosi per la salute. ▪ evitare qualsiasi contatto con l’acido corrosivo della batteria. In caso di contatto con l’acido della batteria, lavare subito con abbondante acqua corrente la parte del corpo e gli oggetti interessati.
- Page 67 Pericolo di folgorazione! ▪ I caricabatterie possono condizionare il funzionamento di impianti elettronici, quali ad esempio i pace-maker, e quindi essere pericolosi per le persone che li portano. ▪ accertarsi sempre di conservarlo in un luogo asciutto e sicuro. La penetrazione di acqua nei dispositivi elettrici accresce il pericolo di folgorazione.
-
Page 68: Descrizione Del Prodotto
Pericolo di danneggiamento! ▪ Non posizionare mai il dispositivo su o in vicinanza della batteria da ricaricare. I gas prodotti dalla batteria potrebbero danneggiare il dispositivo. Posizio- nare il caricabatterie tanto lontano dalla batteria quanto lo permette il cavo di collegamento. - Page 69 Denominazione Funzione Cavo collegamento polo (-) Per collegare il caricabatterie alla con morsetto (nero) batteria (polo -) Cavo collegamento polo (+) Per collegare il caricabatterie alla con morsetto (rosso) batteria (polo +) alloggiamento alloggiamento metallico con feritoie di ventilazione Spina di rete 230 V Per il collegamento a una presa di rete 230 V ruote...
- Page 70 Denominazione Funzione Charge 24 V / LeD blu Per ricaricare batterie di 24 V geL / LeD rosso Per batterie con elettrolita in gel agM / LeD rosso Per batterie con fibre di vetro StD (Standard) / LeD rosso Per batterie con elettrolita fluido (Wet) e batterie piombo-acido che non necessitano manutenzione (MF) Full / LeD verde...
-
Page 71: Funzioni
FUNZIONI Questo caricabatterie è provvisto di un microprocessore (MCU - Micro-Computer- Unit) e di funzioni interamente automatiche di ricarica, diagnosi, recupero e manutenzione. grazie alla funzione “carica di mantenimento”, il caricabatterie può rimanere collegato di continuo. Lo stato di carica completa viene così mantenuto. Funzioni di sicurezza Il caricabatterie è... -
Page 72: Collegamento Del Dispositivo
Avvertenza! Prima di utilizzare il dispositivo assicurarsi di aver letto con attenzione le istruzioni relative alla batteria e al veicolo e di aver compreso le avvertenze per la sicurezza. ▪ Utilizzare sempre occhiali protettivi e guanti antiacido. ▪ accertarsi che ci sia sempre un’aerazione sufficiente. ▪... -
Page 73: Avvio Del Processo Di Ricarica
4. Prima di avviare la ricarica assicurarsi che la tensione di carica impostata nel caricabatterie (12 V / 24 V) corrisponda alla batteria collegata. Una tensione di carica eccessivamente alta può causare danni/anomalie alla batteria collegata. Avvio del processo di ricarica 1. -
Page 74: Commutazione Della Visualizzazione
3. Premere il tasto Start-StOP (26) per avviare la modalità BOOSt. Nota: la modalità BOOSt si attiva soltanto quando la batteria è collegata. 4. effettuare una prova di avviamento del veicolo. Nota: la prova di avviamento deve durare max. 30 secondi. Prima di effettuare una nuova prova di avviamento attendere circa 5 minuti per far raffreddare il caricabatterie e la batteria. -
Page 75: Fine Del Processo Di Ricarica E Stacco Del Caricabatterie
Durata della ricarica in ore (ca.) Potenza 12 V / 24 V 12 V 24 V Corrente di ricarica (max.) 20 A 60 A 30 A Capacità batteria 10 Ah 25 Ah 50 Ah 100 Ah 150 Ah 200 Ah 300 Ah 400 Ah 600 Ah... -
Page 76: Fasi Di Carica
FaSI DI CarICa Fase 1: Diagnosi Funzione di diagnosi che verifica in modo automatico lo stato della batteria e riconosce la tensione. Fase 3: precarica La batteria viene caricata con una corrente ridotta in modo da riportarla a uno stato idoneo alla carica. Fase 4: soft start La batteria viene caricata con una corrente ridotta. -
Page 77: Modalità Boost
Modalità BOOST Se la batteria collegata si trova al di sotto di 14,7 V, si verifica in modo automatico un processo di ricarica prima che si attivi la modalità BOOSt. Se il tasto Start-StOP (26) viene premuto per 3 secondi, il caricabatterie passa direttamente alla modalità... -
Page 78: Pulizia, Manutenzione E Riparazioni
Guasto / pro- Possibili cause Soluzione blema Lunga durata a temperature molto basse (inferiori ricaricare la batteria della ricarica a 0˚C) la ricarica avviene con una in condizioni normali. corrente minima. tale condizione Pericolo di esplo- allunga la durata della ricarica. Se sione! la batteria si riscalda la corren- Non ricaricare batte-... -
Page 79: Smaltimento
Smaltimento La confezione è composta da materiali a basso impatto ambientale, riciclabili negli appositi siti di raccolta. Non buttare i dispositivi elettrici nei rifiuti domestici! Secondo la direttiva europea 2002/96/Ce in materia di dispositivi elettrici ed elettronici usati e la relativa conversione in legge nazionale, le apparecchiature elettriche usate devono essere raccolte separatamente e portate a un impianto di riciclaggio ecologico. - Page 81 Obsah Úvod............82 Použití...
-
Page 82: Úvod
ÚvOD vysvětlení symbolů a signální slov, použitých v tomto návodu k obsluze nebo na přístroji: Při používání přístroje dbejte vždy na tento návod k obsluze. Nebezpečí ohrožení života a nehody pro malé děti! Dbejte na výstražná a bezpečnostní upozornění! Přístroj používat jen v místech chráněných před povětrnostními vlivy! Těleso s ochrannou izolací... -
Page 83: Použití Ke Stanovenému Účelu
Po rozbalení okamžitě proveďte kontrolu kompletnosti dodávky. zkont- rolujte, zda není poškozeno zařízení ani žádná z jeho součástí. neuváděj- te vadné zařízení nebo jeho část do činnosti. ▪ Nabíječka LW 60.0 včetně kabelu se svorkami ▪ 6 šroubů 3 x15 mm ▪... -
Page 84: Technická Data
Technická data Model LW 60.0 číslo artiklu 97012 vstup napětí 220 - 240 v aC, 50/60 Hz vstupní proud výstup 12 / 24 v DC Nabíjecí napětí (max.) 14,7 v / 29,4 v Nabíjecí proud +/-10 % 12 v: 60 a / 24 v: 30 a Doporučená... -
Page 85: Bezpečnost
beZPečNOST Všeobecné bezpečnostní pokyny Přečtěte si bezpečnostní pokyny a pokyny pro použití. nedodržení bez- pečnostních pokynů a pokynů pro použití může způsobit zásah elektrickým proudem, vznik požáru a/nebo vážné ublížení na zdraví. Uschovejte si všechny bezpečnostní pokyny a pokyny pro použití kvůli další... - Page 86 Nebezpečí poleptání! ▪ baterie obsahují kyselinu, která může zranit oči a pokožku. Při nabíje- ní baterie vznikají plyny a páry ohrožující zdraví. ▪ vyhýbejte se jakémukoliv kontaktu se žíravou kyselinou z baterie. Pokožku nebo předměty, které se dostaly do kontaktu s kyselinou ihned důkladně...
- Page 87 Nebezpečí zásahu elektrickým proudem! ▪ Nabíječky mohou rušit aktivní implantáty jako např. kardiostimulátory a ohrozit tím dotyčné osoby. ▪ I přesto ale zajistěte, aby se přístroj nacházel vždy na bezpečném místě. Nedovolte, aby bylo zařízení vystaveno tekoucí nebo kapající vodě nebo jiným tekutinám. když voda vnikne do elektrických zaříze- ní, dojde ke zvýšení...
- Page 88 Nebezpečí zranění! ▪ Nenabíjejte nikdy vadné nebo zmrzlé baterie ani baterie, které ne- jsou určené k nabíjení. ▪ Nepoužívejte přístroj k nabíjení baterií se suchými články. Takové baterie mohou prasknout a zranit přítomné osoby nebo způsobit věcné škody. ▪ Při použití přístroje dbejte vždy na pokyny uvedené v návodu k obsluze a na všechna bezpečnostní...
-
Page 89: Popis Výrobku
POPIS výRObkU 60 A BOOST Full Charge 20 A Charge Error Charge SELECT Battery DISPLAY DISPLAY DISPLAY 60 A START SELECT SELECT SELECT STOP STOP MODE MODE MODE TYPE TYPE TYPE RATE RATE RATE 26 24 č. Název Funkce Připojovací kabel (-) Pro připojení... - Page 90 č. Název Funkce kolečka Pro přepravu přístroje ventilátor na chlazení nabíjecí elektroniky Displej Pro obsluhu přístroje rukojeti Pro přepravu přístroje 60 a / LeD červená Pro nabíjení baterií s velkou max. Nabíjecí proud: kapacitou (např. baterií člunů 12 v: 60 a / 24 v: 30 a nebo velkých deep-cycle baterií) nebo pro rychlé...
- Page 91 č. Název Funkce aGM / LeD červená pro baterie se sklolaminátovým rounem STD (standard) / LeD pro baterie s tekutým elektro- červená lytem (WeT) a bezúdržbové, kyselino-olovnaté baterie (MF) Full / LeD zelená Svítí, jestliže je připojená baterie nabitá. Charge / LeD oranžová Svítí...
-
Page 92: Funkce
FUNkCe Nabíječka je vybavena mikroprocesorem (MCU - Micro-Computer-Unit) a funkcemi automatického nabíjení, diagnózy, záchrany a údržby baterií. Funkce „udržování stavu nabití“ umožňuje trvalé připojení nabíječky. Plné nabití baterie zůstane zachované. Bezpečnostní funkce Nabíječka je vybavena následujícími, ochrannými funkcemi, aby se zabránilo jejímu poškození... -
Page 93: Připojení Přístroje
Varování! Před použitím přístroje je nezbytné, aby jste si přečetli návod k obsluze baterie i vozidla a rozuměli všem bezpečnostním upozorněním. ▪ Používejte ochranné brýle a ochranné rukavice odolné proti kyselině. ▪ Zajistěte dostatečné větrání. ▪ Očistěte póly baterie. jestliže má baterie odnímatelná odvětrávací víčka, naplňte každý... -
Page 94: Start Nabíjení
Start nabíjení 1. Zvolte, opakovaným stisknutím tlačítka SeLeCT TYPe (27), odpovída- jící typ baterie volba se vám ukáže prostřednictví LeD (15, 16, 17). 2. Zvolte, opakovaným stisknutím tlačítka SeLeCT MODe (28), požadované nabíjecí napětí 12 v nebo 24 v. volba se vám ukáže prostřednictví... -
Page 95: Přepnutí Ukazatele
Přepnutí ukazatele během nabíjení si můžete opakovaným stisknutím tlačítka SeLeCT DISPLaY (23) nechat ukázat následující parametry: ▪ v = nabíjecí napětí (24) ▪ % = stav nabití baterie (25) ▪ Před nabíjením je možné kontrolovat jen aktuální napětí a po nabití jen stav nabití... -
Page 96: Fáze Nabíjení
FáZe NabíjeNí Krok 1: Diagnóza Diagnostická funkce kontroluje automaticky stav baterie a identifikuje napětí. Krok 2: Přednabití baterie se nabíjí nejdříve nízkým nabíjecím proudem, aby se dostala do stavu, ve kterém se může plně nabít. Krok 3: Plynulý pomalý start baterie se šetrně... -
Page 97: Režim Boost
Režim BOOST jestliže leží napětí připojené baterie pod 14,7 v, začne nejdříve automa- ticky nabíjení, než se nabíječka přepne do režimu bOOST. Přidržením tlačítka STaRT-STOP (26) na 3 vteřiny se přepíná nabíječka bez předběžného nabíjení přímo do režimu bOOST. aNaLýZa PORUCH Chyba/Pro- Možné... -
Page 98: Čištění, Ošetřování A Údržba
Chyba/Pro- Možné příčina Pomoc blém Dlouhá život- Při velmi nízkých teplotách Nabíjejte baterii nost (pod 0 ºC) probíhá nabíjení za normálních jen s velmi nízkým nabíjecím podmínek. proudem. Tím se prodlužuje Nebezpečí výbu- životnost baterie. jestliže se chu! baterie zahřeje, reguluje se Nenabíjet zmrzlé... -
Page 99: Likvidace
Likvidace Obal je tvořen neznečišťujícími materiály, které můžete zlikvidovat ve sběrnách recyklovatelného odpadu. Neodhazujte elektrická zařízení do běžného domovního od- padu! v souladu s evropskou směrnicí 2002 / 96 / eS pro stará elektrická a elektronická zařízení a na základě harmonizačního národní- ho zákona musí... - Page 101 Obsah Úvod........... . .102 Používanie v súlade s určeným účelom .
-
Page 102: Úvod
ÚvOD význam symbolov a výstražných upozornení, ktoré sú používané v tomto návode na používanie a/alebo na prístroji: Pri používaní prístroja dodržiavajte tento návod na ovládanie. Nebezpečenstvo ohrozenia života a nehody pre deti! Rešpektujte varovné a bezpečnostné pokyny! Prístroj používajte iba na miestach chránených pred poveter- nostnými vplyvmi! Ochranne izolovaná... -
Page 103: Používanie V Súlade S Určeným Účelom
škody vzniknuté v dôsledku nesprávneho použitia prístroja. Obsah dodávky Po rozbalení si hneď skontrolujte obsah. Prístroj a všetky jeho časti skon- trolujte, ak zistíte poškodenie, prístroj nepoužite. ▪ Nabíjačka LW 60.0 vrátane Pólového pripojovacieho kábla so svorkami ▪ 6 skrutiek 3 x15 mm ▪ Rukoväť... -
Page 104: Technické Údaje
Technické údaje Model LW 60.0 číslo výrobku 97012 Príkon 220 - 240 v aC, 50/60 Hz vstupný prúd Užitočný výkon 12 / 24 v DC Nabíjacie napätie (max.) 14,7 v / 29,4 v Nabíjací prúd +/-10 % 12 v: 60 a / 24 v: 30 a Odporúčaná... -
Page 105: Bezpečnosť
beZPečNOSť Všeobecné bezpečnostné pokyny Prečítajte si bezpečnostné pokyny a pokyny pre použitie. nedodržanie bezpečnostných pokynov a pokynov pre použitie môže spôsobiť zásah elektrickým prúdom, vznik požiaru a/alebo vážne ublíženie na zdraví. Uschovajte všetky bezpečnostné pokyny a pokyny pre použitie kvôli neskoršiemu nahliadnutiu. - Page 106 Nebezpečenstvo poranenia!! ▪ batérie obsahujú kyselinu, ktorá poškodzuje oči a pokožku. Pri do- bíjaní batérií okrem toho dochádza k tvorbe plynov a výparov, ktoré ohrozujú zdravie. ▪ Zabráňte akémukoľvek kontaktu s leptavou batériovou kyselinou. Pokožku a predmety, ktoré prišli do kontaktu s kyselinou, okamžite dôkladne umyte vodou.
- Page 107 Nebezpečenstvo zásahu elektrickým prúdom! ▪ Nabíjačky batérií môžu rušiť činnosť aktívnych elektronických implan- tátov ako je napr. kardiostimulátor a tým ohroziť osoby. ▪ Napriek tomu zabezpečte, aby bol prístroj uložený vždy na bezpeč- nom mieste. Nedovoľte, aby na zariadenie tiekla alebo kvapkala voda alebo iné...
- Page 108 Nebezpečenstvo poranenia! ▪ Nikdy sa nepokúšajte dobíjať nedobíjateľné, poškodené alebo zamrznuté batérie. ▪ Nabíjačku batérií nikdy nepoužívajte na nabíjanie batérií so suchý- mi článkami. Mohli by prasknúť a viesť k poraneniu osôb a vzniku vecných škôd. ▪ Pred používaním prístroja si dôkladne prečítajte návod na používa- nie a všetky bezpečnostné...
-
Page 109: Prehľad Produktu
PReHĽaD PRODUkTU 60 A BOOST Full Charge 20 A Charge Error Charge SELECT Battery DISPLAY DISPLAY DISPLAY 60 A START SELECT SELECT SELECT STOP STOP MODE MODE MODE TYPE TYPE TYPE RATE RATE RATE 26 24 č. Označenie Funkcia Pólový pripojovací kábel (-) Pre pripojenie nabíjačky na so svorkou (čierna) batériu (- pól) - Page 110 č. Označenie Funkcia 230 v sieťová zástrčka Pre pripojenie na 230 v sieťovú zástrčku Transportné kolieska Pre transport prístroja vetranie pre chladenie nabíjacej elekt- roniky Zobrazovacie políčko Pre ovládanie prístroja Rukoväť Pre posúvanie prístroja 60 a / LeD červená Pre nabíjanie batérií s vysokou max.
- Page 111 č. Označenie Funkcia STD (štandard) / LeD pre batérie s tekutým elektroly- červená tom (WeT) a bezúdržbové olovo- kyselinové batérie (MF) Full / LeD zelená Svieti, keď je pripojená batéria nabitá. Charge / LeD oranžová Svieti počas procesu nabíjania. error / LeD červená Svieti, keď...
-
Page 112: Funkcie
FUNkCIe Nabíjačka je vybavená mikroprocesorom (MCU - Micro-Computer-Unit) a má plnoautomatické funkcie nabíjania, diagnostiky, revitalizácie a údržby. Nabíjačka môže byť vďaka funkcii „udržiavacie nabíjanie“ trvale pripoje- ná. Maximálny stav nabitia zostane pritom zachovaný. Bezpečnostné funkcie Nabíjačka je vybavená nasledovnými ochrannými zabezpečeniami zabraňujúcimi poškodenie nabíjačky a batérie alebo vozidla: ▪... -
Page 113: Zapojenie Prístroja
1. Odstráňte skrutky upevnené na rukoväti (9) pre transport. 2. vyklopte rukoväť nahor a upevnite ju na každej strane troma skrutka- Varovanie! Pred použitím / nasadením prístroja si dôkladne prečítajte návod na používanie batérie ako aj vozidla a všetky bezpečnostné pokyny a uistite sa, že ste im porozumeli. -
Page 114: Spustenie Procesu Nabíjania
ak je batéria diagnostikovaná ako poškodená alebo zapojená s nesprávnou polaritou, svieti LeD-kontrolka „error“ (20) alebo „bad battery“ . v takom prípade vytiahnite nabíjačku a skontrolujte batériu (21) ako aj správne pripojenie (pozri aj „Hľadanie chyby“). 4. Pre začiatkom nabíjania sa uistite, že nabíjacie napätie (12 v/24v) nastavené... -
Page 115: Prepnutie Zobrazenia
1. Zapojte nabíjačku podľa popisu v odseku „Zapojenie prístroja“. 2. Opakovaným stlačením tlačidla SeLeCT MODe (28) zvoľte bOOST- -modus. 3. Stlačte tlačidlo STaRT-STOP (26) pre spustenie bOOST-modusu. Upozornenie: bOOST-modus možno naštartovať iba s pripojenou batériou. 4. vykonajte testovací štart vozidla. Upozornenie: Testovací... -
Page 116: Ukončenie Procesu Nabíjania A Odpojenie Nabíjačky
Doba nabíjania v hodinách (cca.) Užitočný výkon 12 v / 24 v 12 v 24 v Nabíjací prúd 20 A 60 A 30 A (max.) batéria- veľkosť 10 Ah 25 Ah 50 Ah 100 Ah 150 Ah 200 Ah 300 Ah 400 Ah 600 Ah Ukončenie procesu nabíjania a odpojenie nabíjačky... -
Page 117: Boost-Modus
Krok č. 2: Prednabíjanie batéria sa nabíja šetrne minimálnym nabíjacím prúdom, aby sa batéria vrátila do stavu schopného nabiť sa. Krok č. 3: Soft štart batéria sa nabíja šetrne nízkym nabíjacím prúdom. Krok č. 4: Hlavné nabíjanie batéria je rýchlo a bezpečne nabíjaná maximálnym nabíjacím prúdom. Krok č. -
Page 118: Analýza Chýb
aNaLýZa CHýb Chyba/prob- Možné príčiny Riešenie lém LeD „bad Poškodená batéria: batériu nechajte battery“ (21) Napätie batérie je nižšie ako skontrolovať v svieti 1,5 v odbornej dielni. batériu vymeňte. LeD „error“ Nesprávne pripojená/nepripo- Nabíjačku odpojte (20) svieti jená/batéria zo siete a skontro- lujte pripojenia. -
Page 119: Čistenie, Starostlivosť A Údržba
Chyba/prob- Možné príčiny Riešenie lém Príliš nízke na- batéria nebola nabíjaná dosta- Zabezpečte pätie batérie točný čas dostatočne dlhé nabíjanie batérie. čISTeNIe, STaROSTLIvOSť a ÚDRŽba ▪ Po každom ukončení nabíjacieho procesu vyčistite svorky. aby ste predišli korózii, utrite každú batériovú tekutinu, ktorá sa môže even- tuálne dostať... -
Page 120: Likvidácia
Likvidácia Obal je vyrobený z materiálu, ktorý neznečisťuje prostredie a preto ho môžete zlikvidovať v zberniach recyklovateľného odpadu. Neodhadzujte elektrické zariadenia do bežného domového odpadu! v súlade s európskou smernicou 2002 / 96 / eS pre staré elektrické a elektronické zariadenia a na základe harmonizačného národného zákona, použité... - Page 124 SPa SystemPartner GmbH & Co. Industriestr. 31 CH-8112 Otelfingen ▪ SPa Systems s.r.o. Pod višňovkou 1661/37 140 00 Praha 4 - krč, CZ ▪ www.aeg-automotive.com aeG is a registered trademark used under license from ab electrolux (publ) Stand der Informationen: 05/ 2014 eaN: 4038373970121...
Need help?
Do you have a question about the LW 60.0 and is the answer not in the manual?
Questions and answers