Table of Contents
Advertisement
Advertisement
Table of Contents

Subscribe to Our Youtube Channel
Related Manuals for Stanley ST4WPLT-(CA)


Summary of Contents for Stanley ST4WPLT-(CA)
- Page 3 AND SAVE THESE INSTRUCTIONS This Manual is for the following Models ST1WP-(CA), ST1.5WP-(CA), ST2WPLT-(CA), ST3WPLT-(CA), ST4WPLT-(CA) STANLEY® Water Pumps are compliant for sale and use in all 50 States and Canada CA Indicates the unit is certified for sale in California...
- Page 4 Customer Service Hotline at 1-877-684-8912. This Owner’s Manual is for the Following Models: ST2WPLT-(CA) ST3WPLT-(CA) ST4WPLT-(CA) ST1WP-(CA) ST1.5WP-(CA) (ST) indicates this unit is a STANLEY® product. (WP) indicates this unit is a Water Pump (- C A)indicatesthisunitisCARBCertifiedforCalifornia...
-
Page 5: Table Of Contents
Table of Contents Preface Product Specifications Safety Instructions Controls and Features PRE-OPERATING INSTRUCTIONS Connecting Water Inlet Hose Connecting Water Outlet Hose Engine Oil Level Check Engine Fuel Level Check Air Cleaner Element Check Pump Water Capacity Check Operation of Water Pump Transporting and Storing the Unit Maintenance Troubleshooting... -
Page 6: Preface
Today’s Market!” All STANLEY® Water Pump products are manufactured with quality components. Your new Water Pump will give you years of dependable service. Your STANLEY® Water Pump is designed, engineered, and manufactured with LIFAN’s Industrial Grade Gasoline Engine. This Owner’s Manual will provide you with all of your needed information for your new Power Equipment Product, including Safe Operation and Maintenance of your unit. -
Page 7: Product Specifications
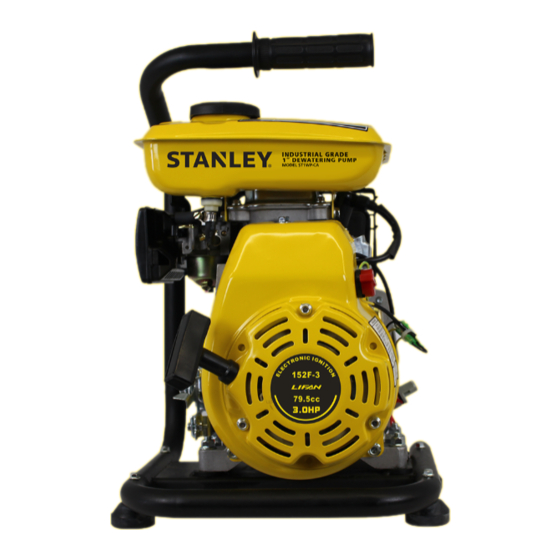
Product Specifications MODEL ST1WP-CA ST1.5WP-CA ST2WPLT-CA ST3WPLT-CA ST4WPLT-CA Suction/ 1" 1.5" 2" 3" 4" Discharge Diameter Rotation 3600rpm 3600rpm 3600rpm 3600rpm 3600rpm Velocity Delivery 2377 gph 2377 gph 6604 gph 14260 gph 22983 gph Suction Lift 13 ft 13 ft 19 ft 19 ft 15 ft... -
Page 8: Safety Instructions
Safety Instructions This is the safety alert symbol. It is used to alert you to potential personal injury hazards. Obey all safety messages that follow this symbol to avoid possible injury or death. To reduce the risk of injury, user must read all safety, pre-operating and operating instructions before using the product. - Page 9 Safety Instructions (continued) WARNING! Rapid recoil of starter cord (kickback) may pull hand and arm forward toward engine at a rapid rate. Brokenbones,bruises,sprains,andfracturesmayresult. When starting engine, pull cord slowly until tension is felt, then pull rapidly to avoid kickback WARNING! Fuel and its vapors are extremely flammable and explosive.
- Page 10 Safety Instructions (continued) WARNING! While engine is running temperature may exceed 150°F (65°C). Severe burns may occur. Exhaust heat/gasses can ignite combustibles, structures or damage fuel tank causing a fire. •DoNOTtouchhotsurfacesanddoavoidexhaustgasses. •Allowwaterpumptocoolbeforetouching. •Keepatleast6ft.(183cm)clearanceonallsidesofwaterpumpincludingoverheadclear. •Reflectiveexhaustheatmaydamagefueltankcausingfire. •CodeofFederalRegulation(CFR)Title36Parks,Forests,andPublicPropertyrequireequipmentpoweredby an internal combustion engine to have a spark arrester, maintained in working order, complying to USDA Forest servicestandard5100-...
-
Page 11: Controls And Features
Controls and Features LEGEND Throttle Valve Lever Controls engine speed. Beforestartingcoldengine,rotatethechokelever to the left until resistance is felt. After starting the Choke Lever water pump, rotate the choke lever to the right to disengage. Do NOT choke a warm engine when starting. -
Page 12: Pre-Operating Instructions
Pre-Operating Instructions: Connecting Water Inlet Hose Use commercially available hose, hose joint, and clamp. The water inlet hose must be of continuous structure and be rigid. The length of the hose should be no more than required. The effect of suction is greatest at shorter distances from the water surface. Suction time varies with the length of the water inlet hose. -
Page 13: Connecting Water Outlet Hose
Pre-Operating Instructions: Connecting Water Outlet Hose Use commercially available hose, hose joint, and clamp. A short hose with a big diameter will provide the best performance. A long hose with a small diameter will increase flowing resistance and decrease the power output of the water pump. -
Page 14: Engine Oil Level Check
Pre-Operating Instructions: Engine Oil Level Check NOTICE: • Runningenginewithinsufficientengineoilcancauseseveredamagetotheengine. • Theengineperformanceandservicelifeisdirectlydependentofthequalityoftheengineoil.DoNOTuse contaminated engine oil or vegetable oil • Checkengineoillevelonlywiththeenginestalledandwithunitonlevelground. Use 4-stroke gasoline engine oil equivalent in quality with SF, SG from API. Oil velocity varies with average environmental temperature. Select engine oil with proper velocity using the chart below in accordance with your regional environmental temperature. -
Page 15: Engine Fuel Level Check
Pre-Operating Instructions: Engine Fuel Level Check WARNING: •Gasolineisextremelyflammable.Keepawayfromignitionsources. •Fuelunitonlyinwell-ventilatedareaswiththeenginestalled. •DoNOTsmokenearunit. •DoNOTspillfueloutofthefueltank.Spilledgasolineandgasolinevapormayignite.If gasoline is spilled, wipe completely dry before starting the engine. •Avoidrepeatedorsustainedbreathingofgasolinefumes. •Avoidskincontactwithgasoline. •Keepoutofreachofchildrenandpets. •DoNOTusecontaminatedgasoline.Keepdirt,dustandwateroutoffueltank. •Afterfuelingiscomplete,ensurefuelfillercapissecurelyfastened. To Check Engine Fuel Level: 1. Remove fuel filler cap. 2. Visually check fuel level within gas tank. 3. -
Page 16: Air Cleaner Element Check
For paper type air filters, replace with the correct air filter for your unit. They are available at your dealer or from STANLEY®. Order your filter by calling toll free 1-877-684-8912. 3. Re-Install the air filter element into the air filter housing. -
Page 17: Pump Water Capacity Check
Pre-Operating Instructions: Air Cleaner Element Check PRIME PUMP BEFORE USE! NOTICE: •DoNOTrunenginewithoutwaterinsidethepump.Operationofenginewithoutwaterinsidethe pump will cause the pump to overheat. Prolonged operation of engine without water inside the pump will damage the pump gasket and impeller. •Ifwaterwithinthepumpisnotfull,shutofftheengineatonceandfillthepumpafterallowingthe unit to cool. To Check Pump Water: 1. -
Page 18: Operation Of Water Pump
Operation of Water Pump Water Pump Use Location: DANGER! Running water pump gives off carbon monoxide gas. It is odorless, colorless, and highly toxic. Breathingcarbonmonoxidegaswillresultinseriousinjuryordeath. • Onlyoperatewaterpumpoutdoors. • Preventexhaustgasfromentering,throughwindowsdoorsorventilationintakes,anyconfined areas. • DONOToperatewaterpumpinsideanyenclosedorroofedareas. Before Operating Water Pump: Refer to Pre-Operating Instruction section for additional procedures and definitions. - Page 19 Operation of Water Pump (continued) Starting the Engine: Refer to the Controls and Features section for additional diagrams and definitions. 1. PRIME THE PUMP. 2. Move the fuel cock to the “ON” position. 3. To start a cold engine, refer to instruction in the Controls and Features section – “2. Choke lever”.
- Page 20 Operation of Water Pump (continued) Stopping the Engine: Refer to the Controls and Features section for additional diagrams and definitions. IN AN EMERGENCY: 1. Turn the engine switch to the “OFF” position. NORMAL PROCEDURE: 1. Move the throttle valve lever to the “LOWER” position. 2.
-
Page 21: Transporting And Storing The Unit
Transporting and Storing the Unit WARNING: •Toavoidfire,allowwaterpumptocooldownforatleasttwentyminutes before transporting or storing the unit. •Alwaystransportandstoretheunitwiththefuelcockinthe“OFF”position. •Alwayskeepunitinhorizontal,LEVELpositiontothegroundtopreventfuelfrom spilling. Spilled gasoline and gasoline vapor may ignite. •Gasolineisextremelyflammableandexplosive. Storing the Water Pump: Refer to the Controls and Features section for additional diagrams and definitions. 1. -
Page 22: Maintenance
Maintenance MAINTENANCE SCHEDULE PROCEDURE TIME Engine Oil Check Each Use Replace Engine Oil AfterEach40HoursofUse(ForInitialBreakin– After First (1st) 10 Hours of Use Air Cleaner Filter Check Each Use/Replace As Needed or After Every 100 Hours of Use Impeller Check After 300 Hours of Use or After First Year Air Cleaner Wash Check before each use/ Clean as needed/ Change ea. - Page 23 For paper type air filters, replace with the correct air filter for your unit. They are available at your dealer or from STANLEY®. Order your filter by calling toll free 1-877-684-8912. 3. Re-install the air filter element into the air filter housing.
- Page 24 Maintenance (continued) SPARK PLUG MAINTENANCE: 1. Remove spark plug cap (refer to “Spark Plug Cap Removal” figure below). 2. Remove spark plug with socket and handle supplied with your unit (refer to “Spark Plug Removal” figure below). 3. Clean any carbon build-up around the spark plug. 4.
- Page 25 Maintenance (continued) FUEL SYSTEM MAINTENANCE (continued): (See diagram below) and either clean or replace the fuel filter element. Re-assemble the fuel filter element (refer to “Fuel Filter Element Assembly” diagram below). USAGE IN HIGH ALTITUDE REGIONS: In regions with high altitude, the standard carburetor produces overly dense combinations of fuel and air, which result in decreased engine performance and increased fuel consumption.
-
Page 26: Troubleshooting
Owner’s manual for proper procedure. 5. If the unit will still NOT start after performing the above checks, call our customer service line at STANLEY®, Toll Free 1-877-684-8912 or take the unit to an authorized service center. -
Page 27: Water Pump Safety
Water Pump Safety 1. Never pump gasoline or other flammable liquids. 2. The dealer or customer helpline (1-877-684-8912) can instruct you on intended uses. 3. Water pump must be placed on a level surface. 4. Do NOT expose the water pump to extreme conditions. Excessive dust, moisture and corrosive vapors will damage the unit. -
Page 28: Limited Warranty Policy
*** Commercial/Rental use is defined as any usage for income producing or other business related uses. In order to qualify for the limited warranty the product(s) must be purchased in North America from an authorized STANLEY® dealer or a dealer authorized by STANLEY® to sell STANLEY® products. This warranty is non-transferable and applies only to the original purchaser. - Page 29 STANLEY® the warranty registration card supplied with your product. This confirms your warranty coverage and provides a direct link between you and STANLEY® if we find it necessary to contact you. Your receipt for purchase including date, model and serial number must be maintained and registered to receive service from an Authorized Service Dealer for warranty service.
- Page 31 This Owner’s Manual includes the operation of models: ST1WP-(CA), ST1.5WP-(CA), ST2WPLT-(CA), ST3WPLT-(CA) and LF4WPLT-(CA) Thank you for purchasing our STANLEY® Industrial Grade Water Pump! All information in this publication is based on the latest product information available at the time of approval for printing. We reserve the right to make changes at any time without notice and without incurring any obligation.
Need help?
Do you have a question about the ST4WPLT-(CA) and is the answer not in the manual?
Questions and answers