Table of Contents
Advertisement
Advertisement
Table of Contents

Subscribe to Our Youtube Channel
Related Manuals for Gree KFR-25x2GW/NaJ31F-K


Summary of Contents for Gree KFR-25x2GW/NaJ31F-K
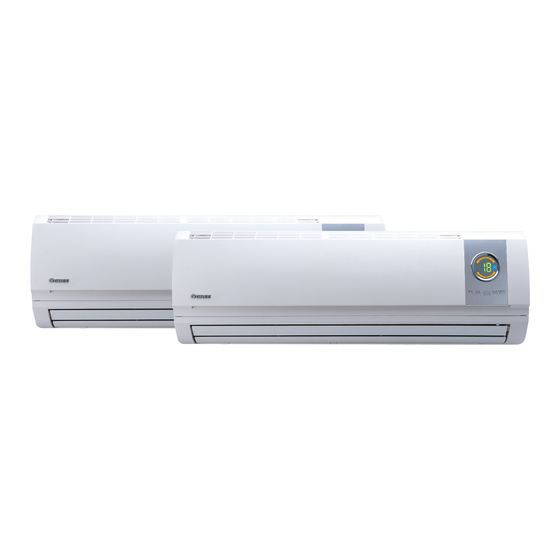
- Page 1 Please read this owner's manual carefully before operating, and keep it carefully for reference. Split Air Conditioner Wall Mounted Model Linge Wind Dual Split Type Series OWNER'S MANUAL 66162181 OWNER'S MANUAL KFR-25×2GW/NaJ31F-K GREE ELECTRIC APPLIANCES, INC. OF ZHUHAI...
-
Page 2: Table Of Contents
Install the indoor unit 22 Install the outdoor unit 24 Test operation and check after installation 27 Thank you for choosing GREE air conditioner, please read this owner's manual carefully before operating the unit and keep it carefully for consultation. - Page 3 (Please read the following carefully before operating the unit) WARNING Don't insert your hands or ★ Never damage the wires Earth: It must be reli- stick into the air intake or use the inapplicable wires. ably earthed. The earth Otherwise, it may cause elec- or outlet vents.
- Page 4 ★ Don't use fuse excluding Don't place a space heater Keep chemical spray ★ ★ away from the outdoor un- the fuse of correct capacity. near the air conditioner. it for more than 1 meter. Airflow from the air condi- Improper wire could cause the It is likely to ignite and ex- tioner can cause incomp-...
-
Page 5: Models And Specifications
Models and specifications Model KFR-25X2GW/NaJ31F-K Cooling capacity(kW) 5.00 Heating capacity(kW) 5.80 Rated power supply 220-240V~50Hz 7.2/7.8 Cooling/heating rated current (A) Cooling/heating Power Input (kW) 1.55/1.60 Cooling/heating Rated Input (kW) 2.45/2.30 R410A Refrigerant Refrigerant and charge (kg) 38/56 Noise (Indoor/ outdoor)dB(A) -
Page 6: Names And Functions Of Each Part
Names and functions of each part Air in Displayer Front panel Wrapping tape Guide louver Air out Air in Displayer Front panel Guide louver Air out Zoom in the display Set Temp. Wireless remote control Heating Cooling Air in Drainage hose Air in Connection pipe and connection wire... -
Page 7: Name And Function-Wireless Remote Control
Wireless remote control operation procedure Name and Function-Wireless remote control Note: l Be sure that there is no obstruction. l Don’t drop or throw the remote control. l Don’t place the remote control in a location exposed to direct sunlight. When the unit is restarted after stopped, it can automatically resume its most latest running mode, and the outdoor unit starts a little bit later. - Page 8 Name and Function-Wireless remote control (Continue) Note: This type of remote control is a kind of new current. Some of the control which have extra function will be described below. Liquid crystal displayer It shows all set contents. TIMER button: T-ON button: Press this button to set time.
-
Page 9: Cool Mode Operation Procedure
COOL mode operation procedure According to the differences between room temp. and set temp. and the rate dropping of room temp., microcomputer can control output power of the compressor, that is, the cooling capacity. running at the set speed. If room temp. is higher than set temp., the compressor starts running. If room temp. -
Page 10: Heat Mode Operation Procedure
HEAT mode operation procedure According to the differences between room temp. and set temp. and the rising rate of room temp. microcomputer can control output power of the compressor, that is, the heating capacity. If room temp. is lower than set temp. adds 2 ℃, the compressor starts. If the value of room temp. -
Page 11: Dry Mode Operation Procedure
DRY mode operation procedure If room temp. is higher than set temp, compressor operates at a fixed frequency and indoor fan motor runs at low speed. If room temp. is 2 ℃ lower than set temp, compressor stops and outdoor fan motor delays 30 seconds to stop, indoor fan motor runs at low speed. -
Page 12: Auto Mode Operation Procedure
AUTO mode operation procedure At AUTO mode operation, standard SET TEMP. is 25℃ for COOL mode and 20℃ for HEAT mode. 2.According to room temp. 1.Plug in, press ON/OFF button, microcomputer can automatically set and then air conditioner is turned COOL HEAT operation mode, so as for best... - Page 13 TIMER mode operation procedure At stopping, press TIMER ON button, set ON TIME in range of 0 to 24 hour to start the unit automatically. At operating, press TIMER OFF button,set OFF TIME in range of 0 to 24 hour to stop the unit automatically. T-OFF button: At operating, press T-OFF button.
-
Page 14: Sleep Mode Operation Procedure
SLEEP mode operation procedure When the unit is cooling or drying, if SLEEP operation is set, SET TEMP. would increase 1℃in 1 hour and 2℃ in 2 hours. When the unit is heating, if SLEEP operation is set, SET TEMP. would decrease 1℃... -
Page 15: How To Insert Batteries
How to insert batteries 1.Remove the cover from the back of the wireless remote control. 2.Insert the two batteries (Two AAA dry-cell batteries). 3.Re-attach the cover. Note: l Don't confuse the new and worn or different batteries. l Remove batteries when not in use for a long time. l The batteries can be used for about one year. -
Page 16: The Best Operating Methods
The best operating methods It aims at saving the energy and operating the unit conveniently and safely. Adjust to the suitable temperature. Too cool will do harmto the health. Clean the air filter seriously and maintaining it carefully . Please take out the batteries from the wireless remote control, when it is... -
Page 17: User Notices
User notices ● Select the most appropriate temperature. The airflow direction can be adjusted app- ropriately. It can preclude the electricity wasted. At operating, adjust the vertical airflow direction by adjusting the louvers of upward/downward dire- ction. And then, hold two ends of left and right louvers Keep room coo- to adjust the horizontal airflow. -
Page 18: Care And Maintenance
Care and Maintenance ◆ CAUTION Turn power off and pull out the power plug before cleaning air condi- ▲ tioner. Otherwise, it can cause electric shock. ▲ Never sprinkle water on the indoor unit and the outdoor unit for cleaning because it can cause an electric shock. ▲... -
Page 19: Trouble Shooting
Cleaning To clean the dust adhering to the filters, you can either use a vacuum cleaner, or wash them with warm water(the water with the neutral de- tergent should below 45℃) when the filters are very dirty (such as oil stain), and dry it in the shade, please see the right fig. - Page 20 Trouble Shooting Phenomenon There's unusual smell blowing from the This is caused by the odors in the outlet after operation is started. room which have been breathed into the air conditioner. Sound of water flow can be heard This is caused by the refrigerant flowing inside the unit.
-
Page 21: Wireless Remote Control
Phenomenon Trouble Shooting Remote control can't be used occasionally ・ Wireless remote control is not available. w h e n t h e a i r c o n d i t i o n e r i s d i s t u r b e d o r changing its functions frequently. -
Page 22: Installation Dimension Diagram
The installation must be done by trained and qualified service personnel with reliability according to this manual. Contact service center of GREE before installation to avoid the malfunction due to unprofessional installation. When picking up and moving the units, you must be guided by trained and qualified personnel. -
Page 23: Installation Location
Installation location ◆ Indoor unit The inlet and outlet should not be covered so that the outflow air can reach all parts of the room. Install in a location from which the condensation water can be drained out conveniently and that is permitting easy connection with the outdoor unit. -
Page 24: Install The Indoor Unit
◆ Install the indoor unit (Note: If there is no special indication, install of dual-split indoor unit is shown by unit A, installation method of unit B is the same as that of unit A.) ☆ Install of rear panel 1. Measure horizon by handing line or horizontal measurement. -
Page 25: Install Indoor Unit
As shown in fig.3, connect the blue wire of power connect wire onto terminal 'N(1)', black on onto terminal '2', brown to '3' and yellow-green one (earth wire) to terminal Cover connection cover plate on where it is, tighten bolts to ensure connection 5... -
Page 26: Install The Outdoor Unit
2. After wrapped piping and wiring (as shown in fig.5), pull them through the piping hole. 3. Hang the 2 mounting slots behind indoor unit on the upper tabs of the rear panel and check if it is firm enough. 4. - Page 27 Front side plate Rear side plate Indoor unit wire hole Power connect schematic of indoor and outdoor unit Note: Wrong wire connection may cause malfunction of some electric components. After fixing cable, ensure that leads between connection to fixed point have some space.
- Page 28 Screwdriver Air purging and leakage test Gas pipe Fluorine charg- Remove the flare nuts from the cut-off valves ing nuzzle. of the outdoor unit. Align the center of the piping flare with the Liquid Gas valve relevant valve, and screw in the flare nut by pipe hands.
-
Page 29: Test Operation And Check After Installation
Test operation and check after installation Test operation 1. Before test operation AUTO Do not switch on power before installation is finished completely. Electric wiring must be connected correctly and securely. Manual switch Cut-off valves of the connection pipes should be opened. All the impurities such as scraps and thrums must be cleared from the unit.
Need help?
Do you have a question about the KFR-25x2GW/NaJ31F-K and is the answer not in the manual?
Questions and answers