Advertisement

EVERLAST
Power TIG ® Series
Tig (GTAW) and mma (smaw)
Welders
Operator ' s Manual for PowerTig® AC/DC Welders
Includes Power i-Tig® DC Models
Safety, Setup and General Use Guide
1
Rev. 1
0518-09

Advertisement

Table of Contents
loading

Summary of Contents for Everlast PowerTig 200EX

  • Page 1 EVERLAST Power TIG ® Series Tig (GTAW) and mma (smaw) Welders Operator ’ s Manual for PowerTig® AC/DC Welders Includes Power i-Tig® DC Models Safety, Setup and General Use Guide Rev. 1 0518-09...
  • Page 2 Thank you for purchasing an everlast product. We ap- preciate your patronage and hope that you will enjoy years of use from our product. Please go directly to the Everlast website to register your unit and receive your warranty information.
  • Page 3 Serial number: __________________________ Model number: ____________________________ Date of Purchase___________________________ EVERLAST Contact Information Everlast consumer satisfaction email: sales@everlastwelders.com Everlast Website: everlastwelders.com Everlast Technical Support: Support@everlastwelders.com Main toll free number: 1-877-755 WELD ( 9353 ) 9am—5pm PST M-F 11am-4pm PST Sat. FAX: 1-650-588-8817...
  • Page 4: Table Of Contents

    Table of contents Section……………………………………………….Page General ...…………………………………………… Safety Precautions..………………………………. Introduction and Specifications………………… Know Your Machine……………………………….. 2.1 
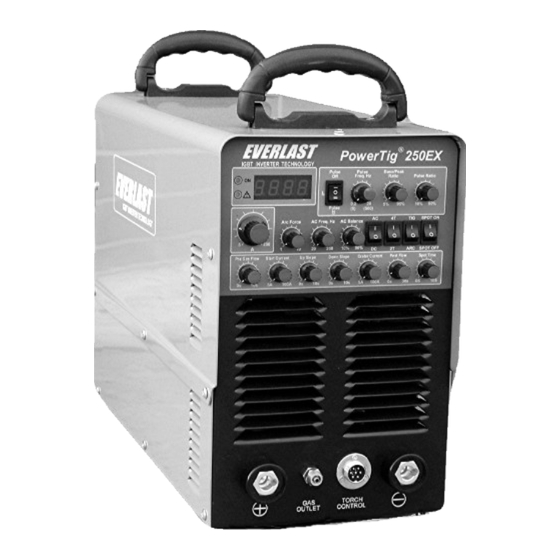
Panel Face and Functions…………………… 2.2 Lower Panel and functions….……………… Getting Started…………………………………….. 3.1 General Guidelines…………………………… 3.2 Shielding Gas Selection……………………… 3.3 Regulator/Flow meter Selection…………… 3.4 Regulator Connection………………………... 3.5 Regulator Adjustment………………………..
  • Page 5: General

    Safe operation and proper maintenance is your responsibility. We have compiled this operator’s manual, to instruct you in basic safety, op- eration and maintenance of your Everlast product to give you the best possible experience. Much of welding and cutting is based upon experience and com- mon sense.
  • Page 6: Safety Precautions

    SAFETY PRECAUTIONS These safety precautions are for protection of safety and health. Failure to follow these guidelines may result in serious injury or death. Be careful to read and follow all cautions and warnings. Protect yourself and others. Welding and cutting processes produce high levels of ultraviolet (UV) radiation that can cause severe skin burn and damage.
  • Page 7 SAFETY PRECAUTIONS continued WARNING! Persons with pacemakers should not weld, cut or be in the welding area until they consult with their physician. Some pacemakers are sensitive to EMF radiation and could severely malfunction while welding or while being in the vicinity of someone welding.
  • Page 8 SAFETY PRECAUTIONS continued WARNING! Electrical shock can kill. Make sure all electrical equipment is properly grounded. Do not use frayed, cut or otherwise damaged cables and leads. Do not stand, lean or rest on ground clamp. Do not stand in water or damp areas while weld- ing or cutting.
  • Page 9: Introduction And Specifications

    Section 1 Introduction and Specifications Product Feature Comparison Product Features EX Series LX Series DX Series I-Tig 315 DX 200/250 200/250 200/250 200/250 Over Current Warning • • • • • High Frequency Start • • • • • High Frequency AC •...
  • Page 10 Section 1 Introduction and Specifications PowerTig DX, LX and EX Models, I-Tig Models PowerTig LX Series PowerTig DX Series PowerTig EX Series Power I-Tig Series...
  • Page 11 Section 1 Introduction and Specifications PowerTig TIG (GTAW) WP 26 Torch Assembly PowerTig 315 Industrial PowerTig TIG (GTAW) Foot Pedal Assembly PowerTig Deluxe Stick (SMAW, MMA) Electrode Holder And Ground Clamp PowerTig TIG (GTAW) For TIG and STICK Torch Accessory Pack Operation...
  • Page 12 1.5 The unit should be stored in a dry 1.2 To ensure that your Everlast product is place for long term storage. Humid/wet in top condition, carefully inspect unit for conditions can contribute to the eventual damage upon opening the box, looking for decay of the circuitry in the machine.
  • Page 13 Section 1 Introduction and Specifications PowerTig EX Models Table 1.1 MODEL PowerTig 200EX PowerTig 250EX 1ph 230V 50/60Hz 1 or 3 ph230V50/60Hz INPUT Voltage Open Current Voltage 60 - 80V Welding Current Range 5A( ± 3)~160A 5( ± 3)~200A Rated Output Current...
  • Page 14 Section 1 Introduction and Specifications PowerTig LX Models Table 1.2 MODEL PowerTig200LX PowerTig250LX 1ph 230V 50/60Hz 1ph 230V 50/60Hz INPUT Voltage Open Current Voltage 60 - 80V Base Current 5A~160A 20~200A Rated Output Current 160A 200A Rated Duty Cycle Open Current Voltage 60 - 80V Base Current 20A~200A...
  • Page 15 Section 1 Introduction and Specifications PowerTig DX Models Table 1.3 MODEL PowerTig200DX PowerTig250DX 1ph 230V 50/60Hz INPUT Voltage 1ph 230V 50/60Hz Open Current Voltage 60 - 80V Base Current 5A~160A 20~200A Rated Output Current 160A 200A Rated Duty Cycle Open Current Voltage 60 - 80V Base Current 20~200A...
  • Page 16 Section 1 Introduction and Specifications PowerTig DX Model 315 Table 1.4 MODEL PowerTig315DX INPUT Voltage 3 ph 230V 50/60Hz Open Current Voltage 60 - 80V Base Current 20~250A Rated Output Current 250 A Rated Duty Cycle Open Current Voltage 60 - 80V Base Current 20-315 A AC balance...
  • Page 17 Section 1 Introduction and Specifications Power I-Tig 200 DC Output Only Table 1.5 Model Power I-Tig 200 Power Supply Voltage AC 220/230/240V 50-60 Hz Open Current Voltage 60-80 V(DC) Rated Output Current 200A Rated Duty Cycle 5-200A(TIG) Base Current 5-160A(Stick) Base Amps 5-200A Start current (fixed)
  • Page 18 Section 1 Introduction and Specifications Power I-Tig 250 Dual Voltage DC Output Only Table 1.6 Model Power I-Tig 250 Power Supply Voltage AC 110V/220V AC 50-60 Hz Open Current Voltage 60-80V (DC) Rated Output Current 150A (110V) 250A (220V) Rated Duty Cycle 5-150A(TIG) 5-250A(TIG) Base Current...
  • Page 19: Know Your Machine

    Once lamp goes out, you may resume using the unit. If frequent or continuous over- 5. Pulse Frequency. The pulse frequency con- heating is encountered, contact Everlast. trols the number of pulse cycles per second (Hz). Where applicable, when the pulse is se- 3.
  • Page 20 Section 2 Know Your machine continued 6. Base/Peak Ratio. This proportions the the arc penetrates the metal when the arc base amperage with the peak amperage of is held short. This is an exceptionally help- the pulse cycle, expressed as a percentage ful feature in MMA (SMAW) operation.
  • Page 21 Section 2 Know Your machine continued weld. Activate the spot timer by pressing and holding the torch trigger until the spot timer cycle is completed. 16. Pre Gas Flow. This timer allows the appropriate amount of shielding gas to flow to purge the gas lines and to provide adequate shielding gas coverage over the weld before the weld arc initiates.
  • Page 22: Lower Panel And Functions

    Section 2 Know Your machine continued 2.2 Lower Panel. The lower front panel is de- 2.3 Rear Panel. The following depiction is a picted below. Each terminal or lug should be typical rear panel view. kept free of dirt or obstructions. Image 2.2 Image 2.3 Rear Panel 1.
  • Page 23: Getting Started

    Section 3 Getting started 3.1 These are general guidelines for use Always be sure to select the correct and maintenance for your PowerTig unit. flow meter for the type of shielding Take into account all safety rules and rec- gas that is in use. Never substitute oxygen ommendations first before operation and or acetylene regulators! service.
  • Page 24: Machine Setup

    Pure tungsten (Green) is not rec- cerning 220V wall plug configurations, ommended for use in any Everlast Power- Everlast may choose to ship the unit with- Tig machine. Pure tungsten is not capable out a plug for wall service and to allow for...
  • Page 25 Section 3 Getting started continued The following table supplies basic information about Tungsten selection and suitability. Table 3.7.1 Recommended Note: Use only recommended sizes in Tig torches unless you purchase additional col- lets to fit the electrodes snugly. Loose fitting electrodes quickly ruin TIG torch parts.
  • Page 26: Tig Torch

    Refer to the following a good welder. Only practice and skill can do PowerTig Torch image for a typical TIG torch that. Everlast provides this basic information Assembly breakdown. as a general guideline to assist the operator in learning basic principles and techniques.
  • Page 27 Starting an arc with your High Frequency Everlast Image 3.9b Tungsten Sharpening welder is quite simple. Select the machine for TIG operation. Then, select the desired amperage.
  • Page 28: Mma (Stick Welding)

    Section 3 Getting started continued weld. A “skeleton” keyhole will begin to form in front of the weld. The keyhole is 3.13 Machine operation. MMA/Stick evidence that you are ready to add filler (SMAW) material and move forward. Introduce the Select switch for MMA/Arc operation.
  • Page 29 Section 3 Getting started continued 4. Use the Arc force and Amp adjustment Be sure to observe the manufacturer rec- to change arc qualities. Adjust the amper- ommendations regarding polarity. If the age according to the recommendations of weld appears lumpy, porous or otherwise the electrode (welding rod) manufacturer malformed, change the polarity of the for the type and size of the electrode used.
  • Page 30: Trouble Shooting

    Check that the switch is correctly selected for TIG or MMA. Machine welds, but displays will not il- Check machine fuse. Contact Everlast Support for further remedy. luminate. Tungsten is rapidly consumed. Inadequate gas flow. Too small of tung- sten.

Table of Contents