
Related Manuals for Unique CB2426


Summary of Contents for Unique CB2426
- Page 1 Top 10 Tips - Service Guide Models CB2426 thru UGP 8 1992 to current 2245 Wyecroft Road #5, Oakville, Ontario Canada L6L 5L7 Ph: 905-827-6157 Toll Free: 1-877-427-2266 Fax: 905-827-2027 www.UniqueOffGrid.com 03/26/10...
- Page 2 Listed are points that must be followed before trying to troubleshoot an absorption fridge. The following pages outline the Top Ten Tips, and explain “why” and “how” to troubleshoot. "Personal Service & Knowledge Makes Us Unique" "Personal Service & Knowledge Makes Us Unique"...
- Page 3 This product can produce carbon monoxide. Carbon Monoxide has no odor and can kill you. The burner and flue system must be kept clean. "Personal Service & Knowledge Makes Us Unique" "Personal Service & Knowledge Makes Us Unique"...
- Page 4 Carbon Monoxide Warning Label Carbon Monoxide Warning Label This label found inside all fridge and freezers "Personal Service & Knowledge Makes Us Unique" "Personal Service & Knowledge Makes Us Unique"...
- Page 5 This in turn will reduce/stop the operational efficiency of your absorption fridge/freezers. Note: Installation and service must be by licensed gas fitter in accordance with local codes or must comply with Propane Installation Code. "Personal Service & Knowledge Makes Us Unique" "Personal Service & Knowledge Makes Us Unique"...
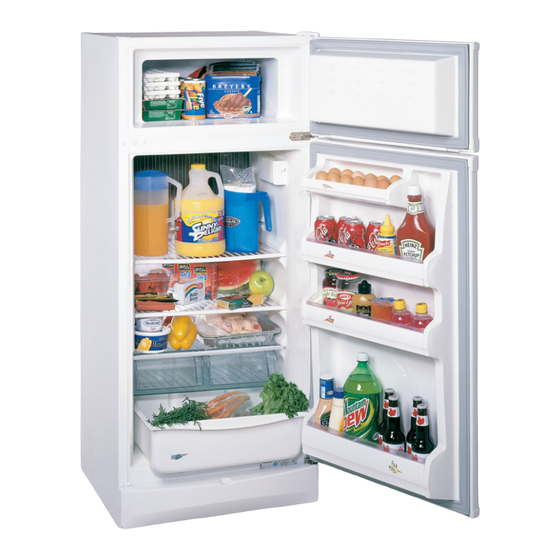
- Page 6 Without proper leveling, you will not achieve adequate cooling inside the fridge, and/or cause damage to the system. "Personal Service & Knowledge Makes Us Unique" "Personal Service & Knowledge Makes Us Unique"...
- Page 7 Ensure the fridge is level by using a 2ft level and adjusting the feet at the bottom of the front or back of the fridge until desired level is reached Left to Right Front To Back "Personal Service & Knowledge Makes Us Unique" "Personal Service & Knowledge Makes Us Unique"...
- Page 8 Ensure the fridge is level by using a 2ft level and adjusting the feet at the bottom of the front or back of the fridge until desired level is reached "Personal Service & Knowledge Makes Us Unique" "Personal Service & Knowledge Makes Us Unique"...
- Page 9 See leveler bolt and leveler cover, which fits onto the bottom of the bolt. These are located at the four corners of the fridge. "Personal Service & Knowledge Makes Us Unique" "Personal Service & Knowledge Makes Us Unique"...
- Page 10 - poor cooling, or fridge shutting down when switching to low flame. When pressure is too high, the unit will overheat and failure will occur within 36 hrs. "Personal Service & Knowledge Makes Us Unique" "Personal Service & Knowledge Makes Us Unique"...
- Page 11 ¾” wrench on the floating nut as well a 11/16” wrench on the on/off valve. Turn the nut counterclockwise. This will allow you to go to the next step "Personal Service & Knowledge Makes Us Unique" "Personal Service & Knowledge Makes Us Unique"...
- Page 12 Step2: Hook up Manometer to the downstream side of gas line, off of the On/Off Valve to take pressure reading Manometer hooked up to Removed from Gas Control downstream side of the gas line "Personal Service & Knowledge Makes Us Unique" "Personal Service & Knowledge Makes Us Unique"...
- Page 13 Hook this to the downstream side of your gas line "Personal Service & Knowledge Makes Us Unique" "Personal Service & Knowledge Makes Us Unique"...
- Page 14 Solution Solution Step 4: Adjust regulator to achieve the 11” mark on the manometer (adjust slowly) "Personal Service & Knowledge Makes Us Unique" "Personal Service & Knowledge Makes Us Unique"...
- Page 15 A dirty burner will create carbon build-up, along with carbon monoxide gases. It will also cause low heat to be produced from the flame, which in turn will cause poor cooling. "Personal Service & Knowledge Makes Us Unique" "Personal Service & Knowledge Makes Us Unique"...
- Page 16 Use a small brush to clean out the burner tube to free it of any spider webs, use a wire brush to clean any build up that has clogged the screen, and finish by blowing it out with compressed air. "Personal Service & Knowledge Makes Us Unique" "Personal Service & Knowledge Makes Us Unique"...
- Page 17 Locate nut to remove the burner cover plate, use a 1/4” nut driver to remove it. This will then give you access to the burner for cleaning. "Personal Service & Knowledge Makes Us Unique" "Personal Service & Knowledge Makes Us Unique"...
- Page 18 Solution – Removal Of Burner Assembly cont … Here is a view of the parts and their locations. All these parts will be removed for cleaning. "Personal Service & Knowledge Makes Us Unique" "Personal Service & Knowledge Makes Us Unique"...
- Page 19 Turn burner nut counter to remove the orifice from the orifice holder. clockwise in order to loosen from orifice. "Personal Service & Knowledge Makes Us Unique" "Personal Service & Knowledge Makes Us Unique"...
- Page 20 "Personal Service & Knowledge Makes Us Unique" "Personal Service & Knowledge Makes Us Unique"...
- Page 21 Use two wrenches, a ½” wrench on the union and a ½” wrench on the burner tube nut, turn the wrench in a counter clockwise direction. Once off, retain for cleaning. "Personal Service & Knowledge Makes Us Unique" "Personal Service & Knowledge Makes Us Unique"...
- Page 22 **Remember after removing the electrode, clean the tip with emery cloth to remove any carbon buildup or oxidization "Personal Service & Knowledge Makes Us Unique" "Personal Service & Knowledge Makes Us Unique"...
- Page 23 Step 6: Remove the thermocouple from the burner assembly in order to remove the burner from the bottom of the coil. Turn 12mm wrench counter clockwise "Personal Service & Knowledge Makes Us Unique" "Personal Service & Knowledge Makes Us Unique"...
- Page 24 Step 7: Locate the burner bolts at the front and the back. With a 3/8” ratchet remove bolts in a counterclockwise direction and once removed retain burner for cleaning. Back Bolt Front Bolt "Personal Service & Knowledge Makes Us Unique" "Personal Service & Knowledge Makes Us Unique"...
- Page 25 Cleaning of the burner Tools required for cleaning the burner Canned Air to blow out Pipe Cleaner and Wire Brush to burner after cleaned. remove dirt and scale. "Personal Service & Knowledge Makes Us Unique" "Personal Service & Knowledge Makes Us Unique"...
- Page 26 Take your burner and soak it in Isopropyl (rubbing)Alcohol or paint thinners for at least 10-15 minutes. Soak your orifice and burner tube at the same time. "Personal Service & Knowledge Makes Us Unique" "Personal Service & Knowledge Makes Us Unique"...
- Page 27 Your goal is to remove any scale buildup that may have occurred which would have reduced the size of the screen holes. "Personal Service & Knowledge Makes Us Unique" "Personal Service & Knowledge Makes Us Unique"...
- Page 28 Ensure the burner screen looks close to this image after it has been cleaned well. The next step will be to run the pipe cleaner through the burner. "Personal Service & Knowledge Makes Us Unique" "Personal Service & Knowledge Makes Us Unique"...
- Page 29 Run a pipe cleaner all the way up to the screen to ensure any spider webs have been removed and also to clean the walls of the burner tube. "Personal Service & Knowledge Makes Us Unique" "Personal Service & Knowledge Makes Us Unique"...
- Page 30 Step 5: Take a can of compressed air and blow through both ends of the burner. Burner is now cleaned. Set aside and clean orifice next. "Personal Service & Knowledge Makes Us Unique" "Personal Service & Knowledge Makes Us Unique"...
- Page 31 The orifice supplies the correct amount of gas flow to the burner. If the orifice is clogged, the flame will burn low causing poor cooling and thermocouple drop out. (fridge shuts down). "Personal Service & Knowledge Makes Us Unique" "Personal Service & Knowledge Makes Us Unique"...
- Page 32 **Do not stick any sharp object into the orifice - it will pop out the ruby and you will create incomplete combustion problems. "Personal Service & Knowledge Makes Us Unique" "Personal Service & Knowledge Makes Us Unique"...
- Page 33 (fridge shuts down) due to low gas pressure leading to the burner. "Personal Service & Knowledge Makes Us Unique" "Personal Service & Knowledge Makes Us Unique"...
- Page 34 Compressed air will not remove spider webs on its own. "Personal Service & Knowledge Makes Us Unique" "Personal Service & Knowledge Makes Us Unique"...
- Page 35 This scale can become dislodged and clog the orifice, this tube should be cleaned every time the orifice is cleaned or the fridge is serviced. "Personal Service & Knowledge Makes Us Unique" "Personal Service & Knowledge Makes Us Unique"...
- Page 36 Then proceed to blow out tube with compressed air to remove any leftover debris "Personal Service & Knowledge Makes Us Unique" "Personal Service & Knowledge Makes Us Unique"...
- Page 37 #6, Chimney & Boiler tube must be cleaned of debris each time fridge is serviced. After this has been done reassemble the burner assembly. Here is a reminder of the burner components locations "Personal Service & Knowledge Makes Us Unique" "Personal Service & Knowledge Makes Us Unique"...
- Page 38 Cleaning is required to avoid debris from falling down the boiler tube and onto the strangler assembly and burner. A clean chimney ensures less chance of overheating and carbon monoxide gases developing. "Personal Service & Knowledge Makes Us Unique" "Personal Service & Knowledge Makes Us Unique"...
- Page 39 You must cover or remove the burner so no debris will fall on it. Clean the chimney with the chimney brush (supplied on the back of the fridge) Reassemble "Personal Service & Knowledge Makes Us Unique" "Personal Service & Knowledge Makes Us Unique"...
- Page 40 Step 1: Locate the nut on the panel which is located on the right side of the fridge while facing the back. Take a ¼” nut driver to remove the screw that secures the chimney. located here "Personal Service & Knowledge Makes Us Unique" "Personal Service & Knowledge Makes Us Unique"...
- Page 41 Step 2: Remove upper section of chimney, remove the deflector/strangler and set aside for cleaning after the following steps are complete. Remove strangler and set aside in order to clean the boiler tube "Personal Service & Knowledge Makes Us Unique" "Personal Service & Knowledge Makes Us Unique"...
- Page 42 Step 3: Cover the burner if the burner has not been removed to eliminate any debris falling into the burner. Cover the burner with paper towel or any type of material that will stop any debris falling into the burner "Personal Service & Knowledge Makes Us Unique" "Personal Service & Knowledge Makes Us Unique"...
- Page 43 Run the brush up and down more, if scale continues to fall. Run chimney brush up and down the boiler tube to remove all scale build "Personal Service & Knowledge Makes Us Unique" "Personal Service & Knowledge Makes Us Unique"...
- Page 44 This may not allow the proper temperature to be obtained, which in turn may over-boil the system. "Personal Service & Knowledge Makes Us Unique" "Personal Service & Knowledge Makes Us Unique"...
- Page 45 The length of the deflector/strangler from the bend at the top of the wire down to the bottom of the baffle should be 25 3/8" for all 2-Door models (CB2426, SC21F, CQE22A,B,D,F & UGP 8) - the 1-Door model Models QM2808 – 58, with strangler hooked at the top length is 28 ¼”...
- Page 46 "Personal Service & Knowledge Makes Us Unique" "Personal Service & Knowledge Makes Us Unique"...
- Page 47 This will allow the heat to move freely around the disk and will not restrict the heat flow. File the edges of the disk with the file to remove scale build "Personal Service & Knowledge Makes Us Unique" "Personal Service & Knowledge Makes Us Unique"...
- Page 48 Step 2: Use the brush to clean the baffle part of the assembly. Once this is done, clean the wire and the baffle with the emery cloth. Clean with brush and finish off with emery cloth. "Personal Service & Knowledge Makes Us Unique" "Personal Service & Knowledge Makes Us Unique"...
- Page 49 Hook wire over lip at top over the boiler tube. "Personal Service & Knowledge Makes Us Unique" "Personal Service & Knowledge Makes Us Unique"...
- Page 50 On/Off valve. When this filter is clogged, it will slow the flow of gas to the gas control therefore causing low pressure to the burner (low flame). "Personal Service & Knowledge Makes Us Unique" "Personal Service & Knowledge Makes Us Unique"...
- Page 51 The purpose of the filter is to stop sludge and debris from entering the gas control. "Personal Service & Knowledge Makes Us Unique" "Personal Service & Knowledge Makes Us Unique"...
- Page 52 ¾” wrench on the floating nut and one 11/16” wrench on the on/off valve in front of it. Loosen the nut by turning it counterclockwise until the valve comes off. Place wrench on nut and one on the on/off valve "Personal Service & Knowledge Makes Us Unique" "Personal Service & Knowledge Makes Us Unique"...
- Page 53 Step 2: Once the on/off valve has been removed, remove the union fitting by turning it counterclockwise with a 3/16” allen wrench. This will now give you access to the filter inside the valve. Locate allen fitting remove turning counter clockwise "Personal Service & Knowledge Makes Us Unique" "Personal Service & Knowledge Makes Us Unique"...
- Page 54 When replacing the fitting ensure you use pipe dope on the threads to create a leak proof seal With fitting removed you can access to filter "Personal Service & Knowledge Makes Us Unique" "Personal Service & Knowledge Makes Us Unique"...
- Page 55 It is imperative that there is adequate ventilation around the fridge for the absorption system to cool properly and to allow proper operating temperatures within the cooling coil. "Personal Service & Knowledge Makes Us Unique" "Personal Service & Knowledge Makes Us Unique"...
- Page 56 Facing Unit LP only units Right Side & Top. 6" Left Side & Rear. 0“ Dual Powered UGP 8’s Left, Right & Top. 6" Rear. 3“ "Personal Service & Knowledge Makes Us Unique" "Personal Service & Knowledge Makes Us Unique"...
- Page 57 The magnet keeps the gas valve open, allowing the burner to stay lit. "Personal Service & Knowledge Makes Us Unique" "Personal Service & Knowledge Makes Us Unique"...
- Page 58 Do not over tighten, especially on the CO monitored models where there is an interrupter block between the valve and the thermocouple connection. "Personal Service & Knowledge Makes Us Unique" "Personal Service & Knowledge Makes Us Unique"...
- Page 59 - at this point give it a 1/4 to 1/2 turn more. This will ensure that you do not over tighten and damage the thermocouple . "Personal Service & Knowledge Makes Us Unique" "Personal Service & Knowledge Makes Us Unique"...
- Page 60 Step 1: See below the thermocouple connection with the Carbon Monoxide detector hooked up. To re-assemble the connection first screw the interrupter block clockwise into the gas control. Interrupter block "Personal Service & Knowledge Makes Us Unique" "Personal Service & Knowledge Makes Us Unique"...
- Page 61 Note: it is ok that the block is a bit loose in order to obtain this position, once you screw in the thermocouple it will tighten itself. Next, insert the mosfet into the block with arrow facing inwards. Mosfet "Personal Service & Knowledge Makes Us Unique" "Personal Service & Knowledge Makes Us Unique"...
- Page 62 - at this point give it a 1/4 to 1/2 turn more. This will ensure that you do not over tighten and damage the thermocouple and interrupter block insulator ring (black). "Personal Service & Knowledge Makes Us Unique" "Personal Service & Knowledge Makes Us Unique"...
- Page 63 Flame Images Flame Images Use for Technical Reference Use for Technical Reference Correct Flame Appearances High Fire – 11” W.C Low Fire 2” W.C "Personal Service & Knowledge Makes Us Unique" "Personal Service & Knowledge Makes Us Unique"...
- Page 64 Incorrect Flame Appearances Weak Flame Clogged Burner Screen "Personal Service & Knowledge Makes Us Unique" "Personal Service & Knowledge Makes Us Unique"...
Need help?
Do you have a question about the CB2426 and is the answer not in the manual?
Questions and answers