
Subscribe to Our Youtube Channel
Related Manuals for Unique UGP 13


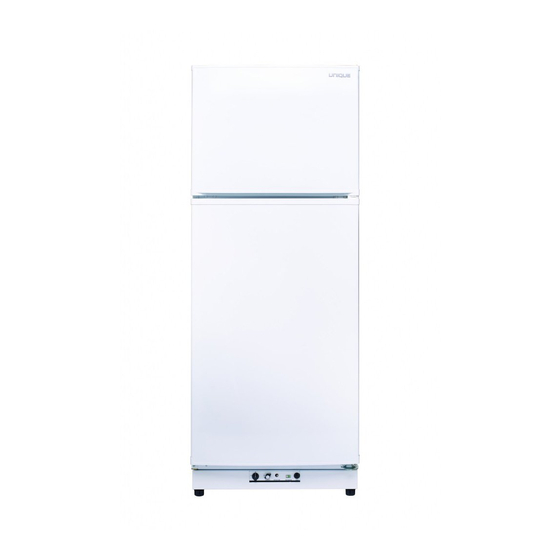
Summary of Contents for Unique UGP 13
- Page 1 379 L / 13.4 cu. ft. UGP 13 Propane Refrigerator OWNER”S GUIDE serial number: April 2018...
- Page 2 UNIQUE UGP-13 Propane Refrigerator Installation and Owner’s Manual The installation of the appliance must conform with local codes or, in the absence of local codes, to the national Fuel Gas Code, ANSI Z233.1 and in Canada B149.2 Propane Storage and Handling Code April 2018...
- Page 3 NOTE: The Combination Carbon Monoxide Alarm & Safety Shut-Off Instructions (CM Model), Owners/Installation Manual are stored inside the refrigerator. For Unique Gas Products Support, Call Toll Free 1-877-427-2266 Regular maintenance of the fridge is critical to prevent unsafe levels of Carbon Monoxide. Before lighting the refrigerator at any time, clean the flue tube as per the Owner’s Manual &...
- Page 4 M A N U F A C T U R E D A N D C E R T I F I E D B Y Unique Gas Products Ltd “ & ” “ & ” “ & ” 2245 Wyecroft Road...
-
Page 5: Table Of Contents
T able of Contents Chapters Welcome Safety and Warnings Appliances and Heat Shield Installation General Operating Instructions How To Use The Refrigerator Maintenance & Service Troubleshooting & Suggested Spares Door Removal and Reversal Temperature Controls & Food Storage and Cleaning Parts &... -
Page 6: Chapters
We know you will enjoy your new refrigerator and Thank You for choosing one of our Unique Gas Products. We hope you will consider us for future purchases. PLEASE READ AND SAVE THESE INSTRUCTIONS This manual provides specific operating instructions for your model. Use your refrigerator only as instructed in this manual. -
Page 7: Safety And Warnings
U G P 1 3 Safety and Warnings If you smell gas Open Windows Don’t touch electrical switches Extinguish any open flame Immediately call your gas supplier For your Safety Do not store or use gasoline or other flammable vapors and liquids in the ... - Page 8 Chapter U G P 1 3 Installation For best performance at high ambient temperatures, there must be free air circulation over the cooling unit at the rear of the refrigerator. Ensure that there is a free air space above the refrigerator and that the flue (chimney) on top of the cabinet is not covered in any way.
- Page 9 U G P 1 3 Clearances Minimum clearances to combustible materials are: Top – 6” Sides – 2” Rear – 0” with left-hand side rear shield mounted as shown in Figures. 1, 2 & 3. Note: DO NOT install the appliance directly on carpeting. Carpeting must be removed or protected by a metal or wood panel beneath the appliance, which extends at least the full width and depth of the appliance.
- Page 10 U G P 1 3 connections should be checked for leaks with a non-corrosive leak detector and/or soap and water for a bubble check.. – D ARNING O NOT USE FLAME TO CHECK FOR GAS LEAKS The gas supply system must incorporate a pressure regulator to maintain a supply pressure of not more than 12”...
-
Page 11: General Operating Instructions
Chapter U G P 1 3 General Operating Instructions Importance of Leveling a Refrigerator The refrigerator must be adjusted to a vertical position in both directions. In an absorption refrigeration system, ammonia is liquefied in the finned condenser coil at the top rear of the refrigerator. - Page 12 U G P 1 3 while holding in the gas button until the needle in the flame indicator D moves into the green area (to the right). 4. When the needle starts to move into the green area, this means flame is now lit. Stop sparking and continue to hold gas button E down for an additional 10 seconds.
-
Page 13: How To Use The Refrigerator
U G P 1 3 2. “MAX” Setting of the Thermostat: In gas operation, the thermostat allows the burner to remain on high flame continuously. (turn clockwise) 3. The thermostat can be adjusted between “Max” and “Min” to obtain the desired fridge temperature. - Page 14 U G P 1 3 Defrosting can be done with the fridge running if so desired. Simply open both doors and turn the thermostat to min, or fully counter clockwise. Once the ice starts to melt a towel can be placed under the evaporator fins in the fridge, then pull off the ice. Wipe the fins clean and shut both doors.
- Page 15 U G P 1 3 Interior Light The interior light is located inside the fridge compartment, at the upper middle part of the fridge. It can be removed/replaced by popping off the cover and unscrewing the light socket. 4 x “AA” size batteries operate the interior light, the battery compartment is located on the exterior back of the fridge.
-
Page 16: Maintenance & Service
Chapter U G P 1 3 Maintenance & Service The user should be aware of service that must be done on a regular schedule to keep the refrigerator operating properly. Installation must be by a licensed gas fitter in accordance with local codes or must comply with Propane Installation Code CAN/CGA-B149.2 (latest edition) REFRIGERATOR REMOVAL... - Page 17 U G P 1 3 to all LP connections. The appearance of bubbles indicates a leak and should be repaired immediately by a qualified serviceman. – D ARNING O NOT USE FLAME TO CHECK FOR GAS LEAKS Check burner flame for proper appearance. The flame should be light blue with no yellow at the tip.
- Page 18 U G P 1 3 Before removing burner orifice, clean burner area of any soot, scale or dirt. Remove the orifice and soak it in alcohol (isopropyl alcohol or thinners) and blow it out with compressed air. Re-install and tighten burner orifice.
- Page 19 Chapter U G P 1 3 TROUBLESHOOTING INSTRUCTIONS & SUGGESTED SPARE PARTS TO KEEP ON HAND REFRIGERATOR DOES NOT COOL, CHECK LIKELY CAUSES: Burner orifice clogged. Clean. See section M & S AINTENANCE ERVICE HAPTER Item #2. Periodic Maintenance, Items 1-9. Check to ensure refrigerator is level –...
- Page 20 U G P 1 3 Spare Parts The following is a list of commonly used parts which are available: Burner orifice Burner Electrode Thermocouple Safety valve & Thermostat Piezo Igniter (push button) Baffle ...
- Page 21 Chapter U G P 1 3 Door Removal & Reversal Instructions This appliance has the capability of either opening the door from the left or right side. The unit is delivered to you with the door opening from the left side, to the right. Should you desire to reverse the opening direction, please follow these instructions.
- Page 22 U G P 1 3 Hinge Pin Bushing Lift off the freezer door from the middle hinge and place it on a padded surface to prevent scratching. Unscrew the middle hinge using a ratchet tool with an 8mm socket or a Philips screwdriver.
- Page 23 U G P 1 3 Remove screw and Remove transfer to right hand side cap and of cabinet plugs In order to remove the bottom hinge remove the 4 bolts that hold it in place using a ratchet tool with an 8 mm socket or a Philips screwdriver. Remove four bolts Pop out the four caps that cover the hinge holes from the bottom left side of the...
- Page 24 U G P 1 3 Now, loosely mount the bottom hinge to the left side of the cabinet with the four bolts., straighten and tighten all four bolts. Mount hinge then tighten all bolts Take the hinge clips and metal securing clip provided and install them to the bottom of the fridge and freezer door as shown in the image below.
- Page 25 U G P 1 3 Replace the refrigerator door on bottom hinge pin, close the door against the cabinet, the gasket in the door magnet will hold it in place. Place the middle hinge pin in the top of the fridge door. Lightly secure the middle hinge to the cabinet.
- Page 26 U G P 1 3 Check that the freezer and fridge doors are aligned with the left side of the cabinet and gaskets all fit. Also look directly at the front of the fridge and ensure the gap between the top of the fridge door and bottom of the freezer door has the same spacing from left to right.
- Page 27 Chapter U G P 1 3 Temperature Controls Note: Maximum setting is override; therefore the thermostat function is not operational at this setting. This setting is usually only required during very hot and humid days. COOL DOWN PERIOD To ensure safe food storage, allow the refrigerator to operate with the doors closed for at least 8 hours before loading it with food.
- Page 28 U G P 1 3 Crispers The crisper is located under the bottom refrigerator shelf and for storing fruits, vegetables, and other fresh produce. Wash items in clean water and remove excess water before placing them in the crispers. Items with strong odors or high moisture content should be wrapped before storing.
- Page 29 U G P 1 3 Do not refreeze meat that has thawed. OADING THE REEZER Avoid adding too much warm food into the freezer at one time. This overloads the freezer, slows the rate of freezing, and can raise the temperature of frozen foods.
- Page 30 Chapter U G P 1 3 Parts Diagram and List Interior of Fridge...
- Page 31 U G P 1 3 Burner Train Assembly...
- Page 32 U G P 1 3 UNIQUE UGP-13 Fridge (13 cu/ft) Item# ESCRIPTION UGP13-01 IEZO GNITOR UGP13-02-1 UTLET ITTING UGP13-03-1 UTLET UGP13-04 RIFICE DRILL SIZE UGP13-05 URNER OUNTING RACKET UGP13-06 URNER UGP13-07 URNER ROTECTION OVER UGP13-08 LECTRODE WITH UGP13-09...
- Page 33 U G P 1 3 Item# ESCRIPTION UGP13-47-1 RIDGE DOOR GASKET UGP13-48-1 RIDGE UGP13-49-1 IDDLE AND OTTOM HELVES UGP13-50 EVELING FOOT UGP13-51-1 RISPER RAWER UGP13-52-1 IDDLE AND OTTOM HELVES UGP13-53-1 NTERIOR LIGHT UGP13-54-1 IDDLE INGE UGP-UNV REMIUM HIMNEY RUSH FOR ALL PRODUCTS UGP13-55 AFFLE...
- Page 34 This UNIQUE Refrigerator must be serviced regularly as outlined in the Owner’s Manual. Unique Gas Products Ltd. the seller will not be liable for direct or indirect loss of foods caused by failure in operation. In case of damage, the owner must provide proof of purchase, Model, and Serial Number to the Seller or Unique Gas Products Ltd.
- Page 35 Product returned to UNIQUE at Buyer’s expense and risk, will be repaired or replacement shall be made without charge, provided that: (a) the Product has not been subjected to abuse, contamination, neglect, accident, incorrect wiring not our own, improper installation or servicing, or used in violation of instructions furnished by Unique; and (b) as to any prior defects in materials or workmanship covered by this warranty, the Product has not been repaired or altered by anyone except Unique; and (c) the model number and manufacture date label has not been removed, defaced or otherwise changed; and (d) examination discloses, in the ...
- Page 36 © 2018 Unique Gas Products Ltd., 2245 Wyecroft Road #5, Oakville, Ontario, Canada, L6L 5L7 www.uniqueoffgrid.com...
Need help?
Do you have a question about the UGP 13 and is the answer not in the manual?
Questions and answers