Advertisement
Quick Links
Advertisement

Subscribe to Our Youtube Channel
Summary of Contents for ParaBody 894104A
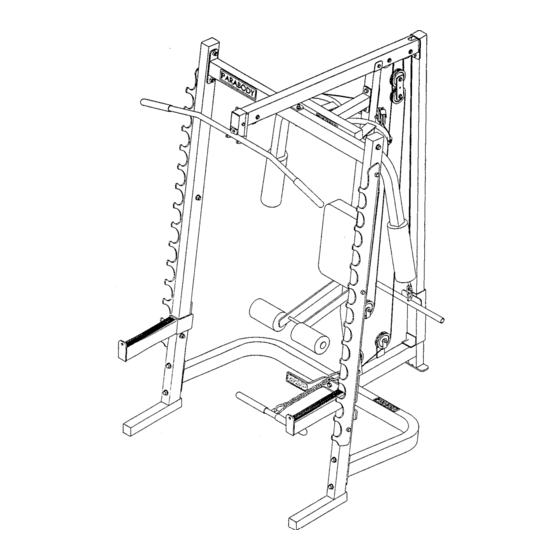
- Page 1 Serious Steel 894104 PEC DEC OPTION Illl ASSEMBLY INSTRUCTIONS Revision:4/26/99 Part # 6820101...
- Page 2 2. Do not allow minors or children to play on or around this equipment. 3. Exercise with care to avoid injury. 4. If unsure of proper use of equipment, call your local Parabody distributor or call the Parabody customer service department at (800) 328-9714.
-
Page 3: Parts List
DESCRIPTION KEY PART # BEARING HOUSING 6818103 6818403 PEC DEC ARM LEFT 6818503 PEC DEC ARM RIGHT 6818303 CENTER PULLEY BRACKET 6686802 PULLEY BRACKET BACK PAD 6597402 6176201 4 X 12" ROLLER PAD 3-1/2" PULLEY 3116201 6492201 94-1/2" CABLE 134-3/4" 6819001 6405201 2"... - Page 4 FIGURE 2 STEP 2: ¯ Assemble t~vo 1 X 1" GLIDES (12) to the BEARING HOUSING (1) as sho~vn in FIGURE ¯ Insert t~vo 2" SQ. END CAPS (11) to the ends of the BEARING HOUSING (1) as shown in FIGURE...
- Page 5 FIGURE 3 STEP 3: ¯ Insert four 2" SQ. END CAPS (11) into the ends of the LEFT and RIGHT PEC DEC ARMS (2 & 3) as sho~vn in FIGURE ¯ Assemble two 4 X 12" ROLLER PADS (7) to the LEFT and RIGHT PEC DEC ARMS (2 & 3) as shown in FIGURE 3. (TI~P: Spray window cleaner on the inside of the roller pad to help ease assembly.)
- Page 6 FIGURE 4 STEP 4: ¯ LOOSELY assemble two 3-1/2" PULLEYS (8) and two CABLE RETAINING CLIPS (13) to the CEN’IER PULLEY BRACKET (4) using two 3/8 X 2" BOLTS (14), two 3/8" WASHERS FIGURE 5 STEP 5: SECURELY assemble the BEARING HOUSING (1) and the CENTER PULLEY BRACKET (4) to the UPRIGHT FRAME using two 1/2 X 3-1/4"...
- Page 7 FIGURE 6 STEP 6: Assemble the LEFT & RIGHT PEC DEC ARMS (2 & 3) to the BEARING HOUSING (1) using four 3/4" FLANGE BEARINGS (21), two 1/2" WASHERS (19), and m’o 1/2" LOW HEIGHT LOCK NUTS (22) as shown in FIGURE 6. (Tighten connection securely, then back nut off 1/8 turn or until arm rotates freely.) HEIGHT...
- Page 8 UPRIGHT 3/8X2-3/4", FIGURE 7 STEP 7: SECURELY assembleBACKPAD (6) to theUPRIGHTFRAMEusingtwo 3/8X2-3/4"BOLTS (15) andtwo 3/8" WASHERS (17) as shown inFIGURE7. I 1 I 1...
- Page 9 STEP 8 Wrap the 94-1/2" CABLE (9) around one 3-1/2" PULLEY (8) and SECURELY assemble the PULLEY to the PULLEY BRACKET (5) using one 3/8 X 2" BOLT (14) and one LOCKNUT (18) as shown in FIGURE FIGURE 9 STEP 9: ¯...
- Page 10 4-1/2" PULLEY,~ FIGURE 10 STEP 10: ¯ Route the end of the 134-3/4" CABLE (10) through the slot of the UPRIGHT FRAME then SECURELY ously removed 4-1/2" PULLEY to the UPRIGHT FRAME using two previously removed 3/8 X 2-3/4" BOLTS, two 3/8" FLANGE SPACERS, two 3/8"...
- Page 11 SECURELY tighten jam nut. Thank you for purchasing the Parabody 894104 PEC DEC OPTION. If unsure of proper use of equip- ment, call your local Parabody distributor or call the Parabody customer service department at (800) 328- assemble the PULLEY to the plate on the UPRIGHT (17), and 3/8"LOCK...


Need help?
Do you have a question about the 894104A and is the answer not in the manual?
Questions and answers