
Related Manuals for ParaBody 807 BODY SYSTEM


Summary of Contents for ParaBody 807 BODY SYSTEM
- Page 1 807 BODY SYSTEM WORKOUT CENTER WARNING: Read and follow all directions for each step to insure proper assembly of this product. USER’S GUIDE CLASS H Version: 807109 PART # 7346601 Revision: 2/10/03 REV. C...
-
Page 2: Important Safety Information
3. Keep body and clothing free of all moving objects. DO NOT attempt to fix. Notify your authorized ParaBody dealer before use and have repairs made by 4. Inspect the machine before use. DO NOT use it if it an authorized service technician. -
Page 3: Important Notes
IMPORTANT NOTES Please note: * Thank you for purchasing the ParaBody 807 Gym System. Please read these instructions thoroughly and keep them for future reference. This product must be assembled on a flat, level surface to assure its proper function. - Page 4 4’ 6’ 1’ 2’ 3’ 5’ 7’ 1’ 2’ 3’ 4’ 5’ 1 Square = 1’ X 1’...
-
Page 5: Parts List
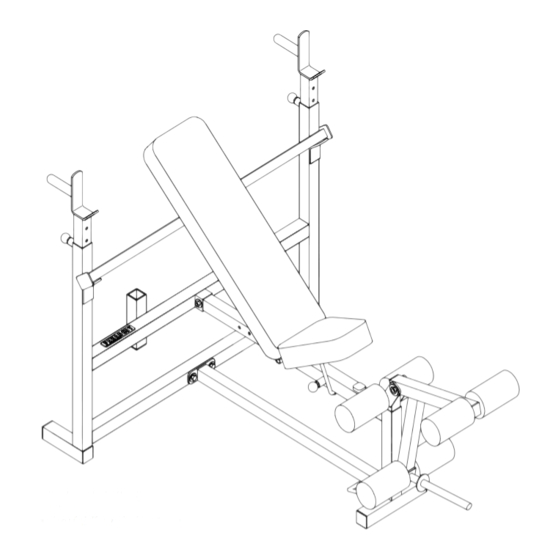
PARTS LIST PART # DESCRIPTION 7339309 UPRIGHT FRAME 7338609 BENCH FRAME 6111010 HEIGHT ADJUSTMENT BAR 7338910 SEAT ADJUST 6407810 BASE LEG 6407310 SADDLE 6407210 LEG EXTENSION NECK 6024710 LEG EXTENSION 6406401 HINGE TAB 7339801 U-PIN 6125101 ROLLER PAD SHAFT 6194601 ROLLER PAD 6654521 SEAT PAD... - Page 6 FIGURE 1 STEP 1: • Attach eight PARAGLIDE STRIPS (31) to the SEAT ADJUST (4) (FOUR ON EACH END) as shown in FIGURE 1 using the following steps: • Thoroughly clean all surfaces where the PARAGLIDE STRIPS are to be attached. •...
- Page 7 FIGURE 2 STEP 2: • Pull back the SPRING PIN on the SEAT ADJUST (4) and slide it over the end of the BENCH FRAME (2) as shown in FIGURE 2. Engage the SPRING PIN into one of the adjustment holes. •...
- Page 8 3/8 X 2-3/4” 16 3/8 X 3” 17 FIGURE 3 STEP 3: • Insert four 2” SQ. END CAPS (33) into the BASE TUBES of the UPRIGHT FRAME (1) as shown in FIGURE 3. • SECURELY assemble the BENCH FRAME (2) to the UPRIGHT FRAME (1) using two 3/8 X 3” BOLTS (17), one 3/8 X 2-3/ 4”...
- Page 9 FIGURE 4 STEP 4: • Attach eight PARAGLIDE STRIPS (31) to both UPRIGHT TUBES on the UPRIGHT FRAME (1) (FOUR ON EACH END) as shown in FIGURE 4 using the following steps: • Thoroughly clean all surfaces where the PARAGLIDE STRIPS are to be attached. •...
- Page 10 NOTE: Holes in items 34 are not centered 7/8” 7/8” 3/8 X 2” 3/8 X 1” FIGURE 5 STEP 5: • Insert one 1 X 2” END CAP (37) into each BACK PAD SUPPORT (34) • Assemble the SEAT PAD (13) to the two HINGE TABS (9) using two 3/8 X 1” BOLTS (15), two 3/8” LOCK WASHERS (20), and two 3/8”...
- Page 11 1/2” X 9” FIGURE 6 STEP 6: • Assembly pad assemblies by aligning BACK SUPPORTS (34) and HINGE TABS (9) with SEAT ADJUST (4) using one 1/2” X 9” BOLT (35) and one 1/2” JAM NUT (42) as shown in FIGURE 6.
- Page 12 FIGURE 7 STEP 7: • Insert one 1-3/4” SQ. END CAP (23) into the top of the LEG EXTENSION NECK (7) as shown in FIGURE 7. • Slide two ROLLER PADS (12) over each end of the SHAFT of the LEG EXTENSION NECK (7), as shown in FIGURE 7, and secure in place using two 3/4”...
- Page 13 18 1/2 X 3” LOW HEIGHT 24 FIGURE 8 STEP 8: • Insert three 1-3/4” SQ. END CAPS (23) into the ends of the LEG EXTENSION (8) as shown in FIGURE 8. • Insert two 1/2” FLANGE BEARINGS (26) into the BUSHING on the LEG EXTENSION (8) as shown in FIGURE 8. •...
- Page 14 FIGURE 9 STEP 9: • When ready to perform LEG CURLS or LEG EXTENSION, pull up slowly on the front of the BENCH FRAME (2) and allow the U-PIN (10) to rest on top of the TAB of the BASE LEG (5). (NOTE: THE BENCH FRAME MUST BE ADJUSTED UP WHEN USING THE LEG EXTENSION TO ALLOW PROPER CLEARANCE FOR WEIGHT PLATES)
- Page 15 FIGURE 10 STEP 10: • Set the HEIGHT ADJUSTMENT BAR (3) across the UPRIGHT FRAME (1) as shown in FIGURE 10, for performing INCLINE, or MILITARY PRESSES. When performing DIPS, use the HEIGHT ADJUSTMENT BAR (3) to hold the BACK PAD forward as shown in the WALL CHART.
-
Page 16: Maintenance
Please note: * We recommend cleaning your product (pads and frame) on a regular basis, using warm soapy water. Touch-up paint can be purchased from your ParaBody customer service representative at (800) 328-9714. * Inspect equipment daily. Tighten all loose connections are replace worn parts immediately. -
Page 17: Limited Warranty
ParaBody extends the following LIMITED WARRANTY to the original owner of the ParaBody products. The Warranty terms apply to IN HOME USE ONLY. 1. LIMITED WARRANTY ON FRAME AND WELDS. If the frame of the ParaBody product or a weld should crack or break, it will be repaired or replaced by ParaBody. - Page 18 LIFE FITNESS CONSUMER DIVISION 14150 Sunfish Lake Blvd. Ramsey Minnesota, 55303 U.S.A. Tel: 763.323.4500 Fax: 763.323.4797 800.328.9714 (Toll-free within the U.S. and Canada) www.parabody.com INTERNATIONAL OFFICES Life FitnessAtlantic BV Life Fitness (UK) Ltd. Atlantic Headquarters Queen Adelaide Bijdorpplein 25-31 Ely, Cambs CB7 4UB...
Need help?
Do you have a question about the 807 BODY SYSTEM and is the answer not in the manual?
Questions and answers