Table of Contents
Advertisement
Available languages
Available languages
Advertisement
Chapters
Table of Contents

Related Manuals for Future light Scan SC-740


Summary of Contents for Future light Scan SC-740
-
Page 1: User Manual
BEDIENUNGSANLEITUNG USER MANUAL MODE D’EMPLOI © Copyright Für weiteren Gebrauch aufbewahren ! Keep this manual for future needs ! Nachdruck verboten ! Gardez ce mode d’emploi pour des Reproduction prohibited ! utilisations ultérieures ! Réproduction interdit ! - Page 2 Weitere Produkte aus dem FUTURELIGHT-Sortiment: Further products from the FUTURELIGHT-range: www.futurelight.com Autres produits de l’assortiment de FUTURELIGHT: ARTIKELBESCHREIBUNG ............BEST.-NR. ARTICLE DESIGNATION ............NO. DESCRIPTION D’ARTICLE ............N° D’ART. FUTURELIGHT LICHTEFFEKTE FUTURELIGHT LIGHTING EFFECTS FUTURELIGHT EFFETS LUMINEUX FUTURELIGHT RT-150, DMX Zylinder,für EFR ......51830500 FUTURELIGHT FX-150, DMX Flower, für EFR ......
-
Page 3: Table Of Contents
Inhaltsverzeichnis 1. Sicherheit ........................4 1.1 Sicherheitshinweise ....................4 1.2 Bestimmungsgemäße Verwendung ................4 2. Einführung ........................6 2.1 Einsetzen der Lampe ....................6 3. Installation ........................7 3.1 Allgemeine Hinweise ....................7 3.2 Anschluß ans Netz ....................7 3.3 Anschluß an den DMX-512 Controller / Verbindung Projektor - Projektor ....7 4. -
Page 4: Sicherheit
Achtung ! Gerät vor Feuchtigkeit und Nässe schützen ! Vor Öffnen des Gerätes Netzstecker ziehen ! LESEN SIE VOR DER ERSTEN INBETRIEBNAHME ZUR EIGENEN SICHERHEIT DIESE BEDIENUNGSANLEITUNG SORGFÄLTIG DURCH! 1. Sicherheit 1.1 Sicherheitshinweise Alle Personen, die mit der Aufstellung, Inbetriebnahme, Bedienung, Wartung und Instandhaltung dieses Gerätes zu tun haben, müssen - entsprechend qualifiziert sein - diese Betriebsanleitung genau beachten... - Page 5 nicht mehr korrekt funktionieren, ist das meist das Ergebnis von unsachgemäßer Bedienung! Das Gerät darf nicht in Betrieb genommen werden, nachdem es von einem kalten in einem warmen Raum gebracht wurde. Das dabei entstehende Kondenswasser kann unter Umständen Ihr Gerät zerstören. Lassen Sie das Gerät solange uneingeschaltet, bis es Zimmertemperatur erreicht hat! Betreiben Sie das Gerät nur, nachdem Sie sich vergewissert haben, daß...
-
Page 6: Einführung
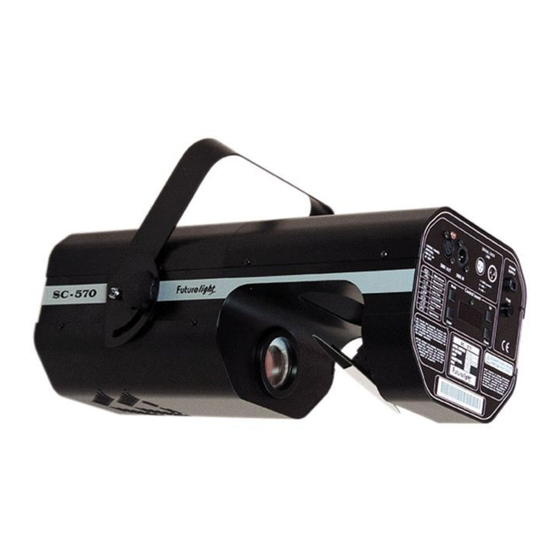
Futurelight Scan SC - 740 STANDARD WEITWINKELOBJEKTIV OPTIONALES 12° OBJEKTIV STANDARD WEITWINKELOBJEKTIV MIT FROSTFILTER OPTIONALES 12° OBJEKTIV MIT FROSTFILTER Leistungsstarker Scanner mit umfassenden Features Für extrem helle 575 W HMI-Lampe • 11 unterschiedliche, dichroitische Farbfilter und weiß • Über 2 Korrekturfilter lassen sich bis zu 36 unterschiedliche Farben und Halbfarben erzeugen •... -
Page 7: Installation
Schalten Sie das Gerät nur bei geschlossenem Gehäuse ein. 3. Installation 3.1 Allgemeine Hinweise BRANDGEFAHR! Achten Sie bei der Installation des Gerätes bitte darauf, daß sich im Abstand von mind. 0,5 m keine leicht entflammbaren Materialien (Deko, etc.) befinden. Das Gerät kann in jeder möglichen Position installiert werden, ohne seine funktionellen Eigenschaften zu verändern. -
Page 8: Bedienung
4. Bedienung 4.1 Funktionen der Steuerkanäle 4.1.1 Steuerkanal 1 - Pan Wenn Sie den Regler verschieben, bewegen Sie den Spiegel horizontal (PAN). Allmähliches Einstellen des Spiegels bei langsamen Schieben des Reglers (0-255, 128-Mitte). Der Spiegel kann an jeder gewünschten Einstellung angehalten werden. - Page 9 Offen/weiß Türkis Cyan Grün Magenta Hellblau Gelb Grün Pink Blau Orange 128 - 190 Rainboweffekt vorwärts mit absteigender Geschwindigkeit 191 - 192 Keine Rotation 193 - 255 Rainboweffekt rückwärts mit zunehmender Geschwindigkeit 4.1.8 Steuerkanal 8 - Statische Gobos Geschlossen 1 - 45 Dimmer 46 - 63 Offen...
-
Page 10: Funktionen Der Steuerkanäle - 8 Bit
4.1.12 Steuerkanal 12 - Indizieren der rotierenden Gobos, Goborotation 0 - 127 Goboindizierung 128 - 191 Goborotation vorwärts von schnell bis langsam Keine Rotation 193 - 255 Goborotation rückwärts von langsam bis schnell 4.1.13 Steuerkanal 13 - Iris Offen 1 - 179 Max. -
Page 11: Fernsteuerbare Funktionen
6. Fernsteuerbare Funktionen 6.1 Lampe Der SC-740 wird mit einer HMI 575 W Entladungslampe betrieben. Ein Relais im Projektor ermöglicht die Schaltung der Lampe über das Control Board am Projektorkopf oder über den angeschlossenen Controller. 6.2 Lampe über das Control Board schalten 1. -
Page 12: Lüfter
Auf dem Effektrad befindet sich das 3-fach Prisma. 6.11 Lüfter Der SC-740 wird über einen Axiallüfter im hinteren Teil des Gehäuses gekühlt. Die Lüftergeschwindigkeit (und damit natürlich auch das Geräusch) kann stufenlos geregelt werden und läßt sich für leise Vorführungen auf ein Minimum reduzieren. -
Page 13: Spec - Spezialfunktionen
oder die Mode-Taste, um zum Hauptmenü zurückzukehren. Um den Betriebsstundenzähler auf 0 zurückzusetzen halten Sie bitte die Up- und Down-Taste und drücken Sie die Enter-Taste. - Betriebsstundenzähler: Mit dieser Funktion können die Betriebsstunden des Projektors abgefragt werden. Drücken Sie die Enter-Taste oder die Mode-Taste, um zum Hauptmenü... - Page 14 - Automatische Displayabschaltung: Mit dieser Funktion läßt sich einstellen, daß das Gerät das Display nach 2 Minuten automatisch abschaltet wenn keine Taste mehr gedrückt wurde. Drücken Sie die Up-/Down-Tasten, um "ON" oder "OFF" einzustellen. Drücken Sie die Enter-Taste zur Bestätigung oder die Mode-Taste, um abzubrechen. - Displaybeleuchtung: Mit dieser Funktion können Sie die Displaybeleuchtung zwischen 20 und 100 einstellen.
-
Page 15: Fehlermeldungen
1. Kalibrieren über das Control Board Drücken Sie die Enter-Taste und auf dem Display erscheint durch Drücken der Up-/Down-Tasten: "Col, Sgob, EFEC, rGob, rotG" für sehr weiche Funktionskalibrierung. Wählen Sie eine dieser Funktionen über die Enter- Taste um den richtigen Wert zwischen 0 und 255 einzugstellen. Drücken Sie die Enter-Taste zur Bestätigung oder die Mode-Taste um abzubrechen. -
Page 16: Technische Daten
Fehler am statischen Goborad. Diese Fehlermeldung erscheint, wenn nach dem Reset die magnetisch-indizierte Fehlfunktionen vorliegen (Photodiode defekt oder der Magnet fehlt) oder der Steppermotor defekt ist (oder dessen Treiber auf der Hauptplatine). Dabei befindet sich das statische Goborad nach dem Reset nicht in der Vorgabeposition. -
Page 17: Wartung Und Reinigung
Dimmer Weicher Dimmer von 0 - 100 %. Effekte - Effektrad mit Dimmereinheit, Frostfilter, Korrekturfilter 3200 K und 5600 K und UV-Filter Prisma - 3-Facettenprisma Motor - 8 hochwertige Steppermotoren (gesteuert durch Mikroprozessoren) Elektronik - Digitaler Serieneingang DMX-512 - 13 Steuerkanäle Gehäuse Durch die große Gehäuseöffnung einfacher Zugriff zur Lampe und durch den modularen Aufbau Wechseln der Elemente sehr schnell möglich. - Page 18 Table of contents 1. Safety ........................... 19 1.1 Safety instructions ....................19 1.2 General instructions ....................19 2. Introduction ......................... 19 2.1 Fitting the lamp ....................... 19 3. Installation ........................21 3.1 General instructions ....................21 3.2 Connection to the mains ..................21 3.3 DMX-512 connection / connection between projectors ...........
-
Page 19: Safety
CAUTION ! Keep this device away from rain and moisture ! Unplug mains lead before opening the housing ! FOR YOUR OWN SAFETY, PLEASE READ THIS USER MANUAL CAREFULLY BEFORE YOU INITIAL START - UP! 1. Safety 1.1 Safety instructions This device has left our premises in absolutely perfect condition. - Page 20 To insert the lamp (HMI 575) open the housing by loosening the fastening screws at the side panels and frontcover. Do not install a lamp with a wattage! A lamp like this generates temperatures the device is not designed for. Damages caused by non-observance are not subject to warranty.
-
Page 21: Installation
Futurelight Scan SC - 740 Powerful scanner with the latest technology 11 different, dichroic colour-filtres and white • Via 2 correction-filters, up to 36 different colours and semi-colours can be created • Rainbow-effect in both directions • Static gobo-wheel with 8 gobos, 1 dichroic glass-gobo and open •... -
Page 22: Setup
The wires must not come into contact with each other, otherwise the projectors will not work at all, or will not work properly. 4. Setup 4.1 Function of the control channels - 16 bit protocol 4.1.1 Channel 1 - Pan Push slider up in order to move mirror horizontally (PAN). - Page 23 4.1.5 Channel 5 - Speed of PAN / TILT movement Max. speed Min. speed 250 - 255 Max. speed 4.1.6 Channel 6 - Switch On / Off the lamp, reset, speed control of cooling fan open, max. speed of fan open, min.
-
Page 24: Function Of The Control Channels - 8 Bit Protocol
4.1.9 Channel 9 - Dimmer, frost, correction filters, 3-facet prism : Closed 1 - 63 Soft slow dimmer 64 - 95 Open position (hole) 96 - 127 Frost filter 128 - 159 3-facet prisma 160 - 191 3200 K correction filters 192 - 223 5600 K correction filters 224 - 255... -
Page 25: Remotely Controllable Functions
For address setting follow this procedure : 1. Switch On the SC-740 and wait until the fixture reset has finished ("rSt" is flashing at the display). 2. Press the [Mode] key in order to access the main menu. Browse through the menu by pressing the [Up] and [Down] keys until the display shows "A001". -
Page 26: Iris
6.6 Iris Motorized iris for different beam diameters 6.7 Shutter / Strobe The shutter unit is situated on the gobo wheel and it enables to produce strobo effect from 1 to 7 flashes per seconds. 6.8 Effect wheel This wheel has both hot and cold color temperature filters (3200 K and 5600 K). Total numbers of color combinations are 36. -
Page 27: Spec -Special Functions
This function allows you to invert the tilt movement. Use the [Up] and [Down] keys to select "On" if you wish this feature or "Off" if you don’t wish this feature and press [Enter] to confirm or [Mode] to cancel and return to the main menu. - Page 28 - DMX values Readout DMX values of each channel received by the fixture. Use the [Up] and [Down] keys to select desired channel and press [Enter] to read its value coming to the fixture or [Mode] to cancel and return to the menu. - Automatic blackout of Display This function allows you to keep the display On or to turn Off automatically 2 minutes after last pressing any key on the control board.
- Page 29 - continuous controlling of the fan speed the fan automatically raises its speed in order to control inside temperature of the lighting, if the temperature inside increases about certain level (the low fan speed reduces the cooling of the lighting). This cycle can repeat several times until the temperature inside is on suitable level.
-
Page 30: Error And Information Messages
DMX Calibration protocol: Channel GOBOS ROTATING GOBO Function COL. SGOB. EFEC. RGOB ROTG COLOURS EFFECT IRIS STROBO GOBOS ROTATION CALIBRAT. CALIBRAT. CALIBRAT. CALIBRAT. CALIBRAT. STANDARD STANDARD STANDARD STANDARD STANDARD STANDARD 0 - 255 0 - 255 0 - 255 0 - 255 0 - 255 PROTOCOL PROTOCOL... -
Page 31: Technical Specifications
9. Technical Specifications Power supply: 230 V/50 Hz Power consumption: 800 W, Fuse: T5A Lamp: HMI 575 Optical System - Double condensor lens with high efficiency parabolic mirror Colours - 11 interchangeable dichroic-filters plus white - Colour-wheel with variable rotation speed Static gobos - 9 static gobos plus full circle - 1 Multicolor-gobo... -
Page 32: Maintenance And Cleaning
10. Maintenance and cleaning It is absolutely essential that the projector is kept clean and that dust, dirt and smoke-fluid residues must not build up on or within the projector. Otherwise, the projector‘s light-output will be significantly reduced. Regular cleaning will not only ensure the maximum light-output, but will also allow the projector to function reliably throughout its life. - Page 33 Sommaire 1. Sécurité ........................33 1.1 Instructions de sécurité ................... 33 1.2 Emploi selon les prescriptions ................33 2. Introduction ......................... 33 2.1 Installation de la lampe ................... 34 3. Installation ........................35 3.1 Indications générales ....................35 3.2 Alimentation ......................36 3.3 Connexions au contrôleur DMX-512/raccord projecteur-projecteur ......
-
Page 34: Sécurité
ATTENTION ! Protéger de l‘humidité ! Débrancher avant toute manipulation ! POUR VOTRE PROPRE SÉCURITÉ, VEUILLEZ LIRE CE MODE D‘EMPLOI ATTENTIVEMENT AVANT LA PREMIÈRE MISE EN SERVICE 1. Sécurité 1.1 Instructions de sécurité Toutes les personnes ayant à faire avec l’installation, le montage, l’utilisation, l’entretien et les réparations de cet appareil doivent être suffisament qualifiées et suivre les instructions contenues dans ce mode d’emploi. -
Page 35: Installation De La Lampe
2.1 Installation de la lampe DANGER DE MORT ! Toujours débrancher l’appareil avant de mettre en place la lampe. Pour mettre en place la lampe, désserrez les vis du boîtier et ouvrez celui-ci. Ne pas utiliser des lampes d’une puissance supérieure, la température dégagée par celle-ci est trop haute pour cet appareil. -
Page 36: Installation
Control board: 11 - Touche Enter 12 - Affichage 13 - Touche Mode 14 - Touches Up/Down Futurelight Scan SC-740 OBJECTIVE GRAND ANGLE STANDARD OBJECTIVE OPTIONEL 12° OBJECTIVE GRAND ANGLE STANDARD AVEC FILTRE FROST OBJECTIVE OPTIONEL 12° AVEC FILTRE FROST Scanner de haute puissance avec beaucoup de features Scanner de haute puissance avec beaucoup de features •... -
Page 37: Alimentation
Fixez le projecteur grâce à l’orifice qui se trouve dans le ceintre de fixation. Le diamètre de perçage est de 10 mm. Si vous voulez fixer le scanner au plafond, installez-le avec une chaîne ou une corde de sérurité. 3.2 Alimentation Connecter l’appareil avec le câble d'alimentation au secteur. - Page 38 4.1.2 Canal de contrôle 2 - Tilt Les mouvements verticaux du miroir (TILT) sont contrôles par le régulateur. Ajuster le miroir peu à peu en poussant lentement le régulateur (0- 255, 128-centre). Vous pouvez arrêter le miroir à la position désirée. 4.1.3 Canal de contrôle 3 - Pan fine 16bit 4.1.4 Canal de contrôle 4 - Tilt fine 16bit 4.1.5 Canal de contrôle 5 - Vitesse du mouvement PAN/TILT...
- Page 39 4.1.8 Canal de contrôle 8 - Shutter, Strobe et Gobos Fermé 1 - 45 Dimmeur 46 - 63 Ouvert 64 - 127 Effet stroboscopique (max. 7 flash par seconde) 128 - 132 Fermé 133 - 135 Reset de l'appareil 136 - 140 Fermé...
-
Page 40: Fonction Des Canaux De Contrôle - Protocole 8 Bit
4.2 Fonction des canaux de contrôle - protocole 8 bit: Channel EFECTS PAN/TILT GOBOS ROTATING GOBO Function PAN TILT ON/OFF COLOURS PRISM IRIS SPEED STROBO FUNCTION GOBOS ROTATION LAMP DIMMER 5. Codage du projecteur L'unité de contrôle à la tête du SC-740 permet de coder l'adresse initiale DMX des projecteurs. L'adresse initiale est le premier canal à... -
Page 41: Roue De Couleurs
automatiquement dès que vous remettez l'appareil sous tension. Lorsque vous coupez la lampe via l'unité de contrôle et mettez le SC-740 hors tension, la lampe sera coupée automatiquement dès que vous remettez l'appareil sous tension. Il faut que vous allumiez la lampe encore une fois via l'unité... -
Page 42: L'unité De Contrôle
7. L'unité de contrôle L'unité de contrôle se trouve à la tête du SC-740 et offre plusieurs caractéristiques, par exemple pour ajuster l’addresse DMX, indiquer les heures de maniement du projecteur ou de la lampe, allumer ou éteindre la lampe, commencer le programme test, faire un reset ou utiliser des fonctions spéciales pour contrôle manuel, demon- strations ou service. -
Page 43: Spec - Fonctions Speciales
7.2 SPEC - fonctions speciales Pressez les touches Up/Down jusqu'à ce que l'affichage indique les différents fonctions. Pressez la touche Enter pour confirmer la séléction. - contrôle manuel des effets: Cette fonction permet de contrôler les fonctions des canaux manuellement. Pressez les touches Up/Down pour sélectioner la fonction désirée. - Page 44 - temperature L'affichage indique la temperature intérieure en dégrée Celsius. Une temperature intérieure jusqu'à 70° C est normale. Assurez-vous que la température ambiante ne dépasse pas 55° C. - contrôle de la vitesse du ventilateur Cette fonction permet de sélectioner les 3 modes de la vitesse du ventilateur. Pressez les touches Up/Down pour sélectioner "reG, Lo.HI, Lo.OF".
-
Page 45: Avis D'erreur Et D'information
Protocôle de calibration DMX: Channel GOBOS ROTATING GOBO Function COL. SGOB. EFEC. RGOB ROTG COLOURS EFFECT IRIS STROBO GOBOS ROTATION CALIBRAT. CALIBRAT. CALIBRAT. CALIBRAT. CALIBRAT. STANDARD STANDARD STANDARD STANDARD STANDARD STANDARD 0 - 255 0 - 255 0 - 255 0 - 255 0 - 255 PROTOCOL... -
Page 46: Caractéristiques Techniques
9. Caractéristiques techniques Alimentation 230 V/50 Hz Puissance de rendement: 800 W Fusible: Lampe HMI 575 W Système optique - Lentille de très haute qualité Couleurs - 11 filtres dichroïques interchangeables + blanc - Changeur de couleurs à vitesse de rotation variable Gobos Gobos statiques: - 9 gobos statiques + cercle plein... -
Page 47: Appendice
Le miroir et la lentille d’objectif doivent être nettoyés toutes les semaines, car des résidus de liquide de brouillard se déposent rapidement. Nettoyer le ventilateur tous les mois. Les gobos peuvent être nettoyés à l’aide d’une brosse douce. Nettoyer l’intérieur du projecteur au moins une fois par an avec un aspirateur ou une lame d’air.
Need help?
Do you have a question about the Scan SC-740 and is the answer not in the manual?
Questions and answers