Table of Contents
Advertisement
Advertisement
Table of Contents

Related Manuals for Midland PACIFIC


Summary of Contents for Midland PACIFIC
- Page 1 Manual de utilizare in Limba Engleza Statie radio maritima Midland Pacific...
-
Page 2: Table Of Contents
Table of contents Introduction ......................2 Above all… safety! ....................3 2.1 Symbols used ....................3 2.2 Warnings ......................3 2.3 Service ......................4 Identifying the parts ....................5 3.1 Display ......................5 3.2 Radio .......................6 Preparing the transceiver ..................7 4.1 Installing and removing the belt clip ..............7 4.2 Installing and removing batteries ..............7 4.2.a Installation ...................7 4.2.b Removal ....................8 4.3 Recharging batteries ..................8 4.4 Memory effect of rechargeable batteries ............8... -
Page 3: Introduction
1. Introduction The new handheld marine transceiver PACIFIC is able to satisfy communication requirements for all types of navigation whether professional or hobbyist. PACIFIC is robust, electronically advanced and enables clear and reliable communications on the VHF nautical band for all international channels assigned by ITU. It offers security for all navigational requirements thanks also to a dedicated button that gives instant access the emergency channel N.16. PACIFIC, which boasts 57 channels and outputs 5W transmission power, is made up of components specifically designed for this type of equipment. PACIFIC is particularly straightforward to use and guarantees best performance in all situations, thanks also to the keypad lock that prevents accidental pushing of buttons while handling the device. A LCD back lit display enables its use in darkness or poor visibility. -
Page 4: Above All
2. Above all… safety! 2.1 Symbols used For ease and convenience of use, this manual uses symbols to highlight urgent situations, practical advice, and general information. Exclamation marks such as this one indicate a crucial description regarding technical repairs, dangerous conditions, safety warnings, advice, and/or other important infor- mation. Ignoring these symbols may result in serious problems and/or damage and/or personal injury. -
Page 5: Service
2.3 Service We advise you to write the serial number of your transceiver in the space provided below. This number is found on the rear panel of the transceiver and will be useful in the event of repair/ assistance and/or loss and/or theft. Serial Number _______________________... -
Page 6: Identifying The Parts
Liquid Crystal Display (LCD). The symbols and their corresponding parameters that may appear, according to the operational status of the device, are described as follows: VOX - Activation of VOX function; TX - During transmission (when you press PTT button) : warns you of battery low charge; Channel - These two large digits show the selected marine channel; INT/USA/CAN and the first of the 2 small digits - Specify the frequency band in use (USA and CAN: can be activated by means of the optional programming software PRG PACIFIC, but they are for American version only). Second small digit - Gives further information with regards to the channel being used (“d” duplex). - Appears when the keypad lock is activated. - This symbol marks activation of weather information channels (only for American version - bands USA and CAN). -
Page 7: Radio
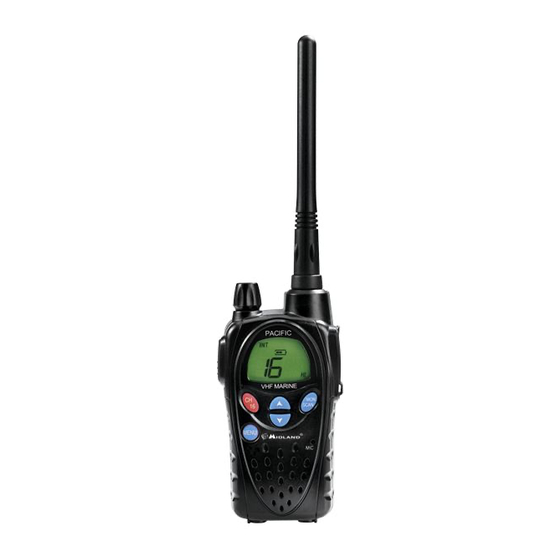
3.2 Radio Refer to the following images to identify the various parts of the device: VOLUME control - On/off switch for the device and adjusts VOLUME of reception. PTT (press to talk) - Press this button to switch to transmission Button ‘16’ - Press this button to instantly recall channel 16. Built-in MICROPHONE - Here is where sound is picked up by the microphone. Built-in SPEAKER - Here is where the speaker is housed. ANTENNA - Receives and transmits radio signals. MIC/CHG Socket (under protective cover) - To connect to external audio devices (headphones, microphone etc.) and to the battery charger. MENU button - Press this button to display the device’s MENU. MONITOR/SCAN button - Press this button once to activate SCAN (scanning of channels). Keep the same button pressed for about 2 seconds to activate MON function. This function temporarily cuts off Squelch (for weak signals) / buttons - Press these buttons to select channel number and to change setting within the MENU. -
Page 8: Preparing The Transceiver
4. Preparing the transceiver Make sure the following items are supplied in the package before you start using your transceiver: • Transceiver; • Desk/wall support • NiMH battery pack • Belt clip; • Desktop charger along with adaptor; • 2-way car lighter charger; • User manual; If any of the above is missing or damaged contact your supplier immediately. -
Page 9: Removal
4.2.b Removal 1) Follow steps 1 and 2 of par 4.2.a; 2) Remove the battery pack from the device; 3) Follow steps 4 and 5 of par 4.2.a. 4.3 Recharging batteries Batteries can be recharged without taking them out of the transceiver (but the device must be turned off); batteries take 8-10 hours to fully recharge (battery pack 800mAh). To recharge batteries by means of the 2-way car lighter charger: 1. - Page 10 solution for avoiding the memory effect is to use in turn two battery sets: one in use, and the other as a spare set. The memory effect can be easily eliminated by completely discharging/charging the batteries 3 or 4 times. The memory effect should not be confused with the normal battery life, which is 400 cycles of charge/discharge on average. It is completely normal for operating duty to decrease when the batteries have reached the end of their life; at this point, you will need to substitute the battery set.
-
Page 11: Basic Operations
5. Basic operations 5.1 Turning on/off To turn on the transceiver, turn the ON/OFF/VOLUME knob clockwise until you hear it clicks: the LCD display will light up and do an Auto-Test. Subsequently you will hear 1 beep. To turn off the transceiver, turn the knob counter-clockwise until you hear another click. 5.2 Selection of the operational channel 1) Press once the MENU button. The number of the channel will start flashing on the display. 2) Press the / buttons to scroll up or down the channel list till you select the desired channel. 3) Press the PTT button to confirm, or wait for 10 seconds. Refer to the table of frequencies. Moreover, the reception frequency could be different (duplex channels) from the transmission frequency or it could be the same (simplex channels). Normally communications among vessels can only take place on simplex channels. -
Page 12: Choosing High Or Low Transmission Power
5.6 Choosing high or low transmission power Batteries are drained more quickly during transmission. In order to extend the battery life you can select the low power when transmitting over short distances: 1) Press the MENU button twice and the writing ‘Pr’ will display. 2) Select LO using the scroll buttons / 3) Press PTT to confirm, or wait for 10 seconds. If you want to transmit a longer distance repeat the above procedure to select the high power. At step 2 use the / to make the writing LO disappear. When the batteries are in good conditions, high power is about 5 watt, whereas low power is about 1 watt. A low battery level during transmission will have a negative effect on the performance of your device. -
Page 13: Advanced Functions
Once you are tuned in the communication you were looking for, press PTT to talk on the selected channel. PACIFIC will however remain in scanning mode (which is indicated by the flashing of the channel on the display) and it is possible to start scanning again by pressing the / buttons. If you press PTT during scanning you can transmit on the channel from which the scanning started. The / keys allow you to change the direction of scanning (from lower channels to higher ones or vice versa) and therefore to skip communications which are of no interest. 6.2 VOX Function PACIFIC enables hands free conversations through VOX function. The degree of sensitivity of VOX function can be adjusted to three different levels. You can enable VOX function with or without accessories. 1) To activate VOX function press the MENU button four times (except for CH75-76) and VOX will appear on the display 2) Use the / keys to select: A. High sensitivity B. -
Page 14: Roger Beep (End-Of-Message Tone)
USA and CAN Bands: for American area only. It is your own responsibility to choose the correct band (by means of the optional programming kit PRG-PACIFIC), otherwise you may cause interferences with other services or you may not be able to communicate. -
Page 15: Troubleshooting
7. Troubleshooting Your PACIFIC is designed to provide you with years of optimal performance. If for some reason problems arise, refer to this chapter before contacting a service centre in your region. 7.1 Solution table Problem Possible Cause Solution Ref. The radio does not The batteries are not charged Ensure the batteries are turn on and/or are not correctly inserted charged and correctly inserted in the radio The radio turns on, The volume is too low The volume is too low but does not receive signals You are unsuccessful Incorrect selection of marine Check your channel and band in establishing... -
Page 16: Technical Specifications
8. Technical specifications Channels ........................57 International Frequency generation ....................PLL synthesizer Frequency range (International band) .......... TX 156,025 - 157,425 MHz ........................RX 156,300 - 162,000 MHz Antenna Impedance ......................50 Ohm Power Supply...................... 6 VDC +/- 10% Operating Temperature Range................ from -15° to +55°C Size ......................108x62x35 mm (HxWxD) Weight (without batteries) ....................... 183 g Duty cycle ..................TX 5%, RX 5%, Stand-by 90% 8.1 Transmitter Output power ..................... 1 or 5 Watt (Selectable) Modulation type ...........................FM Residual noise attenuation. - Page 17 INTERNATIONAL CHANNEL (INT) Channel ID Ship Station Channel ID Ship Station Frequency Frequency Frequency Frequency 156,050 MHz 160,650 MHz 156,025 MHz 160,625 MHz 156,100 MHz 160,700 MHz 156,075 MHz 160,675 MHz 156,150 MHz 160,750 MHz 156,125 MHz 160,725 MHz 156,200 MHz 160,800 MHz 156,175 MHz 160,775 MHz 156,250 MHz 160,850 MHz 156,225 MHz 160,825 MHz 156,300 MHz 156,300 MHz 156,275 MHz 160,875 MHz 156,350 MHz 160,950 MHz 156,325 MHz 160,925 MHz 156,400 MHz 156,400 MHz 156,375 MHz 156,375 MHz...
Need help?
Do you have a question about the PACIFIC and is the answer not in the manual?
Questions and answers