Advertisement
- 1 CONTENT
- 2 COVERAGE/RANGE
- 3 DESCRIPTION OF THE CONTROLS AND FUNCTIONS
- 4 DESCRIPTION OF THE CONTROLS
- 5 OPERATIONS AND FUNCTIONS
- 6 TRANSMISSION AND RECEPTION
- 7 SQUELCH
- 8 KEYPAD LOCK
- 9 CTCSS TONES
- 10 CTCSS TONE TABLE
- 11 VOX
- 12 BEEP TONE
- 13 ROGER BEEP (end of transmission tone)
- 14 CALL ALERT SELECTION
- 15 DUAL WATCH
- 16 OUT OF RANGE
- 17 BABY SITTER FUNCTION
- 18 THE BATTERY COMPARTMENT AND THE BELT CLIP
- 19 RECHARGING THE BATTERY AND POWER SAFE
- 20 MEMORY EFFECT OF RECHARGEABLE BATTERIES
- 21 BATTERY LEVEL INDICATOR
- 22 USE AND CARE
- 23 WARNINGS
- 24 TABLE OF SOLUTIONS
- 25 TECHNICAL SPECIFICATIONS
- 26 Documents / Resources
![]()
CONTENT
- 2 MIDLAND G5 XTtransceiver
- 6 Ni-MH rechargeable batteries
- 2 belt clips
- 2 wall chargers
COVERAGE/RANGE
The maximum range depends on terrain condition and is obtained during use in an open spaces.
The only limitations to maximum possible range are environmental factors such as blockage caused by trees, buildings, or other obstructions. Inside a car or a metallic construction, the range can be reduced.
Normally the coverage in the city, with buildings or other obstructions is about 1 or 2 Km. In open spaces but with obstructions like trees, leaves or houses the maximum possible range is about 4-6 Km. In open spaces, without obstructions and in sight, like for example in mountain, the coverage can be more than 12 Km.
DESCRIPTION OF THE CONTROLS AND FUNCTIONS
Thanks for choosing Midland! Midland G5XT is a portable transceiver that is free use in almost all European countries. For further information, we suggest you look at the "Restrictions on the use" chart.
Combining the latest technology in radio communication along with a sturdy mechanical frame, the Midland G5XTmakes the ideal and effective solution for the professionals who need to stay in touch with colleagues (construction sites, buildings, hotels, trade fairs, shows) or with leisure users that just want to keep up with friends and family.
Its robust frame and the simple design make it ideal for any activity.
DISPLAY
Your midland G5XT keeps you constantly updated about its operational status through a Liquid Crystal Display (LCD). The symbols and their corresponding parameters that may appear, according to the operational status of the device, are described as follows:

 | Appears while you are transmitting a signal (PTT button pressed) |
 | Means that the radio is receiving a signal. |
 | Indicates the channel selected |
 | Indicates the sub audio tone selected. (of-38). |
 | Indicates if VOX MODE is active. |
 | Indicates the battery level. |
 | Indicates if the Out of Range is active. |
 | Indicates that the baby sitting function is on. |
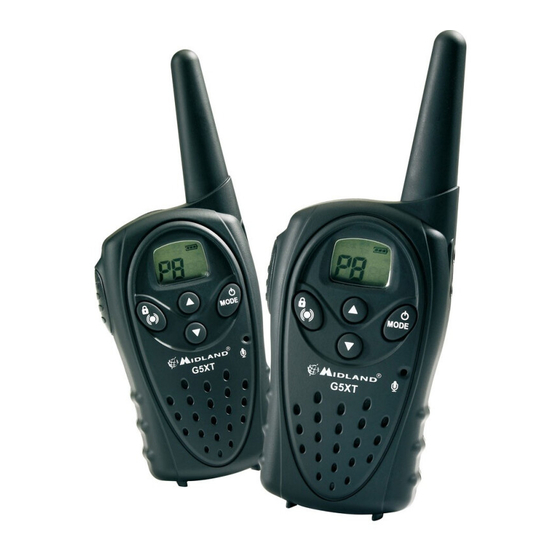
DESCRIPTION OF THE CONTROLS
Refer to this picture to identify the various parts of the device:

ANTENNA
BUILT-IN SPEAKER - Here is where the speaker is housed.
 BUILT-IN MICROPHONE - Here is where sound is picked up by the microphone.
PTT (push to talk) Push this button to transmit.
▲▼ use these buttons for changing the settings
 Pressing this button you can use the Out of range function. If you keep it pressed for about 5 seconds, the keypad lock is activated.
MODE/ - Press this button to enter the radio's menu. If you keep it pressed for about 3 seconds, you turn on/turn off the radio.
EXTERNAL SPEAKER/MIC/CHG JACK - allows the connection with external devices as headsets, microphones, charger...
OPERATIONS AND FUNCTIONS
POWER ON/POWER OFF
Press and keep pressing the button for about 3 seconds. The transceiver will make 3 different beep tones and the display will do an auto scanning for about 1 second. You will visualize on the display the last used channel.
VOLUME ADJUSTMENT
Use the ▲▼ to increase or decrease the volume setting.
CHANNEL SELECTION
Press the MODE button. The number of the channel will start flashing on the display.
Press the scroll buttons ▼▲ till you select the desired channel. Press the PTT button to confirm, or wait for 5 seconds.
| Channel | FREQ. RX/TX (MHz) | Channel | FREQ. RX/TX (MHz) |
| 01 | 446.00625 | 05 | 446.05625 |
| 02 | 446.01875 | 06 | 446.06875 |
| 03 | 446.03125 | 07 | 446.08125 |
| 04 | 446.04375 | 08 | 446.09375 |
The pre-set channels correspond (as here following) to:
| Channel | CTCSS Channels and tones | Channel | CTCSS Channels and tones |
| 09 | correspond to channel 01 16 | 17 | correspond to channel 01 31 |
| 10 | correspond to channel 02 16 | 18 | correspond to channel 03 31 |
| 11 | correspond to channel 03 16 | 19 | correspond to channel 05 31 |
| 12 | correspond to channel 04 16 | 20 | correspond to channel 07 31 |
| 13 | correspond to channel 05 16 | 21 | correspond to channel 02 31 |
| 14 | correspond to channel 06 16 | 22 | correspond to channel 04 31 |
| 15 | correspond to channel 07 16 | 23 | correspond to channel 06 31 |
| 16 | correspond to channel 08 16 | 24 | correspond to channel 08 31 |
For displaying the channel/sub audio tone
To momentarily display the PMR446 channel and the subadio tone used in the pre-set channels, go to the desired channel (from 9 to 24) and keep pressed the buttons ▲▼ for 5 seconds.
TRANSMISSION AND RECEPTION
To communicate, all radios in your group must be set on the same channel.
To transmit, press and hold the PTT button and speak in a normal voice into the microphone  . The "TX" icon will appear continuously on the LCD display while transmitting.
You can communicate also using an external accessory or a hand mic, pressing and holding the PTT button on the side of the hand mic. For a maximum clarity, hold the device at a distance of about 2/3 cm.
To receive a CALL, release the PTT button. The "RX" icon will appear on the display when your radio is receiving a transmission.
SQUELCH
With the SQUELCH function, noises can be suppressed on the free channel. In MIDLAND G5 XT this function is always active.
KEYPAD LOCK
Keep pressed the button  for about 5 seconds and the lock function will be activated. "Lc on" will appear on the display.
To disable this function, keep pressed again the button for 5 seconds approx. The display will show "Lc of".
CTCSS TONES
The CTCSS tones are codes that can be added to the channels for creating new private ones. For each channel you can choose until 38 CTCSS.
The addition of these codes can be made on the main PMR channels (from 01 to 08).
The pre-set channels from 9 to 24 can not be modified.
To select a privacy code for the current channel press twice the MODE button, then with the scroll buttons ▲▼ select the desired code.
To confirm the selection, press the PTT button or wait for 5 seconds.
The selected Privacy Code will appear on the display.
To disable the CTCSS function, select the private code and then press the MODE button, until you visualize the flashing CTCSS Privacy Code on the display. Select then "off" using the scroll buttons ▲▼.
To confirm, press PTT or wait for 5 seconds.

Note: To communicate with other radios, they must be set to the same channel and Privacy Code selections.
CTCSS TONE TABLE
| Number Displayed | Tone Frequency Hz | Number displayed | Tone Frequency Hz | Number displayed | Tone Frequency Hz |
| 01 | 67.0 | 14 | 107.2 | 27 | 167.9 |
| 02 | 71.9 | 15 | 110.9 | 28 | 173.8 |
| 03 | 74.4 | 16 | 114.8 | 29 | 179.9 |
| 04 | 77.0 | 17 | 118.8 | 30 | 186.2 |
| 05 | 79.7 | 18 | 123.0 | 31 | 192.8 |
| 06 | 82.5 | 19 | 127.3 | 32 | 203.5 |
| 07 | 85.4 | 20 | 131.8 | 33 | 210.7 |
| 08 | 88.5 | 21 | 136.5 | 34 | 218.1 |
| 09 | 91.5 | 22 | 141.3 | 35 | 225.7 |
| 10 | 94.8 | 23 | 146.2 | 36 | 233.6 |
| 11 | 97.4 | 24 | 151.4 | 37 | 241.8 |
| 12 | 100.0 | 25 | 156.7 | 38 | 250.3 |
| 13 | 103.5 | 26 | 162.2 |
VOX
Your G5 XT has 4 VOX levels (off, 1, 2, 3, and 4). This function allows the user to activate the communication without pressing the PTT button. You just have to speak and the communication is on.
You can set the VOX on 3 levels, with or without accessories.
The fourth level activates the VOX with Talkback function: when one of the two devices transmit for more than 20 seconds, the VOX Talkback stops the transmission for 10 seconds; so the other user has himself the opportunity to talk.
To set the VOX level, press the MODE button, until the display shows "Vo of" and "VOX" flashing in the upper side of the display.
After that, with the scroll buttons ▲▼, select "1","2","3" or "4".
To confirm, press the PTT button or wait for 5 seconds.
To disable the VOX function, follow the previous indications, but select "oF" and then push the PTT key to confirm.
BEEP TONE
This function permits you to produce a beep tone every time you press a button.
If you want to disable this function, press the MODE button until the display shows "bp on", then select by the scroll buttons ▲▼ "bp of".
To confirm, press the PTT button or wait for 5 seconds.
In this way, all "beeps" and "tones" are disabled.
To re-enable this function, repeat the procedure selecting the "bp on" using the scroll buttons ▲▼ and confirm by pressing the PTT button or wait for 5 seconds.
ROGER BEEP (end of transmission tone)
When the PTT button is released, the radio will beep to confirm to other users that you've finished your transmission and that they can begin to speak.
To turn the ROGER BEEP on, press the MODE button till the display shows "rb of"; than by the scroll buttons ▲▼, select "rb on".
To confirm, push the PTT button or wait for 5 seconds.
To disable this function, repeat the procedure selecting the "rb of".
CALL ALERT SELECTION
G5 XT allows to send a CALL alert signal to all the users of the same channel.
To CALL, quickly press twice the PTT button. On the display the "TX" icon appears and the tone of confirmation can be heard by your own speaker.
G5 XT has 3 selectable CALL alerts (oF, 1, 2 and 3).
To select, press the MODE button until a "CA" icon with the current CALL ALERT number is displayed.
Use the scroll button ▲▼ to make the CALL alert selections; the radio will emit a corresponding tone for each selection.
Note that all this is possible only if the radio is set on "BP on".
To confirm, press the PTT button or wait for 5 seconds.
To dis-able this function repeat this procedure selecting "CA of".
DUAL WATCH
The DUAL WATCH function enables users to monitor, only in reception, 2 selected channels for any activity.
To turn on the DUAL WATCH function, press the MODE button until the display shows "of-TX/RX".
Select the second channel with the scroll buttons ▲▼. If you also want to select one of the 38 CTCSS tone for the second channel press again the MODE button and select with ▲▼ the desired tone.
To confirm press the PTT button or wait for 5 seconds.
To turn off the DUAL WATCH function, you can just press the MODE button.
When the radio will receive a signal on one of the two channels selected, the "DUAL WATCH" function will temporarily stops, allowing the transmission and the reception of the active signal on the channel in use.
G5 XT will stay in the active channel as long as the signal is present and will resume scanning 5 seconds after the signal is no longer present.
OUT OF RANGE
The G5 XT is equipped with the "out of range" function.
With the MIDLAND G5 XT you can choose between the automatic Out of Range or the manual one.
To enable/disable the Out-Of-Range function:
Automatic Out of Range
Press MODE till the display shows "OU of", than select "OU AU" (automatic) with the buttons ▲▼.
Confirm the settings with the PTT button or wait for 5 seconds. The display will show .
.
By setting this function a pair of G5 XT transmitts every 60 seconds a data control code. As soon as the contact between both units is getting lost and one station doesn't receive this data control code twice consecutively, the icon "OU no" starts flashing in the display and you will hear a beep tone.
Manual Out of range:
Press MODE till the display shows "OU of", than select "OU PB" (manual) with the buttons ▲▼.
Confirm the settings with the PTT button or wait for 5 seconds. The display will show .
To switch on this function manually, press the button (  ).
).
If there is a contact between the units, you will hear the "CA" tone previously set, otherwise if you don't hear any tone, that means that your radio is out of range.
To disable this function, push MODE till "OU AU" or "OU PB" is displayed; select "OU of" (disabled) with the buttons ▲▼.
Confirm your selection by pushing PTT or waiting for 5 seconds.
BABY SITTER FUNCTION
Midland G5 XT can operate on 2 different ways: as a standard radio with all the traditional functions, or as baby monitor, for holding your baby in check.
If you set the radio in baby sitter mode, all the other traditional functions are disabled and the transceiver works only as baby monitor.
To set the radio for the baby, that will be put near the cradle, press the MODE button several times, until the display will show "bp of"(baby sitter off). Using the scroll buttons ▲▼, you can choose between the 2 possible options: "b" or "p"; select "p" and then press the PTT button to confirm or wait for 5 seconds. The radio will display  , that means that the function is active. At the same time, on the display you will also see "b1", that is the "baby" channel in use.
Now take the other radio, the one used by the parent, follow the same procedure and select the option "p". Also in this case, the icon will appear on the screen together with "p1", that is the "parent" channel in use.
If the channel in use is noisy, you can choose another baby sitter channel. There are 9 available baby sitter channels: from "p1" to "p9" for the parent's radio and from "b1" to "b9" for the baby's one. Press the MODE button once and then change the channel using the scroll buttons ▲▼ in both radios.
Remember that the 2 radio should operate in the same channel number.
For example: if the radio placed near the baby is set on the channel "b4", the other one used for listening the baby should be set on channel "p4".
The baby sitter mode allows some specific functions for monitoring the baby:
- Automatic transmission of the baby's radio (vox): the baby's radio will automatically transmit when it picks any noises up. E.g.: when the baby cries.
- Automatic out of range: if the parent's radio moves too much away from the baby's radio, after 2 minutes an alert beep tone is emitted from the "parent" radio, advising you that the two radios are not in range anymore. You must reduce the distance between the radios to stop the alert sound.
- Manual out of range: you can also manually check if the "baby" radio is in range. Briefly press the button
![]() on the "parent" radio. If the two radios are in range, you will hear the "CA" tone previously set, otherwise if you don't hear any tone, that means that your radio is out of range.
on the "parent" radio. If the two radios are in range, you will hear the "CA" tone previously set, otherwise if you don't hear any tone, that means that your radio is out of range. - Talk to the baby: normally at any moment, you can talk to the baby just pressing the PTT button on the parent's radio. But if the baby is crying (that means that the radio is transmitting), you should wait until the baby stops crying. Thanks to the Talk back function, if you hear your baby crying for more than 20 seconds, the VOX Talkback stops the transmission for 10 seconds, permitting you to talk and calm the baby down.
 on the "parent" radio. If the two radios are in range, you will hear the "CA" tone previously set, otherwise if you don't hear any tone, that means that your radio is out of range.
To disable the baby sitter function, press the MODE button several times, till "bp b" or "bp p" is displayed; Press now the buttons ▲▼ to choose "bp of". Confirm your selection by pushing PTT or wait for 5 seconds. Now the baby sitter function is disable and all the standard functions are back.
BABY SITTER CHANNELS
| Channel | Frequency | CTCSS Ch | Vox level | Out of range | Corresponding channel |
| b1 | 446.00625 | 156.7 (25) | On Lv 4 | Of | 01 25 |
| b2 | 446.01875 | 156.7 (25) | On Lv 4 | Of | 02 25 |
| b3 | 446.03125 | 156.7 (25) | On Lv 4 | Of | 03 25 |
| b4 | 446.04375 | 156.7 (25) | On Lv 4 | Of | 04 25 |
| b5 | 446.05625 | 156.7 (25) | On Lv 4 | Of | 05 25 |
| b6 | 446.06875 | 156.7 (25) | On Lv 4 | Of | 06 25 |
| b7 | 446.08125 | 156.7 (25) | On Lv 4 | Of | 07 25 |
| b8 | 446.09375 | 156.7 (25) | On Lv 4 | Of | 08 25 |
| b9 | 446.09375 | Of | On Lv 4 | Of | 08 |
| p1 | 446.00625 | 156.7 (25) | Of | On AU | 01 25 |
| p2 | 446.01875 | 156.7 (25) | Of | On AU | 02 25 |
| p3 | 446.03125 | 156.7 (25) | Of | On AU | 03 25 |
| p4 | 446.04375 | 156.7 (25) | Of | On AU | 04 25 |
| p5 | 446.05625 | 156.7 (25) | Of | On AU | 05 25 |
| p6 | 446.06875 | 156.7 (25) | Of | On AU | 06 25 |
| p7 | 446.08125 | 156.7 (25) | Of | On AU | 07 25 |
| p8 | 446.09375 | 156.7 (25) | Of | On AU | 08 25 |
| p9 | 446.09375 | Of | Of | On AU | 08 |
To momentarily display the PMR446 channel and the sub-audio tone of the Baby sitter channel, , go to the desired channel and keep pressed the ▲▼ buttons for 5 seconds.
THE BATTERY COMPARTMENT AND THE BELT CLIP
Installing and removing the belt clip: with the belt clip you can easily attach the transceiver to your belt.
The clip however, must be removed in order to install or change the batteries. To remove the belt clip lift the trigger and slide the clip down.
To fix the clip back to the device slot it in the guides at the back of the transceiver until it clicks into place.

Installation of the batteries:
- Remove the belt clip
- Insert the AAA Alkaline battery or the rechargeable battery into the battery
- compartment;
- Replace the battery cover and fix the belt clip.
RECHARGING THE BATTERY AND POWER SAFE
The battery power saving feature enables a reduction in the consumption of up to 50%; power saving comes on automatically when the transceiver does not receive any signal for more than 7 seconds.
To recharge the batteries you need to connect the socket of the wall adaptor to a main power socket and insert the jack of the wall adaptor into the charging jack of the G5 XT. It takes 8/10 hours to fully recharge. For maximum battery life, we recommend charging the battery pack when
the G5 XT is off and the low battery icon comes on.
When the batteries are discharged, the icon appears "bt lo"  on the display.

Do not overcharge the batteries! When these are fully charged the charging process does not stop automatically.
Do not forget therefore, to remove the transceiver from the charger as soon as the batteries are charged.

Do not try to charge alkaline batteries or non rechargeable batteries. Make sure that when you charge the radio, only rechargeable NI-MH batteries should be contained in the battery compartment! It is very dangerous attempting to recharge other types of batteries (for example alkaline or manganese batteries). Batteries which are not suitable to be recharged may leak, explode or even burn and cause damage!
Using a different battery charger, other than the one specified can cause damage to your device or may even cause explosions and personal injuries.
Do not throw batteries into fire or place them near heat, as this may cause explosions or personal injuries. Dispose of the batteries according to procedures set out by local regulations.
Do not mix old and new batteries or batteries of different types or batteries which have been used in different manners.
MEMORY EFFECT OF RECHARGEABLE BATTERIES
Rechargeable NiMH (Nickel-Metal-Hydrate) batteries are affected by what is known as the "memory effect". This phenomenon is associated with a drastic reduction of battery autonomy and is triggered if the batteries are regularly charged before being fully discharged and/or are not completely recharged.
To avoid the memory effect:
- When possible, recharge the batteries only when they are completely discharged (until the device turns itself off during normal use)
- Do not disconnect the battery charger before the time indicated for a full battery charge.
- Discharge and recharge your batteries completely at least twice a month.
In any case, the best solution for avoiding the memory effect is to use in turn two battery sets: one in use, and the other as a spare set.
The memory effect can be easily eliminated by completely discharging/ charging the batteries 3 or 4 times.
The memory effect should not be confused with the normal battery life, which is 300-400 cycles of charge/discharge on average.
It is completely normal for operating duty to decrease when the batteries have reached the end of their life; at this point, you will need to substitute the batteries.
BATTERY LEVEL INDICATOR
G5 XT has a BATTERY LEVEL METER that shows the battery power level.
The greater the number of bars visible, the stronger the battery level will be. When the battery level is low, the battery icon ![]() will flash in the display, indicating that your batteries should be replace or recharged if using a rechargeable battery.
will flash in the display, indicating that your batteries should be replace or recharged if using a rechargeable battery.
USE AND CARE
Use a soft damp cloth to clean the radio. Do not use alcohol or cleaning solutions.
Do not immerse the radio in water.
Turn off the radio and remove the batteries during long term storage.
WARNINGS

DO NOT OPEN THE RADIO FOR ANY REASON!
The mechanics and electronics radio precision require experience and specialized equipment; for the same reason, the radio should under no circumstances be realigned as it has already been calibrated for maximum performance.
Unauthorized opening of the transceiver will void the warranty.
TABLE OF SOLUTIONS
| Problem | Possible cause | Solution |
| The radio doesn't switch on | The batteries are discharged and/or have not been installed correctly. | Verify that the batteries are charged and that they have been correctly installed. |
| The radio switches off shortly after it has been switched on | Discharged batteries. | Recharge the batteries if they are rechargeable or change them. |
| The battery does not recharge | The battery-charger has not been connected or installed correctly. | Inspect the connections of the battery-charger and the installation of the batteries. |
| The radio switches on but is unable to receive signals | The site of installation is too shielded. | Move to another area. |
| The volume is too low | Adjust the volume. | |
| Incorrect CTCSS | Check that the CTCSS tone corresponds to the one set by the parties you are communicating with. | |
| It is not possible to communicate with other parties | An incorrect radio channel has been selected. | Select the same radio channel used by the parties you are communicating with. |
| The radio is installed in a shielded area or is too far from the party you are communicating with | Move to another area. | |
| Incorrect CTCSS | Check that the CTCSS tone corresponds to the one set by the parties you are communicating with. | |
| Reception is fragmented and/or disturbed | The transmission distance is excessive and/or there are obstacles in the transmission path | Move closer to the party you are communicating with or to another area. |
| The radio has been installed too close to equipment that causes interference (televisions, computers, etc.) | Increase the distance between the radio and this equipment. | |
| VOX causes the radio to accidentally enable transmission | The sensitivity and/or environmental noise are too high. | Reduce the VOX sensitivity |
| The VOX feature requires speaking in a loud voice | The sensitivity is too low. | If the environmental noise is not high, increase the sensitivity or use an optional microphone |
| Logic related faults (unreadable displayed symbols, functions ) | Incorrect setting caused by a problem with the power supply. | Recharge the batteries or change them |
TECHNICAL SPECIFICATIONS
| Channels | 1~8 PMR | |
| Frequency generation | PLL synthesizer | |
| Frequency range | 446.00625 - 446.09375MHz (PMR) | |
| Aerial | 12.5 KHz | |
| Rated power supply 3x AAA type 4,5 V (Alkaline) or 3,6 V (rechargeable) | +/- 10% VDC | |
| Operating temperature | from -20° to +55° | |
| Size (without antenna | 85 x 50 x 25 mm | |
| Weight (without batteries | 0,075 kg | |
| Operation cycle (% on 1 h | TX 5%, RX 5%, stand-by 90% | |
| Transmitter | ||
| Output power (ERP | 500 mW | |
| Type of circuit | FM | |
| Suppression of spurious signals | Compliant with ETSI law | |
Receiver
| Sensitivity at 12dB Sinad | 0,35μV | |
| Spurious signals rejection | 70dB | |
| Audio output power (10% THD | 300mW @ 10% THD | |
| Medium frequencies | 1°:21,4 MHz; 2°:455 KHz | |
| Connection for external microphone and recharge | 2,5 mm jack stereo | |
| Connector for external speaker | 3.5 mm jack mono | |
Specifications are subject to change without notice.
Direct plug-in ac/dc power supply must be used for disconnecting the transceiver from the mains; the desktop charger must be positioned close to the unit and easily accessible.
- For information about the warranty please visit www.midlandradio.eu
Produced or imported by: CTE INTERNATIONAL s.r.l. Via. R.Sevardi 7 42124 Mancasale Reggio Emilia Italy
Imported by: ALAN-NEVADA UK
Unit 1 Fitzerhert Spur Farlington Portsmouth Hampshire P06 1TT
United Kingdom - www.alan-uk.com www.midland-uk.com
The use of this transceiver can be subject to national restrictions. Read the instructions carefully before installation and use. if the product contains batteries: do not throw the battery into fi re. To disperse after use, throw into the appropriate containers.

Documents / Resources
References

Download manual
Here you can download full pdf version of manual, it may contain additional safety instructions, warranty information, FCC rules, etc.
Advertisement


Need help?
Do you have a question about the G5 XT and is the answer not in the manual?
Questions and answers