Table of Contents
Advertisement
Advertisement
Table of Contents

Related Manuals for Amano BX-1600


Summary of Contents for Amano BX-1600
- Page 1 BX-1600 Electronic Time Recorder Operation Manual...
- Page 2 ENGLISH VERSION...
- Page 3 Important safety information Precautions given in this manual are being categorized depending on the degree and content of hazardousness as follows. Do not fail to read these precautions carefully before starting use of this product. Warns possibilities of occurrences of fatal or serious physical Warning: injuries unless its content is duly observed.
-
Page 4: Table Of Contents
TABLE OF CONTENTS INTRODUCTION ···························································································1-1 Components ····································································································1-1 Note ················································································································1-1 FOR THE OPERATIONAL SAFETY ··························································1-2 NAMES OF PARTS ·······················································································1-4 Names of Exterior Parts ··················································································1-4 Programming Section ·····················································································1-5 CAUTIONS WHEN INSTALLING ·······························································1-8 Installation ······································································································1-8 Wall Mounting ································································································1-9 Power Source ································································································1-10 OPERATION ·······························································································1-11 Selecting the Print Column ···········································································1-11 Inserting Time Cards ····················································································1-11 SETTING ·····································································································1-12... -
Page 5: Introduction
INTRODUCTION Read this manual carefully for sale and proper use of the product. Also, after reading this manual, preserve it at a handy location for quick reference at needs. The specifications, appearance, and descriptions are subject to change due to improvement. -
Page 6: For The Operational Safety
FOR THE OPERATIONAL SAFETY Carefully read to fully appreciate the following warnings and cautions before starting use of the equipment. Warning • Do not use with any power voltage other than that indicated on the product. This could cause fire or electric shock. •... - Page 7 Caution • Do not install the time recorder in unstable or inclined place. The time recorder could drop or fall, causing an injury. • Do not put a water container or metal object on the time recorder. If water or metal object gets inside the time recorder, it may cause fire or electric shock.
-
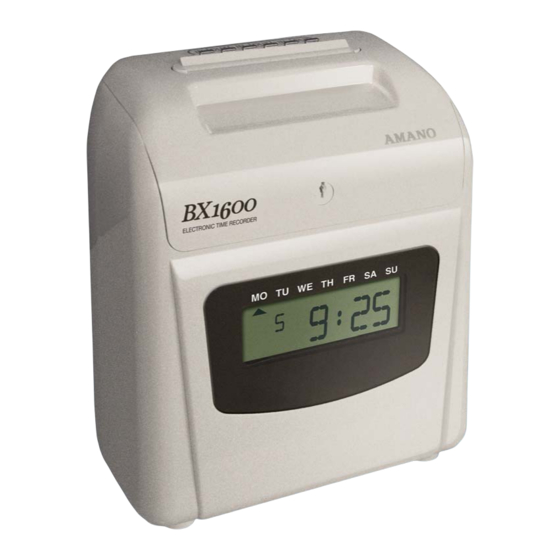
Page 8: Names Of Parts
NAMES OF PARTS Names of Exterior Parts Dust cover Display Front case Column buttons (setting buttons) Column buttons Setting index Ribbon cassette Card Pocket... -
Page 9: Programming Section
Programming Section Open the lid to set each item. (See page 1-12.) Turn the dial at the left side to rotate the setting index. Setting index and setting index can be selected. Press the button at the front of the setting index to operate. For setting details see pages 1-13~1-31. - Page 10 Setting Index CLOCK D.L.S. ADJUST YR/MO/DT HR/MN START + − DIAL CLOCK Use this button to change year, month, and day. To change these values, press the “+” or “–” button. YR/MO/DT CLOCK Use this button to change hour and minute. To change these values, press the “+”...
- Page 11 Setting Index WEEKLY PROGRAM + − PRINTING DAY ON DAY OFF DY/HR/MN MARK POSITION DIAL WEEKLY PROGRAM Press this button to set day of the week, hour, and minute in a weekly program. DY/HR/MN Press this button to set for printing time cards in the WEEKLY PROGRAM irregular mark printing or the normal printing in a MARK...
-
Page 12: Cautions When Installing
CAUTIONS WHEN INSTALLING Installation Proper installation and good power conditions will enable you to operate the time recorder for a long time. Caution • Do not install the time recorder in unstable or inclined place. The time recorder could drop or fall, causing an injury. •... -
Page 13: Wall Mounting
Wall Mounting Caution • For mounting the time recorder on the wall, use a fixture suitable to wall material so that weight of this unit can be securely held. Actual size If not, the time recorder may fall, causing an injury. Insert a screw into the wall. -
Page 14: Power Source
Power Source Warning • Do not use with any power • Do not remodel the time voltage other than that recorder. indicated on the product. This may cause fire or electric shock. This could cause fire or electric shock. • If any abnormality •... -
Page 15: Operation
OPERATION Selecting the Print Column Press an appropriate IN or OUT button to select the print position for time cards. Time cards are printed in the column where the column button light is on. To change the print position, press the button corresponding to the desired print position. -
Page 16: Setting
SETTING Opening / Closing the Lid Open the lid when you adjust time, change pay period ending date, change year, month or day, replace ribbon cassette, etc. Note : Open/close the lid with power turned on. How to open ELECTRONIC TIME RECORDER 1. -
Page 17: Setting Imprint
Setting Imprint Print formats are changed as follows : 0 : Monthly pay surface Card Type (with 6mm pitch) detection not operational Select from 1~7 the mode 1 : Monthly pay surface which applies to the card detection operational you use. - Page 18 24-hour/12-hour 1 : 24-hour indication 2 : 12-hour indication Indication Change-over Print Format 1 : 24-hours (0~23 hours) (0 is not printed at the tens digit of hour. Example : 9:00) 2 : 1 2 - h o u r s ( A M / P M h o u r s ) ( M i n u t e i s underlined for PM.
- Page 19 Example : Set “Monthly pay surface detection operational” , “Shifting print position manually operational” “12-hour indication” , “12-hour system printing” , “1/100 hour B” and “Date printing”. MO TU WE TH FR SA SU Turn the dial of the setting index. CLOCK SETTING ADJUST PAY END...
-
Page 20: Changing Pay Period Ending Date
Changing Pay Period Ending Date Pay period ending date can be set three ways : weekly pay, bi-weekly pay and monthly pay. Select the desired one. Make the selection when setting imprint. (See pages 1-13~1-15.) <Weekly pay> Example : Set the pay period ending day to Monday. Open the lid and turn the setting index. - Page 21 <Monthly pay> For the “Monthly Pay”, assign “pay period ending date” and “blank row”. A blank row means a row is left blank out of the 32 rows on the front and back of a time card. The top row of the front is numbered 01 and the last row on the back is numbered 32.
-
Page 22: Day Time Change
Day Time Change A day time change is the time when a print row is changed on a time card.When a day time change is made, only hours are changed, and the minutes portion is fixed at 00. The initial day time change has been set at 3 o’clock a.m. Example : Set the day time change at 5 : 00. -
Page 23: Setting The Clock
Setting the Clock There are two procedures : setting the minutes, and setting the date and hour. Setting Minutes Open the lid and turn the setting index. PAY END CLOCK SETTING ADJUST BLANK IMPRINT CHANGE .MIN .MIN CURRENT W. + −... -
Page 24: Setting The Date
Setting the Date Year, month, date, hour, and minute are set as follows : Press the “ + ” or “ – ” button to change values. Be sure to press the “E” button before setting a new item or when registering values. <Setting of Year, Month, and Date>... - Page 25 <Setting of Hour and Minute> Example : Change 18 : 00 to 8 : 30. Open the lid and turn the setting index. CLOCK D.L.S. ADJUST YR/MO/DT HR/MN START + − Press the “HR/MN” button. Press the “ + ” or “ – ” button to change the hour. Press the “E”...
-
Page 26: Setting Daylight Savings Time
Setting Daylight Savings Time Starting/ending dates and times of the daylight saving time are set as shown below. When the time reaches the registered starting time of the day beginning daylight saving time, the clock will advance 1 hour automatically. ... - Page 27 Confirm the year. If the value is correct, press the “E” button. Press the “ + ” or “ – ” button to set the starting month. Press the “E” button to register the setting. Press the “ + ” or “ – ” button to set the starting date. Press the “E”...
-
Page 28: Before Setting Weekly Program
Before Setting Weekly Program Setting table preparation Before setting a program, check the working conditions and prepare a setting table. Setting table is shown on page 1-37. Example : Day change time Beginning of work End of work 3:00 8:30 12:00 17:00 MON~FRI... - Page 29 Setting Day of the Week and Time In a weekly program, day of the week and time are set first, and other items such as irregular mark printing and shift of print position are set later. Example : Monday to Friday and 8:30. Turn the dial of the setting index.
-
Page 30: Setting Weekly Program
Setting Weekly Program Setting Irregular Mark Printing and Normal Printing It is possible to change the content of printing to distinguish between regular work hours, starting late, and leaving early. Set the desired day of the week first, then set the irregular mark printing. - Page 31 Setting a Shift of Printing Position Print columns automatically shift from 1st column to 6th column at the designated time. Print columns can be set to “IN” for reporting time range, “OUT” for quitting time range. column column column column column column Example : The print column moves to the 1st column at 3:00 and the 4th...
- Page 32 Press the “E” button again. When the next program number appears, the registration is completed. Set Program No. 2. MO~FR, 12:00 4 (shifted to 4th column) are set in P-02. Note : If different columns are set at the same time, column with higher program No.
- Page 33 Copying Set Items Set items (day of the week, time) can be copied in the next program. Setting time can be reduced by changing the copied data. If time and day of the week have already been set, hold the “E” button down for more than two seconds to copy them. If the next program has been set, they are copied in the subsequent program in which no data has been set.
- Page 34 Changing (Confirming) Set Items A weekly program can be changed (confirmed) as follows : Example : Change the setting in program No. 5 from “Irregular mark at 8:31” to “Irregular mark at 9:01”. Press the + /DAY ON or – /DAY OFF button to indicate the number of the program to be changed.
- Page 35 Canceling of Set Data Weekly programs can be canceled as follows : the contents of a program to be canceled are confirmed before cancellation, but they can be canceled while their numbers are displayed. Example : Cancel the set data of Program No. 5. Press the + /DAY ON or –...
-
Page 36: Troubleshooting
TROUBLESHOOTING Troubleshooting Trouble Causes and Corrective Measures Power failure. Wait until power supply is restored. Insert the power plug firmly into the The time recorder does The power cord is disconnected. power outlet. not accept time card. Cards were inserted or pulled out Pull the power plug out of the power ... -
Page 37: List Of Error Codes
List of Error Codes When the IN/OUT button lamp has gone out with an error signal, a problem may have occurred inside the time recorder. Disconnect the power cord, and after a while connect it to the power outlet. If the time recorder does not return to normal, check the error indication and contact the dealer from whom you bought the time recorder. -
Page 38: If Prints Become Dim (Replacing The Ribbon Cassette)
IF PRINTS BECOME DIM (Replacing the Ribbon Cassette) Warning Caution • Do not connect or disconnect • Before replacing the ribbon power plug with wet hand. cassette, remove the lid This could cause electric shock. and disconnect the power plug from the power outlet. •... -
Page 39: Appendix
APPENDIX Daily Maintenance Clean the case when it becomes soiled. Wet a soft cloth with water or a neutral detergent and wipe the case lightly. Do not use benzine, volatile thinner or other chemicals for cleaning, because they may damage or discolor the case. -
Page 40: Initial Values
Initial Values Content Set Value Range Initial Value Pay period ending date, 01~31, 1~7, 1~2 31 (ending on 31st) Pay period ending day, Current week Blank 01~32 01 (1st row) Day change time Time 00~23 03 (3 : 00 (midnight) ) Print format ... -
Page 41: Weekly Program Setting Table
Weekly Program Setting Table MARK PRINTING HR MN R/B* POSITION 123456 123456 123456 123456 123456 123456 123456 123456 123456 123456 123456 123456 123456 123456 123456 123456 123456 123456 123456 123456 123456 123456 123456 123456 123456 * R : Start of the irregular mark printing. B : Start of the normal printing. - Page 42 Copyright © 2011 Amano Cincinnati, Inc.
Need help?
Do you have a question about the BX-1600 and is the answer not in the manual?
Questions and answers
How to rectify error 4
To fix error code 4 on the Amano BX-1600, call 800 253 9836 for assistance.
This answer is automatically generated