Table of Contents
Advertisement
Advertisement
Table of Contents

Related Manuals for Amano CP-3000


Summary of Contents for Amano CP-3000
- Page 1 CP-3000 Electronic Time Recorder User’s Guide...
-
Page 2: Proprietary Notice
This document contains proprietary information and such information may not be reproduced in whole or part without the written permission from Amano Cincinnati, Inc. 140 Harrison Ave., Roseland, New Jersey 07068. Amano Cincinnati, Inc. reserves the right to make equipment changes and improvements, which may not be reflected in this document. -
Page 3: Table Of Contents
Entering and Saving Values ............ 4-2 Scrolling Through the Program Mode ........4-2 Exiting Program Mode ............. 4-2 Programming Guides ............... 4-3 Basic Programming ..............4-7 Year, Month, and Date ............. 4-7 Hours and Minutes ..............4-8 CP-3000 User’s Guide... - Page 4 Leap Year Error ..............6-3 Printing or Ribbon Error ........... 6-3 Time Card Error ............... 6-4 Imprint/Card Size ............. 6-4 Weekly Program ............... 6-5 Overheat Protection ............6-5 Err 6 thru Err 9 ................. 6-5 Card Stuck ............... 6-5 CP-3000 User’s Guide...
- Page 5 Mode and Keys Test .............. 6-12 LCD Test ................6-13 EPROM Test ................6-14 Buzzer Test ................6-14 Signal 1 Test ................6-15 Color Change Test ..............6-15 Model ID ................6-16 Chapter 7: Appendix ............7-1 CP-3000 User’s Guide...
- Page 6 This page intentionally left blank. CP-3000 User’s Guide...
-
Page 7: Chapter 1: Introduction
Chapter 1: Introduction Before attempting to use the Amano CP-3000 time recorder/stamp, please carefully review Chapter 1: “Introduction”, Chapter 2: “Getting Started”, Chapter 3: “Time Cards”, and Chapter 4: “Programming”. This chapter of the manual covers the specifications, accessories, names and functions of parts, LCD Display, and description of controls. -
Page 8: Names And Functions Of Parts
Accessories The following accessories are provided with the Amano CP-3000. After unpacking, please ensure that all of the following items are provided: User’s Guide This User’s Guide (1 Keys (one pair, 2 CP-3000 (1 unit) copy) keys) Please note that specifications, appearance, and/or description are subject to change without notice due to product enhancements. -
Page 9: Features
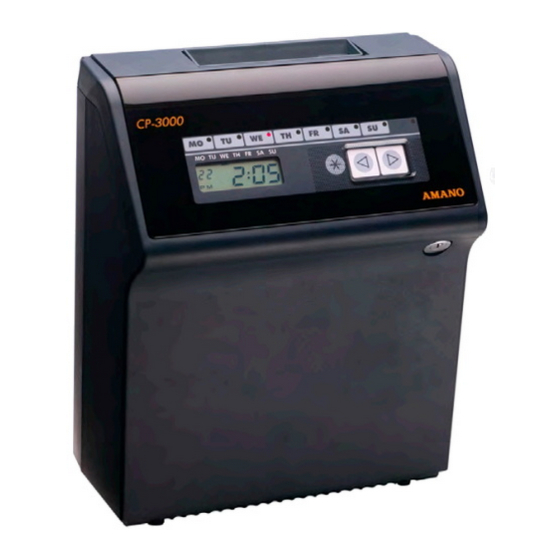
Features There are three (3) versions of the CP-3000 available. The model numbers and features are listed in the following table. Features A050 A051 A056 Single Color Printing Two Color Printing Signal Device Full Power Reserve Index No. Imprint Front Panel Description The front panel displays the date, time, day of the week, and is used for programming the unit. - Page 10 Note: ESD (Electrostatic Discharge) precautions should be adhered to before touching the Mode Switch. CP-3000 User’s Guide...
-
Page 11: Chapter 2: Getting Started
Chapter 2: Getting Started Before using the Amano CP-3000 time recorder/stamp, please carefully review this chapter of the manual, which covers: Removing the top cover, Removing the front cover, Placement/Location Desktop Installation Wall Mounting ... -
Page 12: Front Cover
The front cover must be removed to connect the Full Power Reserve Battery and connect the external signal line (Model A051 and A056 only) for the CP-3000. To do so, perform the following steps: Step 1. Disconnect the power cord from the power source if applicable. -
Page 13: Placement/Location
Placement/Location When choosing a mounting location for your CP-3000, you should ensure the following parameters are met: The mounting surface and hardware is capable of supporting the unit’s weight, 9.66 lbs. (4.38 kg). The area must be within the specified operating temperature range. -
Page 14: Wall Mounting
Step 9. Holding the sides of the cover, lift the CP-3000, bottom forward, to the back plate. Step 10. Align the tabs on the bottom of the CP-3000 housing with the grooves in the bottom flange of the back plate. Hold the CP- 3000 in place so that the tabs are even with the bottom flange. -
Page 15: External Signal Connections
External Signal Connections The model A051 and A056 versions of the CP-3000 are equipped with a single external signal relay circuit that enables you to activate an audible device such as a bell or buzzer. The relay contacts of the circuit are Normally Open and should not exceed Class 2 Circuit requirements (30 VAC RMS at 3A, or 30 VDC at 3A). - Page 16 Step 2. Following the manufacturer’s guidelines for the external device, connect the signal wires to it and run them to the mounting location of the CP-3000. Make sure the wires are properly labeled. Step 3. Strip approximately 0.25” (6.35 mm) of insulation off the ends of the wires that will be connected to the CP-3000.
-
Page 17: Connecting The Battery
Step 9. Observing polarity, insert one wire into the CP-3000 through the knockout hole and connect it to the proper terminal position of CN7A. Using a screwdriver, secure the wire in place. Insert the other wire into the unit and secure in place. Make sure that only the stripped wire is clamped, and not the insulation. - Page 18 Step 6. Replace the top cover. Note: The “As Shipped” time display format setting is configured at the factory. If the CP-3000 should lose its configuration, the time will be displayed in the default (24 hour) time format when the battery is connected.
-
Page 19: Initialization And Reset
Initialization and Reset Initialization Prior to first use, the CP-3000 must be initialized. Initialization resets the time and date to their default settings, but does not affect their “As Shipped” format. Note: This procedure must be performed with the power cord disconnected from the power source. -
Page 20: Reset (All Clear)
Note: Initialization or pressing the Reset button does not mean that all program data is reset to defaults. Only the time and date are reset to defaults. The CP-3000 is reset to defaults by performing a Reset (All Clear). Reset (All Clear) This function is provided to clear all programmed data (Weekly Programs, imprint formatting, etc.) from the CP-3000. - Page 21 (12 hour) format: Note: The “As Shipped” time display format setting is configured at the factory. If the CP-3000 should lose its configuration, the time will be displayed in the default (24 hour) time format when the power is connected.
- Page 22 This page intentionally left blank. 2-12 CP-3000 User’s Guide...
-
Page 23: Chapter 3: Time Cards
Making a Test Print Follow these steps to make a test print: Step 1. Make sure that there is power to the CP-3000, and the Mode Switch is set to NORMAL. Step 2. Gently insert a time card into the card throat. The card will automatically be fed in, printed and ejected. -
Page 24: Card Dimensions
If the CP-3000 should lose its configuration, it will revert to the default imprint: Card Dimensions The CP-3000 is factory set for use with a 3.375” (86 mm) wide and 0.0126” (0.32 mm) thick standard “Clipper” type time card. The recommended column dimensions are as follows: where: Bm = Bottom Margin, 0.827”... -
Page 25: Card Color
Card Color The CP-3000 can be used with most of the colored time cards available. However, when selecting a time card, you should make sure that the background color of the card does not interfere with the time card sensors’ ability to read the contrast between the card and the Column Position Block in the imprint (see page 3-1). - Page 26 01 to 31 in increments of 0.01” (0.25 mm). When the correct value appears, press the YES key. Step 5. Exit the Program Mode and insert a time card into the card throat to test. Note: This feature is only for small variations. CP-3000 User’s Guide...
-
Page 27: Card Thickness Adjustment
Note: This feature is only for small variations. Card Thickness Adjustment The CP-3000 is factory set for a time card thickness of 0.0126” (0.32 mm). It can be adjusted for time cards with a thickness of 0.0079” to 0.0197” (0.2 mm to 0.5 mm). -
Page 28: Card Width Adjustment
Step 6. Loosen the upper card width adjustment screw, insert the card into the card throat and slide the guide to adjust the width allowing 0.0197” (0.5 mm) between the card and the guide. Tighten the screw. CP-3000 User’s Guide... - Page 29 Step 9. Install the front cover. Step 10. Reconnect the power cord to the power source. Step 11. Program the correct time and date. Step 12. Set the Mode Switch to NORMAL and install the top cover. CP-3000 User’s Guide...
- Page 30 This page intentionally left blank. CP-3000 User’s Guide...
-
Page 31: Chapter 4: Programming
Chapter 4: Programming Introduction The CP-3000 must be programmed before use. There are two types of programming: Basic and Weekly. Basic Programming is used to program basic clock functions such as time, date, time display, Daylight Saving Time (DST) adjustment, and card imprint. -
Page 32: Entering And Saving Values
An LED indicator will light for each menu position. Continue pressing the FUNCTION key and the cursor will eventually return to the first program item. Exiting Program Mode To exit the Program Mode at any time, slide the Mode Switch to the NORMAL position. CP-3000 User’s Guide... -
Page 33: Programming Guides
Programming Guides The following is a reference guide for programming the Model A050 and Model A051 versions of the CP-3000: (Chart continued on next page) CP-3000 User’s Guide... - Page 34 Note: The “As Shipped” imprint settings are configured at the factory. If the CP-3000 should lose its configuration, it will revert to the default imprint settings. CP-3000 User’s Guide...
- Page 35 The following is a reference guide for programming the Model A056 version of the CP-3000: (Chart continued on next page) CP-3000 User’s Guide...
- Page 36 Note: The “As Shipped” imprint settings are configured at the factory. If the CP-3000 should lose its configuration, it will revert to the default imprint settings. CP-3000 User’s Guide...
-
Page 37: Basic Programming
1. To save these settings, press the YES key. When the year, month and date are saved, the next menu item, Hours and Minutes will appear in the display. CP-3000 User’s Guide... -
Page 38: Hours And Minutes
(00 thru 59) appear in the display. Holding down the NO key for more than three seconds will increment the number in the display by ten. Step 6. When the correct minutes appears in the display, press the YES key. CP-3000 User’s Guide... -
Page 39: Day Change Time
Change Time, will appear in the display. Day Change Time For proper operation of the CP-3000, the Day Change Time must be set to “00:00”. To do so, perform the following: Note: To verify the Day Change Time you must cycle through the sequence of displays and save the data displayed. -
Page 40: Automatic Adjustment
Press the NO key until the correct week number of the year (01 thru 52) appears in the display. Holding down the NO key formore than three seconds will increment thenumber in the display by ten. 4-10 CP-3000 User’s Guide... -
Page 41: By Month And Day
YES key. Holding down the NO key for more than three seconds will increment the number in the display by ten. When saved, the second pair of digits (date of the month) will flash in the display. 4-11 CP-3000 User’s Guide... - Page 42 2. To save these settings, press the YES key. When saved, the display will move to the Time Card Settings menu. Step 9. Exit the Program Mode by setting the Mode Switch to NORMAL. 4-12 CP-3000 User’s Guide...
-
Page 43: Manual Adjustment
Step 5. When the desired value appears, press the YES key. The display will automatically move to the Fraction of Hours (Minutes) Imprint menu item. Step 6. Using the NO key, select one of the following: 4-13 CP-3000 User’s Guide... - Page 44 (ON). Step 11. When the desired value appears, press theYES key. The display will automatically move to the Month Imprint menu item. Step 12. Using the NO key, select one of the following: 4-14 CP-3000 User’s Guide...
-
Page 45: Index No. Imprint (Model A056 Only)
This group of menu items is used to set the duration (in seconds) that the relay contacts of the installed signal device (Models A051 and A056 only) will be closed or the built-in buzzer will sound, and verify that the Master Clock function is disabled. 4-15 CP-3000 User’s Guide... -
Page 46: Weekly Programming
Weekly Programming This menu allows you to create a weekly schedule that will enable or disable certain features of the CP-3000 at predetermined times of the day and on specific days of the week. This schedule is comprised of two components: Moments and Objects. -
Page 47: Creating A Weekly Program
(Friday) day of the week, Signal 1 will activate for the duration specified, and the CP-3000 will print in black ink. At 10:12 on the same days, the built in buzzer will sound for the duration specified, and the CP-3000 will print in red ink. - Page 48 Color Change item. Note: For Models A051 and A056 only: If you program a color change, you must program another step or schedule to return the ribbon to its original color. 4-18 CP-3000 User’s Guide...
-
Page 49: Obtaining A Printout Of Programmed Data
With “1” flashing in the display, press the YES key. The “1” will cease to flash, the ribbon carriage will cycle, and all programs in the CP-3000 will momentarily appear in the display. Step 4. Insert a time card. All Basic Programming information will be printed on the time card. -
Page 50: Editing Weekly Programs
To move to previously numbered Weekly Programs, press and hold the NO key. Step 5. Change the Weekly Program as desired. For the changes to be in effect, you must cycle through the sequence of displays, and save the data entered. 4-20 CP-3000 User’s Guide... -
Page 51: Adding Additional Weekly Programs
Step 7. Press the YES key to delete this program. The remainder of the programs in the CP-3000 will automatically have their program number moved down one to fill the empty space left by the program that was just deleted. For example, if program number seven was deleted, program number eight will now be program number seven. - Page 52 Step 8. After saving the program, press the FUNCTION key to move to the Program Printout menu item and print out a copy of the program to check. 4-22 CP-3000 User’s Guide...
-
Page 53: Chapter 5: Maintenance
Do not use thinner, benzine, or insecticides. Fuse Replacement There are two fuses used in the CP-3000. The main fuse is a 250 V F2A (Fast Acting) fuse. The second fuse, which protects the power supply, is a 250 V F4A (Fast Acting) fuse. -
Page 54: Ribbon Replacement
The ribbon should be replaced when the imprint of the time card appears light or when the following message appears in the display: Always use Amano approved ribbons. Non-Amano ribbons bind in the printer carriage, and produce weak quality prints and ink residue on print head, rollers, and the time card. - Page 55 Step 8. Set the Mode Switch to NORMAL. Step 9. Insert a time card into the card throat to check the printing qualityand to confirm that you have installed the ribbon properly. Step 10. Replace the top cover. CP-3000 User’s Guide...
- Page 56 This page intentionally left blank. CP-3000 User’s Guide...
-
Page 57: Chapter 6: Troubleshooting
Chapter 6: Troubleshooting Introduction If your CP-3000 should fail to operate properly, you should perform the following to determine the cause: Visually inspect the unit Obtain a print out of programmed data and verify it Check that AC power is connected ... -
Page 58: Foreign Object Or Material
Obtain a printout of programmed data in your CP-3000. Verify that Signal 1 is correctly programmed in the Weekly Program Run the Signal 1 Test from the Diagnostics menu to check if the Signal 1 relay is operating properly. If it is not, contact your local... -
Page 59: Error Messages
(Err 6 thru Err 9). Err 0 thru Err 5 When one of the following errors occur, the CP-3000 will display the error message and may beep. After the beeps, the message will disappear and the unit will return to normal operation. These messages are used as warnings that there may be a problem that does not require immediate attention. -
Page 60: Time Card Error
Printer or printer carriage is damaged. Contact your local Amano dealer. A non-Amano ribbon was used. Always use Amano approved ribbons: non-Amano ribbons bind in the printer carriage, produce weak quality prints and ink residue on print head, rollers, and time card. -
Page 61: Weekly Program
Overheat Protection To prevent overheating of the card feed and printing motors and a quick and high discharge of the battery, the CP-3000 is provided with an internal counter for the number of imprints. When you print too many times within a short time period, the recorder will refuse to accept new... -
Page 62: Insufficient Power
Blank Display When this condition occurs, the CP-3000 will also emit a continuous beep. If possible, perform the LCD Test in the Diagnostics menu. If this condition persists, contact your local Amano dealer. -
Page 63: Display Related Problems
Power Failure A blinking LED and constant colon in the display indicates an AC power failure. When this occurs, the operation of the CP-3000 is taken over by the internal battery. If AC power is connected and working, and the display indicates a power failure, contact your local Amano dealer. -
Page 64: Hour Change
A non-Amano ribbon was used. Always use Amano approved ribbons, non-Amano ribbons bind in the printer carriage, and produce weak quality prints, and ink residue on print head, rollers, and time card. -
Page 65: Card Cannot Enter Or Card Blocked
After a minute change on the display or when the user presses one of the keys, the CP-3000 will automatically retry to flush out the card. If the card is unable to be flushed out by the feed motor, it must be manually removed. -
Page 66: Imprint Position Wrong
The surface of the time card is too rough or there is dirt, oil, dust, or ink residue on the card. Imprint Position Wrong If your CP-3000 is functioning normally, but the position of the imprint is incorrect, perform the following: ... -
Page 67: Weak Or Light Printing
Printer or printer carriage is damaged. Contact your local Amano dealer. The slider on the printer carriage is not moving correctly due to a missing black plastic bushing in the small hole of the right printer frame. Contact your local Amano dealer. -
Page 68: Led Test
Step 5. Slide the Mode Switch to PROGRAM. The LED indicator should illuminate. Repeat this sequence several times. Step 6. To test the keys, set the Mode Switch to NORMAL. The LED indicator should turn off. 6-12 CP-3000 User’s Guide... -
Page 69: Lcd Test
Step 5. Press the NO key to move to the next test or exit the Diagnostics menu by pressing the FUNCTION key, or by exiting the Program Mode. 6-13 CP-3000 User’s Guide... -
Page 70: Eprom Test
Test menu item will appear in the display. Step 3. Press the YES key to select and start the test. The test number will cease to flash in the display, and the Buzzer will sound for a maximum of eight beeps. 6-14 CP-3000 User’s Guide... -
Page 71: Signal 1 Test
Mode and press the FUNCTION key until the LED Test menu item appears in the display. Step 2. Press the NO key eight times. The Color Change Test menu item will appear in the display. 6-15 CP-3000 User’s Guide... -
Page 72: Model Id
Step 4. Press the YES key. A beep will sound and the test number will flash in the display. Step 5. Exit the Diagnostics menu by pressing the FUNCTION key, or by exiting the Program Mode. 6-16 CP-3000 User’s Guide... -
Page 73: Chapter 7: Appendix
Chapter 7: Appendix The following charts are provided to assist you in creating Weekly Programs for your CP-3000. (Chart continued on next page) CP-3000 User’s Guide... - Page 74 CP-3000 User’s Guide...
- Page 76 Corporate Headquarters 140 Harrison Avenue, Roseland, NJ 07068-1239 (800) 526-2559 ATR-100403 Copyright © 2006 Amano Cincinnati, Inc. 10/06/0...
Need help?
Do you have a question about the CP-3000 and is the answer not in the manual?
Questions and answers