Miele PW 5065 Operating Manual
Hide thumbs
Also See for PW 5065:
- Operating and installation instructions (76 pages) ,
- Operating manual (64 pages) ,
- Operating and installation instructions (68 pages)

Related Manuals for Miele PW 5065


Summary of Contents for Miele PW 5065
- Page 1 Operating manual Washer PW 5065 en - CA To prevent accidents and machine damage read these instructions before installation or use. M.-Nr. 09 756 310...
-
Page 2: Table Of Contents
Contents IMPORTANT SAFETY INSTRUCTIONS....... . . 3 Guide to the washer..........7 Before using for the first time. -
Page 3: Important Safety Instructions
Installation, repair and maintenance GROUNDING INSTRUCTIONS work should be performed by a This appliance must be grounded. In Miele authorized service technician. the event of malfunction or breakdown, Work by unqualified persons could grounding will reduce the risk of be dangerous electric shock by providing a path of least resistance for electric current. - Page 4 EXPLOSIVE. If the hot water system has If the power cord is damaged it not been used for such a period, turn must only be replaced by a Miele Ser- on all hot water faucets and let the vice technician with a genuine Miele water flow from each for several power cord.
- Page 5 IMPORTANT SAFETY INSTRUCTIONS Persons who lack physical, sensory or mental abilities, or experience with Only use the washing machine to the appliance should not use it without wash items which are specified by the supervision or instruction by a manufacturer to be machine washable responsible person.
- Page 6 Do not touch the glass. Danger of burns! Keep children away from the washer when in use. Accessories Only use genuine Miele accessories and replacement parts. If other parts are used, guarantee, performance and product liability claims may become void.
-
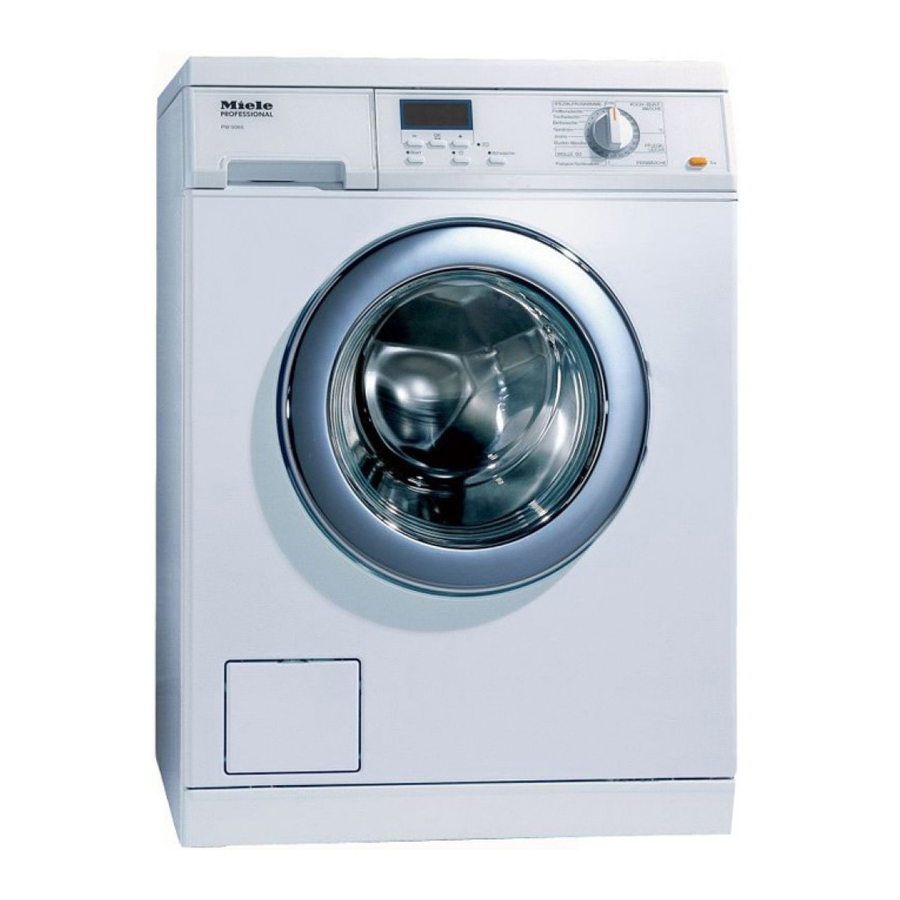
Page 7: Guide To The Washer
Guide to the washer Control panel a "Start" button with indicator e Pre-wash button with indicator starts the selected wash program. f Program selector b Display with –, "OK" and + buttons to select a wash program. allows more info to be seen on the The program selector can be turned following screens. - Page 8 Guide to the washer Display Temperature conversions Celsius Fahrenheit 95°C 203°F 75°C 167°F 60°C 140°F 40°C 104°F 30°C 86°F – / + buttons To change the component highlighted in the display. – decreases the value or moves the marker up + increases the value or moves the marker down.
-
Page 9: Before Using For The First Time
Before using for the first time Setting time of day The appliance must be correctly installed and connected before the 12:00 first use. Please see the "Installation instructions". Set the time of day For safety reasons, it is not possible ^ Set the hours with the +/–... -
Page 10: Use
1. Sort the laundry General tips – Dark fabrics often bleed the first few times they are washed. They should be washed separately several times before being included in a mixed load. – Remove any lead weights or strips from curtains before washing. –... -
Page 11: Load The Laundry
^ Close the drum door. 2. Load the laundry ^ Open the drum door using the "Door" button. The drum light switches on. ^ Load the laundry loosely into the drum. For best results, wash mixed loads of small and large items. This will improve washing effectiveness and help distribute the load evenly. -
Page 12: Select A Program
3. Select a program When selecting "Special programs" the display shows the list. Quick wash Shirts Starch ^ Select the desired program with the buttons +/– and confirm with OK. The display switches to the program selection. Shirts ^ Select a program and the desired 40°C 600 rpm temperature with the program... -
Page 13: Adding Detergent
4. Adding detergent Use detergent according to the laundry soiling and water hardness. Too little detergent may cause: – ineffective cleaning of laundry; fabrics may become gray and stiff over time. – grease stains on the laundry. – hard water deposits on the heating element. -
Page 14: Starting A Program
5. Starting a program 6. At the end of a program The anti-crease program starts when Coin mechanism the laundry is not immediately removed If the machine is coin operated, please from the washer after the program regard the displayed request to pay. ends. -
Page 15: Canceling A Program
Changing a program The program will be locked 3 minutes after the program has To change a program started when the washer is operated A program change is not possible after with a coin mechanism. Canceling a program has started. or changing a program is no longer possible. -
Page 16: Adding/Removing Laundry During A Wash Program
Adding/removing laundry The drum door cannot be opened if: during a wash program – the water temperature is greater than 130°F (55°C). You can interrupt some programs to add or remove a piece of laundry. – the water level is too high. ^ Press the "Door"... -
Page 17: Program Guide
Program guide ABCD COTTONS 95° to 30°C (203°F to 86°F) Items Cottons, linens or mixed fabrics. Tips – Use COTTONS 95°C to sanitize laundry or for heavily soiled items. – Wash dark colored fabrics with detergent for colors or a liquid detergent. - Page 18 Program guide Bed linen 60°C to 40°C (140°F to 104°F) Items Bed linens made of cottons or mixed fabrics. Use color detergent for color items Detergent Universal or color detergent Load size 14.3 lb (6.5 kg) Curtains 40°C to cold (104°F to cold) Items Curtains which are machine washable according to the manufacturer.
- Page 19 Program guide Special programs Quick wash 40°C (104°F) Items Small load of lightly soiled items, which can be washed in "COTTONS" Detergent Universal or color detergent Load size 7.7 lb (3.5 kg) Shirts 60°C to 40°C (140°F to 104°F) Items Shirts and dress shirts.
- Page 20 Program guide Proofing 40°C to 30°C (104°F to 86°F) Items To treat micro fiber, ski clothing, fine dense cotton or table cloths to make them water repellent and soil resistant. – The item should be washed and spun or dried. –...
- Page 21 Program guide Additional special programs can be accessed in the menu "Settings - Supervisor level". Contact Miele technical service to access these programs. Intensive Wash 60°C to 40°C (140°F to 104°F) Items Heavily soiled cottons, linen or mixed fabrics Detergent...
- Page 22 Program guide Towels + 60°C to 40°C (140°F to 104°F) Items Lightly soiled cotton terry laundry Use color detergent for dark colored laundry Detergent Universal detergent Load size 12 lb (5.5 kg) Capes 30°C (86°F) Items Lightly soiled synthetic capes Detergent Detergent for delicates Load size...
-
Page 23: Program Sequence
Program sequence Main wash Rinse Spin Water Wash Water Rinses Rinse Final level rhythm level spin spin COTTONS MINIMUM IRON DELICATES – Towelling Table linen Bed linen Curtains – Denim – Dark garments Woollens Quick wash Shirts – Starch – –... - Page 24 Program sequence Symbols Special features in the program sequence: d = Low water level ( = Medium water level Anti-crease: e = High water level The drum continues to turn up to 30 a = Normal wash rhythm minutes after the program has ended to b = Gentle wash cycle prevent wrinkling.
-
Page 25: Selecting A Spin Speed
Selecting a spin speed Rinse spin Program max. rpm COTTONS 1400 The laundry is spun after the main wash and between the rinse cycles. MINIMUM IRON 1000 Reducing the final spin speed will also DELICATES reduce the rinse spin speeds. Towelling 1400 Table linen... -
Page 26: Delay Start
Delay Start Starting the delay start The delay start feature cannot be ^ Press the "Start" button. used when the washer is operated by a coin mechanism. 40°C 1200 rpm The delay start feature allows you to start a program at a later time. The Start in: 2:41 h program start can be delayed 30... -
Page 27: Detergent
Detergent Water hardness Only use laundry detergent formulated for front loading washing machines. Hardness Water hardness in Water hardness level in mmol/l For wool and wool blend fabrics use a (also German detergent formulated for wools. hardness in °d) soft (I) 0 - 8.4 0 - 1.5 Follow instructions on the detergent... - Page 28 §. to an external detergent dosage system. A conversion kit is necessary If you use starch frequently, clean the which can be purchased from Miele. dispenser compartment and especially the siphon tube and conditioner channel. See "Cleaning the detergent...
-
Page 29: Cleaning And Care
Cleaning and Care Cleaning the detergent drawer Before cleaning the appliance, Detergent residue should be cleaned disconnect the power supply by out regularly. unplugging the unit or manually tripping the circuit breaker. Do not use chemical solvents, abrasive cleaners, glass or all purpose cleaners. -
Page 30: Cleaning The Inlet Hose Filter
Cleaning and Care Cleaning the inlet hose filter Cleaning the filter in the inlet valve ^ Using pliers carefully loosen and The washer has two water inlet filters to protect each inlet valve. Check and remove the plastic hose connector clean these filters every 6 months. -
Page 31: Frequently Asked Questions
Frequently asked questions Repairs to electrical appliances must only be carried out by a qualified and trained person in accordance with local and national safety regulations. Repairs and other work by unqualified persons could be dangerous. The following section will help you avoid placing a service call by identifying issues you may encounter while operating the machine: A wash program cannot be started Issue... -
Page 32: The Display Shows A Fault Message
– the inlet hose is kinked. – the filters are blocked. Technical There is a fault. Start the program again. fault If the fault message appears again contact Miele’s Technical Service Department. * To cancel an error message, press OK. -
Page 33: General Problems With The Washer
Frequently asked questions General problems with the washer Issue Possible cause Solution – The four feet are – Level the machine (see The washer shakes during the spin cycle. not resting evenly Installation Instructions). on the floor. – The floor is not –... -
Page 34: Poor Wash Results
Frequently asked questions Poor wash results Issue Possible cause Solution Liquid detergents do not – Use powder detergent The laundry does not get clean with contain bleaching agents. containing bleach. liquid detergent. Fruit, coffee and tea (Be sure this is suitable stains may not be according the fabric care removed. - Page 35 Frequently asked questions The door will not open when the "Door" button is pressed Issue Solution Insert the plug into the outlet and check that the The washer has no power. circuit breaker has not tripped. Power failure To open the drum door, see "Frequently asked questions - Opening the drum door during a power failure...".
-
Page 36: Opening The Door During A Power Failure Or When The Drain Is Blocked
Frequently asked questions Opening the door during a Machines with a drain pump power failure or when the drain If the main drain hose is clogged, water is blocked will be retained in the machine (max. 6.5 gal [30 l]). Disconnect the machine from the power supply. - Page 37 Frequently asked questions Once the flow of water stops: Open the drum door Always make sure the drum is stationary before reaching into the drum to remove laundry. A moving drum is extremely dangerous. ^ Remove the lint trap lid. ^ Insert a screwdriver into the notch, beside the lint trap, pull it down.
- Page 38 Frequently asked questions Machines with a drain valve Open the drum door Always make sure the drum is stationary before reaching into the drum to remove laundry. A moving drum is extremely dangerous. ^ Press the lever for the emergency drain down and hold until you hear no more water running out.
-
Page 39: After Sales Service
Miele will provide information when such possibilities become available. Both can be found on the data plate visible above the front glass on the Optional accessories inside of the door. Optional accessories are available through your Miele dealer or Miele. -
Page 41: Installation Instructions
Installation Instructions To prevent accidents and machine damage read these instructions before installation or use. -
Page 42: Installation
Installation Front view a Water intake hose hot g Access panel to drain filter, drain pump and emergency door release b Water intake hose cold h Height adjustable feet c Electrical connection i Stand d Control panel j Fixing bracket e Detergent dispenser drawer f Drum door... - Page 43 Installation Rear view a Lid with transport grips d Shipping struts with rotary protectors b Mounting for: e Water intake hose (cold) f Water intake hose (hot) – Water intake hose g Drain hose for drain pump – Drain hose h Drain hose for drain valve –...
-
Page 44: Installation Site
Installation Installation site Installation ^ Use the front washer feet and the The washer cannot be built-in. rear excess end to transport the washer from its shipping pallet to the installation site. Do not install the machine Do not lift the washer by the drum directly next to or over an open floor door. - Page 45 Installation ^ Turn the left shipping strut ^ Turn the right shipping strut counterclockwise 90° with the clockwise 90° with the enclosed enclosed combination wrench. combination wrench. ^ Pull the shipping strut out. ^ Pull out the shipping strut out.
-
Page 46: Installing The Shipping Struts
Installation Movement of the washer without the shipping struts in place should be kept to a minimum. The shipping struts should be stored on the back of the washer for future use. They must be reinstalled before moving the machine. Installing the shipping struts ^ Reinstall the struts by reversing the installation procedure. -
Page 47: Leveling The Washer
Installation Leveling the washer Adjust the four leveling feet The washer is leveled by adjusting the four feet. The machine is boxed with the feet completely screwed in. To ensure smooth operation the washer must be level. Failure to level the machine can result ^ Turn the locking nut, 2, counter- in increased water and energy clockwise with the enclosed... -
Page 48: Installation On A Base
"This washer must be connected to the power supply to open the drum door. Do not use force to open the door." * Available from your Miele dealer or Miele. -
Page 49: Water Connection
Extension hoses (8’ 2" or 13’ [2.5 m or line by a qualified plumber. 4 m]) may be obtained from Miele. The water pressure must be between 14.5 -145 psi (1 -10 bar). If the water... - Page 50 Installation Hot water connection If the washer is not to be installed for hot water connection, the settings "Main Connecting the machine to a hot water wash", "Pre-wash" and "Rinses" must be supply will lead to low electrical adjusted respectively. The hot water consumption during hot water intake hose must be removed.
-
Page 51: Drainage
16’ 5" (5 m). The hose There are two drainage extras for this extension can be purchased from your machine: Miele dealer or Miele. Drain valve The machine is drained with a motorized drain valve. A connection can be made to an on-site floor drain (gully with an air gap) on an angle. -
Page 52: Electrical Connection
The conversion must be performed by a Miele Service Technician. Additionally the "Heating level" setting must be adjusted. Do not install devices to automatically turn the washer off,... -
Page 53: Technical Data
Technical Data Height " (85 cm) Width " (59.5 cm) Depth " (72 cm) Depth with the door open " (112 cm) Weight 236 lb (107 kg) Maximum floor load 625 lb [2778 Newton (approx. 278 kg)] Capacity 15 lbs (6.5 kg) dry laundry Fuse rating see data plate Rated load... -
Page 54: Help To Protect The Environment
Help to protect the environment Disposal of the packing Disposal of an old appliance materials Old appliances may contain materials that can be recycled. Please contact The cardboard box and packing your local recycling authority about the materials protect the appliance during possibility of recycling these materials. - Page 55 Depending on default settings – some settings are visible and can be changed by all users (Menu "Settings J") – all setting are locked in the "Supervisor level" by a code (Menu "Settings - Supervisor level"). Contact Miele Technical Service.
-
Page 56: Settings J
Settings J Language J Accessing the "Settings" J ^ Turn the program selector to "Finish". The display contents can be shown The main menu shows. in different languages. 12:03 The displayed language can be changed by the sub-menu Selecting a program "Language J". -
Page 57: Time Of Day
Settings J Time of day Display contrast This selection allows the clock to be The contrast of the display can be shown as 24 hours, 12 hours or not set at ten different levels. at all. The time of day is also set It is factory set to Setting 4. - Page 58 Settings J Standby Memory The display goes out after 10 The Memory function remembers the minutes and the "Start" button addition of an extra feature to a flashes slowly to save energy. program, a change in spin speed or the temperature the next time that Two options can be selected: program is selected.
-
Page 59: Menu Settings - Supervisor Level
Menu Settings - Supervisor level The menu "Settings - Supervisor level" has to be "activated" by a Entry OK. Miele service technician or dealer. Menu opened. The menu "Settings" (except Language J) is locked with a code The user is now in the supervisor level. - Page 60 Menu Settings - Supervisor level Language J Pre-wash water The display contents can be shown The water type (hot/cold) for the in different languages. pre-wash can be selected (except for the program "Curtains"). The hot The fixed language selection can be water intake will be only accessible set in the sub-menu "Languages J".
- Page 61 Menu Settings - Supervisor level Rinse water Temperature pre-wash The water type for the rinse cycle can For the programs "COTTONS" and be selected for the "COTTONS" and "Grease and fat +" the pre-wash "MINIMUM IRON" programs. The hot temperature can be selected. water intake will be only accessible at The machine comes factory set with the a wash temperature of 122°F (50°C)
- Page 62 Menu Settings - Supervisor level MINIMUM IRON duration Hygiene The program "MINIMUM IRON" If a temperature lower than 140°F allows you to extend the wash time (60°C) was selected for the last for the main wash. wash program "Hygiene" is displayed.
- Page 63 Menu Settings - Supervisor level MINIMUM IRON rinses External dosage The program "MINIMUM IRON" The washer is set for connection to allows you to change the number of an external detergent dosage rinses. system. To use the external dosage system the setting must be 2 rinses (factory set) adjusted/set accordingly.
- Page 64 Technical Service. U.S.A. Canada Miele, Inc. Importer Miele Limited National Headquarters 9 Independence Way Headquarters and Miele Centre Princeton, NJ 08540 161 Four Valley Drive Phone: 800-843-7231 Vaughan, ON L4K 4V8 609-419-9898 www.miele.ca 609-419-4298...
Need help?
Do you have a question about the PW 5065 and is the answer not in the manual?
Questions and answers