Philips HD9170 User Manual
Hide thumbs
Also See for HD9170:
- Instruction manual (68 pages) ,
- User manual (10 pages) ,
- Instructions manual (190 pages)
Advertisement
Quick Links
注册您的产品并在以下网站链接中了解详情
www.philips.com/welcome
HD9170
HD9171
EN
User manual
คู ่ ม ื อ ผู ้ ใ ช้
TH
IN
Buku Petunjuk Pengguna
VI
Hướng dẫn sử dụng
KO
사용 설명서
ZH-CN
用户手册
Manual pengguna
MS-MY
ZH-TW
使用手冊
10
c
b
a
技术规格如有变更,恕不另行通知
© 2013 Koninklijke Philips Electronics N.V.
保留所有权利
HD9170_HD9171_UM_ROW_V1.0
English
1 Introduction
Congratulations on your purchase and welcome to Philips! To fully benefit from the support
that Philips offers, register your product at www.philips.com/welcome.
For recipes to use with your steamer, go to www.philips.com/kitchen.
2 Important
Read this user manual carefully before you use the appliance, and save the user manual for
future reference.
Danger
•
Never immerse the base in water or rinse it under the tap.
Warning
•
Check if the voltage indicated on the appliance corresponds to the local mains voltage
before you connect the appliance.
•
Only connect the appliance to an earthed wall socket. Always make sure the plug is
inserted firmly into the socket.
•
Do not use the appliance if the plug, the mains cord or the appliance itself is damaged.
•
If the mains cord is damaged, you must have it replaced by Philips, a service centre
authorised by Philips or similarly qualified persons in order to avoid a hazard.
•
This appliance is not intended for use by persons (including children) with reduced
physical, sensory or mental capabilities, or lack of experience and knowledge, unless
they have been given supervision or instruction concerning use of the appliance by a
person responsible for their safety.
•
Children should be supervised to ensure that they do not play with the appliance.
•
Keep the mains cord out of the reach of children. Do not let the mains cord hang over
the edge of the table or worktop on which the appliance stands.
•
Keep the mains cord away from hot surfaces.
•
Never steam frozen meat, poultry or seafood. Always thaw these ingredients
completely before you steam them.
•
Never use the food steamer without the drip tray, otherwise hot water splashes out of
the appliance.
•
Only use steaming bowls 1, 2 and 3 and the soup bowl in combination with the original
base.
Caution
•
Never use any accessories or parts from other manufacturers or that Philips does not
specifically recommend. If you use such accessories or parts, your guarantee becomes
invalid.
•
Do not expose the base of the appliance to high temperatures, hot gas, steam or damp
heat from other sources than the steamer itself.
•
Do not place the food steamer on or near an operating or still hot stove or cooker.
•
Always make sure the appliance is off before you unplug it.
•
Always unplug the appliance and let it cool down before you clean it.
•
This appliance is intended for household use only. If the appliance is used improperly
or for professional or semi-professional purposes or if it is not used according to the
instructions in the user manual, the guarantee becomes invalid and Philips refuses any
liability for damage caused.
•
Place the food steamer on a stable, horizontal and level surface and make sure there is
at least 10cm free space around it to prevent overheating.
•
While using steaming bowls 1, 2 and 3 with their removable bottoms, always make sure
the rim of the bottom points upwards and that the bottom locks into place ('click').
•
Beware of the hot steam that comes out of the food steamer during steaming or when
you remove the lid.When you check food, always use kitchen utensils with long handles.
•
Always remove the lid carefully and away from you. Let condensation drip off the lid
into the food steamer to avoid scalding.
•
Always hold the steaming bowls by one of their handles when you stir hot food or
remove it from the bowls.
•
Always hold the steaming bowls by their handles when the food is hot.
•
Do not move the food steamer while it is operating.
•
Do not reach over the food steamer while it is operating.
•
Do not touch the hot surfaces of the appliance. Always use oven mitts when you
handle hot parts of the appliance.
•
Do not place the appliance near or underneath objects that would be damaged by
steam, such as walls and cupboards.
•
Do not operate the appliance in the presence of explosive and/or flammable fumes.
•
This appliance is not intended to be operated by means of an external timer or a
separate remote-control system.
•
There is a small sieve inside the water tank. If the sieve becomes detached, keep it out
of the reach of children to prevent them from swallowing it.
1
a
b
u
c
d
e
f
g
t
s
h
r
i
q
j
p
k
o
l m
n
5
6
c
a
b
a
MAX
MIN
Automatic switch-off
The appliance is equipped with automatic shut-off. The appliance switches off automatically
if you do not press a button within 2 minutes after plugging in the appliance .The appliance
switches off automatically after the set steaming time has elapsed.
Boil-dry protection
This food steamer is equipped with boil-dry protection. The boil-dry protection automatically
switches off the appliance if it is switched on when there is no water in the water tank or if
the water runs out during use. Let the food steamer cool down for 10 minutes before you
use it again.
Electromagnetic fields (EMF)
This Philips appliance complies with all applicable standards and regulations regarding
exposure to electromagnetic fields.
Recycling
Your product is designed and manufactured with high quality materials and
components, which can be recycled and reused.
When you see the crossed-out wheel bin symbol attached to a product, it means
the product is covered by the European Directive 2002/96/EC:
Never dispose of your product with other household waste. Please inform
yourself about the local rules on the separate collection of electrical and electronic
products. The correct disposal of your old product helps prevent potentially
negative consequences on the environment and human health.
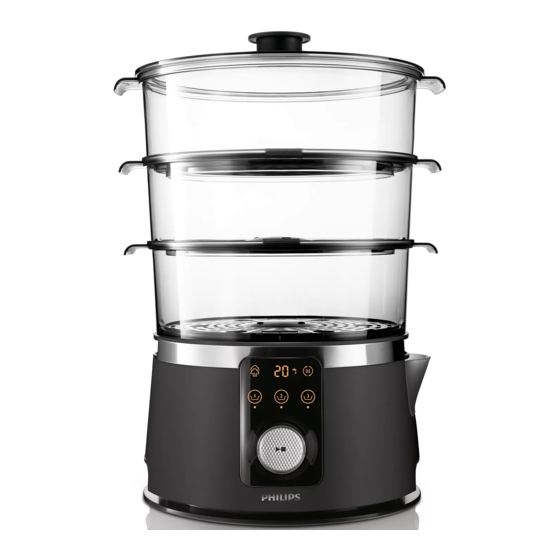
3 Overview (fig.1)
a Lid handle
l Cord storage facility
b Steam vents
m Water refill spout
c Lid
n Start/stop and pause button
d Soup bowl
o Timer adjustment knob with light ring
e Large steaming bowl (3)
p Steaming bowl buttons (1,2,3)
f Medium steaming bowl (2)
q "Keep-warm" light
g Small steaming bowl (1)
r Turbo light
h Flavor booster
s Timer indication
i Drip tray
t Water tank empty light
j Base with water tank
u Removable bottom
k Control panel
4 Before first use
Thoroughly clean the parts that come into contact with food before you use the appliance
for the first time (see chapter 'Cleaning and maintenance').
Wipe the inside of the water tank with a damp cloth.
5 Using the appliance
Tip
•
Put the appliance on a stable, horizontal and level surface.
•
Fill the water tank with water up to the maximum level. with a full water tank, the steamer
can steam approximately 1 hour.
Note
•
Always fully unwind the mains cord from the reel in the base before you plug in the appliance.
•
Only fill the water tank with water. Never put seasoning, oil, or other substances in the water
tank.
•
Food in the top bowl takes usually a little longer to steam than food in the lower bowls.
•
If you use ground herbs and spices, rinse the drip tray to wet the flavor booster. This prevents
ground herbs or spices from falling through the openings of the flavor booster. If desired, put
dried or fresh herbs or spices on the flavor booster to add extra flavor to the food to be
steamed.
Food steaming table (fig.2)
The steaming time mentioned in the food table is just an indication. Steaming time may vary
depending on the size of the food pieces, the space between the food in the steaming bowl,
the amount of food in the bowl, the freshness of the food and your personal preference.
If desired, put dried or fresh herbs or spices on the flavor booster to add extra flavor to the
food to be steamed.
2
(MAX)
(MAX)
500 g
400 g
400 g
250 g
250 g
200g
300ml
250 ml
6 pcs
7
2
4
8
1
2
MAX
MIN
4
5
Steaming food (fig.3, 4 & 5)
Put the food to be steamed in one or more steaming bowls and/or in the soup bowl. You can
use the bowl for melting chocolate/butter and cooking rice.
Steaming egg (fig.6)
Put the egg holders to steam eggs conveniently.
Note
•
Use a needle to make a small hole on the bottom of the egg before placing it on the egg
holder.
•
Make sure you place the bowl properly so they do not wobble.
Steaming bowls
You do not have to use all 3 steaming bowls.
The steaming bowls are numbered. You can find the number on their handles. The top
steaming bowl is No. 3. The middle steaming bowl is No.2, and the bottom steaming bowl is
No.1.
Only stack the steaming bowls in the following order: steaming bowl 1, steaming bowl 2,
steaming bowl 3.
Note
•
If you use steaming bowls 2 and 3 with their removable bottoms (when using the soup bowl),
always make sure the rim of the bottom points upwards and that the bottom locks into place
when you hear a click.
•
If the water runs out during steaming, the "water tank empty" light and the light ring start
flashing to indicate that you need to refill the water tank.
Manual mode (fig.7)
1
Turn the timer adjustment knob to the left or right to select the required steaming
time.
2
Press the start/stop button to start steaming.
» The steaming process starts. The light ring and the turbo light flash slowly and the
timer counts down the set steaming time.
» When the set steaming time has elapsed, the appliance beeps and switches to the
keep-warm mode. The keep-warm light goes on.
Meal mode (fig.8)
Use this mode to prepare a complete meal with different preparation times for each
steaming bowl. The appliance automatically starts to steam the food in the steaming bowl
with the longest preparation time and beeps to let you know when to place the steaming
bowls with a shorter preparation time. The last steaming bowl has the lowest preparation
time.
Note
•
If you want to prepare a meal without using all three steaming bowls, only set the timer for
the steaming bowls you are using.
1
Press steaming bowl button 1, 2 or 3 to select one of the bowls.
» The corresponding light starts to flash.
2
Turn the timer adjustment knob to the left or right to select the required steaming
time.
3
Press the steaming bowl button you are setting the time for again to confirm.
4
Repeat steps 2 and 3 until you have set the time for all steaming bowls you want to
use.
5
Put the food with the longest preparation time in the smallest steaming bowl (1), the
food with the second-longest preparation time in the medium steaming bowl (2) and
the food with the shortest preparation time in the largest steaming bowl (3).
6
Place the steaming bowl with the longest preparation time on the steamer base.
7
Press the start/stop button.
» The steaming process for the steaming bowl with the longest preparation time
starts. The light ring flashes slowly and the timer counts down the steaming time.
» After some time the appliance beeps and the light of the steaming bowl with the
second longest preparation time flashes quickly to indicate that you have to place
the next steaming bowl
3
(MAX)
(MAX)
15-20 min
16-18 min
a
16-18 min
30-35 min
10-12 min
40 min
MAX
MIN
12-16 min
15 min
9
3
2
MAX
MIN
4
5
8
7
3
8
Place the steaming bowl with the second-longest preparation time on top of the
steaming bowl that is already on the steamer and press the flashing steaming bowl
button or the start/stop button.
9
The steamer proceeds with the steaming process.
10
Repeat the same process for the shortest preparation time on top of the other
steaming bowls.
11
When the steaming time has elapsed, the appliance beeps and switches to the keep-
warm mode. The keep-warm light and the light ring flash slowly.
6 Cleaning and maintenance (fig.9 & 10)
Note
•
Never use scouring pads, abrasive cleaning agents or aggressive liquids such as petrol or
acetone to clean the appliance.
•
If the vinegar starts to boil over the edge of the base, unplug the appliance and reduce the
amount of vinegar.
Caution
•
Do not clean the base in the dishwasher.
•
If the sieve in the water tank becomes detached, keep it out of the reach of children to
prevent them from swallowing it.
•
Never immerse the base in water, nor rinse it under the tap.
Descaling
You have to descale the appliance after it has been used for 15 hours. It is important that
you descale the food steamer regularly to maintain optimal performance and to extend the
lifetime of the appliance.
1
Fill the water tank with white vinegar (8% acetic acid) up to the maximum level.
2
Put the drip tray, steaming bowls, and lid on top of the steamer.
3
Turn the steaming time adjustment knob to set a steaming time of 25 minutes.
4
Let the vinegar cool down completely and empty the water tank. Rinse the water tank
with cold water several times.
Note
•
Do not use any other kind of descaler.
•
Repeat the procedure if there is still some scale in the water tank.
7 Storage
1
Make sure all parts are clean and dry before you store the appliance (see chapter
"Cleaning and maintenance").
2
Make sure the removable bottoms are in place in the steaming bowls.
3
Place the drip tray on the base.
4
Place steaming bowl (3) on the drip tray. Place steaming bowl (2) in steaming bowl (3).
Place steaming bowl (1) in steaming bowl (2).
5
Place the soup bowl in steaming bowl (1).
6
Place the lid on the soup bowl or on steaming bowl (1).
7
To store the mains cord, wind it round the reel in the base.
8 Guarantee & service
If you need service or information or if you have a problem, please visit the Philips website at
www.philips.com or contact the Philips Consumer Care Center in your country (you can find
its phone number in the worldwide guarantee leaflet). If there is no Consumer Care Centre
in your country, go to your local Philips dealer.
4
c
b
a
MAX
MIN
3
9
1/2
3140 035 36411
Advertisement

Related Manuals for Philips HD9170


Summary of Contents for Philips HD9170
- Page 1 Always remove the lid carefully and away from you. Let condensation drip off the lid If you need service or information or if you have a problem, please visit the Philips website at » The corresponding light starts to flash.
- Page 2 Anda dapat menggunakan mangkuk untuk melelahkan cokelat/ 지정점에 의뢰하여 교체하십시오. • Jika kabel listrik rusak, maka harus diganti oleh Philips, pusat layanan resmi Philips atau 세 개의 용기를 모두 사용하지 않아도 됩니다. mentega dan memasak nasi. •...
- Page 3 หากสายไฟชำ า รุ ด คุ ณ ต อ งให ช า งผ ช ำ า นาญของ Philips ดำ า เนิ น การให , ศู น ย บ ริ ก ารที ่ ไ ด ร ั บ อนุ ญ าต...
- Page 4 (bạn có thể tì m thấy số điện thoại của Trung tâm trong tờ bảo hành toàn cầu). Nếu tại quốc 拔除插頭前,務請先行確認產品已關閉。 gia của bạn chưa có Trung Tâm Chăm Sóc Khách Hàng , hãy liên hệ với đại lý Philips tại địa 提示...
Need help?
Do you have a question about the HD9170 and is the answer not in the manual?
Questions and answers