Table of Contents
Advertisement
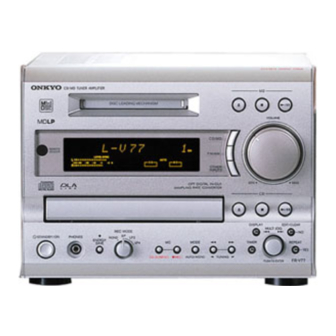
CD/MD Receiver
FR-V3
Instruction Manual
CD / MD RECEIVER
Thank you for purchasing the ONKYO CD/MD
Receiver.
Please read this manual thoroughly before making
connections and turning on the power.
Following the instructions in this manual will enable
you to obtain optimum performance and listening
enjoyment from your new CD/MD Receiver.
Please retain this manual for future reference.
DISCRETE OUTPUT STAGE
Contents
Before Using
Connecting
Preparations
Basic Operation
Advanced Operation
Additional Operation
Others
2
6
10
16
26
45
52
Advertisement
Table of Contents

Related Manuals for Onkyo FR-V3


Summary of Contents for Onkyo FR-V3
-
Page 1: Instruction Manual
Instruction Manual Basic Operation CD / MD RECEIVER DISCRETE OUTPUT STAGE Advanced Operation Thank you for purchasing the ONKYO CD/MD Additional Operation Receiver. Please read this manual thoroughly before making connections and turning on the power. Following the instructions in this manual will enable you to obtain optimum performance and listening enjoyment from your new CD/MD Receiver. -
Page 2: Important Safeguards/Precautions/Main Features/Supplied Accessories
WARNING: The lightning flash with arrowhead symbol, within an equilateral triangle, is intended to alert TO REDUCE THE RISK OF FIRE OR ELECTRIC the user to the presence of uninsulated SHOCK, DO NOT EXPOSE THIS APPLIANCE TO “dangerous voltage” within the product’s RAIN OR MOISTURE. - Page 3 ON for about one hour to remove the The fuse is located inside the chassis and is not user-serviceable. condensation. If power does not come on, contact your Onkyo authorized service When transporting this unit, be careful not to bump it. station.
-
Page 4: Main Features
ELECTRONICS GmbH INDUSTRIESTRASSE 20 82110 GERMERING, GERMANY declare in own responsibility, that the ONKYO product described in this instruction manual is in compliance with the corresponding technical standards such as EN55013, EN55020, EN61000-3-2, -3-3 • Batteries (size AA/R6) [2] and EN60065 GERMERING, GERMANY K.OTSU... -
Page 5: Table Of Contents
CD to MD Synchro Recording ....................32 Moving, dividing, combining, and erasing MD tracks ............33 Recording from a connected source to an MD ..............38 Synchro Recording operation with an ONKYO stereo cassette tape deck ......39 Using the timers ........................40 Additional Operation Customizing the source names ..................... -
Page 6: Connecting
Connecting Antenna (aerial) and speakers Antenna (aerial) connection is a must for auto clock setting. Do not connect the AC power cord (mains lead) at this time. The AC power cord will be connected on page Antenna (aerial) connector Speaker connectors ANTENNA –... - Page 7 Notes • Connecting the left and right speakers reversely or with wrong polarities can cause unnatural or distorted sound. • The load impedance of each speaker must be between 4 and 16 ohms. Connecting speakers with less than 4 ohms impedance could cause damage to the unit amplifier.
-
Page 8: Audio/Video Equipment
To connect to the The illustration below describes the connection with ONKYO DVD player, be sure to connect to the LINE an ONKYO stereo cassette tape deck. IN-1 jacks with the audio connection cable, not the To connect to other cassette tape deck, connect the TAPE LINE IN-2 jacks. - Page 9 About the LINE IN-1 and IN-2 jacks In addition to the above examples, a laser disc player, satellite broadcast tuner, or VCR may be also connected. Connect analog audio output jacks to the unit LINE IN-1 or IN-2 with the audio connection cable.
-
Page 10: Preparations
Preparations Preparing the remote controller Inserting the batteries Using the remote controller Point the remote controller toward the remote control sensor. Detach the battery cover. 30° 30° Remote control Insert the two R6 sensor (size AA) batteries. Be sure to match the + and –... -
Page 11: Setting The Clock
Setting the clock What’s ACCUCLOCK? What’s RDS? Display Many FM stations now transmit RDS signals which contain visual services such as PS (Program Service Name) and RT (Radio Text) in addition to the normal audio programs (see page 21). RDS signals also carry the signals called CT (clock time and data signal) regularly. - Page 12 Setting the clock (continued) Setting the clock automatically by When setting the RDS initiating ACCUCLOCK manually broadcasting station MODE automatically The RDS broadcasting station to be used for AUTO / MONO Press MODE/AUTO/MONO. obtaining CT can be detected automatically or set The unit starts scanning for the manually.
-
Page 13: Setting The Clock Manually
Disabling/enabling ACCUCLOCK function Press MULTI JOG. If the time adjustment function is unnecessary, you If “AccuClock” appears, turn MULTI MULTI JOG can disable ACCUCLOCK function. You can also JOG until “ManualAdjust” appears. resume (enable) this function later after disabling it. 1 Execute steps 1 and 2 in “Setting the clock SLEEP SOURCE... -
Page 14: Understanding Preparatory/Common Operation
Understanding preparatory/common operation This section explains preparatory/common operations: turning on/off the unit, choosing the required source, adjusting the volume, etc. Source selector buttons SOURCE SELECTOR POWER POWER SOURCE SELECTOR SLEEP TAPE LINE-1 LINE-2 DIGITAL buttons TAPE MODE REPEAT CLEAR SCROLL PRESET TUNING S.BASS... -
Page 15: Presetting Radio Stations Automatically
Presetting radio stations automatically Auto presetting stores frequencies into memory for use in selecting radio stations by channel. Display Before presetting • You can preset up to 30 channels. • If any radio stations are preset in the channels before you start auto presetting, all the preset channels will be replaced. -
Page 16: Basic Operation
Basic Operation Playing a CD Display MULTI JOG DISPLAY Insert the CD (Compact Disc). If the unit is in standby mode, it 1 Press CD to open the disc tray. turns on automatically when 2 Put the CD in the tray. you press CD Put the CD in the tray with the label side facing Put 8-cm discs within the center circle of the... - Page 17 Changing the display information – operating only with the unit Press DISPLAY repeatedly to change the display as follows: During playback or pause While the CD is stopped Total number Total playing The elapsed time of the playing track of the tracks time “TRACK ELAPSED”...
-
Page 18: Playing An Md
Playing an MD Display MULTI JOG DISPLAY Insert the MD (Mini Disc). If the unit is in standby mode, it The MD must be recorded. turns on automatically when Insert the end of the MD. you insert the MD. The arrow printed on the MD must face up and point to the unit. - Page 19 Changing the display information – operating only with the unit Press DISPLAY repeatedly to change the display as follows: During playback or pause While the MD is stopped Total playing Total number The elapsed time of the playing track time of tracks “TRACK ELAPSED”...
-
Page 20: Listening To The Radio
Listening to the radio Display Preset radio stations before you proceed to the following steps. (See page 15.) DISPLAY TUNING Turn on the unit. STANDBY / ON Press TUNER. “FM”, frequency, and the preset channel you called last TUNER will appear. SLEEP SOURCE C D TIMER... - Page 21 Changing the display information – operating only with the unit Press DISPLAY repeatedly to change the display as follows: “FM,” frequency, and preset channel number, SLEEP SOURCE C D TIMER ONCE W.DAY W.END S.BASS MUTING LEVEL - SYNC DIGITAL CHAIN DISC TRACK ELAPSED REMAIN TITLE REPEAT RDS MONO AUTO STEREO...
-
Page 22: Basic Cd Dubbing
Basic CD Dubbing Display • The MD will be recorded in digital. • If the MD is prerecorded, the new recording will be made on the blank portion. The track numbers will be added to the existing track numbers sequentially. Insert the CD and MD. - Page 23 When the TOC indicator lights or flashes If you had a power failure or disconnected the AC Information such as track numbers will be recorded onto power cord (mains lead) when the TOC indicator the TOC (Table Of Contents) of the MD when you eject the was lit or flashing MD, turn off the unit, or stop recording.
-
Page 24: Recording Radio Programs
Recording radio programs Display EDIT/CLEAR/NO REPEAT/YES Insert an MD. See step 1 in “Pla ying an MD” on pa ge 18. The MD must be recor dable. Check the remaining recordable time. See step 2-3 and 4 on page 22. Press TUNER, then turn MULTI JOG or press TUNER it repeatedly to choose the preset channel. - Page 25 Marking track numbers Adjusting the recording level in – LevelSync analog recording • LevelSync is the function which marks track If the recording level isn’t appropriate, adjust the numbers when the source input level starts rising recording level manually. from a minimum point. If the LevelSync function is Execute the following steps while the MD is recording on, the track numbers will be automatically marked or in recording pause.
-
Page 26: Advanced Operation
Advanced Operation Various ways of playing CDs and MDs Five different playback modes are available in addition to normal playback in Basic Operation. Insert the CD or MD before you operate (see page 16 and 18). MEMORY playback Press of the selected source to start MEMORY You can select and store track numbers (up to 25) in playback. -
Page 27: Random Playback
1 TR (one track) playback RANDOM playback You can play back only a single track using this mode. All the tracks on the disc will be shuffled, then played back. While the source is CD or MD, and in stop mode While playing or pausing the CD or MD Press MODE/AUTO/MONO repeatedly until the 1TR indicator lights in the display. - Page 28 Various ways of playing CDs and MDs (continued) REPEAT/CHAIN REPEAT playback Canceling the playback mode • The REPEAT mode plays back a CD or MD repeatedly, and the CHAIN REPEAT mode plays back both the CD and MD in turns. •...
-
Page 29: Adjusting The Tone
Adjusting the tone You can adjust the bass and treble sound, and turn Super Bass mode On or Off. Press MULTI JOG. The normal display resumes. MULTI JOG PUSH TO EDIT/CLEAR/ ENTER Tips REPEAT/YES You can resume normal display by pressing EDIT/CLEAR/ NO after adjusting each tone. -
Page 30: Naming A Cd, Md And Its Tracks, And Preset Channels
Naming a CD, MD and its tracks, and preset channels Naming a CD Entering a name After inserting the CD and selecting CD for the source, execute “Entering a name” on the right column. • You can enter up to 28 letters per name. •... - Page 31 1 Press If you entered a wrong character repeatedly until the character behind the point at which you See “Correcting and erasing a character.” wish to enter a new character flashes. If you add a new character between characters SLEEP SOURCE C D TIMER ONCE...
-
Page 32: Advanced Cd Dubbing
Advanced CD CD to MD Synchro Dubbing Recording Dubbing a track you are listening CD to MD synchro recording to from the beginning This function is convenient for CD editing to MD. 1 Insert a CD and an MD, then select CD as 1 Insert a CD and an MD, then press CD the source. -
Page 33: Moving, Dividing, Combining, And Erasing Md Tracks
Moving, dividing, combining, and erasing MD tracks Five basic functions Erasing all the tracks of the MD – All Erase • All Erase This function erases all the tracks and names to • This is done only while the MD is stopped. initialize the MD. - Page 34 Moving, dividing, combining, and erasing MD tracks (continued) Erasing a selected track – Erase Deleting the selected track • This is done while the MD is stopped or paused. • To cancel the operation, press MD . Renumbering the tracks Insert the MD, then select MD as the source.
- Page 35 Moving the selected track – Move Press REPEAT/YES or MULTI JOG to move. • This is done while the MD is stopped or paused. REPEAT “Complete” appears. • To cancel the operation, press MD . The selected track was moved and all the tracks have been renumbered from the top.
- Page 36 Moving, dividing, combining, and erasing MD tracks (continued) Dividing a selected track Press REPEAT/YES. – Divide “Rehearsal” and “Position OK?” appear REPEAT alternatively and the approximate four- • This is done while the MD is playing or paused. second section around the dividing •...
- Page 37 Combining selected tracks Press REPEAT/YES. – Combine “Rehearsal” and “Track OK?” appear REPEAT alternatively and the approximate • This is done while the MD is playing, paused, or eight-second section around the stopped. combining point will be played • Only when the preceding track has a name, the repeatedly.
-
Page 38: Recording From A Connected Source To An Md
Recording from a connected source to an MD You can record the sound from connected equipment (see page 8) onto an MD. Digital or analog recording is possible depending on the connected source. Press MD to start recording. SLEEP SOURCE C D TIMER ONCE W.DAY... -
Page 39: Synchro Recording Operation With An Onkyo Stereo Cassette Tape Deck
K-185X connected to the unit function is On. If you set LevelSync function to Off (see If the incoming signal to the ONKYO stereo cassette tape page 25), then Signal Wait function does not operate. deck, K-185X is too high during CD dubbing, execute the •... -
Page 40: Using The Timers
CD Dubbing If you set Sleep timer while you are carrying out the CD Dubbing to the MD or ONKYO stereo cassette tape deck, the unit will turn off after completing CD dubbing regardless of the remaining time you set. - Page 41 Setting Once, Weekday, Weekend, Operating with and Rec timer Editing/erasing the MD tracks (continued) the unit Sleep timer can be set between 90 and 10 minutes decreasing in intervals of 10 minutes. Setting the timer from 1 to 99 in one-minute increments is also possible using MULTI JOG.
- Page 42 Using the timers (continued) Press MULTI JOG, then turn it to Press MULTI JOG. select the start time. “Timer On” is displayed and the timer MULTI JOG MULTI JOG you have set turns on. SLEEP SOURCE TIMER ONCE W.DAY W.END SLEEP SOURCE C D TIMER...
- Page 43 RANDOM appears (see page 45). Sunday has become On. Rec timer with TAPE only operates when you connected an ONKYO stereo cassette tape deck 4 To change the setting of other days, (see page 8). repeat steps 2 and 3.
- Page 44 Using the timers (continued) Switching the set timer On/Off If the start or end time of a timer overlaps another timer You can switch each set timer to Off, or On after switching it Off. If the same start time is set in more than one timer The priority of the timers is follows: Once, Weekday, Weekend, and Rec timer in order.
-
Page 45: Additional Operation
Additional Operation Customizing the source names You can change the source name appearing in the display to suit the connected component on page 8. DIGITAL* ↔ DVD/dig ↔ V.DISC/dig PC/dig DSR/dig ↔ CS/dig ↔ BS/dig * The name in bold letters is the initial name. -
Page 46: Manual Presetting/Erasing/Copying Of Radio Stations
Manual presetting/erasing/copying of radio stations Presetting radio stations To cancel presetting, press EDIT/ CLEAR/NO instead. manually – Preset Write If you wish to change the You can preset radio stations automatically as channel number, turn MULTI MULTI JOG described on page 15, but manual presetting is also JOG. - Page 47 Erasing a preset channel – Preset Copying a preset channel – Preset Erase Copy If you copy the preset channel to another channel, the name of the preset channel (see page 30) will also be copied to the other channel. Call the preset channel you wish to erase (see page 20).
- Page 48 Manual presetting/erasing/copying of radio stations (continued) Tips for relocating the radio station to If “Overwrite?” appears another preset channel number You can relocate the radio station to another preset SLEEP SOURCE C D TIMER ONCE W.DAY channel by combining the Preset Copy and Preset W.END S.BASS MUTING...
-
Page 49: Using The Optional Remote Controller
Using the optional remote controller Mainly designed to control the ONKYO MD recorder, the optional remote controller enables you to operate some functions easier and provides extra functions. (In this manual, the illustration of the optional remote controller, RC-339MD is used.) - Page 50 Using the optional remote controller (continued) Finding the desired track using sampling • Examples for the tracks from 1 to 25 playback – Music Scan The selecting track The number buttons Music Scan plays back the beginning of every track only for eight seconds per track.
- Page 51 Entering a name Repeat step 3-a or 3-b to enter the next character. If you wish to change the character POWER PLAY MODE type, execute step 2 in advance. CONTINUE RANDOM MEMORY When finished entering the NAME name, press REPEAT/YES. ·...
-
Page 52: Others
Others Message list Rules for digital recording Guide to the serial copy management system The following table explains the various messages that appear in the display. Since your MD unit uses the Serial Copy Management System (SCMS), MDs recorded through Message Meaning the digital input terminal cannot be used to make... - Page 53 Rule 2 Rule 3 You can record the digital input signal of a digital A recordable MD with material recorded from analog satellite broadcast onto a recordable MD via the sources (analog records or FM programs, etc.) digital input terminals on MD recorder which is through the line input terminal can be copied to capable of handling a sampling frequency of 32 kHz another recordable MD through the digital output...
-
Page 54: System Limitations
System limitations The MD recording system in the unit is radically different from those used in cassette and DAT decks and is characterized by the limitations described below. Note, however, that these limitations are due to the inherent nature of the MD recording system itself and not to mechanical causes. -
Page 55: Precautions For Handling The Compact Disc (Cd)
Precautions for handling Precautions for handling the Compact Disc (CD) the MiniDisc (MD) Important notes on handling CDs The MD is housed in a cartridge, so you can handle it without worrying about dust and fingerprints. Even so, 1 Carefully lift the disc from the disc case, a dirty or warped cartridge may cause malfunction. -
Page 56: Troubleshooting
If the problem still persists after trying these remedies and referring to the other components’ instruction manuals, consult your nearest ONKYO authorized service center, giving your name, address, phone number, product name, and the details of the problems. - Page 57 The remote control • The cable is not connected. • Connect the system correctly cross- referring to the ONKYO stereo cassette operates the unit but tape deck instruction manual. does not operate the ONKYO stereo cassette •...
-
Page 58: Index To Parts And Controls
Index to parts and controls For operational instructions, refer to the page indicated in brackets. Front panel CD / MD RECEIVER DISCRETE OUTPUT STAGE DISC LOADING MECHANISM VOLUME CD/MD TUNER TAPE / LINE OPTICAL DIGITAL INPUT SAMPLING RATE CONVERTER DISPLAY EDIT / CLEAR MULTI JOG PHONES... -
Page 59: Remote Controller
0 MD button [14, 19] CLEAR SCROLL A FM button [14, 21] (The AM button doesn’t operate for this unit.) B TAPE/LINE-1/LINE-2/DIGITAL buttons [14] PRESET C Operation buttons for an ONKYO stereo cassette tape TUNING deck S.BASS D MD operation buttons [19] MUTING VOLUME –... -
Page 60: Specifications
Tel: 201-825-7950 Fax: 201-825-8150 E-mail: onkyo@onkyousa.com ONKYO EUROPE ELECTRONICS GmbH Industriestrasse 20, 82110 Germering, GERMANY Tel: 089 84 93 20 Fax: 089 84 93 226 E-mail: info@onkyo.de ONKYO CHINA LIMITED Units 2102-7, Metroplaza Tower I, 223 Hing Fong Road, Kwai Chung, HOMEPAGE http://www.onkyo.co.jp/...
Need help?
Do you have a question about the FR-V3 and is the answer not in the manual?
Questions and answers