Table of Contents
Advertisement
Quick Links
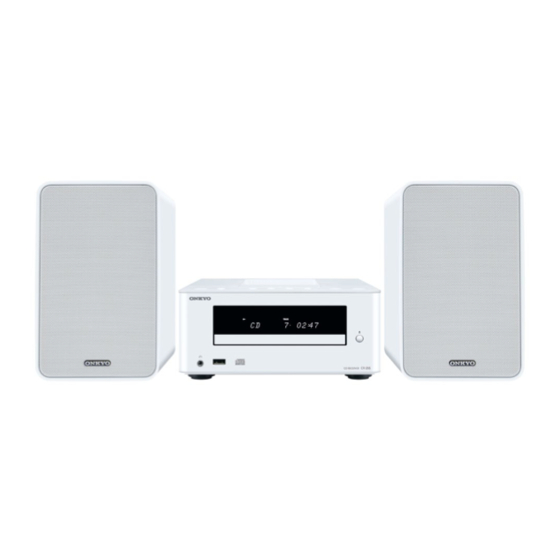
CD Receiver System
CS-255
CD Receiver (CR-255)
Speakers (D-T15)
Instruction Manual
Thank you for purchasing an Onkyo CD Receiver System.
Please read this manual thoroughly before making any
connections and plugging it in.
Following the instructions in this manual will enable you to
obtain optimum performance and listening enjoyment from
your new CD Receiver System.
Please retain this manual for future reference.
Getting Started .......................... 2
Connections ............................ 13
Basic Operations .................... 16
Playing CDs ............................. 17
Playing Your iPod/iPhone ....... 20
Listening to the Radio ............ 22
USB Flash Drive ...................... 24
Setting the CD Receiver ......... 24
Using the Timer ....................... 25
Miscellaneous ......................... 27
E
n
Advertisement
Chapters
Table of Contents

Related Manuals for Onkyo CS-255


Summary of Contents for Onkyo CS-255
-
Page 1: Table Of Contents
Playing a USB Flash Drive ...... 24 Setting the CD Receiver ..24 Thank you for purchasing an Onkyo CD Receiver System. Please read this manual thoroughly before making any connections and plugging it in. Following the instructions in this manual will enable you to Using the Timer ....... -
Page 2: Important Safety Instructions
WARNING: AVIS WARNING RISK OF ELECTRIC SHOCK RISQUE DE CHOC ELECTRIQUE TO REDUCE THE RISK OF FIRE OR ELECTRIC DO NOT OPEN NE PAS OUVRIR SHOCK, DO NOT EXPOSE THIS APPARATUS The lightning flash with arrowhead symbol, within an TO RAIN OR MOISTURE. equilateral triangle, is intended to alert the user to the presence of uninsulated “dangerous voltage”... -
Page 3: Precautions
If water or any other liquid gets inside this unit, have it checked by your Onkyo This unit contains a semiconductor laser system and is dealer. - Page 4 Precautions —Continued THIS PRODUCT UTILIZES A LASER. USE OF CONTROLS OR ADJUSTMENTS OR WARNING PERFORMANCE OF PROCEDURES OTHER THAN THOSE SPECIFIED HEREIN MAY RESULT IN HAZARDOUS RADIATION EXPOSURE. DO NOT INGEST BATTERY, CHEMICAL BURN The label on the right is HAZARD applied on the rear panel.
- Page 5 Precautions —Continued Before Using Your New Speakers • Place the speakers on sturdy, flat surfaces. Putting them on uneven or unstable surfaces where they may fall and cause damage will affect the sound quality. • Do not keep water or other liquids close to the speakers.
-
Page 6: Package Contents
Package Contents Make sure you have the following items: When using the remote controller, point it toward the CD receiver’s remote control sensor, as shown below. CD Receiver (CR-255) CR-255 Remote controller (RC-823S) Remote control sensor Indoor FM antenna Power cord (Connector type varies from country to country.) Speakers (D-T15) Speaker cables... -
Page 7: Features
Features General ® • CD tuner audio system with built-in iPod ®*1*2 iPhone dock • Super Bass (S.Bass) function for deeper bass sounds • Bass and treble tone controls iPhone, iPod, iPod classic, iPod nano, iPod shuffle, and • Line input for external audio source iPod touch are trademarks of Apple Inc., registered in the U.S. -
Page 8: Getting Started
Contents Getting Started Playing Your iPod/iPhone Important Safety Instructions........2 Playing Your iPod/iPhone ........20 Precautions..............3 Playing an iPod/iPhone via iPod Dock....20 Package Contents ............. 6 Playing an iPod/iPhone via USB......20 Using the Included Floor Pads for speakers..6 Controlling Your iPod/iPhone.......21 Using the Remote Controller ......... -
Page 9: Getting To Know The Cd Receiver
Getting to Know the CD receiver Top and Front Panels For detailed information, see the pages in parentheses. ON/STANDBY button (16, 25, 26, 27) Headphones [ ] jack (16) INPUT button (16) USB port (24) Previous [ ]/PRESET [ ] button Display (17, 21, 23) Disc tray (17) -
Page 10: Display
—Continued Getting to Know the CD receiver Display SLEEP indicator TIMER indicators Play and Pause indicators Tuning indicators USB indicator RDS indicator FOLDER indicator FILE indicator S.BASS indicator TRACK indicator MUTING indicator Message area Playback mode indicators DISC, TOTAL, and REMAIN indicators Rear Panel FM ANTENNA jack LINE IN jacks... -
Page 11: Remote Controller
Getting to Know the CD receiver —Continued Remote Controller For detailed information, see the pages in parentheses. CLOCK CALL button (24) DIMMER button (16) MUTING button (16) SHUFFLE button (19, 21) TIMER button (24, 25, 26) PLAYLIST [ ]/[ ] buttons (21) Input Selector buttons (16, 20, 22, 23, 24) On/Standby [ ] button (16, 25, 26) Stop [ ] (17, 21),... -
Page 12: Disc (Audio Cd And Mp3) And Usb Flash Drive (Mp3) Notes
Disc (Audio CD and MP3) and USB Flash Drive (MP3) Notes Precautions for Playback Playback from USB Flash Drives Compact discs (CDs) with the following logo on the MP3 files recorded on a USB flash drive can be played label surface can be used. with the CD receiver. -
Page 13: Connecting Speakers
Disc (Audio CD and MP3) and USB Flash Drive (MP3) Notes —Continued Precautions for Inkjet Printable Discs Caring for Discs Do not leave a CD-R/CD-RW having a label printed with If the disc is dirty, the CD receiver will have a hard time an inkjet printer in the CD receiver for a long time. -
Page 14: Connecting Fm Antenna
Connecting FM Antenna This section explains how to connect the supplied indoor FM antenna. The CD receiver won’t pick up any radio signals if no antenna is connected, so you must connect the antenna to use the tuner. Caution: • Be careful not to injure yourself when using thumbtacks. -
Page 15: Connecting Other Components
Connecting Other Components CD receiver Analog audio cable (RCA) To wall outlet (Connector type varies from country to country.) e.g., cassette tape deck About Connections Connecting the Power Cord • Before making any connections, read the manuals Connect the CD receiver’s power cord to a suitable wall supplied with your other components. -
Page 16: Basic Operations
Basic Operations Using Headphones This section describes the procedure for using the remote controller, unless otherwise specified. You can connect a pair of stereo headphones (ø3.5 mm phone plug) to the CD receiver’s headphones [ ] jack Turning On the CD receiver for private listening. -
Page 17: Playing Cds
Playing CDs Selecting Tracks This section describes the procedure for using the remote controller, unless otherwise specified. To return to the beginning of the track currently playing, press the Previous [ ] button. Playing CDs Press the Previous [ ] button repeatedly to select earlier tracks. -
Page 18: Selecting Mp3 Files
—Continued Playing CDs Selecting MP3 Files While playback is stopped, press the [MODE] button. The files on an MP3 CD can be located at the disc’s root “FOLDER” will light, and the name of the first level or within a folder. folder will be shown. -
Page 19: Displaying Mp3 Information
Playing CDs —Continued Displaying MP3 Information Repeat Playback You can switch the display by pressing the remote With repeat playback, you can play an entire CD controller’s [DISPLAY] button repeatedly. repeatedly or play one track repeatedly. Repeat playback can also be used in conjunction with During playback, press the [DISPLAY] button random playback. -
Page 20: Playing Your Ipod/Iphone
Playing Your iPod/iPhone Note: This section describes the procedure for using the • To prevent damage to the Lightning connector, do not remote controller, unless otherwise specified. twist or force your iPod/iPhone into the dock, and be • Before using your iPod/iPhone with the CD receiver, careful not to wiggle your iPod/iPhone while inserting be sure to update your iPod/iPhone with the latest software, available from the Apple Web site. -
Page 21: Controlling Your Ipod/Iphone
Playing Your iPod/iPhone —Continued While reading the contents of your iPod/iPhone, Navigating the iPod Menus with the the message “Connecting” appears on the CD Remote Controller receiver’s display. “iPod” appears on the display of the CD receiver. If Press the remote controller’s [MENU] your iPod/iPhone is not connected properly, “No button to display the iPod menu. -
Page 22: Listening To The Radio
Listening to the Radio This section describes the procedure for using the Presetting FM Stations Automatically remote controller, unless otherwise specified. (Auto Preset) With the Auto Preset function, you can automatically Tuning into FM Radio Stations preset all of the FM radio stations available in your area When tuned to a station, the Tuned ( ) indicator in one go. -
Page 23: Presetting Fm Stations Manually
Listening to the Radio —Continued Presetting FM Stations Manually Receiving RDS With the Preset Write function, you can manually preset Press the [DISPLAY] button repeatedly to individual FM radio stations. Presets make it easy to display the following RDS information. select your favorite stations and eliminate the need to tune the radio manually each time you want to change stations. -
Page 24: Playing A Usb Flash Drive
Playing a USB Flash Setting the CD Receiver Drive This section describes the procedure for using the remote controller, unless otherwise specified. This section describes the procedure for using the remote controller, unless otherwise specified. Setting the Clock If an iPod/iPhone is connected to the iPod dock, disconnect the iPod/iPhone from the iPod dock. -
Page 25: Using The Timer
Using the Timer This section describes the procedure for using the Use the arrow [ ]/[ ] buttons to select the remote controller, unless otherwise specified. source, and then press [ENTER]. You can select the following sources: The CD receiver has a programmable timer for FM, CD, iPod/USB, LINE. -
Page 26: Turning Timer On And Off
—Continued Using the Timer Note: Turning Timer On and Off • If the timer turns the power on, the “SLEEP” Once a timer has been programmed, you can turn it on or indication will light. If you perform any operation, the off as necessary. -
Page 27: Troubleshooting
If you have any trouble using the CD receiver, look for a solution in this section. If you can’t resolve the issue yourself, try resetting the CD receiver before contacting your Onkyo dealer. To reset the receiver to its factory defaults, turn it on and, while holding down the CD receiver’s stop [ ] button, press the [... - Page 28 —Continued Troubleshooting Audio performance. • Audio performance will be at its best about 10 to 30 minutes after the CD receiver has been turned on and had time to warm up. • Using cable ties to bundle audio cables with speaker or power cables may degrade the sound quality, so don’t do it. CD Playback The disc will not play.
- Page 29 Troubleshooting —Continued Can’t recharge the iPod/iPhone. • Check the iPod/iPhone connection. • Depending on the state of your iPod/iPhone, the CD receiver might not be able to charge it. Try using the dedicated charging method provided for the iPod/iPhone. USB Flash Drive Playback Can’t access the music files on a USB flash drive.
- Page 30 CD receiver enters standby mode. Onkyo is not responsible for damages (such as CD rental fees) due to unsuccessful recordings caused by the unit’s malfunction. Before you record important data, make sure that the material will be recorded correctly.
-
Page 31: Specifications
Specifications Amplifier Speakers D-T15 Rated output power (IEC) 2 ch × 15 W at 6 ohms, 1 kHz, 2 ch Type 2 way bass-reflex driven of 10% 6 Ω Impedance THD + N (total harmonic distortion + N ) Maximum input power 30 W 0.5% (1 kHz 1W) Output sound pressure level 82 dB/W/m... - Page 32 Tel: 86-21-52131366 Fax: 86-21-52130396 http://www.cn.onkyo.com/ Asia, Oceania, Middle East, Africa Please contact an Onkyo distributor referring to Onkyo SUPPORT site. http://www.intl.onkyo.com/support/ The above-mentioned information is subject to change without prior notice. Visit the Onkyo web site for the latest update.
Need help?
Do you have a question about the CS-255 and is the answer not in the manual?
Questions and answers