Table of Contents
Advertisement
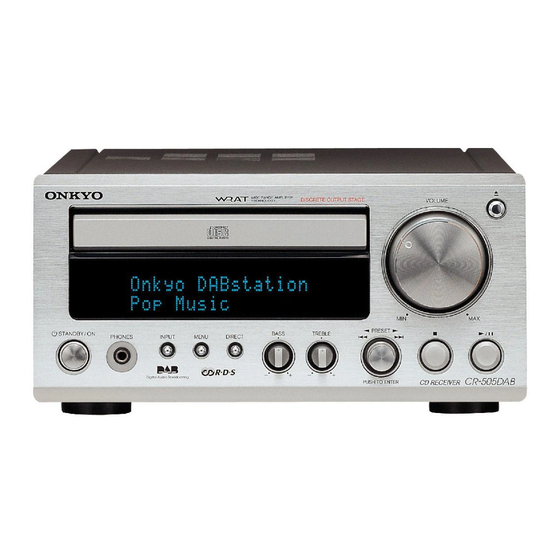
CD Receiver
CR-505DAB
Instruction Manual
Thank you for purchasing an Onkyo CD Receiver.
Please read this manual thoroughly before making
connections and turning on the power.
Following the instructions in this manual will enable
you to obtain optimum performance and listening
enjoyment from your new CD Receiver.
Please retain this manual for future reference.
Contents
Introduction
Connections
Getting Started
CD/MP3 Playback
DAB
FM/AM
Using Other Functions
Appendix
2
11
16
20
24
28
31
35
E
n
Advertisement
Table of Contents

Related Manuals for Onkyo CR-505DAB


Summary of Contents for Onkyo CR-505DAB
-
Page 1: Instruction Manual
Connections Instruction Manual Getting Started CD/MP3 Playback FM/AM Thank you for purchasing an Onkyo CD Receiver. Using Other Functions Please read this manual thoroughly before making connections and turning on the power. Following the instructions in this manual will enable you to obtain optimum performance and listening enjoyment from your new CD Receiver. -
Page 2: Introduction Important Safety Instructions
WARNING: WARNING AVIS TO REDUCE THE RISK OF FIRE OR ELECTRIC RISK OF ELECTRIC SHOCK RISQUE DE CHOC ELECTRIQUE DO NOT OPEN NE PAS OUVRIR SHOCK, DO NOT EXPOSE THIS APPARATUS TO RAIN OR MOISTURE. The lightning flash with arrowhead symbol, within an equilateral triangle, is intended to alert the user to the CAUTION: presence of uninsulated “dangerous voltage”... -
Page 3: Precautions
When you take a glass containing a cold drink outside 2. AC Fuse on a summer’s day, drops of water, called condensation, The AC fuse inside the CR-505DAB is not user-service- form on the outside of the glass. Similarly, moisture able. If you cannot turn on the CR-505DAB, contact may condense on the lens of the optical pickup, one of your Onkyo dealer. -
Page 4: Declaration Of Conformity
CR-505DAB must be plugged into an AC outlet in order to charge the backup system. Once it has been charged, the CR-505DAB will retain the settings for several weeks, although this depends on the This label is located on the side of the unit. It indicates... -
Page 5: Table Of Contents
Features ........... 6 Component Search Mode ......25 Supplied Accessories......6 Sorting Components........25 Before Using the CR-505DAB ....7 Sorted List Search Mode......25 Installing the Remote Controller Batteries..7 Presetting Components........ 26 Using the Remote Controller ......7 Preset Search Mode........ -
Page 6: Features
AM loop antenna Remote controller (RC-581S) two batteries (AAA/R03) DAB antenna *In catalogs and on packaging, the letter added to the end of the product name indicates the color of the CR-505DAB. Specifications and operation are the same regardless of color. -
Page 7: Before Using The Cr-505Dab
Before Using the CR-505DAB Installing the Remote Controller Using the Remote Controller Batteries To use the remote controller, point it at the CR-505DAB’s remote control sensor, as shown below. Open the battery compartment, as shown. CR-505DAB Remote control sensor Insert the two supplied batteries (AAA/ R03) in accordance with the polarity dia- gram inside the battery compartment. -
Page 8: Controls & Connectors
Displays the Tuner menu. Selects the play mode for CD or MP3. Standby indicator (16) Lights up when the CR-505DAB is in Standby mode. DIRECT button (31) Used to select “Tone Direct On” or “Tone Direct Off.” VOLUME control (19) Adjusts the volume. -
Page 9: Rear Panel
To use , you must make an analog RCA/phono SPEAKERS (11) connection between the CR-505DAB and your other These terminals are for connecting left and right speakers. component, even if they are connected digitally. TAPE IN/OUT (14) -
Page 10: Remote Controller
INPUT [ ] [ ] selector buttons— Used to select 10/0 ENTER sound sources. DISPLAY MODE MUTING button— Used to mute the CR-505DAB. SLEEP REPEAT Previous [ ] & Next [ ] buttons (PRESET buttons)— Used to select the previous or next track... -
Page 11: Connecting Your Speakers
Connecting Your Speakers Before you connect your speakers, read the following: Connecting the Speaker Cords to • Disconnect the power cord from the wall outlet. the Speaker Connectors • Read the instructions supplied with your speakers. • Pay close attention to speaker wiring polarity. In other Strip 10 mm from the words, connect positive (+) terminals only to positive (+) end of each cord. -
Page 12: Connecting An Antenna
Connecting an Antenna This chapter explains how to connect the supplied indoor Connecting the AM Loop Antenna FM antenna, AM loop antenna, and DAB antenna and how to connect commercially available outdoor FM and AM The supplied indoor AM loop antenna is for indoor use only. antennas. -
Page 13: Connecting An Outdoor Fm Antenna
Connecting an Antenna—Continued Connecting an Outdoor FM Antenna Connecting an Outdoor AM Antenna If you cannot achieve good reception with the supplied If good reception cannot be achieved using the supplied AM indoor FM antenna, try using a commercially available out- loop antenna, an outdoor AM antenna can be used in addi- door FM antenna instead. -
Page 14: Connecting Your Other Components To The Cr-505Dab
Connecting Your Other Components to the CR-505DAB RCA Connection Color Coding Before Making Any Connections RCA-type connections are usually color coded: red and • Read the manuals supplied with your components. white. Use red plugs to connect right-channel audio inputs •... -
Page 15: Connecting -Compatible Components
I Sleep Timer CONTROL REMOTE FM75 PRE OUT CONTROL ANTENNA When you set the CR-505DAB’s sleep timer, the sleep tim- ers on component connected via are also set, so all TAPE LINE components switch off after the specified period. CR-505DAB Notes: •... -
Page 16: Powering Up And Setting The Clock
DIRECT Before connecting the power cord, complete all connections (see pages 11 to 15). The very first time you turn on the CR-505DAB, the ACCUCLOCK function automatically sets the clock by Connect the power cord to a suitable wall using the CT (Clock Time) information present in RDS outlet. - Page 17 Powering Up and Setting the Clock—Continued I Setting ACCUCLOCK to Use a Specific I Turning Off ACCUCLOCK Station If you don’t want ACCUCLOCK to calibrate the clock auto- matically at 2 AM, 3 AM and 2 PM everyday, you can turn If the wrong time is displayed, you can specify which FM it off as follows.
-
Page 18: Setting The Clock Manually
Down [ ]/[ ] buttons to select “Manual Displaying the Time in Standby Adjust.” Mode You can set the CR-505DAB so that the time is displayed while the CR-505DAB is in Standby mode. With the CR-505DAB turned on, press and hold the CR-505DAB’s [STANDBY/ON] but- ton for more than 2 seconds. -
Page 19: Using The Cr-505Dab
Using the CR-505DAB VOLUME control Adjusting the Volume VOLUME To adjust the volume, use the [VOLUME] control, or the remote controller’s VOL- UME [ ]/[ ] buttons. Turn the [VOLUME] control clockwise to increase the PRESET STANDBY / ON BASS... -
Page 20: Playing Cds
• Press the Stop [ ] button. ber 123, press [--/---] twice, [1], [2] and [3]. I To Pause Playback • Press the Play/Pause [ / ] button on the CR-505DAB or Pause [ ] button on the remote controller. The Pause indicator appears. -
Page 21: Displaying Information
Playing CDs—Continued I MP3 Disc Elapsed track time: The length of time that the current CLOCK STANDBY/ ON CALL track has been playing (default display). TIMER -- / --- CLEAR 10/0 ENTER DISPLAY DISPLAY MODE SLEEP REPEAT Track name: Name of the current track. MUTING INPUT DIRECT... -
Page 22: Various Playback
“Rdm” indicator dis- appears. Note: When carrying out operations on the CR-505DAB, press F-Rpt: Repeat current folder (MP3 only) the [MENU] button repeatedly to select the RANDOM mode, and then press the Play/Pause [ / ] button to start random playback. -
Page 23: Memory Playback
Memory playback stops automatically when all the tracks in the program have been played. Note: When carrying out operations on the CR-505DAB, press the [MENU] button repeatedly to turn on the “Mem” indi- cator, turn the [ ] control to select a track, and press the [ ] control to register. -
Page 24: Dab
Auto Tuning function. Press the [DAB] button on the remote con- troller, or press the [INPUT] button on the Press the [MENU] button. CR-505DAB repeatedly to select DAB input. Turn the [ ] control to select “Search Mode” and push the [ ] control. -
Page 25: Component Search Mode
Using DAB—Continued Component Search Mode Sorted List Search Mode You can select a component for listening from the list of You can select any component for listening from the list of scanned components produced by using the Auto Tuning sorted components. function. -
Page 26: Presetting Components
Using DAB—Continued Preset Search Mode VOLUME You can select previously stored presets as follows. Press the [MENU] button. PRESET STANDBY / ON BASS TREBLE PHONES INPUT MENU DIRECT PUSH TO ENTER Turn the [ ] control to select “Search Mode” and push the [ ] control. -
Page 27: Copying Preset Channels
Using DAB—Continued 3. Bit Rate + mono/stereo Copying Preset Channels Displays the current station mode (stereo or mono) and the bit rate at which the audio signal is being transmitted. This You can copy a preset channel to another channel. rate is set by the broadcaster to suit the type and quality of material being transmitted. -
Page 28: Using The Radio
] or [ button on the remote controller for more than one second and then release it. The CR-505DAB searches for the next station. Search- ing stops when a station is found. Use the TUNING [ ] buttons for fine tuning. -
Page 29: Presetting Fm Stations Automatically
The Auto Preset function scans the FM band from low Note: to high, presetting up to 30 stations with strong signals. When the CR-505DAB is tuned into a station that’s trans- Note: mitting PS (Program Service Name) RDS information, the All previously stored presets will be overwritten when the station’s name will be displayed instead of the frequency. -
Page 30: Deleting Presets
You can copy a preset channel to another channel. When the CR-505DAB is tuned into a station that’s trans- mitting RDS information, the RDS indicator appears on the Select the preset that you want to copy. -
Page 31: Other Functions
Direct Off.” PUSH TO ENTER DIRECT TREBLE BASS CLOCK STANDBY/ ON CALL TIMER Use the [BASS] or [TREBLE] control on the CR-505DAB to adjust the bass or tre- -- / --- CLEAR ble. 10/0 ENTER DISPLAY MODE VOLUME SLEEP REPEAT... -
Page 32: Timers
About the Timers CLOCK STANDBY/ ON CALL The CR-505DAB has four timers so that you can turn it on TIMER and off automatically at certain times and on certain days of TIMER the week, in order to listen to, or record your favourite pro- grams. - Page 33 Use the Up/Down [ ]/[ ] buttons to select the last mode. day, and then press [ENTER]. • If you’re using a timer to start recording on an Onkyo cas- sette tape deck connected via , be sure to select the...
-
Page 34: Turning Timers Off
Timers—Continued Using the Sleep Timer CLOCK STANDBY/ ON CALL With the sleep timer you can set the CR-505DAB so that it TIMER TIMER automatically turns off after a specified period. Press the [SLEEP] button repeatedly to -- / --- CLEAR... -
Page 35: Disc Notes
files. • The CR-505DAB supports CD-R and CD-RW discs. • The CR-505DAB supports up to 500 MP3 files and up to However, some CD-R and CD-RW discs may not work 200 folders per disc. (In this case, Disc and File names... -
Page 36: Handling Discs
Disc Notes—Continued Handling Discs • Never touch the underside of a disc. Always hold discs by the edge, as shown. Underside • Never attach adhesive tape or sticky labels to discs. Cleaning Discs • For best results, keep your discs clean. Fingerprints and dust can affect the sound quality and should be removed as follows. -
Page 37: Troubleshooting
Troubleshooting If you have any trouble using your CR-505DAB, check the following table for possible causes and remedies. If you still can’t resolve the issue yourself, please contact your Onkyo dealer. Trouble Possible Cause Remedy Can’t turn on the CR- Connect the power cord properly to a suitable The power cord is not connected properly. - Page 38 (page 20). The disc is dirty. Remove the disc and clean it (page 36). Can’t play a CD? Remove the disc and leave the CR-505DAB Condensation has formed inside the CR- turned on for several hours until the conden- 505DAB.
- Page 39 five seconds, and then plug it back in again. Restoring the Default Settings To reset the CR-505DAB to its factory defaults, turn it off and unplug the power cord. Then press and hold the [STANDBY/ ON] button on the CR-505DAB, and plug in the power cord.
-
Page 40: Specifications
Units 2102-2107, Metroplaza Tower I, 223 Hing Fong Road, Kwai Chung, N.T., HONG KONG Tel: 852-2429-3118 Fax: 852-2428-9039 D0408-3 SN 29343871B (C) Copyright 2004 ONKYO CORPORATION Japan. All rights reserved. * 2 9 3 4 3 8 7 1 B*...
Need help?
Do you have a question about the CR-505DAB and is the answer not in the manual?
Questions and answers