Table of Contents
Advertisement
Advertisement
Table of Contents

Related Manuals for Newworld NW SUITE 60MF


Summary of Contents for Newworld NW SUITE 60MF
- Page 1 60cm Built-In Oven User Guide NW SUITE 60MF...
- Page 2 ACKNOWLEDGMENT Thank you for purchasing our product. We hope you enjoy using the many features and benefits it provides. Before using this product please study this entire Instruction Manual carefully. Keep this manual in a safe place for future reference. Ensure that other people using the product are familiar with these instructions as well.
- Page 3 supervision or instruction concerning use of the appliance in a safe way and understand the hazards involved. Children shall not play with the appliance. Cleaning and user maintenance shall not be made by children without supervision. During use, the appliance becomes very hot. Care should be taken to avoid touching heating elements inside the oven.
- Page 4 If the supply cord is damaged, it must be replaced by the manufacturer, its service agent or similarly qualified persons in order to avoid a hazard. Do not use harsh abrasive cleaners or sharp metal scrapers to clean the oven door glass since they can scratch the surface, which may result in shattering of the glass.
-
Page 5: Safety Hints
SAFETY HINTS Do not touch the oven with wet or damp hands . For oven: Oven door should not be opened often during the cooking period. The appliance must be installed by an authorized technician and put into use. The producer is not responsible for any damage that might be caused by defective placement, and installation by unauthorized personnel. -
Page 6: Product Description
PRODUCT DESCRIPTION Remind button Time button Stop button Start button Symbol Function description Oven Lamp: Which enables the user to observe the progress of cooking without opening the door. Oven lamp will light for all cooking functions. Defrost: The circulation of air at room temperature enables quicker thawing of frozen food, (without the use of any heat). -
Page 7: Operation Instructions
OPERATION INSTRUCTIONS 1. Clock Setting After connectiong the unit to the power, the symbols "0:00" will be visible on the display. 1> Press " ", the hour figures will flash. 2> Rotate " K2" to adjust the hour figures, (time should be within 0--23). 3>... - Page 8 6. Reminder Function: This function will help to remind you to start cooking in a certain time from 0:01 to 9:59. Only when oven in standby mode, the reminder can be set. Follow below to set the reminder: 1> Press reminder setting button " ";...
- Page 9 . Reservation function 1> To use reservation function, clock must be set in advance. Then, in the way of setting the clock, reserved time that oven starts to cook must be set (a> Press reservation setting button" "; b> Rotate "K2" to set the hour time of reservation. Time should be within 0--23. c> Press reservation setting button "...
-
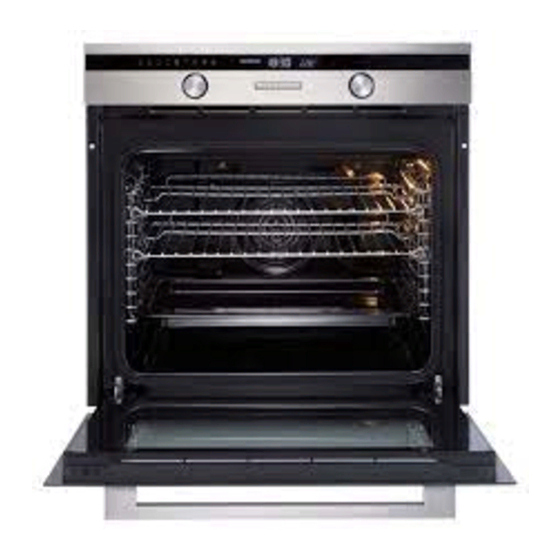
Page 10: Shelf Placement Warning
SHELF PLACEMENT WARNING: To ensure the oven shelves operate safely, correct placement of the shelves between the side rail is imperative. This will ensure that during careful removal of the shelf or tray, hot food items should not slide out. BULB REPLACEMENT For replacement, process as follows: 1>.Disconnect power from the mains outlet or switch off the circuit breaker of the unit's mains outlet. -
Page 11: Ventilating Openings
VENTILATING OPENINGS When cooking is finished or in pause state or in waiting state, if the oven's center temperature is over 75 degree, the cooling fan will continue working for 15 minutes. Or when the oven's center temperature becomes lower than 75 degree, the cooling fan will stop in advance. Ventilating openings CONNECTION OF THE OVEN INSTALLATION... -
Page 12: Technical Data
Technical data Brand WORLD Appliance type Built-in Oven / Supply Voltage and frequency 220-240 V 50/60Hz Max power 3.0 KW Oven lamp power 25 W element (W) Grill element (w) 2000 Bo om element (W) 1100 element (W) 2000 motor (w) Cooling fan (w) Cleaning (Enamel/cata Enamel... -
Page 13: Cleaning And Maintenance
CLEANING AND MAINTENANCE For the sake of a good appearance and reliability, keep the unit clean. The modern design of the unit facilitates maintenance to a minimum. The parts of the unit which come into contact with food have to be cleaned regularly. - Page 14 Installation instruction of the door frame up cover and rotation bracket assembly Preparation before disassembly Most of the tools that you might need are shown below. Some tools are optional. Parts disassembly The oven door’s disass embly Step 1: Open the oven door comple t ely. Step 2: Pull the hinge locks forward on both hinges, until they s top.
- Page 15 Step 3: Raise the doo r so that it is at a 30° angle from the front of the oven. Hold the door with one hand on each side. Lift the door up an d out. Warning: Don’t forcibly pulled out the door and prevent the glass breakage during the dismantling process .
- Page 16 Step 3: Lift up the door outer gla ss and pul lit out, then take the door middle glass out as the same way ; Step 4 : Use one hand to push the door frame up cover towar d middle pa rt (1), then lift up the cover with the another hand (2);...
- Page 17 Step 5 : See the screwdriver to disassemble the rotation bracket assemblies (1.2), then take out it from the door brac ket; Step 6: Change the new rotation bracket assemblies and insert it into the snap joints, then fix it with screw ST3.9*12F; Insert it into the snap joints...
- Page 18 Step 7: Assemble the new door frame up cover on the bracket and make sure it be stable; Step 8: Assemble the door middle glass and pay attention that it should be put at the second floo r of door frame up cov er for 3-layer glass door, and for 4-layer glass door, another middle glass should be place at the first floor;...
- Page 19 second floor second floor second floor first floor first floor first floor Step 9: Assemble the outer glass and accomplish the replacement work.
- Page 20 New World Customer Care Please keep this handbook in a safe place. Please fill in the model number and serial number in the spaces provided below as they will assist us should you need to call. 0844 815 3747 When you dial this number you will hear a recorded message and be given a number of options.
Need help?
Do you have a question about the NW SUITE 60MF and is the answer not in the manual?
Questions and answers