
Related Manuals for Chicco Cortina Together


Summary of Contents for Chicco Cortina Together
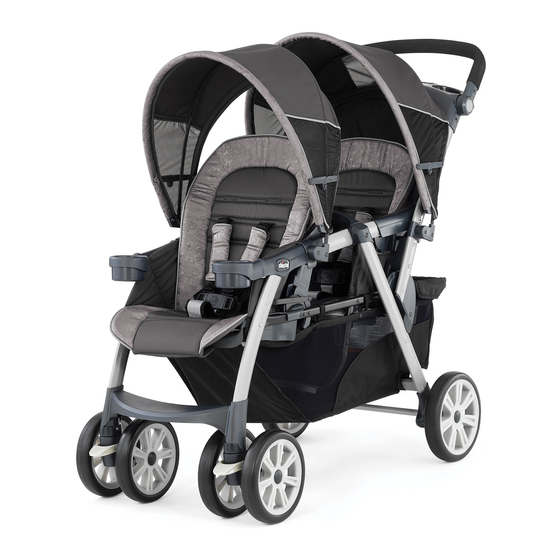
- Page 1 Cortina® Together™ Two-Passenger Stroller Owner's Manual Manual del propietario • Manuel du propriétaire IS0040.4ESF ©2015 CHICCO USA, INC. 03/15...
- Page 2 1 lb (.45 kg) in each stroller: carriage position unless the straps cupholder. • Use only Chicco KeyFit® carrier are fastened to close off the leg • TO AVOID BURNS, never put hot with this travel system. opening.
- Page 3 • CONSERVE EL MANUAL DE • NUNCA UTILICE EL COCHECITO • PARA EVITAR UNA INESTABILIDAD Uso del portabebés Chicco en el PROPIETARIO PARA USO FUTURO. EN ESCALERAS, ya sean comunes PELIGROSA, nunca coloque cochecito: •...
- Page 4 • Utiliser uniquement un porte-bébé siège : toujours se servir de la également preuve de prudence SITUATIONS DANGEREUSES Keyfit® de Chicco avec ce système ceinture de sécurité. Après avoir en montant ou descendant une D’INSTABILITÉ, ne jamais placer de voyage.
- Page 5 Parts list Parts list Lista de las piezas Lista de las piezas Liste des pièces Liste des pièces A. - Stroller frame E. - Washers A. - Estructura del cochecito E. - Arandelas A. - Cadre de poussette E. - Rondelles F.
- Page 6 Parts list How to assemble parent tray Lista de las piezas Cómo armar la bandeja para padre Liste des pièces Comment monter le plateau pour adulte 1A. The parent tray contains the I. - Front canopy mechanism to unfold the stroller. I.
- Page 7 How to assemble parent tray How to open stroller Cómo armar la bandeja para padre Cómo abrir el cochecito Comment monter le plateau pour adulte Comment ouvrir la poussette 1B. Locate the tabs on both ends of the parent 2A. Locate handle on the parent tray. Fold Cable tray and slide the tabs through the channels Lengüeta...
- Page 8 How to open stroller How to assemble storage basket Cómo armar el cestillo portaobjetos Cómo abrir el cochecito Comment monter le porte-bagage Comment ouvrir la poussette WARNING ADVERTENCIA MISE EN GARDE WARNING ADVERTENCIA MISE EN GARDE To prevent tipping, do not Para evitar que el cochecito se Afin de prévenir les risques de Do not load the storage basket...
- Page 9 How to assemble storage basket How to attach rear axle Cómo armar el cestillo portaobjetos Cómo conectar el eje trasero Comment monter le porte-bagage Comment fixer l’essieu arrière 4A. Pull both sides of storage basket 5. Remove and discard red plastic up and wrap it around the basket end caps on the rear axle.
- Page 10 How to attach rear wheels How to attach rear wheels Cómo colocar las ruedas traseras Cómo colocar las ruedas traseras Comment fixer les roulettes arrière Comment fixer les roulettes arrière ADVERTENCIA MISE EN GARDE WARNING 6B. To secure the wheel to the axle, push the pins (F) straight side Asegúrese de que las ruedas Vérifier que les roues sont bien...
- Page 11 How to attach front wheels How to attach rear wheels Cómo conectar las ruedas delanteras Cómo conectar las ruedas traseras Comment fixer les roulettes avant Comment fixer les roulettes arrière 6C. Line up the tabs on the hubcaps 7. Attach front wheels (B) to the (G) with the holes on the wheel.
- Page 12 How to attach cupholder How to attach armbar Cómo conectar el soporte de vasos Cómo colocar la barra apoyabrazos Comment fixer le porte-gobelet Comment fixer l’accoudoir WARNING ADVERTENCIA MISE EN GARDE WARNING ADVERTENCIA MISE EN GARDE Avoid burns never put hot Para evitar quemaduras, nunca Pour éviter les brûlures, ne Do not lift stroller by armbar.
- Page 13 How to attach front canopy How to attach rear canopy Cómo colocar la capota delantera Cómo colocar la capota trasera Comment fixer le baldaquin avant Comment fixer le baldaquin arrière 10A. Attach front canopy (I) to the 10B. Attach rear canopy (J) to the stroller frame using the canopy stroller frame using the canopy mounts.
- Page 14 How to open/close canopy How to use safety harness Cómo abrir/cerrar la capota Cómo utilizar cinturón de seguridad Comment ouvrir/fermer le baldaquin Comment utiliser harnais de sécurité 12. This stroller has a 5-point safety 11A. To open canopy, pull the front harness.
- Page 15 How to use safety harness How to use safety harness Cómo utilizar cinturón de seguridad Cómo utiliza cinturón de seguridad Comment utiliser harnais de sécurité Comment utiliser harnais de sécurité MISE EN GARDE WARNING ADVERTENCIA 14. The length of the Shoulder Straps can be adjusted by pulling on the Ne jamais laisser l'enfant sans Never leave child unattended.
- Page 16 How to adjust stroller handle How to adjust front backrest Cómo ajustar la manija del cochecito Cómo ajustar el respaldo delantera Comment ajuster la poignée de la poussette Comment ajuster le dossier avant 15. The stroller handle can be 16. To recline the front backrest, adjusted to 3 positions for comfort.
- Page 17 How to adjust rear backrest How to use bassinet enclosure Cómo ajustar el respaldo trasero Cómo utilizar la cavidad para moisés Comment ajuster le dossier arrière Comment utiliser la forme de couchette WARNING ADVERTENCIA MISE EN GARDE 17A. To recline the backrest, squeeze the recline handle on the back of the Child may slip into leg El niño puede deslizarse por la...
- Page 18 How to use bassinet enclosure How to access storage basket Cómo utilizar la cavidad para moisés Cómo acceder al cestillo portaobjetos Comment utiliser la forme de couchette Comment accéder au porte-bagage 18B. Lift up leg flap as shown and 19. To access the storage basket when thread two straps (on each side) the backrest is in recline position, through openings in seat side panel...
- Page 19 How to use brakes How to use brakes Cómo utilizar los frenos Cómo utilizar los frenos Comment utiliser les freins Comment utiliser les freins MISE EN GARDE WARNING ADVERTENCIA 20B. To unlock the rear brake, push up on either lever on the rear axle. Always apply the brakes Recuerde siempre accionar los Toujours appliquer les freins...
- Page 20 How to use front wheels How to use front wheels Cómo trabar/destrabar las ruedas delanteras Cómo trabar/destrabar las ruedas delanteras Comment verrouiller et déverrouiller les roulettes avant Comment verrouiller et déverrouiller les roulettes avant For increased maneuverability on For easier pushing on uneven smooth surfaces, activate the front surfaces, lock the wheels in a forward swivel wheels.
- Page 21 How to fold stroller How to fold stroller Cómo plegar el cochecito Cómo plegar el cochecito Comment replier la poussette Comment replier la poussette WARNING ADVERTENCIA MISE EN GARDE 23A. To fold stroller, lock front swivel wheels, squeeze and lift handle on When folding the stroller, Al plegar el cochecito, En refermant la poussette,...
- Page 22 The folded seat is not a suitable seating area for a child. Do not use any other infant carrier. Only use Chicco KeyFit® or KeyFit® 30 infant car seat/carrier. Esta silla de paseo admite portabebés KeyFit®...
- Page 23 How to attach KeyFit® infant carrier - front seat How to attach KeyFit® infant carrier - front seat Cómo colocar el portabebés KeyFit® (asiento delantero) Cómo colocar el portabebés KeyFit® (asiento delantero) Comment installer le porte-bébé KeyFit® – siège avant Comment installer le porte-bébé...
- Page 24 How to attach KeyFit® infant carrier - rear seat How to attach KeyFit® infant carrier - rear seat Cómo colocar el portabebés KeyFit® (asiento trasero) Cómo colocar el portabebés KeyFit® (asiento trasero) Comment installer le porte-bébé KeyFit® – siège arrière Comment installer le porte-bébé...
-
Page 25: Maintenance
Periodically check the stroller for loose screws, worn parts, torn material or stitching. Replace or repair « CLIC » the parts as needed. Use only Chicco replacement parts. To avoid friction that may prevent the correct operation of the stroller, ensure that all the movable plastic parts placed along the metal frame are clean of dust, dirt or sand. -
Page 26: Entretien
Remplacer ou réparer ces pièces au besoin. Utiliser piezas de repuesto de Chicco. Para evitar que la fricción impida el correcto funcionamiento del uniquement des pièces de rechange Chicco. Afin d’éviter la friction susceptible de nuire au cochecito, asegúrese de que todas las piezas plásticas móviles que se encuentren en la estructura de... - Page 27 For more information Más información Pour plus d’information If you have any questions or comments about this product, or are missing any of the parts, please contact us in one of the following ways: By phone (toll free): (877)-424-4226 By e-mail: info.usa@artsana.com By mail: 1826 William Penn Way Lancaster, PA 17601 Si tiene preguntas o comentarios sobre este producto o le falta alguna de las...
- Page 28 www.chiccousa.com...
Need help?
Do you have a question about the Cortina Together and is the answer not in the manual?
Questions and answers