Table of Contents
Advertisement
Quick Links
Read all instructions BEFORE
assembly and USE of product.
KEEP INSTRUCTIONS FOR
FUTURE USE.
Lea todas las instrucciones ANTES
de armar y USAR este producto.
CONSERVE LAS INSTRUCCIONES
PARA USO FUTURO.
Cortina
CX
TM
Stroller
Owner's Manual
Manual del propietario
©2015 Artsana USA, INC. 09/15
IS0138.ES
Advertisement
Table of Contents

Related Manuals for Chicco cortina cx


Summary of Contents for Chicco cortina cx
- Page 1 Read all instructions BEFORE assembly and USE of product. KEEP INSTRUCTIONS FOR FUTURE USE. Lea todas las instrucciones ANTES de armar y USAR este producto. CONSERVE LAS INSTRUCCIONES PARA USO FUTURO. Cortina Stroller Owner's Manual Manual del propietario ©2015 Artsana USA, INC. 09/15 IS0138.ES...
- Page 2 • NEVER USE STROLLER ON STAIRS seat. • USE OF THE STROLLER with a or escalators. You may suddenly • ONLY USE the Chicco KeyFit®or child weighing more than 50 lbs lose control of the product and KeyFit® 30 infant car seat with this (22.7 kg), will cause excessive wear...
- Page 3 • CONSERVE EL MANUAL DE • PARA EVITAR QUE EL COCHECITO • NUNCA UTILICE EL COCHECITO Uso del portabebés Chicco en el PROPIETARIO PARA USO FUTURO. SE INCLINE, no coloque más de EN ESCALERAS, ya sean comunes cochecito: •...
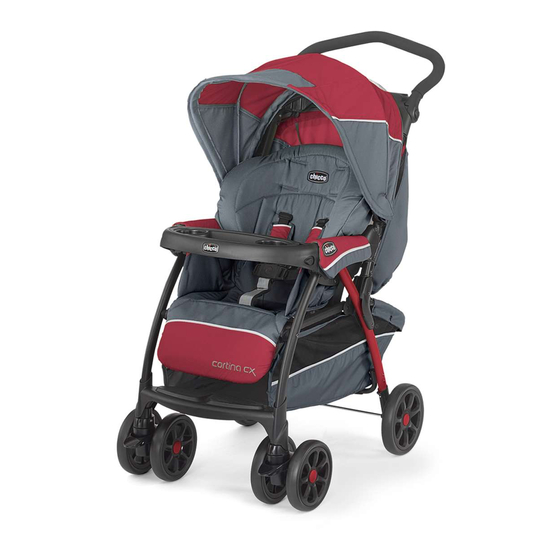
- Page 4 Components Components Componentes Componentes A. - Stroller Frame F. - Pins A. - Estructura del cochecito F. - Clavijas G. - Hubcaps G. - Tapacubos B. - Front Swivel Wheels B. - Ruedas delanteras giratorias H. - Parent Tray H. - Bandeja Para Padre C.
- Page 5 How to Open Stroller How to Open Stroller Cómo abrir el cochecito Cómo abrir el cochecito ADVERTENCIA WARNING Para evitar que el cochecito se To prevent tipping, do not place incline, no cargue más de 3 libras more than 3 lbs (1.4 kg) in the (1,4 kg) en la bandeja para padres.
- Page 6 How to Open Stroller To Adjust Handle Cómo abrir el cochecito Para ajustar la manija 2. Locate handle on the Parent Tray. 3. The Stroller Handle can be With one hand squeeze lock and lift adjusted to 3 positions for comfort. handle.
- Page 7 To Attach Basket Stand Child’s Tray Instalación del soporte de la canasta La bandeja del niño 4. Insert Basket Stand (K) into basket WARNING ADVERTENCIA sleeve. The Basket Stand should slide Always secure your child with the Siempre sujete a su niño con el in between the fabric as shown.
- Page 8 Tray Insert Front Wheels Accesorio de la bandeja Les roues avant 5B. Snap Tray Insert into Child's 6. Attach Front Wheels (B) to the Tray as shown. Remove Tray Insert Stroller Frame as shown. The Wheels by pulling out on the release tabs should click into place.
- Page 9 Rear Axle Rear Wheels El eje trasero Las ruedas traseras 7A. Remove and discard red plastic WARNING ADVERTENCIA end caps on the Rear Axle. Attach the Check that the wheels are fitted Asegúrese de que las ruedas estén Rear Axle (D) to the Stroller Frame as correctly.
- Page 10 Rear Wheels Rear Wheels Las ruedas traseras Las ruedas traseras 7C. To secure the Wheel to the axle, 7D. Line up the tabs on the Hubcaps push the Pins (F) straight side through (G) with the holes on the Wheel. the hole on the axle.
- Page 11 To Attach Canopy To Attach Canopy Instalación de la capota Instalación de la capota 8. Attach the Canopy (I) to the frame 9. To open Canopy, pull the front bow using the canopy mounts as shown. forward. Slide the Canopy down until it meets the armrest.
- Page 12 How to Use 5-point Safety Harness How to Use 5-point Safety Harness Cómo utilizar el cinturón de seguridad Cómo utilizar el cinturón de seguridad 10. The Shoulder Straps can be 11. This stroller has a 5-point safety adjusted to 3 height positions as harness.
- Page 13 How to Use 5-point Safety Harness How to Use 5-point Safety Harness Cómo utilizar el cinturón de seguridad Cómo utilizar el cinturón de seguridad 13. The length of the Shoulder Straps WARNING ADVERTENCIA can be adjusted by pulling on the Never leave child unattended.
- Page 14 To Recline Seat To Recline Seat Para reclinar el asiento Para reclinar el asiento WARNING ADVERTENCIA 14. To recline the Backrest, squeeze the recline handle on the back of the Fabric caught in the latches may La tela que se agarre a las trabas seat.
- Page 15 Reclined Carriage Position Reclined Carriage Position Posición reclinada del cochecito Posición reclinada del cochecito WARNING ADVERTENCIA 6. Lift leg rest, and thread straps through button holes on each side Child may slip into leg openings and El niño podría caerse por las of seat cover.
- Page 16 Swivel Wheels How To Use Brakes Las ruedas giratorias Cómo utilizar los frenos For increased maneuverability on WARNING ADVERTENCIA smooth surfaces, activate the front Recuerde siempre accionar los frenos Always apply both brakes Swivel Wheels. whenever the stroller is stationary. cuando el cochecito esté...
- Page 17 Chicco KeyFit® or KeyFit® 30 infant asiento para automóvil para niños car seat. Use of this product with Keyfit® o Keyfit® 30 de Chicco. El other manufacturer's infant car seats uso de este producto con asientos 20. Los sujetadores/puntos de may result in injury or death.
- Page 18 How to Attach KeyFit® Infant Carrier How to Attach KeyFit® Infant Carrier Cómo colocar el portabebés KeyFit® Cómo colocar el portabebés KeyFit® 21A. Place the KeyFit® infant carrier 22. To remove the KeyFit® infant into the Stroller Frame. The infant carrier, squeeze the Release Handle “CLICK!”...
- Page 19 How to Fold Stroller How to Fold Stroller Cómo plegar el cochecito Cómo plegar el cochecito WARNING ADVERTENCIA 23B. While pulling up on the Release Handle, push down on the Storage When folding the Stroller, make sure Al plegar el cochecito, asegúrese Basket with your foot.
- Page 20 Reemplace o repare las piezas en caso de que sea plastic parts placed along the metal frame are clean necesario. Sólo utilice piezas de repuesto de Chicco. Para of dust, dirt or sand. Keep the stroller in a dry place. If stroller becomes wet open canopies and allow evitar que la fricción impida el correcto funcionamiento...
- Page 21 For More Information Más información If you have any questions or comments about this product, or are missing any of the parts please do not return this product to the store. Contact us in one of the following ways: Si tiene preguntas o sugerencias sobre este producto, o falta alguna de las partes, no devuelva este producto a la tienda.
- Page 22 www.chiccousa.com...
Need help?
Do you have a question about the cortina cx and is the answer not in the manual?
Questions and answers