Table of Contents
Advertisement
Quick Links
Download this manual
See also:
User Manual
Advertisement
Table of Contents

Related Manuals for D-Link DSA-3600


Summary of Contents for D-Link DSA-3600
-
Page 1: User Guide
Thursday DSA-3600 User Guide Version DSA-3600-1.0 April, 2007... - Page 2 Copyright © 2007 D-Link Corporation All rights reserved. Printed in Taiwan. April 2007. D-Link Corporation reserves the right to change, modify, and revise this publication without notice. Trademarks Copyright 2007 D-Link Corporation. All rights reserved. D-Link, the D-Link logo, and DSA-3600 are trademarks of D-Link Corporation.
-
Page 3: Table Of Contents
Chapter 1. Before You Start ........................1 1.1 Audience .............................. 1 1.2 Document Conventions ........................1 Chapter 2. Overview ..........................2 2.1 Introduction of DSA-3600 ........................2 2.2 System Concept ........................... 2 Chapter 3. Hardware Installation......................4 3.1 Panel Function Descriptions ......................... 4 3.2 Package Contents .......................... - Page 4 Appendix D. Certificate Settings for IE6 and IE7 ................116 Appendix E. Service Zones – Deployment Examples ..............123 Appendix F. Deploying DSA-3600 Using DWL-2100AP..............127 Appendix G. Network Configuration on PC ..................130 Appendix H. IPSec VPN ........................135 Appendix I.
-
Page 5: Chapter 1. Before You Start
This manual is intended for use by system integrators, field engineers and network administrators to help them set up DSA-3600 Multi-Service Business Gateway in their network environments. It contains step by step procedures and pictures to guide users with basic network system knowledge to complete the installation. -
Page 6: Chapter 2. Overview
Internet browser, such as the Internet Explorer, may be opened to connect to any website. When the browser attempts to connect to a website, the DSA-3600 will force the browser to redirect to the user login webpage. The user must then enter the username and password, where upon successful identification and authentication, the user... - Page 7 Chapter 2. Overview Figure-2.2a: An example deployment using DSA-3600 Figure-2.2b: An example of SMB environment using DSA-3600...
-
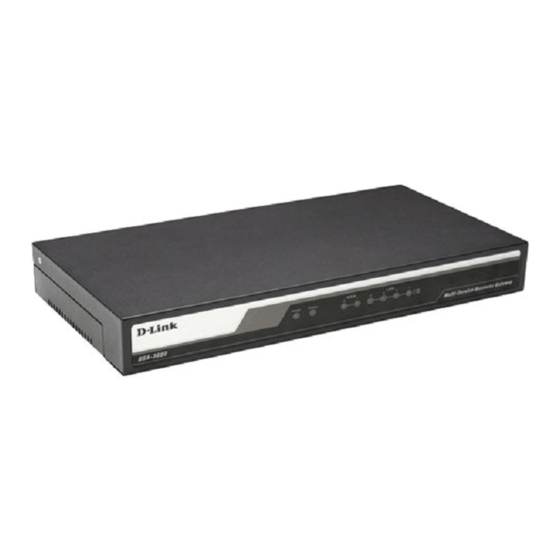
Page 8: Chapter 3. Hardware Installation
Ethernet ports. The interface ports are installed on the rear panel. Six fast Ethernet (100Mbps) ports are provided by DSA-3600. Two are configured as WAN Ports, and the other four are configured as LAN Ports. Located on the rear panel are a serial console port, a reset button, and the power socket. -
Page 9: Package Contents
3 WAN1~WAN2: The two WAN ports connected to an external network not managed by the DSA-3600. These ports may be used to connect to the ATU-Router of an ADSL, or the port of a Cable Modem, or a Switch or Hub on the LAN of an organization. -
Page 10: Installation Steps
After the hardware of the DSA-3600 is installed completely, the system is ready to be configured in the following sections. This manual will guide you step by step to set up the system using a single DSA-3600 to manage the... -
Page 11: Chapter 4. Web Interface Configuration
Chapter 4. Web Interface Configuration This chapter provides further detailed information on setting up the DSA-3600. The following table shows all the functions of DSA-3600. In the web management interface, there are three main interface areas: Tools Menu, Main Menu Tree and Working Area. - Page 12 1. First, set a PC as DHCP in the network with TCP/IP setting to get an IP address from the DHCP server automatically. Next, connect the PC to the DSA-3600 via any LAN port. An IP address will be assigned to the PC automatically via the DSA-3600 built-in DHCP server.
- Page 13 Chapter 4. Web Interface Configuration Once the DSA-3600 has been connected, the Administrator Login Page will appear. Enter “admin” for both the default username and password in the Username and Password fields. Select the Enter button to log in. Caution: If you are unable to get to the login screen, please check the IP address used. The IP address should be in the same subnet of the default gateway.
-
Page 14: System
Chapter 4. Web Interface Configuration 4.1 System This section provides information on the following functions: General, WAN1, WAN2, WAN Traffic, LAN Port Mapping and Service Zones. -
Page 15: General
For example, if the Internal Domain Name is configured as ashop.com, the URL in the User Login page will be https://ashop.com/loginpages/login.shtml. Homepage Redirect URL: Enter a URL in this field. When the clients are logged-in to the DSA-3600 successfully, their browsers will be directed to this URL regardless of the original homepage setting in their browsers. - Page 16 PCs are within the IP address range of 10.2.3.0/24, the administrator can reach the administration page of DSA-3600. If the bit number of the IP range is omitted, 32 are used to specify a single IP address.
-
Page 17: Wan1
Static (Use the following IP Settings): Select Static to specify a static IP address for WAN1 port manually when a static IP address is available for DSA-3600. Fields with red asterisks are required to be filled in. IP Address: The IP address of the WAN1 port. - Page 18 Chapter 4. Web Interface Configuration PPPoE: This is the common connection type for ADSL. To properly configure PPPoE connection type, the Username, Password, MTU and Clamp MSS fields are required. The Dial on Demand function is used to guard the idle time out of the connection. The Maximum Idle Time field is required to enable this function. When the idle time is reached, the connection will be automatically disconnected.
- Page 19 Chapter 4. Web Interface Configuration PPTP: Point to Point Tunneling Protocol is a service that applies to broadband connection used mainly in Europe and Israel. Select Static to specify the IP address of the PPTP Client manually or select DHCP to get the IP address automatically.
-
Page 20: Wan2
Chapter 4. Web Interface Configuration 4.1.3 WAN2 The WAN2 can be disabled when selecting None. When WAN2 Port is enabled, it supports 3 connection types: Static, Dynamic and PPPoE. None: The WAN2 Port is disabled. Static (Use the following IP Settings): Specify the IP Address, Subnet Mask, Default Gateway, Preferred DSN Server and Alternate DSN Server of WAN2 Port, which should be applicable for the network environment. - Page 21 Chapter 4. Web Interface Configuration automatically disconnected.
-
Page 22: Wan Traffic
Enable WAN Failover: The purpose of WAN Failover is to have a backup link for WAN1 when WAN2 is available. Check the check box of Enable WAN Failover to active the WAN failover function of the DSA-3600. Normally a service zone uses WAN1 as it primary gateway. WAN Failover is to have a backup link for WAN1 if WAN2 is available. - Page 23 Chapter 4. Web Interface Configuration Fall back to WAN1 when WAN1 is available again: If WAN Failover is enabled, the traffic will be routed to WAN2 automatically when WAN1 connection fails. A Fall back to WAN1 when WAN1 is available again function will appear when Enable WAN Failover check box is checked.
-
Page 24: Lan Port Mapping
The DSA-3600 supports multiple service zones in either of the two VLAN modes, Port-Based VLAN or Tag-Based VLAN, but not concurrently. In the wireless environment, a service zone of the DSA-3600 is mapped to the VLAN with an associated SSID. When the DSA-3600 is set for tag-based VLAN, a managed Access Point with multiple SSIDs turned on can service multiple service zones. - Page 25 Chapter 4. Web Interface Configuration Tag-based Service Zones Configuration Example – Enabling Two Service Zones Log in to the web management interface and enter “admin” for both the default username and password in the Username and Password fields of the Administrator Login Page. After logging-in the web management interface, from the Menu Tree, click System and then click LAN Port Mapping to verify that Tag-Based service zone mode is selected.
- Page 26 Chapter 4. Web Interface Configuration Scroll up to the middle of the page where the Authentication Settings is, and check the Enabled box for the Authentication Required for the Zone option. The users will now need to be authenticated to connect to the service zone.
- Page 27 Chapter 4. Web Interface Configuration Click Apply to activate the changes for the second service zone. Now is the time to restart the system. After the restart, the system will be configured according to Figure-4.1.5a. Figure-4.1.5a: An example using Tag-Based service zones Port-Based: For port-based service zone, each LAN port can be assigned to a service zone since a LAN port can be mapped to a VLAN tag.
- Page 28 Chapter 4. Web Interface Configuration Port-based Service Zones Configuration Example After running through Setup Wizard on a factory default system, the DSA-3600 is ready to use the default tag-based VLAN for separating networks. Log in to the web management interface and enter “admin” for both the default username and password in the Username and Password fields of the Administrator Login Page.
- Page 29 Chapter 4. Web Interface Configuration In tag-based mode, each LAN port can serve traffic from any service zone because VLAN tags carried in message frame will not be modified. In port-based mode, each LAN port can only service traffic of one service zone, where all messages through the LAN port will be re-tagged with the tag assigned to the port.
-
Page 30: Service Zones
Encryption: Encryption supports WEP (64/128 bit), WPA and WPA2 for AP security. Applied Policy: The policy plan applied to the service zone settings. Authentication: There are 5 authentication methods that DSA-3600 supports: Local, POP3, RADIUS, LDAP and NT Domain. The selected authentication method in Authentication Settings will be shown in this column. - Page 31 Chapter 4. Web Interface Configuration information from the external DHCP server to downstream clients of this service zone. Service Zone Status: Each service zone can be enabled or disabled except the default service zone. Service Zone Name: The name of service zone can be input here. Network Interface: Contains NAT mode and Router mode.
- Page 32 Chapter 4. Web Interface Configuration change it accordingly at System→General→Management IP Address List to let the administrator to login to the DSA-3600 admin page after the default IP address of Network Interface is changed. 2) Service Zone Settings – Authentication Settings The system supports five types of authentication database that are Local, POP3, RADIUS, LDAP, and NT Domain and provides up to four authentication options and one Guest Users authentication option.
- Page 33 Chapter 4. Web Interface Configuration 2.1) Authentication Options Click the hyperlink of Auth Option, the Authentication option page will appear, showing options for Server1 to Server4 and Guest Users. Click the button of Configure to have further configuration. Name: Set a name for the server using numbers (0 to 9), alphabets (a to z or A to Z), dash (-), underline (_) and dot (.) within a maximum of 40 characters.
- Page 34 Chapter 4. Web Interface Configuration Add User: Click this button to enter into the Adding User(s) to the List interface. Fill in the necessary information such as “Username”, “Password”, “MAC” and “Remark”. Select a desired Policy and choose whether to enable Local VPN. Only “Username” and “Password”...
- Page 35 Chapter 4. Web Interface Configuration Click the hyperlink Roaming out & 802.1X Client Device Settings to enter the Roaming out & 802.1X Client Device Settings interface. Choose the desired type, Disable, Roaming Out or 802.1X, and key in the related data and then click Apply to complete the settings. 802.1x Authentication: 802.1x is the IEEE security standard for wired and wireless LANs.
- Page 36 Chapter 4. Web Interface Configuration Postfix: Set a postfix that is easy to distinguish (e.g. Local) for the server using numbers (0 to 9), alphabets (a to z or A to Z), dash (-), underline (_) and dot (.) within a maximum of 40 characters.
- Page 37 Accounting Service: Select this to enable or disable the “Accounting Service” for accounting capabilities. Authentication Protocol: There are two methods for selection: CHAP or PAP. Notice: If the RADIUS Server does not assign idle-timeout value, the DSA-3600 will use the local idle-timeout. Authentication Options → LDAP 2.1.3)
- Page 38 Chapter 4. Web Interface Configuration Server: Enter the IP address/domain name of the LDAP server. Port: Enter the Port of the LDAP server, and the default value is 389. Base DN: Enter the distinguished name of the LDAP server. Account Attribute: Use the user account’s login username and password of the system, and then type one Account Attribute (UID, CN) to access the LDAP server.
- Page 39 Chapter 4. Web Interface Configuration Receipt Footer: Enter receipt footer message here or use the default. Policy Name: Select a policy applied to Guest account. WLAN ESSID: Enter the ESSID of the AP which will print on the receipt for clients’ reference. Wireless Key: Enter the key of the AP which will print on the receipt for clients’...
- Page 40 Chapter 4. Web Interface Configuration Authentication Options → Guest Users → Generate Guest Account User 2.1.5.3) Click this to enter the Generate Guest Account User screen. Click on the Generate button of the desired plan and a guest account will be created. Click Print to print a receipt which will contain the guest user’s information, including the username and password.
- Page 41 Chapter 4. Web Interface Configuration → → Custom Pages Login Page Default Page Choose Default Page to use the default login page. → → Custom Pages Login Page Template Page Choose Template Page to make a customized login page. Click Select to pick up a color and then fill in all of the blanks.
- Page 42 Chapter 4. Web Interface Configuration If the user-defined login page includes an image file, the image file path in the HTML code must be the image file to be uploaded. Remote VPN : <img src=images/xx.jpg”> Default Service zone : <img src=images0/xx.jpg”> Service zone 1 : <img src=images1/xx.jpg”>...
- Page 43 Chapter 4. Web Interface Configuration Custom Pages → Login Pages → External Page Choose the External Page selection and get the login page from the specific website. In the External Page Setting, enter the URL of the external login page and then click Apply. After applying the setting, the new login page can be previewed by clicking Preview button at the bottom of this page.
- Page 44 Chapter 4. Web Interface Configuration After the upload is completed, the customized logout page can be previewed by clicking Preview at the bottom of this page. If restore to factory default setting is needed for the logout interface, click the “Use Default Page”...
- Page 45 Chapter 4. Web Interface Configuration Custom Pages → Login Success Page 2.2.3) The users can apply their own Login Success page in the menu. As the process is similar to that of the Login Page, please refer to the “Login Page” instructions for more details. →...
- Page 46 Chapter 4. Web Interface Configuration → → Custom Pages Login Success Page External Page Choose the External Page selection to get the login success page from the specific website. In the External Page Setting, enter the URL of the external login page and then click Apply. After applying the setting, the new login success page can be previewed by clicking Preview button at the bottom of this page Custom Pages →...
- Page 47 Chapter 4. Web Interface Configuration → → Custom Pages Login Success Page for Instant Account Template Page Choose Template to make a customized login success for Instant account. Click Select to pick up a color and then fill in all of the blanks. Click Preview to see the result. →...
- Page 48 Chapter 4. Web Interface Configuration Custom Pages → Logout Success Page 2.2.5) The administrator can apply their own Logout Success page for Users in the menu. As the process is similar to that of the Login Page, please refer to the instructions on Login Page for more details. →...
- Page 49 Chapter 4. Web Interface Configuration → → Custom Pages Logout Success Page Uploaded Page Choose Uploaded Page to get the logout success page for upload. Click the Browse button to select the file for the logout success page upload. Next, click Submit to complete the upload process. After the upload process is completed and applied, the new logout success page can be previewed by clicking Preview button at the bottom.
- Page 50 Chapter 4. Web Interface Configuration 3) Service Zone Settings – Wireless Settings SSID: Each service zone must setup its own SSID. Security: Each service zone can setup its own Authentication and Encryption support. Authentication support: WPA-PSK, IEEE 802.1X (EAP-MD5, EAP-TLS, CHAP, PEAP); and encryption support: WEP (64/128bit), WPA and WPA2.
-
Page 51: Users
Chapter 4. Web Interface Configuration 4.2 Users This section provides information on the following functions: Authentication, Black List, Policy and Additional Control. -
Page 52: Authentication
Chapter 4. Web Interface Configuration 4.2.1 Authentication This function is used to authenticate users against internal or external account database. The DSA-3600 supports several types of authentication database: Local, POP3, RADIUS, LDAP, and NT Domain. The DSA-3600 provides up to three external authentication servers, one Local users authentication server and one Guest Users authentication server. -
Page 53: Black List
Select Black List: There are 5 lists supported by DSA-3600 for selections. Name: Set the name of the black list and it will show in the pull-down menu above. -
Page 54: Policy
Policies can be selected in the Policy tab. The administrator can select one of the defined policies to have policy-based user management supported by the DSA-3600. All user clients’ access to this service zone will be bound to this policy. When Local is the selected Authentication Database, a policy can be applied per user basis. - Page 55 Chapter 4. Web Interface Configuration 4.2.3.1 Global Policy Select Policy: Select Global to set the Firewall Profile and Specific Route Profile. A. Firewall Profile: Click the hyperlink of Setting for Firewall Profile. The Firewall Configuration will appear. Click Predefined and Custom Service Protocols to edit the protocol list. Click Firewall Rules to edit the rules.
- Page 56 Chapter 4. Web Interface Configuration Selecting the Filter Rule Number 1 as the example: Rule Number: This is the rule selected “1”. Rule Name: The rule name can be changed here. Source/Destination – Interface: There are choices of ALL, WAN1, WAN2, and the named Service Zones to be applied for the traffic interface.
- Page 57 Chapter 4. Web Interface Configuration 4.2.3.2 Policy1 to Policy8 Select Policy: Select a desired policy for configuration. A. Firewall Profile: Click the hyperlink of Setting for Firewall Profile, the Firewall Configuration will appear. Click Predefined and Custom Service Protocols to edit the protocol list. Click Firewall Rules to edit the rules.
- Page 58 Chapter 4. Web Interface Configuration D. QoS Profile: Click the hyperlink of Setting for QoS Profile to enter the Traffic Configuration. Traffic Class: Each login user will be categorized into a policy. Each policy can choose its own traffic class. There are four traffic classes: Voice, Video, Best-Effort and Background. Voice and Video will be put into high priority queue.
- Page 59 Chapter 4. Web Interface Configuration E. Privilege Profile: Click the hyperlink of Setting for QoS Profile to enter the Privilege Configuration Including PPTP login, Instant Account Privilege and Change Password Privilege. PPTP login: When PPTP login is enabled, the policy applied user is able to access the internal network from the external network via establishing a PPTP VPN tunnel when Remote VPN function under Network category is enabled.
-
Page 60: Additional Control
Chapter 4. Web Interface Configuration 4.2.4 Additional Control In this section, additional settings are provided for the administrator to the following for user management. User Session Control: Functions under this section applies for all general users. Idle Timeout: If a user has been idled with no network activities, the system will automatically kick out the user. The logout timer can be set in the range of 1~1440 minutes, and the default logout time is 10 minutes. - Page 61 Chapter 4. Web Interface Configuration Customization: The administrator can upload their own certificate to the system. Remaining Time Reminder: There is a Remaining Time Reminder supported by the system to remind guest users that their accounts are about to expire within the set time. When Remaining Time Reminder is enabled, there will be a message appearing on guest user’s screen to remind them.
-
Page 62: Access Points
Chapter 4. Web Interface Configuration 4.3 Access Points This section provides information on the following functions: List, Discovery, Adding, Templates, Firmware and Upgrade. -
Page 63: List
AP or selecting all the APs together by checking the top check box. Please Note: The supported managed AP may be vary for different DSA-3600 firmware version. After adding an AP: Check any AP and click the button below to Reboot, Enable, Disable, Delete and Apply Template the checked AP. -
Page 64: Discovery
Chapter 4. Web Interface Configuration 4.3.2 Discovery Use this function to detect and manage all the supported APs in the network segments. Discovery Settings When the administrator tries to discover a new AP, select the Service Zone first. Second, select Factory Default or Manual in Admin Settings Used to Discover field;... - Page 65 Chapter 4. Web Interface Configuration Background AP Discovery The system supports discovering APs periodically in background. The New IP Address Assignment and Access to the AP Admin Interface configuration in Background Auto Discovery page are the same as in the Discovery Settings.
-
Page 66: Adding
Chapter 4. Web Interface Configuration 4.3.3 Adding The supported APs (such as DWL-2100AP) can also be added into the List manually. Enter the related information of the AP and select a Template Applied. Click ADD and then the AP will be added to the List. Similar to the AP added after discovery, a manually added AP will show up with a status of “configuring”... -
Page 67: Templates
Chapter 4. Web Interface Configuration 4.3.4 Templates A template is a model that can be copied to every AP without having to configure the each AP individually. The system supports up to three templates which include configurations of APs. The administrator can configure the setting together in the template instead of logging the AP management interface to set the configurations one by one. - Page 68 Chapter 4. Web Interface Configuration Access Control by MAC Address: This function provides to control the clients’ devices that are allowed to associate with the APs applied with the desired template setting. Choose Disabled or Enabled in the Status column and enter the desired clients’ MAC addresses in the MAC Address List. There are up to 20 MAC addresses available.
-
Page 69: Firmware
Chapter 4. Web Interface Configuration 4.3.5 Firmware This is where AP’s firmware can be uploaded. The current firmware can also be downloaded to the local storage if required. The system supports the firmware management of APs to upload new firmware, delete the existing firmware, and download the firmware to managed APs. -
Page 70: Upgrade
Chapter 4. Web Interface Configuration 4.3.6 Upgrade The administrator can upgrade the firmware of selected APs individually or at the same time by checking the check box of the APs in Selection column. Note that both the version before upgrade and the next version must be ones that have been integrated with the system. -
Page 71: Network
Chapter 4. Web Interface Configuration 4.4 Network This section provides information on NAT, Privilege, Monitor IP, Walled Garden, Proxy Server, DDNS, Client Mobility and VPN. -
Page 72: Nat
The administrator can set up to forty virtual servers using this function, so that the computers not belonging to the managed network can access the servers in the managed network via WAN1 port IP of DSA-3600. Enter the External Service Port, Local Server IP Address and Local Server Port accordingly. Depending on the different services selected, the network service will be able to use the TCP protocol or the UDP protocol. - Page 73 Chapter 4. Web Interface Configuration Port and IP Redirect The administrator can set up to forty sets of the IP address ports for redirection purpose using this function. When users attempt to connect to the port of a Destination IP Address listed here, the connection packet will be converted and redirected to the port of the Translated to Destination IP Address.
-
Page 74: Privilege
In addition to the IP addresses, the clients’ MAC addresses can also be set in this list, so that authentication is not required when they using the network. The DSA-3600 allows the setting of up to 100 privilege MAC addresses. Enter the MAC address (in format: xx:xx:xx:xx:xx:xx) and the remark (optional) accordingly. These... - Page 75 Chapter 4. Web Interface Configuration Warning: Permitting specific MAC addresses to have network access rights without going through standard authentication process may result in security problems.
-
Page 76: Monitor Ip
4.4.3 Monitor IP The DSA-3600 will send out a packet periodically to monitor the connection status of the IP addresses on the list. If the monitored IP address does not respond, the system will send an e-mail to notify the administrator that such destination is not reachable. - Page 77 Chapter 4. Web Interface Configuration When the Monitor Now button is clicked, Monitor IP Results page will appear. If the entered IP address is unreachable, a red dot under Result field will appear. A green dot indicates that the IP address is reachable and alive.
-
Page 78: Walled Garden
Chapter 4. Web Interface Configuration 4.4.4 Walled Garden This function allows clients of specified addresses or domain names to access the Internet before login and authentication. Up to 20 addresses or domain names of websites can be defined in this list. Users without network access right in this list can make use of the actual network service free of charge. -
Page 79: Proxy Server
Redirect Outgoing Proxy Traffic To Built-in Proxy Server: The DSA-3600 has a built-in proxy server. If this function is enabled, the clients will be forced to treat the DSA-3600 as the proxy server regardless of the clients’ original proxy settings, and all traffic will be redirected through the built-in proxy server. -
Page 80: Ddns
Chapter 4. Web Interface Configuration 4.4.6 DDNS The DSA-3600 provides a convenient dynamic DNS (DDNS) function to translate the IP address of WAN port to a domain name that helps the administrator memorize and connect to WAN1 port. When the DDNS is enabled, the system will update the newest IP address regularly to the DNS server if the WAN1 interface is set to Dynamic. -
Page 81: Vpn
Chapter 4. Web Interface Configuration 4.4.8 VPN Virtual Private Network (VPN) is designed to increase the security of information transferred over the Internet. VPN can work with wired or wireless networks and dial-up connections over POPS. It can create a private encrypted tunnel from the end user's computer, through the local wireless network and the Internet, to corporate servers and databases. - Page 82 Chapter 4. Web Interface Configuration to 10 PPTP connections. Site-to-Site VPN When the setting is enabled, the system will enable the IPSec VPN tunnel between two remote networks/sites to encrypt the data transmission. Click Add a Remote Site button to set the configuration of remote VPN capable devices, such as a VPN gateway.
- Page 83 Chapter 4. Web Interface Configuration Click Add a New Host to enter the screen of Remote VPN Gateway.
-
Page 84: Status
Chapter 4. Web Interface Configuration 4.5 Status This section covers the description of system status information and online user status, which include System, Interface, Online Users, User Logs, and E-mail & SYSLOG. An overview of the system is also provided here for the administrator's reference. -
Page 85: System
Chapter 4. Web Interface Configuration 4.5.1 System This section provides an overview of the system administration. - Page 86 The following information in the table describes all the items found in the System Setting Overview menu: Description Item The present firmware version of DSA-3600 Firmware Version The system name. The default is DSA-3600 System Name The page to which the users are directed after initial login Homepage Redirect URL success.
-
Page 87: Interface
Chapter 4. Web Interface Configuration 4.5.2 Interface This section provides an overview of the all interfaces for the administrator such as WAN1, Service Zone – Default, Service Zone – Default DHCP Server. Each service zone represents a virtual system, therefore, the information of the system’s network interface is grouped by service zone. -
Page 88: Online Users
Chapter 4. Web Interface Configuration The description of the table is as follows: Description Item The MAC address of WAN1 port. MAC Address The IP address of the WAN1 port. IP Address WAN1 The Subnet Mask of the WAN1 port. Subnet Mask The mode address of the default service zone. -
Page 89: User Logs
Chapter 4. Web Interface Configuration 4.5.4 User Logs This function is used to check the history of DSA-3600. The history of each day will be saved separately in the DRAM for 3 days. Caution: Since the history is saved in the DRAM, if you need to restart the system and also keep the history, then please manually copy and save the information before restarting. - Page 90 Chapter 4. Web Interface Configuration system. NASIP: The IP address of the WAN port of the system. NASPort: The port of the WAN port of the system. UserMAC: The MAC address of the user. SessionID: The system will give a unique Session ID to an authenticated user when he/she starts a new session.
-
Page 91: E-Mail & Syslog
Chapter 4. Web Interface Configuration 4.5.5 E-mail & SYSLOG The system supports sending notification e-mails of Monitor IP Report, Users Log, Guest User Log, and AP Status Change up to 3 e-mail accounts automatically. The notifications of AP Status Change are triggered by event when a managed AP becomes unreachable, while the other three types of e-mails are sent periodically in given intervals. -
Page 92: Tools
Chapter 4. Web Interface Configuration 4.6 Tools This section provides information on seven utilities used for customizing and maintaining the system, including Setup Wizard, Change Password, Backup/Restore Setting, System Upgrade, Restart, Wake-On-LAN, and Quick Links. -
Page 93: Setup Wizard
Chapter 4. Web Interface Configuration 4.6.1 Setup Wizard The administrator can configure the DSA-3600 via its web management interface as specified. In order to connect to the Internet, the TCP/IP related information such as IP address, subnet mask, and gateway address, must first be obtained from the ISP. - Page 94 Select an Internet connection type for WAN1 interface. Contact your ISP or the network administrator to make sure the connection type for WAN1. There are three connection types provided by DSA-3600: Static, Dynamic and PPPoE. Enter the Username and Password provided by the ISP. Click Next to continue, or click Back to change configurations in previous step.
- Page 95 Chapter 4. Web Interface Configuration PPPoE: Set PPPoE Client’s Information Enter the Username and Password provided by the ISP. Click Next to continue. Step 3: Local User Account (Optional) Local User - Add User New local accounts can be added into the local user database. Enter the Username (e.g. staff001) and Password (e.g.
- Page 96 Finish. Click OK to continue. The Setup Wizard is now completed. During the DSA-3600 restarting, a Confirm and Restart page will appear on the screen. Please do not interrupt the DSA-3600 until the DSA-3600 Administrator Login Page reappears. This indicates that the restart process...
- Page 97 Zones to enter the Basic Settings page. Next, click the Server 1 hyperlink. The DSA-3600 uses Virtual LAN (VLAN) along with a SSID to separate service zones. At this stage, the system is ready for use in minimum configuration. The factory default configuration uses tag-based VLAN. The ‘Default’...
- Page 98 Chapter 4. Web Interface Configuration Figure-4.6.1a: An example using Tag-Based service zones...
-
Page 99: Change Password
The default admin password of the system is "admin". Click Apply to activate the new passwords. The DSA-3600 supports three types of account interface: admin, manager or operator. The account interfaces are authenticated for access to specific configuration pages only, depending on the account rights assigned. The default usernames and passwords are as follow: Admin: The administrator can access all configuration pages of the DSA-3600. -
Page 100: Backup/Restore
Chapter 4. Web Interface Configuration 4.6.3 Backup/Restore This function is used to backup/restore the DSA-3600 settings. The DSA-3600 can also be restored to the factory default settings using this function. Backup System Setting: Click Backup button to save the current system configurations to a backup file on a local disk of the management console. -
Page 101: System Upgrade
Chapter 4. Web Interface Configuration Reset to The Factory Default: Click Reset to load the factory default settings of the DSA-3600. Note that a Reset action will wipe out the existing local user accounts. To back up the local user accounts, please export the local user accounts to a text first. -
Page 102: Restart
This function allows the administrator to safely restart the DSA-3600. The process should take about three minutes. Click YES to restart the DSA-3600; click NO to go back to the previous screen. If turning off the power is necessary, restart the DSA-3600 and wait for it to complete the restart process before turning off. -
Page 103: Quick Links
Chapter 4. Web Interface Configuration 4.6.7 Quick Links Quick Links provide the shortcut to eight links for administrators to directly access frequently used functions of the web management interface. The eight functional links are: System Status, Local User Management, Policy Management, AP Management, Online User List, Guest Account Management, Authentication Configuration and Firmware Management. - Page 104 Chapter 4. Web Interface Configuration 4.6.7.1 System Status The System Status quick link provides at a glance, the System Setting Overview, a shortcut to 4.5.1 System in Status section. It provides a summary of system information to the administrator in a single page. Please refer to the section on System for details.
- Page 105 Chapter 4. Web Interface Configuration 4.6.7.4 Guest Account Management Guest Account Management provides information from the Guest Account Configuration, a shortcut to 4.2.1 Authentication in Users sections and 4.1.6 Service Zone → On-demand Server in System. It lets the customers use wireless Internet with username and password from retail environment for access. Please refer to the section on Guest Account Configuration for details.
- Page 106 Chapter 4. Web Interface Configuration 4.6.7.6 Authentication Configuration Authentication Configuration provides information from the Authentication Settings, a shortcut to 4.2.1 Authentication in Users sections and 4.1.6 Service Zone → Service Zone Settings → Authentication Settings in System. It lets the administrator configure a list of authentication options which can be enabled or disabled within each service zone’s management.
-
Page 107: Help
Chapter 4. Web Interface Configuration 4.7 Help The Help button is at the upper right corner of the DSA-3600 display screen. Click Help for the Online Help window, then click the hyperlink of the relevant information required. -
Page 108: Appendix A. External Network Access
Appendix A. External Network Access Appendix A. External Network Access Upon completing this process, the DSA-3600 will be connected to a managed network in a controlled network access environment. 1. Connect a client’s device, such as a PC, to the LAN port of the DSA-3600 with authentication required. - Page 109 Appendix A. External Network Access 3. An Instant user can enter the username and password in the User Login Page and click the Remaining button to know the remaining time or data quota of the account. 4. When an Instant user logs in successfully, the successful Login screen will appear, which differs from the usual user’s login successfully screen, as it contains an extra line showing “Remaining usage”...
-
Page 110: Appendix B. Console Interface Configuration
Enter key to make selection or confirm what you enter. 3. Once the console port of the DSA-3600 is connected properly, the console main screen will appear automatically. If the screen does not appear in the terminal simulation program automatically, press the arrow keys of the keyboard to enable the terminal simulation program to send out some messages. - Page 111 Interface via the browser or when it fails inexplicitly. The administrator can choose this utility and set the DSA-3600 into safe mode to manage the device using a browser. Synchronize clock with NTP server: Immediately synchronize the clock through the NTP protocol and the specified network time server.
- Page 112 Caution: Although it does not require a username and password for the connection via the serial port, the same management interface can be accessed via SSH. Therefore, it is recommended that you immediately change the DSA-3600 admin username and password after logging into the system for the first time. 3. Reload factory default Choose this option to reset the system configuration to the factory default settings.
-
Page 113: Appendix C. Proxy Configuration
Internet Service Providers (ISPs). In a hotspot environment, users usually enable their proxy setting using their web browsers. The DSA-3600 likewise needs to set some proxy configuration in the Gateway. Follow these steps to complete the proxy configuration:... - Page 114 Appendix C. Proxy Configuration Click the Proxy Server from the menu and the External Proxy Servers page will appear. Add the ISP’s proxy Server IP and Port into External Proxy Servers Setting.
- Page 115 Appendix C. Proxy Configuration Enable Built-in Proxy Server in Redirect Outgoing Proxy Traffic to Built-in Proxy Server Setting. Click Apply to save the settings.
- Page 116 Appendix C. Proxy Configuration For Enterprise Enterprises usually isolate their intranet and internet using a more sophisticated network infrastructure. Many enterprises have their own proxy server which is usually located at the intranet or DMZ under firewall protection. In enterprises, network managers or MIS staff often request their users to enable proxy setting in their browsers to reduce Internet access loading, therefore some proxy configuration settings in the Gateway will be necessary.
- Page 117 Appendix C. Proxy Configuration Click the Proxy Server from left menu and the External Proxy Servers page will appear. Add your proxy Server IP and Port into External Proxy Servers Setting. Disable Built-in Proxy Server in Redirect Outgoing Proxy Traffic to Built-in Proxy Server Setting.
- Page 118 Appendix C. Proxy Configuration Click Apply to save the settings. Warning:If your proxy server is disabled, it will result in abnormal user authentication. When users open their browser, the login page will not appear because the proxy server is down. Please ensure your proxy server is always available.
- Page 119 Appendix C. Proxy Configuration Open the browser to add the default gateway IP address (e.g. 192.168.1.254) and logout page IP address “1.1.1.1” into the proxy exception information. For Internet Explorer For Mozilla Firefox...
-
Page 120: Appendix D. Certificate Settings For Ie6 And Ie7
As long as the SSL function is enabled in the DSA-3600, there must be a public SSL certificate signed by an established certificate authority. To avoid the error message in the browser, a company should have its own Certificate Authority (CA). - Page 121 Appendix D. Certificate Settings for IE6 and IE7 Certificate setting for Internet Explorer 7 For IE7, certificate issues caused by certificate publisher not being trusted by IE7, the following steps may be taken to provide a workaround or to bypass the issue. Open the IE7 browser, and you will be redirected to the default login page.
- Page 122 Appendix D. Certificate Settings for IE6 and IE7 For installing a trusted certificate to solve the IE7 certificate issue, please follow the instructions stated below. When the User Login page appears, click “Certificate Error” at the top. Click “View Certificate”. Click “Certification path”.
- Page 123 Appendix D. Certificate Settings for IE6 and IE7 Select root certification, then click “View Certificate”. Click “Install Certificate”. Click “Next”.
- Page 124 Appendix D. Certificate Settings for IE6 and IE7 Select “Automatically select the certificate store based on the type of certificate”, then click “Next”. Click “Finish”. Click “Yes”.
- Page 125 Appendix D. Certificate Settings for IE6 and IE7 10. Click “OK”. 11. Launch a new IE7 browser. The certificate is now trusted via IE7 according to the key symbol shown at top next to the address field.
- Page 126 Appendix D. Certificate Settings for IE6 and IE7 Certificate setting for Internet Explorer 6 For issues relating to IE6 certificate error, the following information provides the step to take when the certificate publisher is not trusted by IE6. Open an IE6 browser, the Security Alert message will be appeared if the certificate is not trusted. Click “Yes” to proceed.
-
Page 127: Appendix E. Service Zones - Deployment Examples
− Appendix E. Service Zones Deployment Examples Appendix E. Service Zones – Deployment Examples Typical Application Scenario: Employees vs. Guests Typical service zone settings will separate users groups into Employee and Guests for the purpose of different authentication level. Application Network Diagram : As shown in the diagram, assign service zone 1 to Employees and service zone 2 to Guest. - Page 128 4. Apply different access control policies to seperated groups Employee and Guests. Solution and Configuration in DSA-3600 1) Configure two service zones to map to the two groups Step 1: Select “Tag-Based mode“ for all “service zones“...
- Page 129 − Appendix E. Service Zones Deployment Examples Step 3: Configure the “service zone“ accordingly 2) Configure the SSID 3) Choose the authentication option and configure the login page 4) Choose the appropriate policy for this “service zone“...
- Page 130 Appendix E. Service Zones – Deployment Examples Finished Configuration – Service Zone Settings: Once the settings of two service zones are completed, the configured result will be displayed on screen in the Service Zone Settings. The name of the service zone and the enabled status should appear in the display.
-
Page 131: Appendix F. Deploying Dsa-3600 Using Dwl-2100Ap
II. Guest (Up to 7 for each DWL-2100AP) – Does not support "Open System/Shared Key“ mode for security Caution: If an existing SSID is already using Guest type, the wireless security of a Service Zone which is associated with this SSID cannot be set in the Open System or Shared Key mode in DSA-3600. - Page 132 Caution: If two or more SSIDs belong to the same DWL-2100AP and the wireless security of the associated Service Zones is set in the “Shared Key” mode in the DSA-3600, those SSIDs cannot be mapped to the Service Zones that have different sets of WEP Keys in the DSA-3600.
- Page 133 “Passphrase“ for the SSID of Guest type is 8 to 34 characters. Caution: The “HEX“ (the other Key type) should NOT be enabled in DSA-3600 if any DWL-2100AP exists in the Service Zone and the associated SSID is in the mode of WPA-PSK, WPA2-PSK or WPA-Auto-PSK.
-
Page 134: Appendix G. Network Configuration On Pc
Appendix G. Network Configuration on PC Appendix G. Network Configuration on PC After the DSA-3600 is installed, the following configurations must be set up on the PC: Internet Connection Setup and TCP/IP Network Setup. Internet Connection Setup If the Internet Connection of this client PC has been configured as use local area network already, you can skip this setup. - Page 135 Appendix G. Network Configuration on PC 2. Click Next when Welcome to the New Connection Wizard screen appears. 3. Choose “Connect to the Internet” and then click Next. 4. Choose “Set up my connection manually” and then click Next.
- Page 136 DHCP to obtain IP address automatically. Windows 95/98/2000/XP configures IP setup to “Obtain an IP address automatically” in default settings. To check the TCP/IP setup or use a static IP to connect to the DSA-3600 LAN port, please follow the following steps:...
- Page 137 Appendix G. Network Configuration on PC Check the TCP/IP Setup of Window XP 1. Select Start > Control Panel > Network Connection. 2. Click the right button of the mouse on the “Local Area Connection” icon and select “Properties” 3. Select “General” label and choose “Internet Protocol (TCP/IP)”...
- Page 138 Using Specific IP Address: To use specific IP address, please request from your network administrator the following information of the DSA-3600: IP address, Subnet Mask, New gateway and DNS server address. Choose “Use the following IP address” and enter the information given from the network administrator in “IP address”, “Subnet mask”...
-
Page 139: Appendix H. Ipsec Vpn
VPN tunneling technology between client’s windows devices and the DSA-3600 itself regardless of wired or wireless network. By pushing down ActiveX to the client’s Windows device from the DSA-3600, no extra client software is required to be installed except ActiveX, in which a so-called “clientless” IPSec VPN setting is then configured automatically. At the end of this setup, a build-in IPSec VPN feature will be enabled and ready to serve once it is launched for setup. - Page 140 Appendix H. IPSec VPN During the first login to the DSA-3600, Internet Explorer will ask user to download the ActiveX component of IPSec VPN. This ActiveX component once downloaded will be running parallel with the “Login Success” page. The ActiveX component helps to setup the IPSec VPN tunnel between client’s device and the DSA-3600. It also helps to check the validity of the IPSec VPN tunnel between them.
- Page 141 Appendix H. IPSec VPN Internet Connection Firewall In Windows XP and Windows XP SP1, the Internet Connection Firewall is not compatible with IPSec. Internet Connection Firewall will drop packets from tunneling of IPSec VPN. Suggestion: Please TURN OFF Internet Connection Firewall feature or upgrade the Windows OS into Windows XP SP2.
- Page 142 The ActiveX component for IPSec VPN is running parallel with the “Login Success” web page. Unless user decides to close the session and to disconnect with NAC DSA-3600, the following conditions or behaviors of user’s browser can be avoided in order to maintain the built IPSec VPN tunnel always alive.
- Page 143 Appendix H. IPsec VPN c. There are some cases of Windows messages by which DSA-3600 will hint current user to: Close the Windows Internet Explorer, Click “logout” button on “login success” page, Click “back” or “refresh” of the same Internet Explorer, Enter new URL in the same Internet Explorer, Open a URL from the other application (e.g.
-
Page 144: Appendix I. Dhcp Relay
DSA-3600, the DHCP server will receive a DHCP REQUEST packet with Option 82 (a code defined in RFC 3046). A Circuit ID will be sent by the DSA-3600 when the DHCP relay is enabled to define where the packet is sent from, and this Circuit ID will have a format of MAC_IP, such as 00:E0:22:DF:AC:DF_192.168.1.254. - Page 145 Here is an example of configuration file of the DHCP server: Based on the above example, the client that connects to the DSA-3600 sends out a DHCP request. The DHCP relay function being enabled in the DSA-3600 sends a Circuit ID 00:90:0B:07:60:91_192.168.1.254 to the external DHCP server.
Need help?
Do you have a question about the DSA-3600 and is the answer not in the manual?
Questions and answers