Advertisement
Quick Links
Download this manual
See also:
User Manual
This product can be set up using
any current Web browser, i.e.,
Internet Explorer 6 or Netscape
Navigator 7 or above.
Before You Begin
You will need the following:
• Computer with an Ethernet adapter and a Windows, Mac, or Unix based operating system.
• Internet Explorer 6 or Netscape Navigator, version 7.0 or above, with JavaScript enabled.
Check Your Package Contents
These are the items included with your DSA-3200 purchase:
If any of the above items are missing, please contact your reseller.
©2004 D-Link Systems, Inc. All rights reserved. Trademarks or registered trademarks are the property of their respective holders. Software and
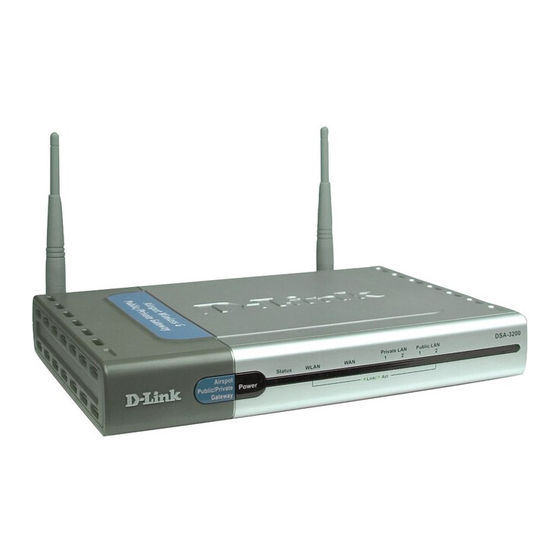
DSA-3200 Airspot
Gateway
CD-ROM (containing Manual and Warranty)
1x Ethernet (CAT5 UTP/Crossover) Cable
2x Ethernet (CAT5 UTP/Straight-Through) Cable
Console Cable (RS-232)
5VDC 3A Power Adapter
specifications subject to change without notice. DSA-3200. 12202004
™
Wireless G Public/Private
Using a power supply
with a different voltage
rating will damage this product
and void its warranty.
DSA-3200
Wireless G Public
/Private Gateway
Advertisement

Related Manuals for D-Link DSA-3200


Summary of Contents for D-Link DSA-3200
-
Page 1: Before You Begin
These are the items included with your DSA-3200 purchase: If any of the above items are missing, please contact your reseller. ©2004 D-Link Systems, Inc. All rights reserved. Trademarks or registered trademarks are the property of their respective holders. Software and DSA-3200 Airspot ™... - Page 2 Connecting The DSA-3200 To Your Network STATUS LED: A solid LED indicates the DSA-3200 is working properly. The LED will flash during reboot. POWER LED: A solid light indicates a proper connection to the power supply. Public LAN Ports: to your public network .
- Page 3 (Note: For configuration purposes a computer can be connected directly to this port using a standard Ethernet cable) Attach an Ethernet cable to the WAN port on the back panel of the DSA-3200. Connect the other end to a router or directly to a broadband modem. The WAN LED light will illuminate to indicate proper connection.
-
Page 4: Using The Setup Wizard
Connect the computer you will be using for configuration to the Private Network or directly to a Private LAN Port. To obtain a new IP address from the DSA-3200 you may need to restart your computer or release and renew your IP address. Make sure that the network adapter in your computer is configured properly. - Page 5 Using The Setup Wizard (continued) Once you have logged in, the home screen will appear. Click Run Wizard You have the option to establish a new password for the admin account. Enter a new admin password and retype it for verification Click Next Select the appropriate time zone for...
- Page 6 IP address of the Domain Name Server. Click Next The DSA-3200 will attempt to determine your WAN connection type. If dynamic IP is detected, no configuration is necessary. If PPPoE is detected, you will be promted to enter your account user name and password.
- Page 7 AP to the On-Demand User Receipt. Click Next Configure the Public WLAN Port: • IP Address: The IP address used for the DSA-3200 on the Public WLAN. • Subnet Mask: The Subnet Mask of the DSA-3200 on the Public WLAN. • DHCP Server Enabled/Disabled:...
- Page 8 Reboot time will take approx. 1.5 ~ 2 Minutes. Click Restart Note: If you are unable to browse the Internet after setting up your DSA-3200, release and renew your Dynamic IP and verify that you receive a valid DNS server address.
- Page 9 Here’s how to configure the network adapter to obtain an IP address automatically from the DSA-3200 Airspot Microsoft Windows XP: Go to Start > right click on My Network Places Right-click on the Network Connection of the Ethernet adapter connecting to the DSA-3200 and select Properties. Click Internet Protocol (TCP/IP) Click Properties...
- Page 10 Select Built-in Ethernet the show pull down menu Select Using DHCP Configure pull down menu The IP address information, the Subnet Mask, the DSA-3200 IP address and the Ethernet adapter address will appear. Click on Apply Now System in the...
- Page 11 Notes...
-
Page 12: Technical Support
You can find software updates and user documentation on the D-Link website. D-Link provides free technical support for customers within the United States and within Canada for the duration of the warranty period on this product. U.S. and Canadian customers can contact D-Link technical support through our website, or by phone.
Need help?
Do you have a question about the DSA-3200 and is the answer not in the manual?
Questions and answers