Table of Contents
Advertisement
Available languages
Available languages
Quick Links
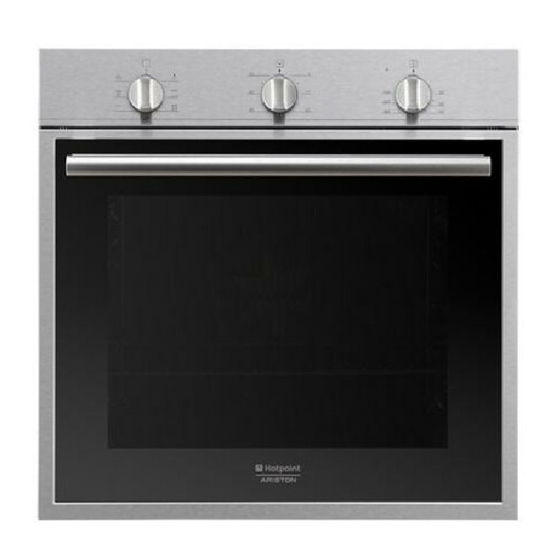
FK 61.1 X/HA
Italiano
Istruzioni per l'uso
FORNO
Sommario
Istruzioni per l'uso,1
Descrizione dell'apparecchio,4
Descrizione dell'apparecchio,4
English
Operating Instructions
OVEN
Contents
Operating Instructions,1
Warnings,2
Assistance,3
Description of the appliance,4
Description of the appliance,4
Installation,11
Advertisement
Table of Contents

Summary of Contents for Hotpoint Ariston FK 61.1 X/HA
-
Page 1: Table Of Contents
FK 61.1 X/HA Italiano Istruzioni per l’uso FORNO Sommario Istruzioni per l’uso,1 Avvertenze,2 Assistenza,3 Descrizione dell’apparecchio,4 Descrizione dell’apparecchio,4 Installazione,5 Avvio e utilizzo,7 Programmi,7 Precauzioni e consigli,9 Manutenzione e cura,9 English Operating Instructions OVEN Contents Operating Instructions,1 Warnings,2 Assistance,3 Description of the appliance,4... -
Page 2: Avvertenze
reduced physical, sensory or mental capabilities or lack of experience and knowledge if they have been given supervision or instruction concerning use of the Avvertenze appliance in a safe way and understand the hazards involved. Children shall not play with the appliance. ATTENZIONE: Questo apparecchio e le sue parti Cleaning and user maintenance shall not be made accessibili diventano molto caldi durante l’uso. -
Page 3: Assistenza
Assistenza Assistance ! Non ricorrere mai a tecnici non autorizzati. ! Never use the services of an unauthorised technician. Comunicare: Please have the following information to hand: • il tipo di anomalia; • the type of problem encountered. • il modello della macchina (Mod.) •... - Page 4 Descrizione dell’apparecchio Vista d’insieme 1 pOSIzIONE 1 2 pOSIzIONE 2 3 pOSIzIONE 3 4 pOSIzIONE 4 5 pOSIzIONE 5 6 GUIDE di scorrimento dei ripiani 7 Ripiano LECCARDA 8 Ripiano GRIGLIA 9 pannello di controllo Description of the appliance Overall view 1 pOSItION 1 2 pOSItION 2 3 pOSItION 3...
-
Page 5: Installazione
Installazione Centraggio e fissaggio Per fissare l’apparecchio al mobile: • aprire la porta del forno; ! È importante conservare questo libretto per poterlo consultare in ogni • togliere i 2 gommini che coprono i fori di fissaggio posti sulla cornice momento. - Page 6 Prima di effettuare l’allacciamento accertarsi che: TARGHETTA CARATTERISTICHE • la presa abbia la messa a terra e sia a norma di legge; • la presa sia in grado di sopportare il carico massimo di potenza della larghezza cm 43,5 altezza cm 32,4 Dimensioni* macchina, indicato nella targhetta caratteristiche (vedi sotto);...
-
Page 7: Avvio E Utilizzo
Avvio e utilizzo programmi AttENzIONE! Il forno è dotato di ! Per tutti i programmi è impostabile una temperatura tra 60°C e MAX, tranne: un sistema di arresto griglie che • GRILL (si consiglia di impostare solo su MAX); consente di estrarle senza che •... - Page 8 GRILL FORNO PIZZA • Inserire la griglia in posizione 3 o 4, disponendo gli alimenti al centro della • Utilizzare una teglia in alluminio leggero, appoggiandola sulla griglia in griglia. dotazione. • Si consiglia di impostare il livello di energia al massimo. Non allarmarsi Con la leccarda si allungano i tempi di cottura e difficilmente si ottiene una se la resistenza superiore non resta costantemente accesa: il suo pizza croccante.
-
Page 9: Precauzioni E Consigli
precauzioni e consigli i RAEE di “piccolissime dimensioni” (nessun lato sopra i 25 cm) possono essere consegnati gratuitamente ai negozianti anche se non si acquista nulla (solo nei negozi con superficie di vendita superiore a 400 mq). Per ! L’apparecchio è stato progettato e costruito in conformità alle norme ulteriori informazioni sulla corretta dismissione degli elettrodomestici i internazionali di sicurezza. - Page 10 Per una pulizia più accurata è possibile smontare la porta del forno: 1. Aprire completamente la porta (vedi figura); 2. Servendosi di un cacciavite, alzare e ruotare le levette F poste sulle due cerniere (vedi figura); 3. Afferrare la porta ai due lati esterni, richiudendola lentamente ma non del tutto.
-
Page 11: Installation
Installation Centring and fixing Secure the appliance to the cabinet: • open the oven door. ! Please keep this instruction booklet in a safe place for future reference. If • remove the 2 rubber plugs covering the fixing holes on the perimeter frame. the appliance is sold, given away or moved, please make sure the booklet is •... -
Page 12: Electrical Connections
Before connecting the appliance to the power supply, make sure that APPLIANCE SPECIFICATIONS • the appliance is earthed and the plug is compliant with the law. • the socket can withstand the maximum power of the appliance, which is width 43.5 cm indicated on the data plate. -
Page 13: Start-Up And Use
Start-up and use Modes WARNING! The oven is provided ! A temperature value between 60°C and MAX can be set for all cooking with a stop system to extract the modes except the following: racks and prevent them from • GRILL (recommended: set only to MAX power level) coming out of the oven (1). -
Page 14: Cooking Advice Table
GRILL PIZZA OVEN MODE • Place the rack in position 3 or 4. Make sure the food is in the centre of the • Use a lightweight aluminium pizza pan. Place it on the rack provided. rack. For a crispy crust, do not use the dripping pan as this extends the total •... -
Page 15: Precautions And Tips
precautions and tips Consumers should contact their local authority or retailer for information concerning the correct disposal of their old appliance. ! This appliance has been designed and manufactured in compliance with Respecting and conserving the environment international safety standards. The following warnings are provided for safety •... - Page 16 195122902.01 10/2014 - XEROX FABRIANO 3. Grip the door on the two outer sides and close it approximately half way. Pull the door towards you, lifting it out of its slot (see diagram). To replace the door, reverse this sequence. Inspecting the seals Check the door seals around the oven regularly.


Need help?
Do you have a question about the FK 61.1 X/HA and is the answer not in the manual?
Questions and answers