Table of Contents
Advertisement
Available languages
Available languages
FK 83.1 X/HA
Italiano
Istruzioni per l'uso
FORNO
Sommario
Istruzioni per l'uso,1
Descrizione dell'apparecchio,4
English
Operating Instructions
OVEN
Contents
Operating Instructions,1
Warnings,2
Assistance,3
Description of the appliance,4
Description of the appliance,4
Installation,13
Modes,16
Advertisement
Table of Contents

Related Manuals for Hotpoint Ariston FK 83.1 X/HA


Summary of Contents for Hotpoint Ariston FK 83.1 X/HA
-
Page 1: Table Of Contents
FK 83.1 X/HA Italiano Istruzioni per l’uso FORNO Sommario Istruzioni per l’uso,1 Avvertenze,2 Assistenza,3 Descrizione dell’apparecchio,4 Descrizione dell’apparecchio,4 Installazione,6 Avvio e utilizzo,8 Il programmmatore di cottura elettronico,8 Programmi,9 Precauzioni e consigli,11 Manutenzione e cura,11 English Operating Instructions OVEN Contents Operating Instructions,1... -
Page 2: Avvertenze
reduced physical, sensory or mental capabilities or lack of experience and knowledge if they have been given supervision or instruction concerning use of the Avvertenze appliance in a safe way and understand the hazards involved. Children shall not play with the appliance. ATTENZIONE: Questo apparecchio e le sue parti Cleaning and user maintenance shall not be made accessibili diventano molto caldi durante l’uso. -
Page 3: Assistenza
Assistenza Assistance ! Non ricorrere mai a tecnici non autorizzati. ! Never use the services of an unauthorised technician. Comunicare: Please have the following information to hand: • Il tipo di anomalia; • The type of problem encountered. • Il modello della macchina (Mod.) •... -
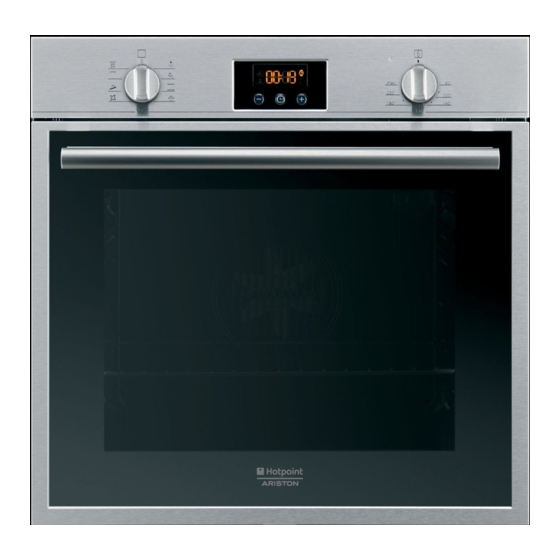
Page 4: Descrizione Dell'apparecchio
Descrizione dell’apparecchio Vista d’insieme 1 POSIZIONE 1 2 POSIZIONE 2 3 POSIZIONE 3 4 POSIZIONE 4 5 POSIZIONE 5 6 GUIDE di scorrimento dei ripiani 7 Ripiano LECCARDA 8 Ripiano GRIGLIA 9 Pannello di controllo Description of the appliance Overall view 1 POSITION 1 2 POSITION 2 3 POSITION 3... - Page 5 Descrizione dell’apparecchio Pannello di controllo 1 Manopola PROGRAMMI 2 Spia TERMOSTATO 3 Manopola TERMOSTATO 4 Programmatore ELETTRONICO Description of the appliance Control panel 1 SELECTOR knob 2 THERMOSTAT indicator light 3 THERMOSTAT knob 4 ELECTRONIC programmer...
-
Page 6: Installazione
Installazione Centraggio e fissaggio Per fissare l’apparecchio al mobile: • aprire la porta del forno; ! È importante conservare questo libretto per poterlo consultare in ogni • togliere i 2 gommini che coprono i fori di fissaggio posti sulla cornice momento. - Page 7 Prima di effettuare l’allacciamento accertarsi che: TARGHETTA CARATTERISTICHE • la presa abbia la messa a terra e sia a norma di legge; larghezza cm 43,5 • la presa sia in grado di sopportare il carico massimo di potenza della altezza cm 32,4 Dimensioni* macchina, indicato nella targhetta caratteristiche (vedi sotto);...
-
Page 8: Il Programmmatore Di Cottura Elettronico,8
Avvio e utilizzo Il programmmatore di cottura elettronico ATTENZIONE! Il forno è dotato di un sistema di arresto griglie che consente di estrarle senza che DISPLAY queste fuoriescano dal forno. (1) Per estrarre completamente le griglie è sufficiente, come indicato Icona Icona ••... -
Page 9: Programmi
Programmare la fine di una cottura Il programma non necessita di preriscaldamento. Questo programma è ! La programmazione della fine di una cottura è possibile solo dopo aver particolarmente indicato per cotture veloci di cibi preconfezionati (surgelati o impostato una durata di cottura. precotti). - Page 10 Tabella cottura Programmi Alimenti Peso Posizione Preriscaldamento Temperatura Durata (Kg) dei ripiani (minuti) consigliata cottura (minuti) Scongelamento Tutti i cibi surgelati Anatra 65-75 Arrosto di vitello o manzo 70-75 Tradizionale Arrosto di maiale 70-80 Biscotti (di frolla) 15-20 Crostate 30-35 Crostate 20-30 Torta di frutta...
-
Page 11: Precauzioni E Consigli
Precauzioni e consigli potenziali danni per la salute e l’ambiente. Il simbolo del cestino barrato è riportato su tutti i prodotti per ricordare gli obblighi di raccolta separata. Quando si acquista una nuova apparecchiatura equivalente si può ! L’apparecchio è stato progettato e costruito in conformità alle norme consegnare il RAEE al negoziante, che è... - Page 12 3. Afferrare la porta ai due lati esterni, richiudendola lentamente ma non del tutto. Poi tirare la porta verso di sé estraendola dalla sua sede (vedi figura). Rimontare la porta seguendo il procedimento in senso contrario. Controllare le guarnizioni Controllare periodicamente lo stato della guarnizione attorno alla porta del forno.
-
Page 13: Installation
Installation • fix the oven to the cabinet using the 2 wood screws. • replace the rubber plugs. ! Please keep this instruction booklet in a safe place for future reference. If the appliance is sold, given away or moved, please make sure the booklet is also passed on to the new owners so that they may benefit from the advice contained within it. - Page 14 ! Once the appliance has been installed, the power supply cable and the electrical socket must be easily accessible. ! The cable must not be bent or compressed. ! The cable must be checked regularly and replaced by authorised technicians only (see Assistance).
-
Page 15: Start-Up And Use
Start-up and use Setting the clock ! The clock may be set when the oven is switched off or when it is switched on, provided that a the end time of a cooking cycle has not been programmed WARNING! The oven is provided previously. -
Page 16: Modes
Cancelling a programme GRILL mode To cancel a programme: The top heating element and the rotisserie (where present) come on. • press the button until the icon corresponding to the setting you wish The high and direct temperature of the grill is recommended for food which to cancel and the digits on the display are no longer flashing. -
Page 17: Cooking Advice Table
Cooking advice table Modes Foods Weight Position of Preheating Recommended Cooking (in kg) shelves (minutes) temperature duration (minutes) Defrosting All frozen foods Duck 65-75 Roast veal or beef 70-75 Traditional 70-80 Roast pork 15-20 Biscuits (shortcrust pastry) 30-35 Tarts Tarts 20-30 1 or 2 40-45... -
Page 18: Maintenance And Care,18
Precautions and tips The crossed out “wheeled bin” symbol on the product reminds you of your obligation, that when you dispose of the appliance it must be separately collected. ! This appliance has been designed and manufactured in compliance with Consumers should contact their local authority or retailer for information international safety standards. - Page 19 3. Grip the door on the two outer sides and close it approximately half way. Pull the door towards you, lifting it out of its slot (see diagram). To replace the door, reverse this sequence. Inspecting the seals Check the door seals around the oven regularly. If the seals are damaged, please contact your nearest Service Centre (see Assistance).
- Page 20 195122906.01 10/2014 - XEROX FABRIANO Indesit Company S.p.A. Viale Aristide Merloni,47 60044 Fabriano (AN) www.hotpoint.eu...
Need help?
Do you have a question about the FK 83.1 X/HA and is the answer not in the manual?
Questions and answers