Table of Contents
Advertisement
Advertisement
Table of Contents

Related Manuals for SPORTS ART 805p


Summary of Contents for SPORTS ART 805p
- Page 1 PDF created with FinePrint pdfFactory Pro trial version http://www.pdffactory.com...
-
Page 2: Table Of Contents
TABLE OF CONTENTS A. SAFETY GUIDELINES..................B. INTRODUCTION....................C. ASSEMBLING YOUR ELLIPTICAL TRAINER INSTALLATION REQUIREMENTS............... LIST OF PARTS....................STEP BY STEP INSTRUCTIONS................ LEVELING FEET....................D. EXERCISING ON YOUR ELLIPTICAL TRAINER ELECTRONICS PACKAGE................. MANUAL......................SET........................STRIDE ADJUSTMENT..................PROGRAM......................USING THE INTERVAL MODE................RESET........................ -
Page 3: Safety Guidelines
SAFETY GUIDELINES Please read and follow the below safety guidelines: • Keep this owner's manual for future use and reference. • Read this owner's manual and follow the instructions. • Assemble and operate the elliptical trainer on a solid, level surface. •... -
Page 4: Introduction
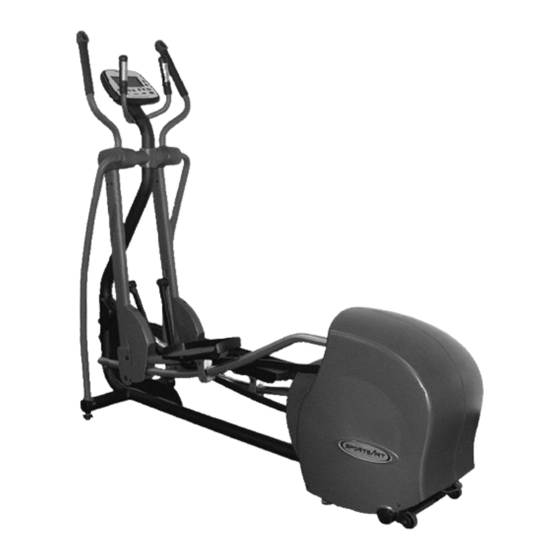
INTRODUCTION Congratulations on purchasing one of the finest pieces of exercise equipment on the market today. Constructed of high quality materials and designed for years of trouble-free usage, the elliptical will be an integral part of your health and fitness. Before using your elliptical trainer, we recommend that you familiarize yourself with the owner's manual. -
Page 5: Assembling Your Elliptical Trainer Installation Requirements
ASSEMBLING YOUR ELLIPTICAL TRAINER INSTALLATION REQUIREMENTS: Read this owner's manual and follow the instructions contained herein. Important: The packing for this unit was designed to protect it during shipment. Please store the original packaging in a safe place in case you need to ship the unit in the future. -
Page 6: Step By Step Instructions
STEP BY STEP INSTRUCTIONS: When you remove the Elliptical from its box, first check to make sure all of the parts are present. Then, read through the assembly instructions before you begin. 1. Remove only the upper box and Styrofoam. (see Fig 1) Note: Do not remove the lower box and Styrofoam until you finished assembly step 5 (see Fig. - Page 7 3. Remove the lower roller and shaft as shown in Fig. 2. Fig.2 PDF created with pdfFactory trial version www.pdffactory.com...
- Page 8 4. Place the glide rail over the rocking bar roller. (see Fig.3) Styrofoam Styrofoam Fig.3 PDF created with pdfFactory trial version www.pdffactory.com...
- Page 9 5. Insert the protrusion on the linkage into its place on the rocking bar and secure with screw as shown in diagram A, then cover with the end cap. Following that remove all the Styrofoam and packing box. (see Fig 4) Styrofoam Styrofoam Fig.4...
- Page 10 6. Make sure the upper roller is located on the glide rail then fasten the foot pedals with screws. Secure the lower roller with the shaft and fasten the shaft by open- end wrench. (see Fig. 5) Fig.5 7. Tighten the pivot enclosure with the screw provided. (see Fig. 6) Fig.6 PDF created with pdfFactory trial version www.pdffactory.com...
- Page 11 8. Fasten the screws to the glide rail as shown in diagram in Fig.7. Fig.7 9. Attach the support tubes with the 1/4" x L 3/4" bolts to the upper tube mount, and secure them tightly. Use T-handle wrench to secure 5/16" x L 3/4" bolts on the lower tube mount.
- Page 12 10. Screw the water bottle holder securely. (See Fig.9) Fig.9 PDF created with pdfFactory trial version www.pdffactory.com...
-
Page 13: Leveling Feet
LEVELING FEET If the elliptical is unsteady on the floor, adjust the leveling feet on the front of the machine. Raise or lower the leveling feet to steady the elliptical. (see Fig. 10). Fig.10 Your ELLIPTICAL is ready to use. PDF created with pdfFactory trial version www.pdffactory.com... -
Page 14: Exercising On Your Elliptical Trainer Electronics Package
EXERCISING ON YOUR ELLIPTICAL TRAINER ELECTRONICS PACKAGE As soon as you turn on the machine, you will automatically enter the MANUAL Mode, the word MAN'L will be shown on and the unit defaults to a starting tension of LEVEL 5. If you want to start in the MAN'L mode, simply begin using the unit. If you stop your workout, STEP will appear in the display to remind you to continue your workout, and then the display will automatically return to MAN'L. -
Page 15: Stride Adjustment
3. Next you will be prompted to input your weight. The default starting weight (either ▲▼ 50 LB or 22 KG) will be displayed. Use the MODE keys to change the weight. Pressing the key once changes the weight 1 LB or 1 KG. Holding the key down will change the weight 10 LB or 5 KG every 0.5 seconds. - Page 16 The course profiles for each program are as follows: Even though the programs feature pre-programmed levels, you can change the level anytime during your workout. If you stop in the middle of your workout, you will be prompted by STEP to continue your workout. All input data (TIME, STRIDE LENGTH, LEVEL, STEPS, CAL., etc.) will be retained.
-
Page 17: Using The Interval Mode
Segments 2-8. If you don't want to set all 8 segments, you can set the TIME for the final segment to zero. For example, if you only want to set four segments, leave segment 5's TIME with a value of zero, and the Elliptical 805P will use only the first four segments. -
Page 18: Reset
RESET 1. TO STOP: When you are in STRIDE motion, press RESET to stop motor. 2. TO CLEAR ALL DATA: Press the RESET key to clear all data and return to the MAN'L mode. KEY FUNCTIONS (definitions): SCAN: Press the MODE key until SCAN appears, and the display will automatically alternate between TIME, STEPS, CAL and PULSE. -
Page 19: Heart Rate Control Feature (If Applicable)
PDF created with pdfFactory trial version www.pdffactory.com... - Page 20 5. If you do not reach your target heart rate, the Level will increase until your heart rate reaches the target zone. 6. Once you enter HEART RATE CONTROL, the START will flash on the display and the computer will beep for 3 seconds and return to the former display. Meanwhile, the Time window will show the minutes previously selected and start to count down.
-
Page 21: Guildlines For Exercise
GUIDELINES FOR EXERCISE How long should I exercise? The duration of your exercise session is dependent on your fitness level. In general, it is recommended to maintain your heart rate in your training zone for at least 20 minutes to realize an aerobic benefit. It is recommended that before beginning any exercise program, you should consult with your doctor. - Page 22 (d) Follow the steps 3 and 4 to replace the access cap. (Point B is where to press in step 4) (see fig.11-3) step Lubrication valve Fig.11 Fig.11-1 step Fig.11-2 Fig.11-3 2. (a) Remove the access cap. (see fig.12) (b) Refill with the lubrication tube and the lubrication valve. (see fig.12-1) (c) Then, remove the lubrication tube.
-
Page 23: Trouble Shooting
TROUBLE SHOOTING (A). Blank display: 1. If you turn on the POWER switch and there is no light: a. Check to make sure the power cord is plugged securely into the wall socket. b. If the switch is still not lit, replace the fuse. CAUTION: Make sure to unplug the power cord from the wall socket when replacing the fuse. - Page 24 If your display has no SPM reading during your workout, please contact your dealer for more details. Cautions: Do not attempt to repair or service the Sports Art 805P elliptical trainer, unless you are a factory authorized service professional. Such an attempt will automatically void the factory warranty.
-
Page 25: Wiring Schematic
Wiring Schematic: 805P Your Authorized Distributor PDF created with pdfFactory trial version www.pdffactory.com...
Need help?
Do you have a question about the 805p and is the answer not in the manual?
Questions and answers
can you provide details on how i replace the drive belt please
The provided context does not include step-by-step instructions for replacing the drive belt on a SPORTSART 805P elliptical. However, it does confirm that the Poly V Drive Belt (catalog number sa490J7) is compatible with the SPORTSART 805P.
To replace the drive belt, you will generally need to:
1. Unplug the machine.
2. Remove the necessary covers to access the drive system.
3. Release tension from the current belt.
4. Remove the old belt from the pulleys.
5. Install the new Poly V Drive Belt.
6. Reapply belt tension.
7. Reattach the covers and test the machine.
If unsure, it is recommended to contact a fitness technician for proper installation.
This answer is automatically generated