Table of Contents
Advertisement
Quick Links
Advertisement
Table of Contents

Related Manuals for Audiovox Pursuit PRO9776C


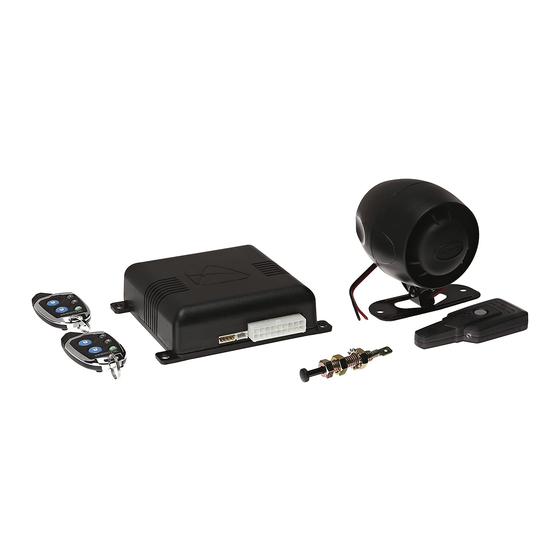
Summary of Contents for Audiovox Pursuit PRO9776C
- Page 1 128-8787 1 of 24...
- Page 2 To program these selectable features; Action Turn ignition on Press and release the valet switch 3 times Within 3 seconds, turn ignition Off Then On This Action Accesses Feature Bank 2 Alarm First Press and release the valet switch 1 time Press transmitter Lock button to change Press transmitter Lock button to change Press transmitter Lock button to change...
- Page 3 128-8787 3 of 24...
- Page 4 Action Turn ignition on Press and release the valet switch 3 times Within 3 seconds, turn ignition Off, On, Off, On This Action Accesses Feature Bank 3 Remote Start Selectable Features First Press the valet switch one time Press transmitter Lock button to change Second Press and release the valet switch Press transmitter Lock button to change...
- Page 5 This Remote Start/Alarm System is designed to be used with Automatic Transmission Vehicles Only! The unit provides a selectable ignition control that allows a number of selectable timed outputs for glow plug pre-heat which may be required for certain diesel vehicles, (see selectable feature #9). If the diesel engine has a instant fire, (no glow plug pre-heat system), feature #9 should remain in the default Gasoline mode setting.
-
Page 6: Shock Sensor
SHOCK SENSOR: Select a centrally located, solid mounting surface for the shock sensor that will allow consistent operation from all areas of the vehicle. The selected location must be within 18" of the control module to allow routing and connecting of the 4 pin harness. Secure the shock sensor to the chosen location using two #8 self taping sheet metal screws. - Page 7 Failure to make this connection properly can result in personal injury and property damage. In all installations it is the responsibility of the installing technician to test the remote start unit and assure that the vehicle cannot start via RF control in any gear selection other than park or neutral. In both mechanical and electrical neutral start switch configurations, the connection of the Yellow wire will be made to the low current start solenoid wire of the ignition switch harness.
-
Page 8: Wiring The 4 Pin Alternate Ignition Harness
WIRING THE 4 PIN ALTERNATE IGNITION HARNESS ORANGE/BLACK Wire: Parking Brake Input This wire is used only when the turbo timer mode, Bank 3, feature # 16 is selected ON. This input insures that the vehicle parking brake is applied whenever the vehicle is set up for and the turbo timer circuit is used. This input must switch to ground when the vehicle's parking brake is applied. - Page 9 WIRING CONNECTIONS: Multi Pin Accessory Input/Output Harness White w/ Red Trace Wire: Parking Light Flasher Feed This wire is the common contact of the on board parking light flasher relay. If the vehicle you are working on has +12 volt switched parking lights, connect this wire to a fused +12 volt source. (Max. 15 Amps) Note: If the vehicle's parking lights are ground switched, connect this wire to chassis ground.
- Page 10 Purple Wire: (+) Door Trigger Input If the vehicle's door courtesy light switches +12 volts when the door is opened (some Fords and some Imports), you must connect this wire to the positive output from one of the vehicle's door pin switches. In most cases, the Purple wire will need to be connected to only one door switch no matter how many doors the vehicle has as most door lighting circuits are wired in parallel.
- Page 11 5. Connect the previously selected resistor from terminal #87 to the second (#2) wire (as shown). Note: The above information and following diagram is for the GM VATS system only. For GM PASS LOCK System you will require the Audiovox AS-PASS II Module. General Motors VATS By-Pass Diagram 128-8787...
- Page 12 Green w/ White trace Wire: Entry Illumination Ground Output This wire provides a 30 second ground output (300 mA Max.) whenever the remote is used to disarm the alarm or to unlock the doors and provides a continuous pulsed output whenever the alarm is triggered. This wire should be connected to an external relay, and wired to the vehicles interior entry lighting whenever the optional Interior Illumination circuit is desired.
- Page 13 Orange Wire: Ground When Armed Output This wire provides a 300 mA ground output when the alarm circuit is armed to control the starter inhibit relay. Connect the Orange wire to terminal #86 (orange wire) of the relay provided. Connect terminal #85 (red wire) of the relay to an ignition wire in the vehicle that is +12 volts when the ignition switch is turned to the on and start positions and off when the key is off.
- Page 14 Black Wire: Chassis Ground Source Connect the Black wire to a known vehicle ground source or to a solid clean metal part of the chassis. Be certain to remove any paint or grease and secure this wire with a self taping screw and ring terminal. Chassis Ground Connection Detail Green w/ Orange Trace Wire: Tachometer Input Signal This wire will continually monitor the engine's tach rate while the unit is under power of the Remote Start...
- Page 15 Negative Door Switch Wiring Detail Dark Blue Wire: Delayed 300 mA Pulsed Channel 3 Output The Dark Blue wire supplies a 300 mA ground pulsed output whenever channel three of the receiver is accessed. Pressing the pre-programmed transmitter button for three seconds will access channel two. This is a low current output and must be connected to a relay to supply power to the trunk release or the circuit you wish to control.
-
Page 16: Wiring The 4 Pin Auxiliary Output Harness
WIRING THE 4 PIN AUXILIARY OUTPUT HARNESS The auxiliary 4 pin connector provides low current outputs to control various functions in the vehicle during different stages of the Remote Start unit's operation. Understanding these outputs and the time in which they occur will allow you to determine if they are needed for the particular vehicle you are working on as well as how to use them. - Page 17 2 Pin Transponder Control Output: (Yellow Connector) This output is intended to allow the control of a transponder bypass interface module or transponder bypass relay. The system also allows software selections to control the way in which this output operates, see remote start feature # 10 for setting this output.
- Page 18 3 Wire Positive Switched Door Lock/Unlock Wiring Detail 3 Wire Ground Switched 2 Step Door Locks In this application, the red wire provides a ground pulse during arming, or the pulsed ground lock output. Connect the red wire to the wire that provides a low current ground signal from the factory door lock switch to the factory door lock control relay.
-
Page 19: Timed Start Program
These applications require the use of additional components which may include relays, fixed resistors, or for convenience, the AS 9159 Door Lock Interface. Refer to the AUDIOVOX Door Lock Wiring Supplement and or the Audiovox fax back service for information on your particular vehicle for properly connecting to these types of circuits. -
Page 20: Timed Start Operation
3. Connect the Yellow wire to a +12 volt ignition 1 source. This wire will have +12 volts with the ignition in the on and start position and have 0 volts with the ignition in the off position. 4. Connect the Green wire to the (Green) or (Orange/Green) tach input of the Audiovox remote start unit. 128-8787... -
Page 21: Testing Your Installation
2. Reach inside the car and pull the hood release. 3. Raise the hood and confirm that the remote start unit shuts down. If the unit fails this test, recheck your pin switch connection to the Gray/Black wire of the Audiovox Remote Start Unit. -
Page 22: Mechanical Neutral Safety Switch Considerations
E. Connect the cathode (striped) side of a 4002 series diode to this same wire, and connect the (non striped) side to the negative shut down safety wire (Gray / Black) of the Audiovox Remote Start Unit. F. Connect terminal 86 of the relay to a fused +12 volt constant battery source. - Page 23 COMPLETING THE INSTALLATION: After you have confirmed the operation of the Audiovox Remote Start unit and tested all the safety features of the system: 1. Mount the control module up and behind the dash securing it in place with cable ties or screws. Be certain that the chosen mounting location will not inhibit any of the controls of the vehicle.
- Page 24 © 2010 Audiovox Electronics Corp., Hauppauge, N.Y. 11788 128-8787 128-8787 24 of 24...
Need help?
Do you have a question about the Pursuit PRO9776C and is the answer not in the manual?
Questions and answers