Table of Contents
Advertisement
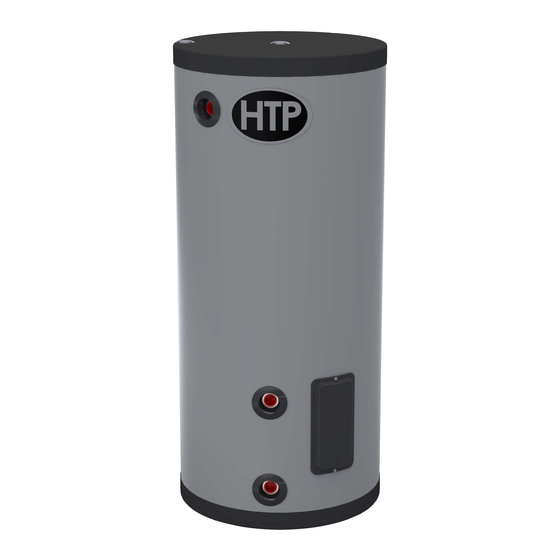
SuperStor Ultra
Indirect Fired
Water Heaters
INSTALLATION
START-UP
MAINTENANCE
PARTS
For Residential and Commercial Use
This manual must only be used by a qualified installer/service technician. Read all instructions in this manual before installing. Perform
steps in the given order. Failure to comply could result in substantial property damage, severe personal injury, or death.
NOTICE: HTP reserves the right to make product changes or updates without notice and will not be held liable for typographical errors
in literature.
The surfaces of these products contacted by consumable water contain less than 0.25% lead by weight, as required by the Safe
Drinking Water Act, Section 1417.
NOTE TO CONSUMER: PLEASE KEEP ALL INSTRUCTIONS FOR FUTURE REFERENCE.
120 Braley Rd. P.O. Box 429
East Freetown, MA 02717-0429
www.htproducts.com
LP-83 Rev. 8.14.14
Advertisement
Table of Contents

Related Manuals for HTP SuperStor Ultra


Summary of Contents for HTP SuperStor Ultra
-
Page 1: Water Heaters
Failure to comply could result in substantial property damage, severe personal injury, or death. NOTICE: HTP reserves the right to make product changes or updates without notice and will not be held liable for typographical errors in literature. -
Page 2: Table Of Contents
FOREWORD This manual is intended to be used in conjunction with other literature provided with the SuperStor Ultra Indirect Fired Water Heater. This includes all related control information. It is important that this manual, all other documents included with this system, and additional publications including the Code for the Installation of Heat Producing Appliances (latest version), be reviewed in their entirety before beginning any work. -
Page 3: Part 1 - General Safety Information
C. WIRING DIAGRAMS ................................24 PART 5 – START-UP AND OPERATION..........................31 PART 6 – MAINTENANCE AND TROUBLESHOOTING ......................33 HTP CUSTOMER INSTALLATION RECORD FORM........................35 PART 1 – GENERAL SAFETY INFORMATION A. PRECAUTIONS This water heater is approved for indoor installations only, and it not intended for use as a pool heater. Clearance to combustible materials: 0”... -
Page 4: When Servicing The Water Heating System
NOTE: OBTAIN ALL APPLICABLE PERMITS AND OBEY ALL LOCAL CODES. NOTE: Install all system components and piping in such a manner that does not reduce the performance of any fire rated assembly. DO NOT USE THIS WATER HEATER IF ANY PART HAS BEEN UNDERWATER. Immediately call a qualified service technician. Any claims for damage or shortage in shipment must be filed immediately against the transportation company by the consignee. -
Page 5: Water Temperature Adjustment
PRODUCTS TO AVOID AREAS LIKELY TO HAVE CONTAMINANTS Spray cans containing fluorocarbons Dry cleaning/laundry areas and establishments Permanent wave solutions Swimming pools Chlorinated waxes/cleaners Metal fabrication plants Chlorine-based swimming pool chemicals Beauty shops Calcium chloride used for thawing Refrigeration repair shops Sodium chloride used for water softening Photo processing plants Refrigerant leaks... - Page 6 Figure 1 – Dimensions LP-83 Rev. 8.14.14...
- Page 7 Figure 2 - Specifications CONTINUOUS FLOW PERFORMANCE CALCULATION FIRST HOUR RATING – (.75 X TANK CAPACITY) = CONTINUOUS FLOW EXAMPLE: SSU-45C = 314 – (.75 X 45) = 280.25 LP-83 Rev. 8.14.14...
-
Page 8: Reduced Boiler Input Sizing Guide
A. REDUCED BOILER INPUT SIZING GUIDE NOTE: IT IS NOT RECOMMENDED TO REDUCE BOILER INPUT WHEN USING DOUBLE WALL TANKS. GROSS OUT GROSS OUT GROSS OUT GROSS OUT GROSS OUT GROSS OUT GROSS OUT MODEL BTU/HR BTU/HR BTU/HR BTU/HR BTU/HR BTU/HR BTU/HR 199,000... -
Page 9: Performance And Sizing Guidelines
Locate the water heater where any leakage from the relief valve, related piping, tank, or connections will not result in damage to surrounding areas or lower floors of the building. The water heater should be located near a floor drain, or installed in a drain pan. HTP will NOT be held liable for leakage damages. -
Page 10: Water Chemistry Requirements
Chemical imbalance of the water supply may affect efficiency and cause severe damage to the water heater and associated equipment. HTP recommends having water quality professionally analyzed to determine whether it is necessary to install a water softener. It is important that the water chemistry on both the domestic hot water and central heating sides are checked before installing the water heater, as water quality will affect the reliability of the system. -
Page 11: Part 3 - Piping
NOTE: It is possible to use live steam in the heat exchanger of the SuperStor Ultra 80 and 119 residential and commercial models ONLY. Using any other Superstor Ultra model in live steam applications will result in product failure and VOID the warranty. -
Page 12: Scalding
6” above the structural floor. The relief line cannot be in contact with any live electrical parts. If the relief valve constantly weeps, install an expansion tank, and see expansion tank manufacturer’s instructions for suggestions. Do not thread a cap or plug into the relief valve under any circumstances! Explosion and property damage, serious injury, or death may result. -
Page 13: Potable Expansion Tank
discharge temperature by mixing cold and hot water in branch supply lines. Such valves are available from your local plumbing supplier. Table 6 details the relationship of water temperature and time with regard to scald injury and may be used as a guide in determining the safest water temperature for your applications. -
Page 14: Piping
H. PIPING NOTES: 1. Minimum pipe size should match connection size. Upsize pipe accordingly if greater flow is required. 2. A thermal expansion tank suitable for potable water must be sized and installed within this piping system between the backflow preventer and the cold water inlet. - Page 15 NOTES: 1. Minimum pipe size should match connection size. Upsize pipe accordingly if greater flow is required. 2. A thermal expansion tank suitable for potable water must be sized and installed within this piping system between the backflow preventer and the cold water inlet. 3.
- Page 16 Figure 6 – Zoning with Zone Valves NOTES: 1. Minimum pipe size should match connection size. Upsize pipe accordingly if greater flow is required. 2. A thermal expansion tank suitable for potable water must be sized and installed within this piping system between the backflow preventer and the cold water inlet.
- Page 17 Figure 7 – Zoning with Circulators NOTES: 1. Minimum pipe size should match connection size. Upsize pipe accordingly if greater flow is required. 2. A thermal expansion tank suitable for potable water must be sized and installed within this piping system between the backflow preventer and the cold water inlet.
- Page 18 Figure 8 – Typical Installation with Storage Tank NOTES: 1. Minimum pipe size should match connection size. Upsize pipe accordingly if greater flow is required. 2. A thermal expansion tank suitable for potable water must be sized and installed within this piping system between the backflow preventer and the cold water inlet.
- Page 19 Figure 9 – Typical Installation with High Efficiency Boiler NOTES: 1. Minimum pipe size should match connection size. Upsize pipe accordingly if greater flow is required. 2. A thermal expansion tank suitable for potable water must be sized and installed within this piping system between the backflow preventer and the cold water inlet.
- Page 20 Figure 10 – Typical Dual Purpose Application w/ Wood Boiler Figure 11 – Typical Dual Purpose Application NOTES: 1. Minimum pipe size should match connection size. Upsize pipe accordingly if greater flow is required. 2. A thermal expansion tank suitable for potable water must be sized and installed within this piping system between the backflow preventer and the cold water inlet.
- Page 21 Figure 12 – Dual Purpose Application with Wood Stove Figure 13 – Dual Purpose Application with Solar Panel NOTES: 1. Minimum pipe size should match connection size. Upsize pipe accordingly if greater flow is required. 2. A thermal expansion tank suitable for potable water must be sized and installed within this piping system between the backflow preventer and the cold water inlet.
- Page 22 Figure 14 – Typical Steam Boiler - NOTE: On Typical Steam Boiler applications, the SSU indirect heat exchanger supply and return connections must be below the water line from the boiler connection. The internal flow check or spring check must be used to avoid thermal siphoning from the connected boiler.
-
Page 23: Part 4 - Heater Control And Wiring
Figure 16 – Typical Multiple Tank Installation NOTES: 1. Minimum pipe size should match connection size. Upsize pipe accordingly if greater flow is required. 2. A thermal expansion tank suitable for potable water must be sized and installed within this piping system between the backflow preventer and the cold water inlet. -
Page 24: Wiring Diagrams
When wiring the water heater and controls, be sure to label all wires for ease of future maintenance. Wiring errors can cause improper and dangerous operation. C. WIRING DIAGRAMS Figure 17 – Wiring with Circulators Figure 18 – Wiring with Zone Valves LP-83 Rev. - Page 25 ZONING WITH CIRCULATORS – 4845 RELAY Figure 19 – Zoning with Circulators – 4845 Relay ZONING WITH CIRCULATORS USING R8182D AND DPST – NO RELAY REQUIRED Figure 20 – Zoning With Circulators Using R8182D and DPST – No Relay Required LP-83 Rev.
- Page 26 ZONING WITH CIRCULATORS USING L8124 A, C, AND R845A RELAY Figure 21 – Zoning with Circulators Using L8124 A, C, and R845A Relay ZONING WITH CIRCULATORS USING L8124 E, F, AND DPST CONTROL – NO RELAY REQUIRED Figure 22 – Zoning with Circulators Using L8124 E, F, and DPST Control – No Relay Required LP-83 Rev.
- Page 27 ZONING WITH CIRCULATORS – R182D AND R845A RELAY Figure 23 – Zoning with Circulators – R182D and R845A Relay CONTROL WITH BUILT-IN DPST SWITCH – NO RELAY REQUIRED Figure 24 – Control with Built-In DPST Switch – No Relay Required LP-83 Rev.
- Page 28 ZONING WITH CIRCULATORS USING L8124 A, C, AND R845A RELAY Figure 25 – Zoning with Circulators Using L8124 A, C, and R845A Relay ZONING WITH CIRCULATORS USING L8124 A, C, AND DPST – NO RELAY REQUIRED Figure 26 – Zoning with Circulators Using L8124 A, C, and DPST – No Relay Required LP-83 Rev.
- Page 29 USING L8148A OR L8152A COLD START BOILER CONTROL WITH CIRCULATORS Figure 27 – Using L8148A or L8152A Cold Start Boiler Control with Circulators PRIORITY ZONE WITH CIRCULATORS Figure 28 – Priority Zone with Circulators LP-83 Rev. 8.14.14...
- Page 30 USING L8148A OR L8152A COLD START BOILER CONTROL WITH ZONE VALVES Figure 29 – Using L8148A or L8152A Cold Start Boiler Control with Zone Valves PRIORITY ZONE WITH ZONE VALVES Figure 30 – Priority Zone with Zone Valves LP-83 Rev. 8.14.14...
-
Page 31: Part 5 - Start-Up And Operation
PART 5 – START-UP AND OPERATION 1. Fill the water heater by opening the cold water shut-off valve. Purge air from the system by opening a hot water outlet at a fixture in a kitchen or bathroom. When water flows freely from the outlet, the system is purged. 2. - Page 32 Figure 31 –Parts #1 – T&P RELIEF VALVE #2 – CONTROL WELL MODEL SSU-20 TP1500 (Not Included) PMW-3SENP-1 SSU-30 TP1500 (Not Included) PMW-3SENP-1 SSU-30LB TP1500 (Not Included) PMW-3SENP-1 SSU-45 TP1500 (Not Included) PMW-3SENP-1 SSU-60 TP1500 (Not Included) PMW-3SENP-1 SSU-80 TP1400 (Included) PMW-3SENP-1 SSU-119 TP1400 (Included)
-
Page 33: Part 6 - Maintenance And Troubleshooting
PART 6 – MAINTENANCE AND TROUBLESHOOTING Periodic maintenance should be performed by a qualified service technician to assure that all the equipment is operating safely and efficiently. The owner should make necessary arrangements with a qualified heating contractor for periodic maintenance of the heater. Installer must also inform the owner that the lack of proper care and maintenance of the heater may result in a hazardous condition. - Page 34 TROUBLESHOOTING NO HOT WATER PROBLEM POSSIBLE SOLUTION Zone valve not opening Open manually to replace. Circulator not operating Check or replace Tank control set too low Raise tank temperature* (SEE NOTE BELOW) Boiler control set too low Raise boiler temperature Wiring incorrect Recheck wiring Tank control failure...
-
Page 35: Htp Customer Installation Record Form
HTP CUSTOMER INSTALLATION RECORD FORM The following form should be completed by the installer for you to keep as a record of the installation in case of a warranty claim. After reading the important notes at the bottom of the page, please also sign this document.
Need help?
Do you have a question about the SuperStor Ultra and is the answer not in the manual?
Questions and answers