
Related Manuals for Philips Pronto


Summary of Contents for Philips Pronto
-
Page 1: Table Of Contents
Table of Contents Taking a First Look Pronto: The Home Theater Control Panel The Device The Touch Screen What’s New for Pronto Next Generation? Before You Start Placing the Batteries Getting Started Turning on Pronto Setting the Contrast Setting Time and Date... - Page 2 Table of Contents ProntoEdit Troubleshooting General Problems Customizing Problems Storage Problems Pronto error messages Maintaining Pronto Important Notices Cleaning Pronto List of Symbols Specifications Glossary Index Copyright User Guide...
-
Page 3: Taking A First Look
Pronto is easy to configure. It contains a huge universal database where IR codes are stored to control different brands for all kinds of video, audio devices and even home automation equipment. -
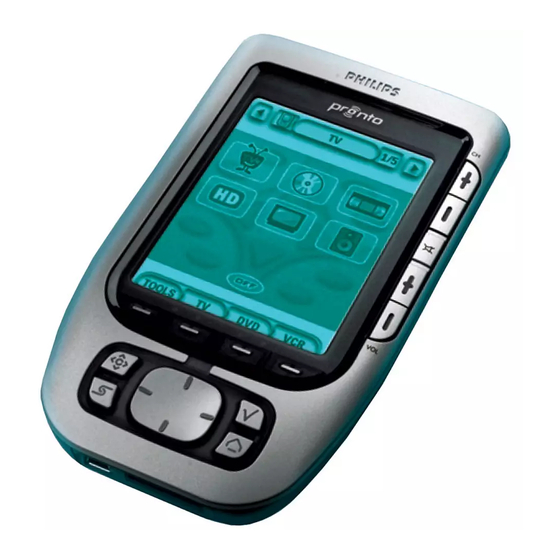
Page 4: The Device
Pronto has several hard buttons. Some are freely programmable, some have a predefined function: The buttons on the left side of Pronto and the buttons at the right side of the screen have predefined functions. The utter left button below the touch screen has a predefined function. - Page 5 Taking a First Look Backlight Page up Page down Reset button Battery compartment Connection to docking station USB port User Guide...
-
Page 6: The Touch Screen
Taking a First Look The Touch Screen Device Page Pronto Overview Overview button button Icon Previous Next Device Device Soft buttons Labels for the hard buttons User Guide... -
Page 7: What's New For Pronto Next Generation
Cursor Navigation By default the cursor is programmed to operate devices. The functions assigned to the cursor button depend on the device active on the Pronto. Pronto also offers you the possibility to use the cursor for navigating through devices and pages on the screen. The Left and Right cursor buttons allow you to scroll through the devices, with the Up and Down cursor buttons you scroll through the different pages. -
Page 8: Before You Start
Before You Start Placing the Batteries When you use Pronto for the first time, you will have to place 4 AAA batteries. You can use rechargeable or non-rechargeable AAA batteries. 1 Slide off the battery cover from the back of Pronto. -
Page 9: Getting Started
Press the Backlight button. Setting the Contrast You can set the contrast level and switch on the backlight of Pronto using the hard buttons on the left side of the device. To decrease the contrast, press and hold the Backlight button and at the same time press the “-”... -
Page 10: Setting Time And Date
Setting Time and Date When you have installed the batteries and turned on the Pronto, you might want to set the current time and date. To go to the Setup Pages, tap the Pronto icon the top center of the touch screen. - Page 11 Getting Started 3 Tap the Year button again. The new year is set. To change the month 1 Tap the Month button in the first Setup Page. The Month button is selected. The labels ‘+’ and ‘-‘ appear for the two middle hard buttons.
-
Page 12: Operating Pronto
Operating Pronto Pronto contains a series of customizable devices, each consisting of several device pages. All active devices on your Pronto are listed in the Device Overview. All the available device pages Device are listed per device in the Page Overview. -
Page 13: Page Overview
Page You can navigate between the different pages in two Overview button different ways: Tap the page you want to operate from the Page Overview. Press the Up or Down hard button on the left side of Pronto. User Guide... -
Page 14: Customizing Pronto
Defining to operate Pronto with IR signals or RF signals (page 34). Defining the Brand for a Device Pronto contains a huge list of brands and their according IR codes in its database. Pronto uses these IR codes to control devices. Because there are several brands using specific IR codes, you have to define the brands and the corresponding code sets for each device. - Page 15 Customizing Pronto Selecting the Brand and Code Set for your Device 1 Press the left hard button below the touch screen for 3 seconds. The Tools menu appears. 2 Tap Brand in the Tools Menu. The ‘Brand Tool’ screen appears.
- Page 16 Customizing Pronto 4 Tap in the ‘Brand Tool’ screen. If there is only one code set, the ‘Installing the Brand’ screen appears. -or- If there is more than one possible code set, the ‘Code Sets’ screen appears. Selecting the code set...
- Page 17 The ‘Searching the Code Set’ screen appears. 2 Tap and point Pronto at the device. The ‘Searching’ screen appears. Pronto searches through the list of code sets for the selected brand, by sending out an IR code for each code set. User Guide...
- Page 18 2 Tap and point Pronto at the device. The ‘Searching’ screen appears. Pronto searches through the list of brands, by sending out an IR code for each brand. 3 When the device for which you are defining the brand, responds to the IR code, tap in the ‘Searching’...
-
Page 19: Learning Commands
E.g. when you select TV, you can learn your Pronto to switch on the TV at the same time. You can also use the Learn Tool to relearn commands that do not work properly. - Page 20 Customizing Pronto Note Make sure that you aim Pronto’s learning eye at the remote control’s IR window. The distance between Pronto and the remote control should be between 4 and 8 inches (10 and 20 cm). 6 Tap the button you want to learn.
-
Page 21: Labeling Elements
Customizing Pronto Labeling Elements The Label tool allows you to label a button, a device or a page. In the Label Tool you can find a virtual keyboard. This keyboard zooms in when you tap a character. The keyboard contains four different character sets, including a series of symbols you can use for labeling. - Page 22 9 Press the hard button. The label of the selected button is changed. The last visited page appears again. 10 You can select other buttons on Pronto to label. 11 Press the left hard button below the touch screen to exit Label Tool.
-
Page 23: Adding Devices
The Add Tool allows you to add a new device or copy an existing device. When you add a new device, a device template stored on your Pronto is used to create the device pages, buttons and functions. Philips IR codes are used when you add a new device. - Page 24 4 Tap the device template you want to add. The ‘IR Code’ screen appears. 5 Tap in the’ IR Code’ screen. The Device is added to Pronto with IR codes. -or- in the ‘IR Code’ screen. The Device is added to Pronto without IR codes.
-
Page 25: Deleting Elements
The button you just deleted is restored. 8 You can select other buttons on Pronto to delete. 9 Press the left hard button below the touch screen to exit the Delete Tool. -
Page 26: Moving Devices
The device you just deleted is restored. 7 You can select other devices on Pronto to delete. 8 Press the left hard button below the touch screen to exit the Delete Tool. -
Page 27: Adjusting The Settings
Shortening the active time will increase Pronto’s battery life. Note The LCD screen will only time out when you are not using Pronto. 1 Tap in the first Setup Page. The LCD Timeout button is selected. The ‘+’ and ‘-‘ labels appear on the two middle hard buttons below the touch screen. -
Page 28: Setting The Timeout Of The Lcd Screen
The timeout of the LCD backlight determines how long the backlight of the touch screen and the buttons stays active. Shortening the active time will increase Pronto’s battery life. The backlight timeout and the LCD screen timeout can work independently. -
Page 29: Setting The Animation Mode
33. Calibrating the Touch Screen When you first use your Pronto, the touch screen is already calibrated. However, if you notice that your Pronto does not send out the commands in accordance with what is indicated on the touch screen, it is advised to recalibrate the touch screen. -
Page 30: Using The Power Features
Using the Power Features Creating and Editing Macros A macro allows you to send a sequence of commands when tapping one single button. You can for instance switch on your TV, turn on a movie channel and prepare your VCR for recording by rewinding the videotape. The macro contains an action list. - Page 31 Using the Power Features To add an action to the action list 1 Tap in the ‘Macro’ screen. The last visited page appears again. 2 Navigate to the Device and the Page that contains the button you want to add to the macro. 3 Tap the button you want to add to the macro.
-
Page 32: Editing A Macro
You do not have to exit the Macro Tool to try out the macro you created or edited. From within the Macro Tool you can test the macro. Pronto executes all actions as you defined them in the action list. -
Page 33: Operating Pronto With The Cursor
Left Down Right The cursor can also be used to navigate through devices and pages on Pronto’s touch screen. When you enable the cursor navigation in the Setup Pages, the touch screen navigation with the Left Device and Right Device buttons at the top area of the... -
Page 34: Operating Pronto With Rf
Using the Power Features Operating Pronto with RF By default, Pronto uses infrared (IR) signals to operate devices. IR signals have an operating distance of approximately 33 ft (10 m). IR signals However, you can choose to have Pronto working with radio frequency (RF) signals to operate devices from a distance or from an adjacent room. -
Page 35: Selecting Rf To Operate Your Devices
‘RF Settings’ screen. Pronto will send out RF signals for the selected device. Note Try to keep Pronto and the RF Extender away from metal objects, as this will have a negative impact on the range. User Guide... -
Page 36: Selecting Ir To Operate Your Devices
The ‘Select IR or RF’ screen appears. RF is selected in the Sending Signals list. 5 Choose IR in the Sending Signals list. The ‘Define RF’ button is disabled. 6 Tap Pronto will send out IR signals for the selected device. User Guide... -
Page 37: Prontoedit
You do this with the PC cable included with your Pronto: Plug one end of the cable in the USB port on your computer. Plug the other end of the cable in the USB port on your Pronto. USB port Add, delete, modify and move control panels, devices and commands anywhere on the touch screen;... -
Page 38: Faq
Why don’t my buttons work properly? When you find that your Pronto does not send out the commands in accordance with what is indicated on the touch screen, it is advised to recalibrate the touch screen. Calibration enables Pronto to place the icons on the touch screen in line with their predefined functions. - Page 39 Philips cannot guarantee that all commands for all devices work properly with RF signals. If a device does not respond properly to RF signals sent out by Pronto, you might better reconfigure Pronto to operate the device with IR signals.
-
Page 40: Troubleshooting
General Problems Pronto shuts off automatically This is a timeout feature of Pronto to save power. You can change the time Pronto stays active in the Settings. See “Setting the Timeout of the LCD Screen” on page 27 for more information. -
Page 41: Storage Problems
When the configuration file is corrupted, you can use Pronto Edit to upload a new configuration file. Taken into account that all your customized commands, devices and macros will be lost and you will have to reprogram your Pronto. Therefore it is recommended to save the configuration by uploading to the PC with ProntoEdit. -
Page 42: Maintaining Pronto
Pronto is not waterproof Pronto should not be exposed to rain or moisture. Do not store or use Pronto in any location that is extremely damp or wet. When you have spilled water on your Pronto, you have to take out the batteries and let Pronto dry for 48 hours before you replace the batteries. -
Page 43: List Of Symbols
List of Symbols Pause Stop Normal run; normal speed Normal run; normal speed Fast run; fast speed Fast run; fast speed Slow run; slow speed Slow run; slow speed Eject Recording, general Navigate Still mode Tape running direction Next track Previous track Fast forward to index Rewind to index... - Page 44 List of Symbols Page number up Page number down Page enlargement TV and text mixed 1st or 2nd language Last view; previous program Stand-by Zone focus: long distance Zone focus: very short distance Single or multi-digit selection Brightness; brilliance Contrast Brightness/contrast Color saturation Lamp;...
- Page 45 List of Symbols Read data from store Write data into store Page hold Sound muting Additional information on screen Viewing angle Spatial sound effect Television; video Sound; audio Surround sound Dolby Digital Digital Theater Systems Active control User Guide...
-
Page 46: Specifications
Interface USB-port connector Software Database with IR codes to operate more than 500 brands Built-in Philips IR codes Total number of devices only limited by memory Infrared (IR) 4 high performance IR-sending LEDs, 1 receiver LED Operating distance of approximately 33 ft (10m) -
Page 47: Glossary
Glossary An action is a command that will be executed by Pronto. An action can Action be an IR code, a link, a delay or a beep. You can assign one or more actions to a button or a hard button. It is the same as a macro. - Page 48 It is the same as an action list. Page A page of a device is the area of 320 by 240 pixels on Pronto’s touch screen containing buttons or other objects. When you switch from one page to another, the first page slides out of Page animation the screen and the second page slides in the screen.
- Page 49 Simulator simulates every aspect of your Pronto. You use Pronto simulator to test your PCF without the need to download it to your Pronto. When you make changes in Pronto simulator, they will not be saved in the configuration file.
-
Page 50: Index
Index action, 31 calibrating the touch screen, 29 action list changing action, 31 date, 10 time, 10 beep, 31 delay, 31 time format, 10 Add Tool, 23 channel adding channel down, 4 action, 31 channel up, 4 beep, 31 clock settings. See time delay, 31 code set new device, 23... - Page 51 Index infrared, 34 operating the Remote Control cursor installing brand, 17 navigation, 33 IR signals, 34 RF signals, 34 touch screen navigation, 33 troubleshooting, 40 keyboard, 21 Overview symbols, 21 Device, 12 zoom, 21 Page, 13 Label Tool, 21 page labeling, 23 labeling Page Overview, 7, 13 button, 21...
-
Page 52: Copyright
RF IR, 34 touch screen, 4, 6 calibrating, 26, 38 transparancy, 7 turning on Pronto, 9 © Royal Philips Electronics NV All rights are reserved. Reproduction in whole or in part is prohibited without the prior written consent of the copyright owner.
Need help?
Do you have a question about the Pronto and is the answer not in the manual?
Questions and answers