
Related Manuals for Electrolux EOC6851


Summary of Contents for Electrolux EOC6851
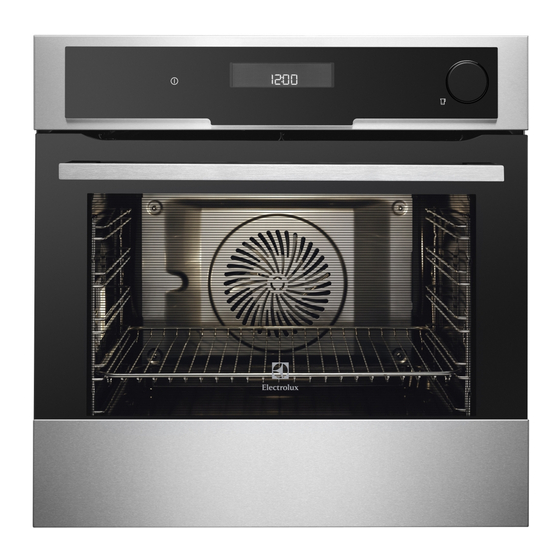
- Page 1 ..................... EOC6851 EN STEAM OVEN USER MANUAL...
-
Page 2: Table Of Contents
15. ENVIRONMENT CONCERNS ..........40 WE’RE THINKING OF YOU Thank you for purchasing an Electrolux appliance. You’ve chosen a product that brings with it decades of professional experience and innovation. Ingenious and stylish, it has been designed with you in mind. -
Page 3: Safety Information
ENGLISH SAFETY INFORMATION Before the installation and use of the ap- • Keep the minimum distance from the pliance, carefully read the supplied in- other appliances and units. structions. The manufacturer is not re- • Make sure that the appliance is installed sponsible if an incorrect installation and below and adjacent safe structures. - Page 4 3 – Do not put ovenware or other objects in the appliance directly on the bottom. • Fully close the appliance door, before – Do not put aluminium foil directly on you connect the mains plug to the the bottom of the appliance.
-
Page 5: Pyrolytic Cleaning
ENGLISH • If you use an oven spray, obey the safe- the high temperature Pyrolytic cleaning ty instructions on the packaging. operation of all Pyrolytic Ovens and can be also a source for low level harmful • Do not clean the catalytic enamel (if ap- fumes. -
Page 6: Product Description
2. PRODUCT DESCRIPTION Draining pipe Water outlet valve Rating plate Shelf positions Steam inlet 2.1 Oven accessories • Wire shelf For cookware, cake tins, roasts. • Baking tray For cakes and biscuits. • Grill- / Roasting pan To bake and roast or as pan to collect Electronic programmer fat. -
Page 7: Control Panel
ENGLISH 4. CONTROL PANEL Electronic programmer Use the sensor fields to operate the appliance Sensor Number Function Comment field On / off To activate and deactivate the appli- ance. Heating Func- To choose a heating function or an As- tions or Assis- sisted Cooking function. -
Page 8: Daily Use
Sensor Number Function Comment field Display Shows the current settings of the appli- — ance. Display Heating function Time of day Heat-up indicator Temperature Duration and End Time functions Other indicators in the display Symbol Function Minute Minder The function operates. - Page 9 ENGLISH 5.2 The menus in overview Main menu Symbol Menu item Application Heating Functions Contains a list of heating functions. Contains a list of automatic cooking pro- Assisted Cooking grammes. Contains a list of favourite cooking pro- Favourite Programme grammes created by the user. Pyrolysis Pyrolytic cleaning.
-
Page 10: Heating Functions
10 www.electrolux.com 5.3 Heating functions Submenu for: Heating Functions Heating function Application True Fan Cooking To bake maximum on three shelf positions at the same time. When you use this function, decrease the oven temperature by 20 - 40 °C from the standard temperatures you use for Conventional Cooking . - Page 11 ENGLISH Heating function Application Au Gratin To prepare dishes such as lasagna or pota- to gratin. Also to gratinate and to brown. Dough Proving To raise the yeast dough before baking. Plate Warming To preheat a plate for serving. Preserving To preserve vegetables in glasses and liquid (e.g.
-
Page 12: Emptying The Water Tank
12 www.electrolux.com The tank can have some water 5.7 Tank Full indicator when the display shows Water re- When the display shows Water tank full , quired . Wait until the water flow you can use the steam cooking. from the water outlet valve stops. -
Page 13: Clock Functions
ENGLISH 6. CLOCK FUNCTIONS 6.1 Clock functions Symbol Function Description To set a countdown (max 2 h 30 min). This function has no effect on the operation of the appliance. You Minute Minder can also activate it when the appliance is off. Use to activate the function. -
Page 14: Automatic Programmes
14 www.electrolux.com • Applicable for all heating functions with Press again and again until the Duration or Weight Automatic. display shows Heat + Hold . Press OK to confirm. • Not applicable for heating functions When the function ends, an acoustic sig- with CT Sensor . -
Page 15: Telescopic Runners
ENGLISH the meat is at the set temperature, the Press in less than 5 sec- appliance deactivates. onds to set the core temperature. Set the oven function and, if necessa- There are two temperatures to be set: ry, the oven temperature. •... -
Page 16: Accessories For Steam Cooking
16 www.electrolux.com Put the wire shelf on the telescopic runners and carefully push them into °C the appliance. Make sure you push back the tele- scopic runners fully in the appliance before you close the oven door. Keep the installation instructions... - Page 17 ENGLISH Steam cooking in a dietary baking dish Put the food onto the steel grill in the bak- ing dish. Add some water. Put the injector (B) into the rubber hose. Put the injector (B) into the special hole in the dietary bak- ing dish.
-
Page 18: Additional Functions
18 www.electrolux.com 9. ADDITIONAL FUNCTIONS 9.1 Favourite Programme menu 9.2 Function Lock You can save your favourite settings, like The Function Lock prevents an accidental duration, temperature or heating function. change of the heating function. You can They are available in the Favourite Pro- activate the Function Lock only when the gramme menu. -
Page 19: Helpful Hints And Tips
ENGLISH Activating the function: Oven tempera- Switch-off time Activate the appliance. ture Set the heating function. 30 °C - 120 °C 12.5 h Press again and again until the 120 °C - 200 °C 8.5 h display shows Duration . Set the time. -
Page 20: Cooking Times
20 www.electrolux.com 10.2 Cooking meat and fish 10.3 Cooking times • Use a deep pan for very fatty food to Cooking times depend on the type of prevent the oven from stains that can food, its consistency, and volume. be permanent. - Page 21 ENGLISH Conventional True Fan Cook- Cooking Cooking TYPE OF time Notes DISH Shelf Temp Shelf po- Temp [min] position [°C] sition [°C] Small cakes 1, 3 and 5 140 - 30 - 45 In a baking - three levels tray Biscuits / 140 - 25 - 45...
- Page 22 22 www.electrolux.com Conventional True Fan Cook- Cooking Cooking TYPE OF time Notes DISH Shelf Temp Shelf po- Temp [min] position [°C] sition [°C] Rye bread 30 - 45 In a bread tin Bread rolls 2 (2 and 4) 25 - 40...
- Page 23 ENGLISH Conventional True Fan Cook- Cooking Cooking TYPE OF time Notes DISH Shelf Temp Shelf po- Temp [min] position [°C] sition [°C] English roast 70 - 75 On a wire shelf beef, well done Shoulder of 120 - With rind pork Shin of pork 100 -...
-
Page 24: Turbo Grilling
24 www.electrolux.com Quantity Grilling Cooking time [min] TYPE OF DISH Pieces Shelf po- Temp 1st side 2nd side sition [°C] Sausages max. 12 - 15 10 - 12 Pork chops max. 12 - 16 12 - 14 Chicken (cut in 1000 max. - Page 25 ENGLISH Veal TYPE OF Quantity Shelf posi- Temperature Time [min] DISH tion [°C] Roast veal 1 kg 160 - 180 90 - 120 Knuckle of 1.5 - 2 kg 160 - 180 120 - 150 veal Lamb TYPE OF Quantity Shelf posi- Temperature Time [min]...
- Page 26 26 www.electrolux.com Further de- TYPE OF Defrosting frosting time Notes DISH time [min] [min] Meat 1000 100 - 140 20 - 30 Turn halfway through. Meat 90 - 120 20 - 30 Turn halfway through. Trout 25 - 35 10 - 15...
- Page 27 ENGLISH 10.9 Drying Cover the oven shelves with baking parchment. VEGETABLES Shelf position TYPE OF Temperature Time [hr] DISH [°C] 1 level 2 levels Beans 60 - 70 6 - 8 Peppers 60 - 70 5 - 6 Vegetables for 60 - 70 5 - 6 soup...
-
Page 28: Pizza Setting
28 www.electrolux.com 1) Preheat the oven for 10 minutes. FLANS Cooking Shelf posi- Temp TYPE OF DISH time Notes tion [°C] [min] Vegetables filled 170 - 180 30 - 40 In a mould Lasagne 170 - 180 40 - 50... - Page 29 ENGLISH TYPE OF Shelf posi- Cooking time Temp [°C] Notes FOOD tion [min] Pizza (thin 200 - 220 15 - 25 In a baking tray crust) Pizza (with a lot 200 - 220 20 - 30 In a baking tray of topping) Mini pizza 200 - 220...
- Page 30 30 www.electrolux.com 10.11 Cooking in the dietary baking dish with True Fan + Steam VEGETABLES Cooking time TYPE OF DISH Shelf position Temperature [°C] [min] Broccoli florets 20 - 25 Aubergine 15 - 20 Cauliflower florets 25 - 30 Tomatoes...
-
Page 31: Care And Cleaning
ENGLISH Cooking time TYPE OF DISH Shelf position Temperature [°C] [min] Polenta 40 - 45 10.12 Core temperature sensor table TYPE OF DISH Core temperature [°C] Roast veal 75 - 80 Veal knuckle 85 - 90 English roast beef, rare 45 - 50 English roast beef, medium 60 - 65... -
Page 32: Shelf Supports
32 www.electrolux.com 11.1 Shelf supports You can remove the shelf supports to clean the side walls. Removing the shelf supports Pull the front of the shelf support away from the side wall. Pull the rear end of the shelf support... -
Page 33: Oven Lamp
ENGLISH Activate the appliance and choose Cleaning the water drawer and the the Pyrolysis function in the main steam generator: menu. Press OK to confirm. Put the water and vinegar mixture Set the length for the procedure: (approximately 250 ml) through the water drawer into the steam genera- –... -
Page 34: Cleaning The Oven Door
34 www.electrolux.com Rinse the water tank and clean the cause it decreases the quantity of remaining lime residue in the oven cleaning procedures. with a cloth. • Tap water - you can use it if your do- Clean the drain pipe by hand in warm mestic water supply has purifier or wa- water with soap. - Page 35 ENGLISH Hold the pushed component with one hand. Use a screwdriver with the other hand to lift and turn the right side hinge lever. Identify the hinge to the left side of the door. Lift and turn the levers on the two hinges.
- Page 36 36 www.electrolux.com Close the oven door to the first open- ing position (halfway). Then pull for- ward and remove the door from its seat. Put the door on a soft cloth on a sta- ble surface. Release the locking system to re- move the glass panels.
-
Page 37: Installing The Door And The Glass Panels
ENGLISH Carefully lift (step 1) and remove (step 2) the glass panels one by one. Start from the top panel. Clean the glass panels with water and soap. Dry the glass panels care- fully. Installing the door and the glass panels When the cleaning is completed, install the glass panels and the oven door. - Page 38 38 www.electrolux.com Problem Possible cause Remedy The appliance does The appliance is deactiva- Activate the appliance. not heat up. ted. The appliance does The clock is not set. Set the clock. not heat up. The appliance does The necessary settings are Make sure that the settings not heat up.
-
Page 39: Technical Data
ENGLISH If you cannot find a solution to the prob- The necessary data for the service centre lem yourself, contact your dealer or the is on the rating plate. The rating plate is service centre. on the front frame of the appliance cavity. We recommend that you write the data here: Model (MOD.) ......... -
Page 40: Environment Concerns
40 www.electrolux.com RRF, H05 VV-F, H05 V2V2-F (T90), H05 BB-F. For the section of the cable refer to the total power (on the rating plate) and to the table: Section of the ca- Total power maximum 1380 3 x 0.75 mm²... - Page 41 ENGLISH...
- Page 42 42 www.electrolux.com...
- Page 43 ENGLISH...
- Page 44 www.electrolux.com/shop...
Need help?
Do you have a question about the EOC6851 and is the answer not in the manual?
Questions and answers