Table of Contents
Advertisement
Quick Links
Advertisement
Table of Contents

Subscribe to Our Youtube Channel
Related Manuals for Lilin NVR2400


Summary of Contents for Lilin NVR2400
- Page 1 NVR1400 / NVR2400...
- Page 2 LILIN NVR Start Guide Page 1 Introduction LILIN’s latest NVR 1400/2400 is a 16-Channel standalone network video recorder solution for managing IP cameras and systems. The embedded HDMI (VGA) engine supports adaptive motion refinement technology, which provides a maximum resolution of 1080p. The NVR can be easily installed in all environments through the...
-
Page 3: Trademarks And Registered Trademarks
Page 2 Supports one eSATA storage device (two for NVR 2400), capacity up to 16TB (32TB for NVR 2400) Supports IPScan utility and LILIN Navigator Trademarks and registered trademarks Microsoft, Windows, Internet Explorer are registered trademarks of Microsoft Corporation in the U.S and/or other countries. -
Page 4: Front View
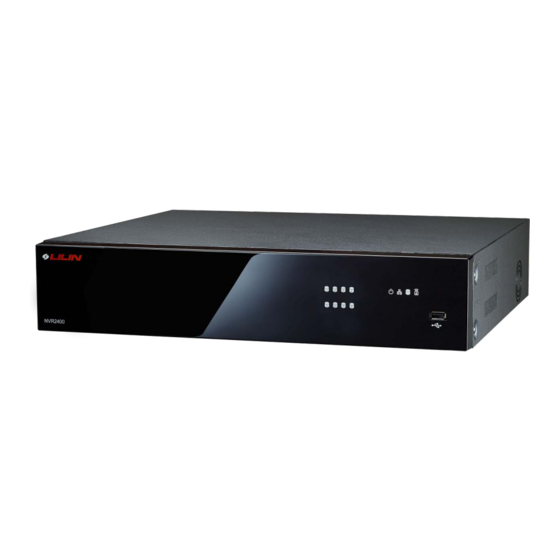
LILIN NVR Start Guide Page 3 Front View NVR 1400 1. Power LED (Yellow) 4. Alarm LED (Red, blinking) NVR power on/off indicator Indicator of triggered alarms 2. LAN LED (Green) 5. USB 2.0 port LAN activity indicator USB flash drive/DVD recorder 3. -
Page 5: Rear View
LILIN NVR Start Guide Page 4 Rear View NVR 1400 ○ ○ ○ ○ ○ ○ ○ ○ ○ ○ ○ ○ ○ 1. RJ-45 connector (1000 Mbps) 8. Secondary power plug 2. VGA connector 9. Keyboard in 3. Audio connector 10. - Page 6 LILIN NVR Start Guide Page 5 NVR1400 Installation Instruction Hard Drive Installation Remove the upper casing and loosen the screws on the both sides of the hard drive bracket to remove it. Install hard drives and tighten the hard drive screws as instructed by the image below.
- Page 7 LILIN NVR Start Guide Page 6 NVR2400 Installation Instruction Hard Drive Installation Remove the upper casing and loosen the screws on the both sides of the hard drive bracket to remove it. Install hard drives and tighten the hard drive screws as instructed by the image below.
- Page 8 LILIN NVR Start Guide Page 7 Secure the other hard drive bracket, and the hard drive cables are, from right to left, H1, H2, H3, and H4, respectively (as shown in the image below). Properly connect the SATA cables and power cables to the connectors following the instruction: H1 ...
-
Page 9: Remote Control
LILIN NVR Start Guide Page 8 Remote control Keys and functions of the remote control are described as followed Function Power switch Start/stop recording MENU Setup menu Escape/exit/stop PIP (SHIFT) Switch between split and full screen ZOOM Digital video zoom... - Page 10 LILIN NVR Start Guide Page 9 Touchscreen Swipe to Navigate Pinch to Zoom Pinch to zoom Put your thumb and index finger together and put them on your touchscreen. Glide them apart to zoom in, and glide them toward each other to zoom out.
- Page 11 LILIN NVR Start Guide Page 10 First Time Using LILIN NVR When you first access the NVR, you will see Setup Wizard on the screen, which provides you the basis configurations for the NVR, including language, password, time/time zone, storage, network, P2P, and camera. Click Next to go through the steps, and be sure to check No longer use Setup Wizard if you don’t want the wizard to...
- Page 12 LILIN NVR Start Guide Page 11 this setting later. 0.00 / 1000 (100) Mbps: To the left of the slash is the combined transmission rate of all channels, and to the right your network speed. HDD 1 (2) Shows the current number of hard drive being used for recording and the storage capacity used.
- Page 13 LILIN NVR Start Guide Page 12 Click the gear icon at the upper-right of the screen to change the NVR display language. Click to pause the real-time video, and the icon will be highlighted . Click to enter the following screen:...
- Page 14 LILIN NVR Start Guide Page 13 Press the drop-down menu at the top to sort the alarm events by date or channel (as shown in the image below). Double-click an event of your choosing, or choose an event before clicking Playback at the upper-right corner of the screen to playback or backup the selected video clip.
- Page 15 LILIN NVR Start Guide Page 14 Click to enter the following screen: Playback You can find video clips by year, month, day, hour, and minute. From the upper timeline drag and select the time period you want to play recorded video or alarm video to enter...
- Page 16 LILIN NVR Start Guide Page 15 Step Forward, and Pause. Click Rewind and Fast Forward multiple times to adjust the speed of respective actions (up to 64x). : Click to return to the Playback / Backup screen. : Click to return to live video.
- Page 17 You may determine to backup the video to DVD, USB storage device, or the temporary space of the NVR. NVR System Settings After you are familiar with the preliminary control of the LILIN NVR, we would like to introduce you to the system settings. First, click System in the left pane, where you are allowed to adjust the configurations of the NVR.
- Page 18 LILIN NVR Start Guide Page 17 Last Boot Time The last time the system is rebooted. Time Date/Time Set the date/time of the NVR. Date Format Modify the date format. Time OSD Switch on/off the time to be displayed on the screen.
- Page 19 LILIN NVR Start Guide Page 18 User LILIN NVR supports up to 15 sets of individual user settings (including administrator, operator, and guest), to which you can assign different access rights. User Enter the name of the user (this field of administrator, operator, and guest cannot be changed).
- Page 20 LILIN NVR Start Guide Page 19 Storage HDD INFO. In HDD INFO., you will see the information of the NVR’s built-in RAID including the record start time, record end time, and HDD usage, etc. You can create or delete any RAID or adjust the settings of your eSATA devices.
- Page 21 LILIN NVR Start Guide Page 20 USB INFO. Connect a USB device (flash drive or hard drive) to the NVR, and then check the one you want to format under this page, then click Format. Event SYSTEM The search field in this page allows you to search for specific event reports at different time and of different content.
-
Page 22: Maintenance
LILIN NVR Start Guide Page 21 Maintenance Firmware Update Choose a firmware file and click Update to proceed firmware update. Export Settings Click Export to save system settings as a configuration file (in XML format). Import Settings Insert a configuration fil (in XML format) to a USB flash drive, then press Import to update the settings. - Page 23 LILIN NVR Start Guide Page 22 General Enter the required information in the fields: IP Mode Select the connection type of the NVR from Static, DHCP, and PPPoE. IP Address Enter the IP address you want to use, and press IP Test if necessary.
- Page 24 LILIN NVR Start Guide Page 23 This is the MAC address of your NVR. PPPoE Account/Password If you choose to connect through PPPoE, enter the account name and password provided by your ISP here. PPPoE IP The dynamic or static IP assigned to the NVR by the ISP will be displayed here.
- Page 25 Signal Strength: The signal strength of your connection. When enabled, a QR code will appear on the screen. Access the QR code to complete the required registration. E-Mail When an alarm is triggered, LILIN NVR can automatically send e-mail notifications to...
- Page 26 LILIN NVR Start Guide Page 25 the recipients you designated. The setting options are described below: Send E-Mail Check the box to enable sending e-mail notifications when an alarms is triggered. E-Mail List The list shows all saved e-mail addresses.
- Page 27 LILIN NVR Start Guide Page 26 When an alarm is triggered, LILIN NVR can automatically send snapshots to the FTP server you designated. The setting options are described below: FTP Server Enter the IP address of the FTP server. Port Enter the port of the FTP server.
- Page 28 LILIN NVR Start Guide Page 27 Check to send alarm notification to the designated FTP address. Alarm FTP Send Dwell Set the frequency of alarm notification sent to the FTP. Camera Check the cameras that you want to send notifications to the FTP when an alarm is triggered, and specify the folder name where the images are saved.
- Page 29 Choose the time interval you want the system to check DDNS connection. Note: The DDNS feature requires Internet connection. Other LILIN NVR also supports other protocols such as UPnP and SDDP, and related configurations can be modified in the OTHER tab. The setting options are described below: UPnP Device Name Your device name shown on the UPnP network.
- Page 30 LILIN NVR Start Guide Page 29 Your device name displayed in Network Places. IE Default Live View Choose the default streaming type (H.264 or MJPEG) when streaming using Internet Explorer. Reset on Ethernet Error Reset the network card when an Ethernet error is detected, and leave a record entry in the event table.
- Page 31 LILIN NVR Start Guide Page 30 Camera Name Enter the camera name to be displayed on Live and Play screens. Camera Source Select the video source of the channel. IP Address Enter the IP address of the camera you want to connect to, and press Dev. Info. to check ONVIF capability.
- Page 32 LILIN NVR Start Guide Page 31 WS Discovery Click WS Discovery to scan for connected devices on the network. Click Cancel to stop scanning. Auto Adjust Automatically assign IP for detected cameras. Snap Show snapshot thumbnails for all the cameras.
- Page 33 LILIN NVR Start Guide Page 32 Live The LIVE tab displays the streams of all connected cameras. With the control buttons and joystick you can control the movement of the selected camera. The settings options are as followed: Camera The number of the selected camera.
- Page 34 LILIN NVR Start Guide Page 33 Play In this tab, you can choose a specific camera and select the date/time information to play the recorded video. You can also display different playback contents by selecting Day List, Motion Event, Sensor Event, and Manual Event.
- Page 35 LILIN NVR Start Guide Page 34 General Record Mode Switch on/off scheduled recording. Audio Switch on/off audio recording. Post-alarm Record Enable to start recording after an event takes place. Set the time period (second) for the NVR to continue recording after the alarm is triggered.
-
Page 36: Alarm Configurations
LILIN NVR Start Guide Page 35 your selection of recording type to all dates and time. Note: click Apply for the changes to take effect. Advance System Recording Mode Choose between Manual or Schedule recording. The Manual mode will continue recording regardless of the schedule, while the Schedule mode performs continuous, alarm, and no recording at the designated time period. -
Page 37: Motion Area
LILIN NVR Start Guide Page 36 Alarm Input Type Set the alarm sensor to Normally Open (NO), Normally Closed (NC), or IP Camera. The last selection will trigger the alarm only when receiving the signal from IP cameras. Alarm Time (DO/Event) Set the time period to activate the relay circuit when an alarm is triggered. -
Page 38: Display Configurations
LILIN NVR Start Guide Page 37 control keys will appear at the bottom-right corner on the Live screen. Alarm LED (Front Panel) When set to On, the LED on the front panel of the NVR will start blinking when an alarm is triggered. - Page 39 LILIN NVR Start Guide Page 38 Advance In this page, you can adjust the NVR’s output of brightness, contrast, saturation, and gain. Click Load Default to restore to the factory default settings. Sequence You are allowed to view videos of multiple cameras in sequence. Check the cameras you want to monitor and choose the number of split screens in the drop-down menu in Sequence Mode.
- Page 40 LILIN NVR Start Guide Page 39 Control ID Choose a corresponding device ID to control the camera. Click Preset and the below controls will appear at the bottom of the screen: HTTP or ONVIF is selected as the Transfer Mode Dwell Determine the dwell time of the preset point.
- Page 41 LILIN NVR Start Guide Page 40 Fish Eye is selected as the Transfer Mode Dwell Determine the dwell time of the preset point. Speed Determine the moving speed to the next preset points. Clear All Presets Clear all configured preset points.
- Page 42 LILIN NVR Start Guide Page 41 NVR Cascade This tab allows you to cascade multiple NVRs or adjust relevant settings. If you own a 931-D keyboard, you can use it for controlling the NVR cascade. If you have to NVR systems, which are assigned with two different IP addresses, you should enter the IP address of the second system to the fourth column in the cascade table.
- Page 43 Load the settings from the USB device connected to the NVR. Metadata General LILIN NVR supports various external devices such as GPS or POS, and in this page you are allowed the change the settings for these devices. The setting options are described as followed: Serial Input Select the USB port to which your external device is connected.
- Page 44 LILIN NVR Start Guide Page 43 Server Command Port Enter the command port of the device. Emulated Mode Choose an emulation type from the drop-down menu (see image below). Encoding Mode Choose between ASCII and UTF-8. Baud Rate Select an option suitable for your device.
- Page 45 LILIN NVR Start Guide Page 44 Event This tab displays a history of detected events. You are allowed to search for events based on time, channel, or content. Other Smartphone This tab provides settings for sending alarm notifications to your smartphone that is paired with the NVR.
- Page 46 LILIN NVR Start Guide Page 45 LILIN NVR supports IVS-enabled cameras. Connect an IVS-enabled IP camera to the NVR and turn on the IVS function (refer to the user manual of your camera). When an object enters and leaves a designated area in the camera view, the NVR will record the time of entrance/exit and the number of entrance/exit in the database.
- Page 47 LILIN NVR Start Guide Page 46 Appendix DDNS and PPPoE Network Settings One of the advantages of dopting DDNS and PPPoE services is to save the cost of renting a global IP address. When you power on a camera with a video server and connect to the Internet with the PPPoE service, the camera asks your ISP for a dynamic global IP address.
-
Page 48: Restore To Factory Default
32GB SDHC For iPhone Users Tap App Store, and search and download LILINViewer by Merit LILIN Ent. Co., Ltd. Or, you can scan the QR Code below. Open LILINViewer, then choose tab Groupings. Select a group, choose a camera type, and add a camera. -
Page 49: For Android Users
After you enter the above information, tap Done to save the changes, and the live view of your IP camera or DVR will appear. For Android Users Tap Play Store to download LILINViewer by Merit LILIN, or scan the following QR code. Open LILINViewer, then choose tab Groupings. Select a group, choose a camera type, and add a camera.
Need help?
Do you have a question about the NVR2400 and is the answer not in the manual?
Questions and answers