Table of Contents
Advertisement
Advertisement
Table of Contents

Related Manuals for Lilin DVR508


Summary of Contents for Lilin DVR508
- Page 1 8/16CH DIGITAL VIDEO RECORDER DVR508/508D/516/516D INSTRUCTION MANUAL...
- Page 2 Summary Professional DVR series are designed to meet the demands for 8/16-channel real-time recording systems. Frame rate, video quality, and resolution can be adjusted for each channel to meet recording requirement. VGA engines are built-in 3D intellectual motion adoptive refinement with vivid image enhancement algorithm to provide best video quality. Professional DVR series provide various backup features include Slim DVD/RW, USB DVD/RW, USB flash disk, HTTP download, and Backup Manager FTP for multiple DVRs’...
-
Page 3: Trademarks And Registered Trademarks
Trademarks and registered trademarks Microsoft, Windows 2000, Windows XP, Internet Explorer are registered trademarks of Microsoft Corporation in the U.S. and/or other countries. Adobe and Adobe PDF are registered trademarks of Adobe Systems Incorporated in the U.S. and/or other countries. JavaScript and all Java-based trademarks and logos are trademarks or registered trademarks of Sun Microsystems, Inc. -
Page 4: Table Of Contents
TABLE OF CONTENTS CHAPTER 1. SYSTEM OVERVIEWS ..................6 Chapter 1-1. Front Panel ....................6 Chapter 1-2. Rear View ..................... 8 Chapter 1-3. System LED Status Panel ................9 Chapter 1-4. Remote controller ..................10 Chapter 1-5. Jog & Shuttle ....................10 Chapter 1-6. - Page 5 Chapter 6-2. Camera Setup .................... 19 Chapter 6-2-1. Camera Name .................. 19 Chapter 6-2-2. Camera Disable (Secured Recording Channel) ....... 20 Chapter 6-2-3. Video Setup ..................20 Chapter 6-3. Monitor Setup ..................... 20 Chapter 6-3-1. Video Advance ................... 21 Chapter 6-3-2. Output Resolution ................22 Chapter 6-3-3.
- Page 6 Chapter 6-6-4. LOG View ..................29 Chapter 6-6-5. Factory Reset ................... 29 Chapter 6-6-6. DVR ID....................29 Chapter 6-6-7. Video System..................29 Chapter 6-6-8. Firmware Update ................29 Chapter 6-6-9. Language ..................30 Chapter 6-6-10. Live Audio ..................30 Chapter 6-7. Network ...................... 30 Chapter 6-7-1.
- Page 7 CHAPTER 8. NETWORK ...................... 39 Chapter 8-1-1. Configuration ..................39 Chapter 8-1-2. Internet Ports ..................39 Chapter 8-2. Access the DVR via Internet Browser ............40 Chapter 8-2-1. Before Using Internet ................ 40 Chapter 8-2-2. Logon ....................41 Chapter 8-2-3. Hyper Link Panel ................41 Chapter 8-2-4.
-
Page 8: Chapter 1. System Overviews
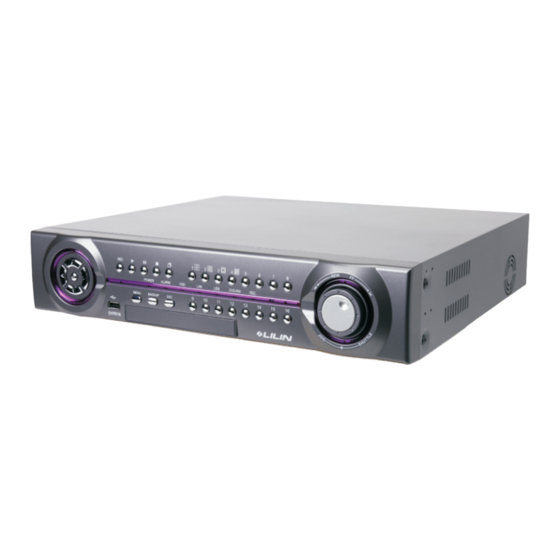
CHAPTER 1. SYSTEM OVERVIEWS Chapter 1-1. Front Panel [DVR508] 1. Left button 12. Shuttle ring a. Move cursor left at menu setup. a. Fast forward video at playback mode. b. Pan left at PTZ control mode. b. Instant video FR or instant event list c. - Page 9 [DVR516] 1. Left button 11. Jog dial a. Move cursor left at menu setup. a. Play recorded image frame by frame b. Pan left at PTZ control mode. at playback mode. c. Decrease a value. b. Perform zoom in and out on a PTZ 2.
-
Page 10: Chapter 1-2. Rear View
Chapter 1-2. Rear View [DVR508] 1. Main monitor 11. RJ-45 Keyboard-in 2. Camera inputs Connected from previous DVR’s keyboard Analog camera BNC 8-inputs output in daisy chain. 3. Looping—camera looping 12. Alarm I/Os 4. Power switch Alarm input switches, 1 N/O alarm output, 5. -
Page 11: Chapter 1-3. System Led Status Panel
[DVR516] 1. Main monitor 11. RJ-45 Keyboard-in 2. Camera inputs Connected from previous DVR’s keyboard Analog camera BNC 16-inputs output in daisy chain. 3. Looping—camera looping 12. Alarm I/Os 4. Power switch Alarm input switches, 1 N/O alarm output, 5. External IR receiver (RCA) and 1 N/C alarm output. -
Page 12: Chapter 1-4. Remote Controller
Chapter 1-4. Remote controller The button arrangement of the remote controller is designed for easy-to-use purposes. Buttons are separated in regions based on their features including DVR operational keys, pan, tilt, and zoom camera device (PTZ) keys, numerical keys, and PTZ buttons. Button Description Button... -
Page 13: Chapter 1-6. Mouse System
Instant rewind & event list modes—Turning shuttle ring left invokes Instant Rewind feature. Instant Rewind rewinds and plays the recorded video from the moment of the operation in backward. It allows that the operator can instantly review the video few seconds or few minutes ago. -
Page 14: Chapter 1-7. Active Camera
Chapter 1-7. Active Camera Active camera is shown as checked at camera name/number. Once a camera is activated, the camera can be controlled for PTZ operation or for camera audio. Moving the active camera sequentially, one can simply press the Enter button on the remote controller, the keypad, or keyboard(s). -
Page 15: Chapter 2. Dvr Operations
CHAPTER 2. DVR OPERATIONS Most of the time, DVR is operated at the surveillance/live mode. In live monitoring mode, the information of screen layout and symbols are described in this section. SCREEN LAYOUT Recording indicator ¨ç REC 2007/06/22 11:03:50 HDD 9% Date ¨è... -
Page 16: Chapter 3. Ptz Control
CHAPTER 3. PTZ CONTROL PTZ device can be controlled in live monitoring mode and PTZ setup mode via the keypad and/or the remote controller. The rest of the chapter describes the ways of controlling PTZ devices using the keypad and a remove controller. Chapter 3-1. -
Page 17: Chapter 4. Recording
CHAPTER 4. RECORDING Chapter 4-1. Start Recording The DVR automatically performs recording task after power on. Press REC button on the keypad or the remote controller that it can change the recording mode from schedule recording to manual recording. Press REC button again. DVR returns back to schedule recording again. -
Page 18: Chapter 5. Playback
CHAPTER 5. PLAYBACK To playback, please press Play button on the remote controller, a keyboard, or the keypad. A playback message box shows up for searching video clips. The details are described in the following sections: PLAYBACK TIME SEARCH EVENT SEARCH RECORD SEARCH DATE SEARCH Chapter 5-1. -
Page 19: Chapter 5-3. Rec Search
To select an event list item, press Up or Down button. Press Enter button to play the video clips Press Shuttle Left or << (FR) for previous page. Press Shuttle Left or >> (FF) for next page on remote controller or keyboard. Chapter 5-3. - Page 20 FR: Press Left button, shuttle right left on the front panel, or FR key on the remote controller to fast rewind the playing video. The speed of fast rewinding is range from 2X ~ 64X of the original playback speed. PAUSE &...
-
Page 21: Chapter 6. Menu System
CHAPTER 6. MENU SYSTEM Chapter 6-1. Setup Menu Setup menu contains menu settings for camera, monitor, record, alarm, system, network, PTZ, and backup. The details of all the setup menu items are described in the rest of the chapters. Record Chapter 6-2. -
Page 22: Chapter 6-2-2. Camera Disable (Secured Recording Channel)
Visual Keyboard INSERT: CAMERA Back Cursor ‘ Enter < > Page SPACE BAR Chapter 6-2-2. Camera Disable (Secured Recording Channel) Channel enable feature can disable the live video of a camera. The channel can still perform video recording. For privacy or security considerations, irrelevant people may be prohibited to see the live video. -
Page 23: Chapter 6-3-1. Video Advance
Chapter 6-3-1. Video Advance To setup advanced LCD/VGA video setting, please following this section. VIDEO ADVANCE ADAPTIVE DEINTERLANCE EDGE PRESERVING MOVING OBJECT CORRECTION FILE MODE SHARPNESS ENHANCER Each of the VGA settings is described in the following table: Adaptive de-interlacing Edge preserving Moving object correction Film mode... -
Page 24: Chapter 6-3-2. Output Resolution
Chapter 6-3-2. Output Resolution VGA output resolutions can be set at this option. Chapter 6-3-3. Backlight Saving DVR/NVR is 24 hours non-stop running. LCD panel consumes the most energy to a typical PC. The following figure shows LCD panel consumption rate. Backlight saving mode is to turn the LCD backlight darker. -
Page 25: Chapter 6-3-9. Spot Sequence Time
Chapter 6-3-9. Spot Sequence Time To specify Spot/Quad sequence time, please set this option. Chapter 6-4. Record Setup Record setup menu can setup features related to recording features such as recording quality, frame rate, recording mode, audio selection, alarm recording, recording resolution, group of pictures (GOP), schedule table, HDD overwritten, and limited recording. -
Page 26: Chapter 6-4-6. Resolution
Chapter 6-4-6. Resolution The DVR can provide full D1 or CIF recording solutions. The default setting is at full D1 recording. To change recording resolution, please press Left or Right button. Chapter 6-4-7. Schedule Once the schedule has been setup, the DVR can record camera video based on the schedule table. -
Page 27: Chapter 6-5-1. Alarm Input Type
ALARM CAMERA SELECT CH01 ALARM INPUT TYPE ALARM ENABLE MOTION SENSITIVITY MOTION AREA SET NORMAL MOTION BUZZER TIME 05 SEC ALARM TIME 05 SEC BUZZER BUTTON SOUND Chapter 6-5-1. Alarm Input Type The DVRs’ alarm inputs can be configured as normal open (N/O) or normal close (N/C). The alarm input is one-to-one mapped to a camera respectively. -
Page 28: Chapter 6-5-5. Alarm Time
Chapter 6-5-5. Alarm Time Motion alarms and external alarm inputs can trigger the buzzer alarm. Buzzer time is adjustable from 0 to 99 sec. Press Left or Right button on Buzzer Time to adjust the time setting. Chapter 6-5-6. SMTP Setup DVR is capable of sending alarm JPEG snapshots to email account if motion or alarm gets triggered. -
Page 29: Chapter 6-6-2. Hdd Information
DATE / TIME TIME 18:16:17 DATE 2005 / 06 / 30 FORMAT YYYY / MM / DD DISPLAY TIME SYNC DISAPLY POS. Time Sync Time Sync feature allows the DVR to synchronize its timer system to PIH-931D keyboard. To synchronize DVR’s timers to a PIH-931D keyboard, please set this option to Keyboard. PIH-931D keyboard starts to synchronize every 15 minutes. -
Page 30: Chapter 6-6-3. Password/Access
HDD Format To format HDDs, please select HDD Format menu item. Password is required for preventing unauthorized access. A warning message also gets prompted for formatting verification. Please be alerted to this operation. It may erase not only event list data but also recorded video data. -
Page 31: Chapter 6-6-4. Log View
Chapter 6-6-4. LOG View Operational log, video lose event, abnormal power off, and other DVR events can be reviewed by LOG View menu item. Chapter 6-6-5. Factory Reset A user may want to restore manufacturing default settings. A confirm message shows up for final verification. -
Page 32: Chapter 6-6-9. Language
Prepare Firmware To prepare firmware update, please create a directory, firmware, in the USB flash disk. The USB flash disk should contain file system FAT-16 or FAT-32. Please visit the web site at www.meritlilin.com to download the latest firmware and save the file in the directory mentioned above. -
Page 33: Chapter 6-7-1. Ip Mode
NETWORK IP MODE STATIC IP ADDRESS 192 . 168 . 0 . 111 SUBNET MASK 255 . 255 . 255 . 0 GATWAY 192 . 168 . 0 . 111 HTTP PORT VIDEO PORT 3100 FTP PORT NUMBER DDNS SETUP SMTP SETUP MASTER DVR SETUP SEND TABLE TO MDVR... -
Page 34: Chapter 6-7-5. Pppoe Setup
Chapter 6-7-5. PPPoE Setup To use ADSL modem¡Aplease enter the “ username” and “ password” for dialing the ADSL modem connection successfully¡C Chapter 6-7-6. MAC Display the MAC address of the DVR. Chapter 6-8. PTZ Setup The DVR can control RS-485 PTZ or IP PTZ. Using DVR’s keypad or the remote controller can access all these cameras. -
Page 35: Chapter 6-8-3. Preset Setup
Model Baud Rate Number of Bytes PIH-7000 (MLP1) 9600 PIH-7600 (MLP1) 9600 PIH-7625-3 (MLP1) 9600 PIH-7625-7 (MLP2) 9600 PIH-7622-7 (MLP2) 9600 Pelco D 2400~9600 None Pelco P 2400~9600 None Chapter 6-8-3. Preset Setup A preset of a PTZ camera can be configured for manipulation during live monitoring. Panning, tilting, zooming, calling presets, auto panning, and other PTZ features provided by a PTZ camera can also be accessed during live monitoring mode. -
Page 36: Chapter 6-8-8. Iris & Auto Iris
Chapter 6-8-8. IRIS & Auto IRIS To adjust IRIS, please press Left or Right button on IRIS option. For auto IRIS, press Enter on Auto IRIS option. Chapter 6-8-9. Focus & Auto Focus To adjust focus, please press Left or Right button on Focus option. For auto focus, press Enter on Auto Focus option. -
Page 37: Chapter 6-9-1. Ftp Download
To perform backup, please press Left or Right to select backup device type. Press Enter button on Channel option to select backup channel(s). Once the channel(s) has been selected, enter start backup and end backup time. The video size will be calculated in Total field. -
Page 38: Chapter 7. File Playback
CHAPTER 7. FILE PLAYBACK To play a backup file from a PC, a user can export DVR’s video to H.264 file. To review multiple channels playback, Backup Manager (Backupman.exe) built-in in the DVR can be used. Chapter 7-1. Play H.264 Files The DVR can export H.264 file to (1) USB flash disk, (2) DVD/RW, (3) File for FTP download (4) HTTP download. -
Page 39: Chapter 7-3. Manage Dvrs Download
Chapter 7-3. Manage DVRs Download To manage multiple DVRs file download, please use Backup Manager to download files from DVRs. To perform DVRs file download, please first click on File->Add DVR. It prompts Add DVR dialog box. Chapter 7-4. Connect to DVR’s FTP Service. After adding a DVR profile into the Tree View, please click on the Profile and click on Connect button. -
Page 40: Chapter 7-5. Start To Download Dvr's Files
Chapter 7-5. Start to Download DVR’s Files. Once a DVR is connected, a list of time stamps of the DVR gets listed in the treeview. Select one of the stamp and click on Download button to download the files. Chapter 7-6. Play local DVR’s files. Click on the time stamp of the local driver, the file clips can by playback by clicking on the Play button. -
Page 41: Chapter 8. Network
To setup IP address, a user can use IPScan utility to scan all the DVRs within a LAN. This powerful tool can help the user to monitor, to find, and to set IP configuration for all Merit LILIN’s IP-based products. Note: The default IP address of the DVR is 192.168.0.111... -
Page 42: Chapter 8-2. Access The Dvr Via Internet Browser
Chapter 8-2. Access the DVR via Internet Browser To access the DVR, a user can use Internet browser to get live and stored video via Internet. The DVR’s web interface also provides features of PTZ access, split window display, and system configurations. -
Page 43: Chapter 8-2-2. Logon
Chapter 8-2-2. Logon To logon the DVR, please type in the IP address in the HTTP address box via Internet browser. By default, type “192.168.1.171” in the HTTP address box to access the logon page. Use default password “1111” for Administrator, password “2222” for Operator, and password “3333”... -
Page 44: Chapter 8-2-5. Save Jpeg File
To perform playback operation, please click on Playback hyperlink. A playback dialog box shows up. Event search list, record search list, and time search are all integrated in the dialog box on the hyper link panel. Normal Record and Event Lists Double click on the record list item or event list item for playback. -
Page 45: Chapter 8-2-6. Network Audio
Chapter 8-2-6. Network Audio The DVR can provide network audio monitoring for both live and playback video. To activate network audio, please open a camera’s video in full screen on Video Display Control. It can deliver network audio to a PC for both live and playback video. Chapter 8-3. -
Page 46: Chapter 8-3-3. Recording Schedule Table
Chapter 8-3-3. Recording Schedule Table A user can setup record schedule table via Internet, to setup scheduling table, please specify day and time with the recording mode. The user can also use Apply Chapter 8-3-4. Alarm Setting Buzzer Enable—Enable/disable DVR buzzer Motion Enable—Enable/disable motion detection Motion Tracer—Enable/disable motion trace Alarm Input Type—Set alarm input as NO/NC or disable... -
Page 47: Chapter 8-3-6. Network Setting
Chapter 8-3-6. Network Setting IP Addres.s—DVR’s IP address Subnet Mask—Subnet mask Gateway IP Address—Router/Gateway IP address PPPoE account—PPPoE protocol account name PPPoE password—PPPoE password Video Port—The DVR’s video port HTTP Port—HTML port number Chapter 8-3-7. System Setting MAC Address: MAC address of the DVR Firmware: firmware version of the DVR DVR/485 ID: Addressable DVR ID for multiple DVRs remote control using remote controller and RS-485 keyboard. -
Page 48: Chapter 8-3-7-2. User Setting
Chapter 8-3-7-2. User Setting There are three levels (admin, operator and guest) of user authentication allowed in the DVR. To change password, please specify the old password, new password, and confirm password. DVR User Manual... -
Page 49: Chapter 8-3-7-3. System Status
Chapter 8-3-7-3. System Status Primary Master HDD—HDD detecting status of primary master IDE channel for the DVR Primary Slave HDD—HDD detecting status of primary slave IDE channel for the DVR Secondary Master HDD—HDD detecting status of secondary maser IDE channel for the DVR Secondary Slave HDD—HDD detecting status of secondary slave IDE channel for the DVR HDD Recording Start—Start recording time of the DVR HDD Recording End-End recording time of the DVR... -
Page 50: Chapter 8-3-7-4. Firmware Update
Chapter 8-3-7-4. Firmware update This DVR is allowed to perform firmware upgrade via network. After DVR receives the firmware, it starts to perform firmware upgrade automatically. After finishing the firmware update, HTML page gets reload. The user can then start to operator the DVR. To perform network firmware update, please click on Browse button and locate the firmware. -
Page 51: Appendix
APPENDIX Appendix A. 8-Ch and 16-CH DVR Alarm I/Os and RS485 for PTZ Pin 1 Alarm input 1 Pin 2 Alarm input 2 Pin 3 Alarm input 3 Pin 4 Alarm input 4 Pin 5 Alarm input 5 Pin 6 Alarm input 6 Pin 7 Alarm input 7... -
Page 52: Appendix C. Hard Disk Drive Support List
Appendix C. Hard Disk Drive Support List Model HDD Size WD5000AVDS 500GB WD5000AVVS 500GB WD10EVDS WD3200AVVS 320GB WD2500AVVS 250GB WD20EVDS WD10EURS-630AB1 WD15EURS-63S48Y0 1.5TB WD20EURS-63S48Y0 ST3500418AS 500GB Appendix D. Supported External USB-DVD/RW Manufacturer Model SONY DRX-S30U-W Lite-On eSAU108 Lite-On eTAU108 Lite-On eHAU424-01 Brand Specification... -
Page 53: Appendix F. Hard Disk Recording Table
Appendix F. Hard Disk Recording Table Approximate recording days and hours can also be found at Menu->System->HDD Info. Table 1. DVR508/ DVR508D Recording Quality Highest High Standard Picture KB/Pic KB/Pic KB/Pic KB/Pic size Days Days Days Days Days Days Days... - Page 54 Table 3. DVR516/ DVR516D Recording Quality Highest High Standard Picture KB/Pic KB/Pic KB/Pic KB/Pic size Days Days Days Days Days Days Days Days 1000 Days Days Days Days 2000 Days Days Days Days Note: #1. Recording frame rate is 30 FPS * 16-Ch at CIF resolution. #2.
-
Page 55: Specification
External alarm, video loss, stop recording, power recovering, motion detection, schedule, logon, HDD format Email Alarm notification with JPEG attachments Accessories Remote controller addressable up to 255 DVRs P/T/Z protocol LILIN MLP2 and Pelco RS-485 Keyboards PIH-931D keyboard IR receiver Extra IR extension connector RS-485/RS-232 RS-485 keyboard connector * 2 , 12V output, RS-485 PTZ output * 1 Jog &... - Page 56 MERIT LILIN ENT. CO., LTD http://www.meritlilin.com...
Need help?
Do you have a question about the DVR508 and is the answer not in the manual?
Questions and answers