Advertisement
Quick Links
Operator's Manual
™
MAX
sa
Register your machine:
www.lincolnelectric.com/register
Authorized Service and Distributor Locator:
www.lincolnelectric.com/locator
Save for future reference
Date Purchased
Code: (ex: 10859)
Serial: (ex: U1060512345)
IM10232
| Issue D ate Mar-15
© Lincoln Global, Inc. All Rights Reserved.
10 CONTROLLER
For use with machines having Code Numbers:
12416
Advertisement

Related Manuals for Lincoln Electric MAXsa 10


Summary of Contents for Lincoln Electric MAXsa 10
- Page 1 Operator’s Manual ™ 10 CONTROLLER For use with machines having Code Numbers: 12416 Register your machine: www.lincolnelectric.com/register Authorized Service and Distributor Locator: www.lincolnelectric.com/locator Save for future reference Date Purchased Code: (ex: 10859) Serial: (ex: U1060512345) IM10232 | Issue D ate Mar-15 ©...
- Page 2 THANK YOU FOR SELECTING A QUALITY PRODUCT BY KEEP YOUR HEAD OUT OF THE FUMES. DON’T get too close to the arc. LINCOLN ELEC TRIC. Use corrective lenses if necessary to stay a reasonable distance away from the arc. READ and obey the Safety Data PLEASE EXAMINE CARTON AND EQUIPMENT FOR Sheet (SDS) and the warning label DAMAGE IMMEDIATELY...
- Page 3 MAGNETIC FIELDS MAY W117.2-1974. A Free copy of “Arc Welding Safety” booklet BE DANGEROUS E205 is available from the Lincoln Electric Company, 22801 St. Clair Avenue, Cleveland, Ohio 44117-1199. 2.a. Electric current flowing through any conductor BE SURE THAT ALL INSTALLATION, OPERATION, causes localized Electric and Magnetic Fields (EMF).
- Page 4 S FETY ELECTRIC SHOCK ARC RAYS CAN BURN. CAN KILL. 3.a. The electrode and work (or ground) circuits are 4.a. Use a shield with the proper filter and cover plates to protect your electrically “hot” when the welder is on. Do eyes from sparks and the rays of the arc when welding or not touch these “hot”...
- Page 5 S FETY WELDING AND CUTTING CYLINDER MAY EXPLODE IF SPARKS CAN CAUSE DAMAGED. FIRE OR EXPLOSION. 7.a. Use only compressed gas cylinders containing the correct shielding gas for the process used 6.a. Remove fire hazards from the welding area. If and properly operating regulators designed for this is not possible, cover them to prevent the welding sparks the gas and pressure used.
- Page 6 PRODUCT MODEL TABLE OF CONTENTS...
-
Page 7: Maxsa
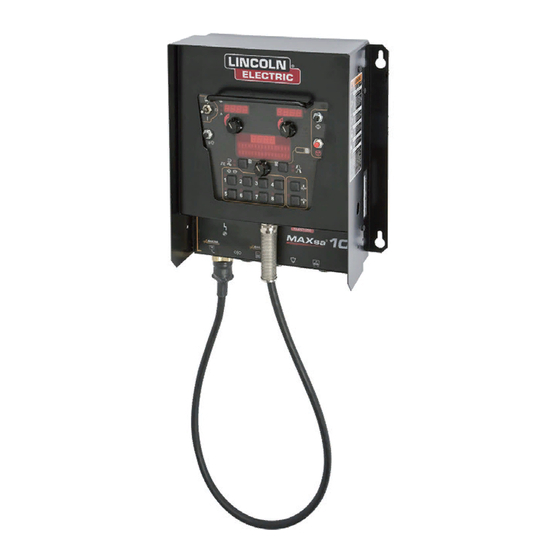
10 CONTROLLER PRODUCT DESCRIPTION SA™ PRODUCT DESCRIPTION GENERAL PHYSICAL DESCRIPTION SYNERGIC WELDING MODES • The MAXsa™ 10 CONTROLLER is a user interface and a feeder • A Synergic welding mode offers the simplicity of single knob controller. The control is used to set all welding parameters control. -
Page 8: K1785-Xx
10 CONTROLLER PRODUCT DESCRIPTION SA™ DESIGN FEATURES • Easy control of all weld parameters. • 8 Memories for easy storage and recall of weld schedules. • Weld parameter limit setting and lockout capabilities. • Digital communications for accurate and reliable performance. •... - Page 9 10 CONTROLLER INSTALLATION SA™ TECHNICAL SPECIFICATIONS: MAXsa 10 CONTROLLER ™ INPUT VOLTAGE & CURRENT PHYSICAL SIzE TEMPERATURE RATING Dimensions Model Voltage* - - Input Amps* Height Width Depth Weight Operating Storage K2814-3 40VDC 15.0in. 13.0 in 4.0 in. 25 Lbs 14°F to 104°F -40°F to 185°F (381 mm)
- Page 10 10 CONTROLLER INSTALLATION SA™ SAFETY PRECAUTION This equipment is for industrial use only and it is not intended for use in WARNING residential locations where the electrical power is provided by the pub- lic low-voltage supply system. There can be potential difficulties in resi- dential locations due to conducted as well as radiated radio-frequency ELECTRIC SHOCK can kill.
- Page 11 10 CONTROLLER INSTALLATION SA™ FIGURE A.1 - MAXsa™ 10 CONNECTIONS STATUS LIGHT PENDANT CONNECTOR MAXsa™ 22 or 29 WIRE DRIVE CONNECTOR (14-PIN) POWER WAVE® AC/DC 1000 SD ARCLINK CONNECTOR FLUX HOPPER CONNECTOR ACCESS TC-3 TRAVEL CARRIAGE HOLES CONNECTOR...
-
Page 12: K1543-Xx
10 CONTROLLER INSTALLATION SA™ INTERFACING TO THE MAXsa™ 10 CONTROLLER Using the Controller as a Hand-held Pendant: 1. Remove the 4 screws from the MAXsa™ 10 CONTROLLER that The MAXsa™ 10 CONTROLLER is a versatile controller. The User hold the cover. See Figure A.2. Interface can be removed and used as a hand-held pendant. - Page 13 10 CONTROLLER INSTALLATION SA™ Auxiliary Input Power Connection Instructions Terminal blocks 48 and 49 are shipped connected to the contacts Use the appropriate size leads, at least 14 AWG – 2 wire with of CR2 and CR3 by leads 531 and 532. These relay contacts are ground.
- Page 14 10 CONTROLLER INSTALLATION SA™ FIGURE A.4 - CONTROLLING NON-LINCOLN EQUIPMENT 3-PIN FLUX 4-PIN TRAVEL RECEPTACLE RECEPTACLE CR1, CR2 CR3 Relays Numbers Refer to Relay Terminals TERMINAL STRIP CONTROLLING NON-LINCOLN AUXILIARY EQUIPMENT 7. The supply voltage to power the devices is provided by the end Custom motion control and/or other auxiliary equipment can be pow- user.
- Page 15 10 CONTROLLER INSTALLATION SA™ FIGURE A.5 - SHUTDOWN AND STOP INPUTS Shorting Jumper Connect STOP Input Here SHUTDOWN INPUTS STOP INPUT The MAXsa™ 10 CONTROLLER has two shutdown inputs avail- The MAXsa™ 10 CONTROLLER has a Stop Input available on the able on the terminal strip.
-
Page 16: Table Of Contents
10 CONTROLLER INSTALLATION SA™ FIGURE A.6 - CONNECTION DIAGRAM - SINGLE ARC SYSTEM Power Wave AC/DC 1000SD ® K1543-XX or K2683-XX Arclink Cable K2814-X MAXsa™ 10 K1785-XX 14-Pin Cable K2370-X MAXsa™ 22 67 Lead Electrode K231-XX Weld Cable Contact Nozzle K1811-XX Sense Lead Work... - Page 17 10 CONTROLLER INSTALLATION SA™ INSTALLATION INSTRUCTIONS FOR MAXsa 10 BEING USED WITH POWER WAVE AC/DC 1000 SD USING 9SS30221-[ ] WARNING ELECTRIC SHOCK can kill. • Turn the supply power OFF at the disconnect switch before working on this equipment.
-
Page 18: Maxsa
10 CONTROLLER INSTALLATION SA™ 3- Remove J331 from the G4018-[ ] board. 4- G4018-[ ] is no longer needed. It can stay or be removed. 5- Replace S27981-[ ] (L11087-[ ]) board with the S30221-[ ] (G6752-[ ]) board. 6- Reconnect the J331 connector to J88 on the S30221-[ ] (G6752-[ ]) board, then reconnect the rest of the connectors. - Page 19 OPERATION 10 CONTROLLER SA™ SAFETY PRECAUTIONS Read this entire section of operating instructions before operating the machine. WARNING ELECTRIC SHOCK can kill. • Do not touch electrically live parts or electrodes with your skin or wet clothing. • Insulate yourself from the work and ground.
- Page 20 10 CONTROLLER OPERATION SA™ FIGURE B.1 - INPUT AND OUTPUT CONNECTIONS FIGURE B.2 - PENDANT CONTROLS AMPS/WFS MODE SELECT VOLTS DISPLAY PANEL (MSP) DISPLAY DISPLAY VOLTS VOLTS AMPS/WFS AMPS INDICATOR INDICATOR CONTROL CONTROL INDICATOR START TRAVEL SWITCH BUTTON (AUTO / OFF / MANUAL) ---- FLUX FILL WELD OUTPUT...
- Page 21 FEED FORWARD Feeds the wire downward towards the work piece. NOTE: The MAXsa 10 has an option in the Setup Menu (P.15) to enable the “Touch Sense” circuitry. See the Setup Menu. When P.15 is enabled and the FEED FORWARD button is...
- Page 22 10 CONTROLLER OPERATION SA™ CHANGING AND SETTING WELD MODES BALANCE ADJUST To select a weld mode, press the WELD MODE SELECTOR button Press the WELD MODE selector until the MSP Display reads until the WELD MODE indicator comes ON (it may already be lit by “Balance”.
- Page 23 10 CONTROLLER OPERATION SA™ WELD MODE SEARCHING MULTIPLE ARC CONFIGURATION The Weld Mode Search feature allows the selection of a welding mode based on certain criteria (wire size, process type, etc.). Power Wave ® AC/DC 1000 SD / MAXsa™ systems can be used in multiple arc set ups with up to six arcs.
- Page 24 10 CONTROLLER OPERATION SA™ FIGURE B.6 - WELD SEQUENCE Arc Start Downslope Delay Start Crater Burnback Strike Upslope Weld Time WELD SEQUENCE START OPTIONS OPERATION The weld sequence defines the weld procedure from beginning to Pressing the Arc Start/End Options pushbutton will illuminate the START OPTIONS LED and the Arc Delay Time parameter will show end.
- Page 25 10 CONTROLLER OPERATION SA™ END OPTIONS The downslope, crater, and burnback parameters are used to Repeated pressing of the Arc Start/End Options pushbutton will define the end of the weld sequence. The are defined in the fol- toggle through the parameters. Turning the Mode Select Panel lowing: Control while on a parameter will change its value.
- Page 26 10 CONTROLLER OPERATION SA™ SETUP MENU FEATURES The Setup Menu provides access for configuring user preferences, which are generally only set at installation. The user preferences PARAMETER DEFINITION are grouped as shown in the following table. P.1 through P.99 Unsecured Parameters (always adjustable) P.101 through P.199 Diagnostic Parameters (always read only) P.501 through P.599...
- Page 27 10 CONTROLLER OPERATION SA™ USER DEFINED PARAMETERS Parameter Definition Exit Setup Menu This option is used to exit the setup menu. When P.0 is displayed, press the Left Button to exit the setup menu Wire Feed Speed Units This option selects which units to use for displaying wire feed speed. English = inches/minute wire feed speed units (default).
- Page 28 10 CONTROLLER OPERATION SA™ USER DEFINED PARAMETERS (CONT.) Parameter Definition P.15 Hot-Inch Touch Sense Option This option allows enabling or disabling touch sense when feeding wire forward. Disabled = Touch sensing is disabled when feeding the wire forward (default). Enabled = Touch sensing is active when feeding the wire forward. When enabled and feeding wire forward, the wire is electrically "hot"...
- Page 29 10 CONTROLLER OPERATION SA™ USER DEFINED PARAMETERS (CONT.) Parameter Definition P.101 View Event Logs Used for viewing all the system event logs. Press the Right Button to enter the option. Rotate Control Knob to select the desired event log to read. Press the Right Button again to enter the selected log.
- Page 30 10 CONTROLLER OPERATION SA™ USER DEFINED PARAMETERS (CONT.) Parameter Definition P.502 Memory Change Lockout Determines if the memories can be overwritten with new contents. No = Memories can be saved and limits can be configured (default). Yes = Memories cannot be changed - saving is prohibited and limits cannot be re-configured. This parameter can only be accessed using Power Wave Manager software.
- Page 31 10 CONTROLLER OPERATION SA™ USER DEFINED PARAMETERS (CONT.) Parameter Definition P.506 Set User Interface Passcode Prevents unauthorized changes to the equipment. The default passcode is zero which allows full access. A nonzero passcode will prevent unauthorized: changes to memory limits, saving to memory (if P.502 = Yes), changes to setup parameters (if P.505 = Yes).
- Page 32 10 CONTROLLER OPERATION SA™ MAKING A WELD Once the necessary parameters have been set and the desired Weld Mode selected: Press the STOP BUTTON to end the weld. Press the START BUTTON to begin welding. The ARC ESTABLISHED INDICATOR will ‘flash’ as the wire If “End”...
- Page 33 10 CONTROLLER OPERATION SA™ USING THE MEMORY OPTION The MAXsa™ 10 has eight available memory locations for storing MULTI PROCEDURE WELDING procedural information. Each location will store the following infor- mation: The MAXsa™ 10 CONTROLLER can do “On-The-Fly” welding changes with multiple weld procedures by using the Memory •...
- Page 34 10 CONTROLLER OPERATION SA™ RECALLING A PROCEDURE FROM A SAVING A PROCEDURE TO A MEMORY LOCATION MEMORY LOCATION Once the parameters have been set: • Press and Hold the Memory Button of the desired location for • Press and release the desired Memory Button. 2 seconds.
- Page 35 10 CONTROLLER OPERATION SA™ OPTIONAL LIMIT SETUP Set High Value Set Low The Limits feature allows the operator to set minimum and maximum Limit Low Limit Limit values for various parameters depending on the Weld Mode selected. Hi=1050 Lo= 200 Each memory location may have a different set of limits, even if the Weld Amps Weld Mode is the same.
- Page 36 10 CONTROLLER NOTES SA™ B-18...
- Page 37 10 CONTROLLER ACCESSORIES SA™ OPTIONS AND ACCESSORIES are available at www.lincolnelectric.com Follow these steps: 1. Go to www.lincolnelectric.com 2. In the Search field type E9.181 and click on the Search icon (or hit ‘Enter’ on the keyboard). 3. On the Results page, scroll down to the Equipment list and click on E9.181.
- Page 38 10 CONTROLLER MAINTENANCE SA™ SAFETY PRECAUTIONS ROUTINE MAINTENANCE WARNING • Check weld cables, control cables and gas hoses for cuts. ELECTRIC SHOCK can kill. PERIODIC MAINTENANCE • Do not touch electrically live parts such as output terminals or internal wiring. •...
- Page 39 HOW TO USE TROUBLESHOOTING GUIDE WARNING Service and Repair should only be performed by Lincoln Electric Factory Trained Personnel. Unauthorized repairs performed on this equipment may result in danger to the technician and machine operator and will invalidate your factory warranty.
- Page 40 USING THE STATUS LED TO TROUBLESHOOT SYSTEM PROBLEMS The MAXsa 10 is equipped with a Status Light. If a problem occurs it is important to note the condition of the status lights. Therefore, prior to cycling power to the system, check the power source status light for error sequences as noted below.
- Page 41 10 CONTROLLER TROUBLE SHOOTING SA™ Observe all Safety Guidelines detailed throughout this manual PROBLEMS POSSIBLE RECOMMENDED (SYMPTOMS) CAUSE COURSE OF ACTION ARCLINK SYSTEM ERROR CODES Err 31 Primary overcurrent 1. The power source has exceeded input current limits. Adjust the welding procedure to reduce the current draw.
- Page 42 10 CONTROLLER TROUBLE SHOOTING SA™ Observe all Safety Guidelines detailed throughout this manual PROBLEMS POSSIBLE RECOMMENDED (SYMPTOMS) CAUSE COURSE OF ACTION ARCLINK SYSTEM ERROR CODES Err 35 Capacitor bank "B" overvolt- 1. The power source input power age. may be wired incorrectly. Verify the power source reconnect panel wiring matches the input power.
- Page 43 10 CONTROLLER TROUBLE SHOOTING SA™ Observe all Safety Guidelines detailed throughout this manual PROBLEMS POSSIBLE RECOMMENDED (SYMPTOMS) CAUSE COURSE OF ACTION ARCLINK SYSTEM ERROR CODES Err 44 Main CPU problem. 1. Verify the earth ground connec- tion to the power source is wired correctly.
- Page 44 Reset button needs to be pressed to clear the fault. Weld set change required clearing of user memory. UI memory could not be saved. Contact Lincoln Electric Service Department for further support. UI memory could not be restored. Contact Lincoln User Interface Electric Service Department for further support.
- Page 45 Code (Varies based on the Internal Error. Collect all displayed values and contact error type and who Lincoln Electric Service Department. caused the error) UI memory could not be restored. Contact Lincoln Electric Service Department for further support. User Interface {"...
- Page 46 1. The electrode is rusty or dirty. Use feeding but drive rolls turning. only clean electrode. Use quality electrode, like L-50 or L-56 from Lincoln Electric. 2. The contact tip is partially melted or has spatter. Replace the con- tact tip.
- Page 47 10 CONTROLLER NOTES SA™...
- Page 48 10 CONTROLLER DIAGRAMS SA™...
- Page 49 10 CONTROLLER DIAGRAMS SA™...
- Page 50 10 CONTROLLER NOTES SA™...
- Page 51 Lincoln Electric for advice or information about their use of our products. We respond to our customers based on the best information in our possession at that time. Lincoln Electric is not in a position to warrant or guarantee such advice, and assumes no liability, with respect to such information or advice.
Need help?
Do you have a question about the MAXsa 10 and is the answer not in the manual?
Questions and answers