Table of Contents
Advertisement
Advertisement
Table of Contents

Related Manuals for Electrolux ESF5202LOW


Summary of Contents for Electrolux ESF5202LOW
- Page 1 ESF5202LOW Dishwasher User Manual...
-
Page 2: Table Of Contents
13. TECHNICAL INFORMATION................. 19 WE’RE THINKING OF YOU Thank you for purchasing an Electrolux appliance. You’ve chosen a product that brings with it decades of professional experience and innovation. Ingenious and stylish, it has been designed with you in mind. So whenever you use it, you can be safe in the knowledge that you’ll get great results every time. -
Page 3: Safety Information
ENGLISH SAFETY INFORMATION Before the installation and use of the appliance, carefully read the supplied instructions. The manufacturer is not responsible if an incorrect installation and use causes injuries and damages. Always keep the instructions with the appliance for future reference. 1.1 Children and vulnerable people safety This appliance can be used by children aged from 8 •... -
Page 4: Safety Instructions
Put knives and cutlery with sharp points in the cutlery • basket with the points down or in a horizontal position. Do not keep the appliance door open without • supervision to prevent to fall on it. Before maintenance, deactivate the appliance and •... - Page 5 ENGLISH • The appliance can release hot steam if you open the door while a programme operates. • Do not put flammable products or items that are wet with flammable products in, near or on the appliance. 2.5 Service • Contact the Authorised Service Centre to repair the appliance.
-
Page 6: Product Description
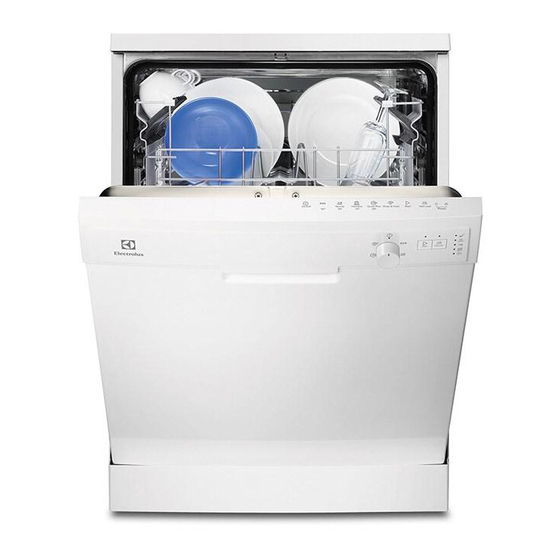
3. PRODUCT DESCRIPTION Worktop Rinse aid dispenser Upper spray arm Detergent dispenser Lower spray arm Cutlery basket Filters Lower basket Rating plate Upper basket Salt container Air vent... -
Page 7: Control Panel
ENGLISH 4. CONTROL PANEL On/off indicator Start button Programme marker Programme knob Indicators Half load button 4.1 Indicators Indicator Description Washing phase. It comes on when the washing phase operates. Drying phase. It comes on when the drying phase operates. End indicator. -
Page 8: Programmes
5. PROGRAMMES Programme Degree of soil Programme Consumption values Type of load phases Duration Energy Water (min) (kWh) Normal soil • Prewash 1.039 Crockery and • Wash 50 °C cutlery • Rinses • Dry Heavy soil • Prewash 150 - 170 1.5 - 1.6 13 - 15 Crockery, cut‐... -
Page 9: Settings
ENGLISH 6. SETTINGS 6.1 Programme selection mode However, if this does not happen, you can set the programme selection mode and user mode in the following way: When the appliance is in programme Press and hold simultaneously Start and selection mode it is possible to set a Half Load until the appliance is in programme and to enter the user mode. -
Page 10: Options
If you use standard detergent or multi- with the first programme. Release tablets without salt, set the proper Half Load when the indicators Start water hardness level to keep the salt and on/off start to flash. refill indicator active. -
Page 11: Daily Use
ENGLISH 4. Remove the salt around the opening of the salt container. CAUTION! Only use rinse aid specifically designed for dishwashers. 1. Press the release button (D) to open the lid (C). 2. Pour the rinse aid in the dispenser (A) until the liquid reaches the fill 5. -
Page 12: Cancelling The Programme
9.3 Setting and starting a • If the salt indicators is on, fill the salt container. programme • If the rinse aid indicator is on, fill the rinse aid dispenser. Starting a programme 3. Load the baskets. 4. Add the detergent. -
Page 13: Hints And Tips
ENGLISH 10. HINTS AND TIPS 10.1 General we recommend that you use the tablets with long programmes. The following hints will ensure optimal • Do not use more than the correct cleaning and drying results in daily use quantity of detergent. Refer to the and also help to protect the environment. -
Page 14: Care And Cleaning
10.5 Before starting a • The correct quantity of detergent is used. programme 10.6 Unloading the baskets Make sure that: • The filters are clean and correctly 1. Let the tableware cool down before installed. you remove it from the appliance. Hot •... -
Page 15: Troubleshooting
ENGLISH CAUTION! An incorrect position of the filters can cause bad washing results and damage to the appliance. 11.2 Cleaning the spray arms Do not remove the spray arms. If the holes in the spray arms are clogged, remove remaining parts of soil with a thin pointed object. - Page 16 Authorised Service Centre, check if you With some problems the end indicator can solve the problem by yourself with flashes intermittently indicating a the help of the information in the table. malfunction. The majority of problems that can WARNING!
- Page 17 ENGLISH Problem and alarm code Possible cause and solution Small leak from the appliance door. • The appliance is not level. Loosen or tighten the adjustable feet (if applicable). • The appliance door is not centred on the tub. Adjust the rear foot (if applicable). The appliance door is difficult to •...
- Page 18 Problem Possible cause and solution There are whitish streaks or • The release quantity of rinse aid is too much. Ad‐ bluish layers on glasses and just the rinse aid level to a lower level. dishes. • The quantity of detergent is too much.
-
Page 19: Technical Information
ENGLISH Refer to "Before first use", "Daily use" or "Hints and tips" for other possible causes. 13. TECHNICAL INFORMATION Dimensions Width / height / depth 600 / 850 / 625 (mm) Voltage (V) 220 - 240 Electrical connection Frequency (Hz) Water supply pressure Min. - Page 20 www.electrolux.com/shop...
Need help?
Do you have a question about the ESF5202LOW and is the answer not in the manual?
Questions and answers