Table of Contents
Advertisement
Quick Links
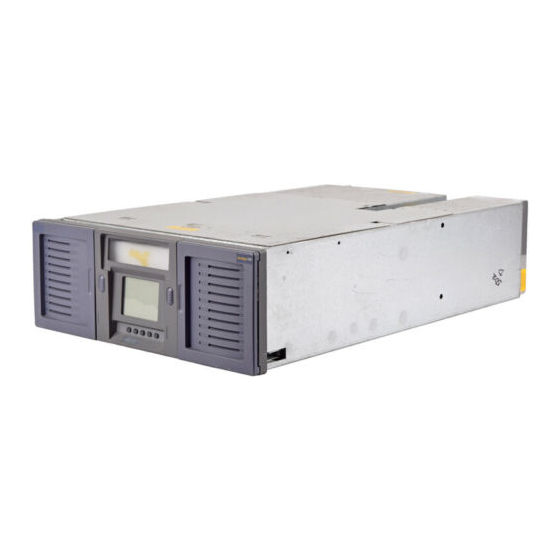
Sun StorEdge L25 Tape Library
and Sun StorEdge L100 Tape Library
Installation Guide
Document 6423015-01, Ver. 1, Rel. 0, June 2002
TM
TM
Space Requirements ......................................................................................3
Cooling Considerations ................................................................................4
Environmental Requirements......................................................................5
Power and Grounding ..................................................................................5
Installing a Desktop L25 Library.................................................................6
Installing a Deskside L100 Library .............................................................6
Determining the Position of the Shelves in the Rack ...............................7
Installing the Rack Mount Shelves..............................................................8
Installing the Library in the Rack..............................................................15
Installing Tape Drives in an L25 ...............................................................18
Installing Tape Drives in an L100 .............................................................19
3
3
6
7
18
1
Advertisement
Table of Contents

Related Manuals for Sun Microsystems storedge L25


Summary of Contents for Sun Microsystems storedge L25
-
Page 1: Table Of Contents
Sun StorEdge L25 Tape Library and Sun StorEdge L100 Tape Library Installation Guide Introduction Site Requirements Space Requirements ..................3 Cooling Considerations ................4 Environmental Requirements..............5 Power and Grounding ..................5 Installing a Desktop or Deskside Library Installing a Desktop L25 Library..............6 Installing a Deskside L100 Library .............6 Installing a Rack Mount Library Determining the Position of the Shelves in the Rack .......7... - Page 2 Sun StorEdge™ L25 Tape Library and Sun StorEdge™ L100 Tape Library Installation Guide Document 6423015-01, Ver. 1, Rel. 0 June 2002 Preparing and Inserting Tape Cartridges Labeling Tape Cartridges ................22 Setting the Write-Protect Switch............... 23 Placing Cartridges in the Library ............. 25 Connecting the Library to AC Power L25 Power Requirements................
-
Page 3: Introduction
Sun StorEdge™ L25 Tape Library and Sun StorEdge™ L100 Tape Library Installation Guide Document 6423015-01, Ver. 1, Rel. 0 June 2002 Introduction This document explains how to install a stand-alone Sun StorEdge™ L25 Tape Library or Sun StorEdge™ L100 Tape Library. Hereafter in this document, these libraries will be referred to as the L25 and the L100, respectively. - Page 4 Sun StorEdge™ L25 Tape Library and Sun StorEdge™ L100 Tape Library Installation Guide Document 6423015-01, Ver. 1, Rel. 0 June 2002 Cooling is one of the most important factors to consider when selecting Cooling Considerations a location for the library. The L25 and L100 libraries are force-cooled: air is drawn into the library through vents at the lower edge of the front bezel and exhausted through vents at the back of the library.
- Page 5 Sun StorEdge™ L25 Tape Library and Sun StorEdge™ L100 Tape Library Installation Guide Document 6423015-01, Ver. 1, Rel. 0 June 2002 Figure 2 Vent Locations, L100 Vents The installation site (desktop or deskside library) or the interior of the Environmental Requirements rack (rack mount library) must meet the following environmental requirements:...
-
Page 6: Installing A Desktop Or Deskside Library
Sun StorEdge™ L25 Tape Library and Sun StorEdge™ L100 Tape Library Installation Guide Document 6423015-01, Ver. 1, Rel. 0 June 2002 Installing a Desktop or Deskside Library This section explains how to install a desktop L25 library or a deskside L100 library. -
Page 7: Installing A Rack Mount Library
Sun StorEdge™ L25 Tape Library and Sun StorEdge™ L100 Tape Library Installation Guide Document 6423015-01, Ver. 1, Rel. 0 June 2002 Installing a Rack Mount Library This section explains how to install an L25 or L100 library in a standard 19-inch rack. The procedures in this section assume that you have already Note: unpacked the library. -
Page 8: Installing The Rack Mount Shelves
Sun StorEdge™ L25 Tape Library and Sun StorEdge™ L100 Tape Library Installation Guide Document 6423015-01, Ver. 1, Rel. 0 June 2002 This section explains how to install the rack mount shelves. You will Installing the Rack ® Mount Shelves need a no. 1 POZIDRIV screwdriver for this procedure. - Page 9 Sun StorEdge™ L25 Tape Library and Sun StorEdge™ L100 Tape Library Installation Guide Document 6423015-01, Ver. 1, Rel. 0 June 2002 Figure 3 Securing the Shelf in the Half Position Install the front shelf clamps (see figure Position a front shelf clamp (PN 217397) on the front left rack rail.
- Page 10 Sun StorEdge™ L25 Tape Library and Sun StorEdge™ L100 Tape Library Installation Guide Document 6423015-01, Ver. 1, Rel. 0 June 2002 Figure 4 Installing the Front Shelf Clamps Front shelf clamp Fully tighten the screws securing the right and left shelves to the rack rails.
- Page 11 Sun StorEdge™ L25 Tape Library and Sun StorEdge™ L100 Tape Library Installation Guide Document 6423015-01, Ver. 1, Rel. 0 June 2002 Position a clamp strip (PN 217405) behind the front left rack rail, aligning it with the front shelf clamp. Insert a screw (PN YS40986) through the upper hole in the front shelf clamp, through the rack rail, and into the upper hole in the clamp strip.
- Page 12 Sun StorEdge™ L25 Tape Library and Sun StorEdge™ L100 Tape Library Installation Guide Document 6423015-01, Ver. 1, Rel. 0 June 2002 Installing the Shelves in a Full U Position To install the rack mount shelves in a full U position: In full U position, the bottom of the rack mount shelf lines Note: up with the bottom of a U.
- Page 13 Sun StorEdge™ L25 Tape Library and Sun StorEdge™ L100 Tape Library Installation Guide Document 6423015-01, Ver. 1, Rel. 0 June 2002 Install the front shelf clamps (see figure Position a front shelf clamp (PN 217397) on the front left rack rail.
- Page 14 Sun StorEdge™ L25 Tape Library and Sun StorEdge™ L100 Tape Library Installation Guide Document 6423015-01, Ver. 1, Rel. 0 June 2002 Position a clamp strip (PN 217405) behind the front left rack rail, aligning it with the front shelf clamp. Insert a screw (PN YS40986) through the upper hole in the front shelf clamp, through the rack rail, and into the upper hole in the clamp strip.
-
Page 15: Installing The Library In The Rack
Sun StorEdge™ L25 Tape Library and Sun StorEdge™ L100 Tape Library Installation Guide Document 6423015-01, Ver. 1, Rel. 0 June 2002 This section explains how to install the library in the rack. You will Installing the Library in the Rack need a no. - Page 16 Sun StorEdge™ L25 Tape Library and Sun StorEdge™ L100 Tape Library Installation Guide Document 6423015-01, Ver. 1, Rel. 0 June 2002 Insert a no. 2 POZIDRIV screwdriver into the hole and turn the rack mount clamp screw clockwise to tighten it. Do not over-tighten the rack mount clamp screw.
- Page 17 Sun StorEdge™ L25 Tape Library and Sun StorEdge™ L100 Tape Library Installation Guide Document 6423015-01, Ver. 1, Rel. 0 June 2002 Figure 10 Securing the Library to the Rack Magazine access doors Access holes for the rack mount clamp screws Insert a no.
-
Page 18: Installing Drives In The Library
Sun StorEdge™ L25 Tape Library and Sun StorEdge™ L100 Tape Library Installation Guide Document 6423015-01, Ver. 1, Rel. 0 June 2002 Installing Drives in the Library This section explains how to install tape drives in the library. You will ® need a TORX T-20 screwdriver and a flat blade screwdriver for this procedure. -
Page 19: Installing Tape Drives In An L100
Sun StorEdge™ L25 Tape Library and Sun StorEdge™ L100 Tape Library Installation Guide Document 6423015-01, Ver. 1, Rel. 0 June 2002 To install tape drives in an L100: Installing Tape Drives in an L100 At the back of the library, use a TORX T-20 screwdriver to remove the cover plate protecting the drive bay in which you will install the tape drive. - Page 20 Sun StorEdge™ L25 Tape Library and Sun StorEdge™ L100 Tape Library Installation Guide Document 6423015-01, Ver. 1, Rel. 0 June 2002 Drive bay Drive bay Leave this drive bay empty unless Figure 13 Drive Bay column 2 column 1 you are installing a sixth drive Numbering, L100 Level 1 Level 2...
- Page 21 Sun StorEdge™ L25 Tape Library and Sun StorEdge™ L100 Tape Library Installation Guide Document 6423015-01, Ver. 1, Rel. 0 June 2002 Using a flat blade screwdriver, loosen the two captive screws that hold the level 3 fixed slot in place (see figure 14).
-
Page 22: Preparing And Inserting Tape Cartridges
Sun StorEdge™ L25 Tape Library and Sun StorEdge™ L100 Tape Library Installation Guide Document 6423015-01, Ver. 1, Rel. 0 June 2002 Preparing and Inserting Tape Cartridges This section explains how to insert tape cartridges into the L25 and L100 libraries. This procedure consists of the following steps: •... - Page 23 Sun StorEdge™ L25 Tape Library and Sun StorEdge™ L100 Tape Library Installation Guide Document 6423015-01, Ver. 1, Rel. 0 June 2002 Applying the Labels Label the tape cartridges (see figure 15): • DLT and SDLT cartridges use non-adhesive labels that slide into a slot at the front of the cartridge.
- Page 24 Sun StorEdge™ L25 Tape Library and Sun StorEdge™ L100 Tape Library Installation Guide Document 6423015-01, Ver. 1, Rel. 0 June 2002 Setting the Write-Protect Switch (DLT and SDLT Cartridges) To write-protect a DLT or SDLT cartridge, move the write-protect switch to the left. An orange tab is visible behind the switch (see figure 16).
- Page 25 Sun StorEdge™ L25 Tape Library and Sun StorEdge™ L100 Tape Library Installation Guide Document 6423015-01, Ver. 1, Rel. 0 June 2002 This section explains how to place tape cartridges in the library. Placing Cartridges in the Library Placing Tape Cartridges in an L25 Library To place tape cartridges in an L25 library: Remove the left magazine: Press the white button next the left magazine access door and...
- Page 26 Sun StorEdge™ L25 Tape Library and Sun StorEdge™ L100 Tape Library Installation Guide Document 6423015-01, Ver. 1, Rel. 0 June 2002 Insert cartridges into each of the magazine slots: Orient the cartridges as described in step Push each cartridge into a slot until the cartridge retaining latch clicks to hold the cartridge in place.
- Page 27 Sun StorEdge™ L25 Tape Library and Sun StorEdge™ L100 Tape Library Installation Guide Document 6423015-01, Ver. 1, Rel. 0 June 2002 Remove the level 2 left magazine (see figure 20). Figure 20 Removing the Level 2 Left Magazine Reach into the library underneath the level 1 left magazine and press up on the release latch (see figure 21).
- Page 28 Sun StorEdge™ L25 Tape Library and Sun StorEdge™ L100 Tape Library Installation Guide Document 6423015-01, Ver. 1, Rel. 0 June 2002 Figure 22 Removing the Level 1 Left Magazine Remove each remaining magazine by grasping the handle at the front of the magazine and sliding it forward and out of the library. Insert cleaning cartridges into the fixed slots.
-
Page 29: Connecting The Library To Ac Power
Sun StorEdge™ L25 Tape Library and Sun StorEdge™ L100 Tape Library Installation Guide Document 6423015-01, Ver. 1, Rel. 0 June 2002 Connecting the Library to AC Power This section explains how to connect the library to AC power. L25 Power To connect the L25 library to AC power: Requirements Referring to... - Page 30 Sun StorEdge™ L25 Tape Library and Sun StorEdge™ L100 Tape Library Installation Guide Document 6423015-01, Ver. 1, Rel. 0 June 2002 Table 4 AC Distribution Requirements, L25 Distribution Unit Requirements # of Library 200-240V 50-60Hz supply voltage (Europe 100-120V 50-60Hz supply voltage (USA, Modules &...
- Page 31 Sun StorEdge™ L25 Tape Library and Sun StorEdge™ L100 Tape Library Installation Guide Document 6423015-01, Ver. 1, Rel. 0 June 2002 Distribution Unit Requirements # of Library 200-240V 50-60Hz supply voltage (Europe 100-120V 50-60Hz supply voltage (USA, Modules & international, etc.) Canada, Japan, etc.) 5-10 Select one of the following options:...
-
Page 32: L25 Power Requirements
Sun StorEdge™ L25 Tape Library and Sun StorEdge™ L100 Tape Library Installation Guide Document 6423015-01, Ver. 1, Rel. 0 June 2002 To connect the L100 library to AC power: L100 Power Requirements Referring to table 5, select appropriate AC distribution unit(s) for your library configuration and input voltage. - Page 33 Sun StorEdge™ L25 Tape Library and Sun StorEdge™ L100 Tape Library Installation Guide Document 6423015-01, Ver. 1, Rel. 0 June 2002 Table 5 AC Distribution Requirements, L100 Distribution Unit Requirements # of Library 200-240V 50-60Hz supply voltage (Europe 100-120V 50-60Hz supply voltage (USA, Modules &...
-
Page 34: Connecting The Library To The Host Computer
Sun StorEdge™ L25 Tape Library and Sun StorEdge™ L100 Tape Library Installation Guide Document 6423015-01, Ver. 1, Rel. 0 June 2002 Connecting the Library to the Host Computer The library robotics and tape drives are independent SCSI devices with independent SCSI connections. The L25 and L100 provide two 68-pin high density connectors for each device. - Page 35 Sun StorEdge™ L25 Tape Library and Sun StorEdge™ L100 Tape Library Installation Guide Document 6423015-01, Ver. 1, Rel. 0 June 2002 This section provides sample SCSI cabling configurations for L25 and SCSI Cabling Diagrams L100 libraries. SCSI Cabling Diagrams, L25 Figures through illustrate sample SCSI cabling configurations for...
-
Page 36: Powering Up The Library
Sun StorEdge™ L25 Tape Library and Sun StorEdge™ L100 Tape Library Installation Guide Document 6423015-01, Ver. 1, Rel. 0 June 2002 SCSI Cabling Diagram, L100 Figures illustrates the recommended SCSI cabling configuration for a single L100 library module. Figure 28 SCSI Cabling Diagram, L100 To host computer... - Page 37 Sun StorEdge™ L25 Tape Library and Sun StorEdge™ L100 Tape Library Installation Guide Document 6423015-01, Ver. 1, Rel. 0 June 2002 Figure 30 Power Switches, L100 Power switches The GUI displays a welcome screen (see figure 31) and the library runs a power-on self-test (POST).
- Page 38 Sun StorEdge™ L25 Tape Library and Sun StorEdge™ L100 Tape Library Installation Guide Document 6423015-01, Ver. 1, Rel. 0 June 2002 When the POST is complete, the GUI displays the main screen (see figure 32). Figure 32 Main Screen, L100 At the bottom of each GUI screen are up to five button labels.
-
Page 39: Disabling Unused Drive Bays
Sun StorEdge™ L25 Tape Library and Sun StorEdge™ L100 Tape Library Installation Guide Document 6423015-01, Ver. 1, Rel. 0 June 2002 Disabling Unused Drive Bays To complete the library installation, disable any unused drive bays as follows: On the main screen, press Menu The GUI displays the screen (see... - Page 40 Quantum Corporation is prohibited by law and constitutes a punishable violation of the law. TRADEMARK STATEMENT StackLink is a trademark of Quantum Corporation. Sun StorEdge™ L25 Tape Library and Sun StorEdge™ L100 Tape Library are trademarks of Sun Microsystems, Inc. Other trademarks may be mentioned herein which belong to other companies.
Need help?
Do you have a question about the storedge L25 and is the answer not in the manual?
Questions and answers